EPS allows users to complete transactions online using their bank credentials, a payment method that is popular in Austria.
EPS redirects customers to their bank’s website in order to authenticate payments, and an immediate notification about the success or failure of the transaction is provided.
All right, now let’s get down to configure the plugin.
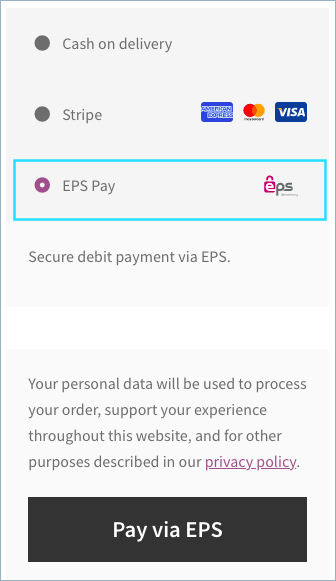
Settings: EPS Pay
- Firstly, install and activate the Stripe payment gateway for the WooCommerce plugin.
- From the WordPress dashboard, go to WebToffee Stripe > General Settings > Local Gateways.
- Head on to the EPS.
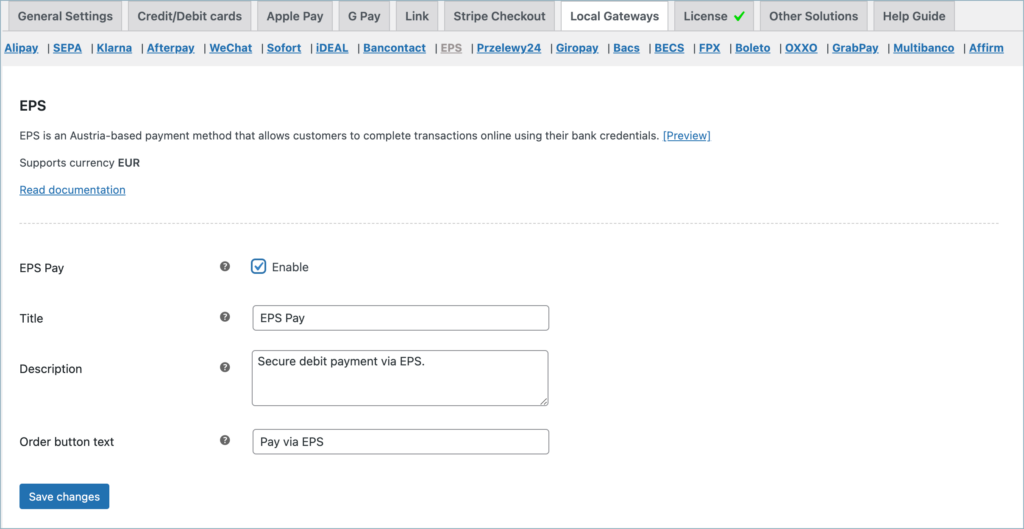
- EPS: Enable to accept EPS payments.
- Title: Enter a custom title for EPS payment. This title will be visible on the checkout page.
- Description: Enter a custom description for EPS payment. This description will be visible on the checkout page.
- Order Button Text: Enter a custom text for the EPS payment button.
Finally, click on the Save changes button to update the plugin settings.
Pay via EPS
- Customer selects EPS at checkout
- Customer is redirected to EPS and chooses bank
- Customer enters account credentials
- Customer completes authorization process (with scanner or SMS)
- Customer is notified that payment is complete
- Customer returns back to business’s site for payment confirmation