Do you want to add custom fields to your checkout page and invoices but don’t know how? This article will cover adding custom checkout fields to the invoices with the WooCommerce PDF Invoices, Packing Slips and Credit Notes plugin.
Every store is different and therefore will have unique requirements. You being the website owner might need to add custom fields to the WooCommerce invoices and/or checkout pages.
This is especially important if you want to get additional information from your customers, such as the customer/business tax ID, taxes like GST, VAT & ABN, etc., to process their orders.
Since WooCommerce doesn’t offer such functionality, let’s see how you can set this up with a third-party tool.
What is the WooCommerce PDF Invoices plugin?
WooCommerce PDF Invoices, Packing Slips, Delivery Notes, and Shipping Labels is a freemium invoice and order related documents generation plugin for WooCommerce from WebToffee.
The plugin assists you in creating and printing warehousing, packaging, shipping, and other order-related documents for both bookkeeping and legal purposes. It is an essential tool that will help you with the fulfillment of your WooCommerce orders.
The plugin also makes it easy to comply with invoice regulations in your country/region. You can even configure it to automatically attach the invoice documents with the order emails.
You can create documents such as invoices, dispatch notes, packing slips, credit notes, shipping labels, and delivery notes with this single tool. Moreover, the plugin offers several features including built-in templates, design customizations, multiple paper and printer compatibility, etc.
Note that the plugin is available in two versions – free and premium. The premium version of this plugin is available in 5 different flavors. They are as follows.
Note that the plugin is available in two versions – free and premium. The premium version of this plugin is available in 5 different flavors. They are as follows.
- WooCommerce PDF Invoices, Packing Slips & Credit Notes Plugin
- WooCommerce Shipping Labels, Dispatch Labels & Delivery Notes Plugin
- WooCommerce Address Labels Plugin
- WooCommerce Picklists Plugin
- WooCommerce Proforma Invoices Plugin
You will need the advanced version of the PDF invoices plugin for WooCommerce to add additional checkout fields option.
How to add custom checkout fields to Invoices?
You can add custom checkout fields to checkout pages and attach the same fields to your invoices with the WebToffee PDF invoice plugin.
Here’s how you can do that.
Step 1: Install and activate the plugin
You will need the premium version of the Invoice plugin for WooCommerce to add custom text input fields to your WooCommerce checkout page and invoices.
Once purchased, install and activate the plugin on your WooCommerce dashboard.
Note that, the premium plugin is an extension of the free plugin. Therefore, the free PDF invoice plugin for WooCommerce has to be installed and activated on your store for the premium plugin to work.
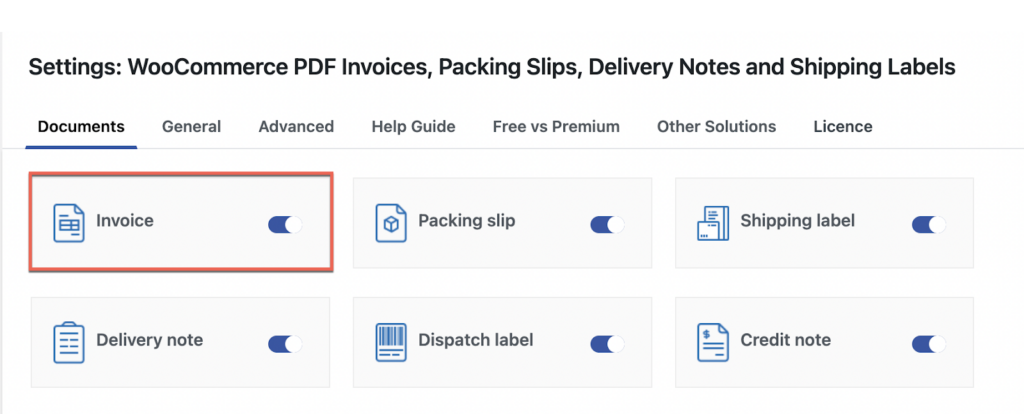
Step 2: Enable Invoice documents in your store
Enable invoices in your store to permit both you and your customers to access the invoice documents.
- Navigate to Invoice/Packing > General Settings > Documents.
- Switch on the Invoice document type.
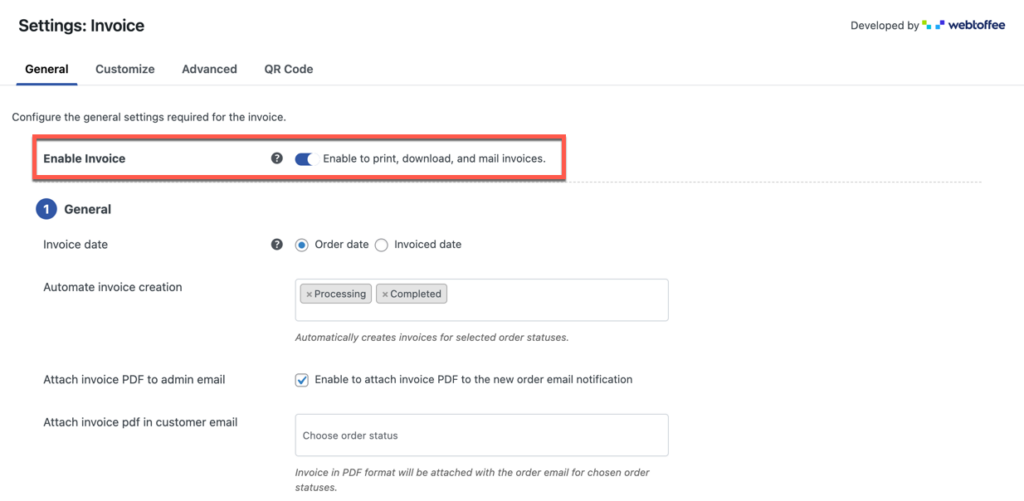
- Now, go to Invoice > General and make sure the option Enable Invoice is turned on. This gives you and your customers the ability to print, download and even attach the invoice to email.
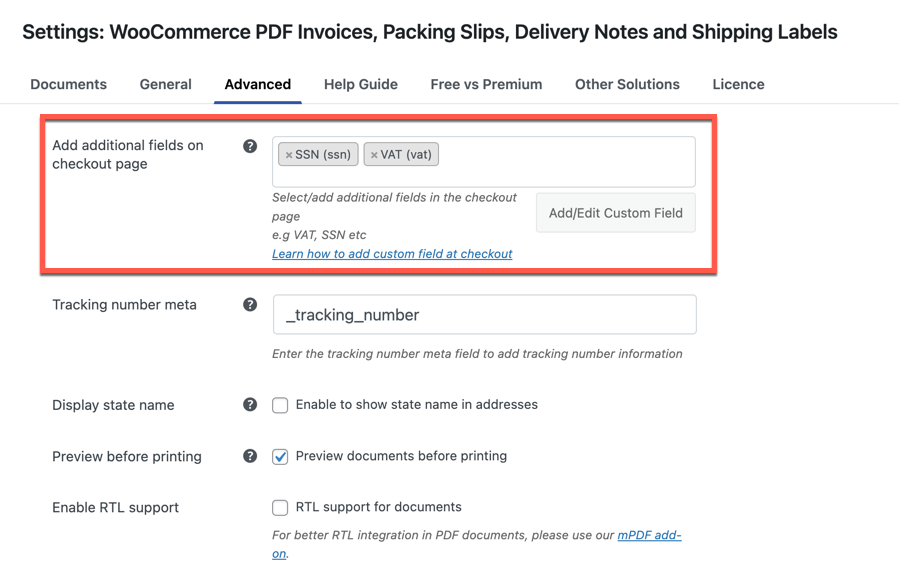
Step 3: Add custom fields to the WooCommerce Checkout page
- Go to Invoice/Packing > General Settings > Advanced.
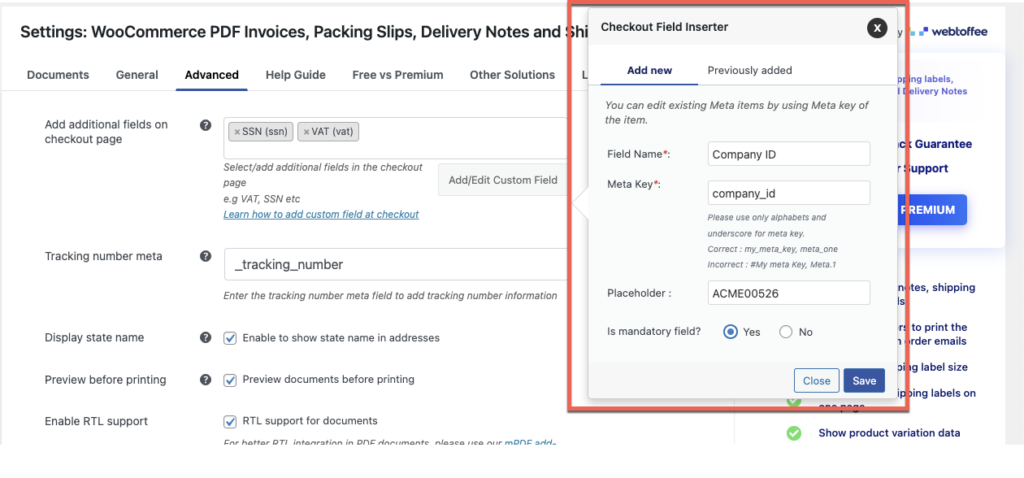
- Add the additional fields that you want on your checkout page under Add additional fields on checkout page. If the field that you want is not available, you can add that with the Add/Edit Custom Field button.
To add additional fields,
- Click on the Add/Edit Custom Field button and go to the Add new tab.
- Provide the field name, meta key, and placeholder for your custom field.
- You can also choose whether the field is mandatory or optional from the same pane.
- Once done, click on Save.
- Now scroll down and click on Update Settings.
Step 4: Add the custom Checkout fields to WooCommerce Invoices
- Navigate to Invoice/Packing > Invoice > Advanced.
- Add the required custom item under the Order meta fields option.
- Now click on Update Settings to save the changes.
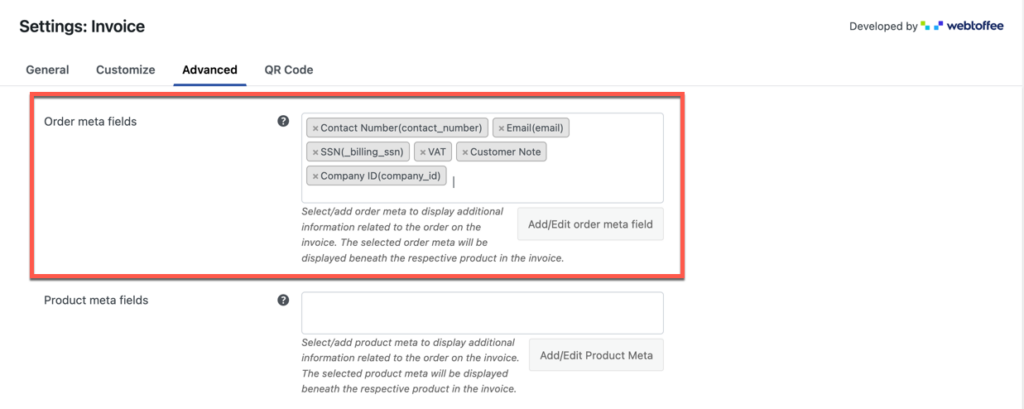
Click on the Add/Edit Order Meta Field button if you want to add more fields or edit the existing ones.
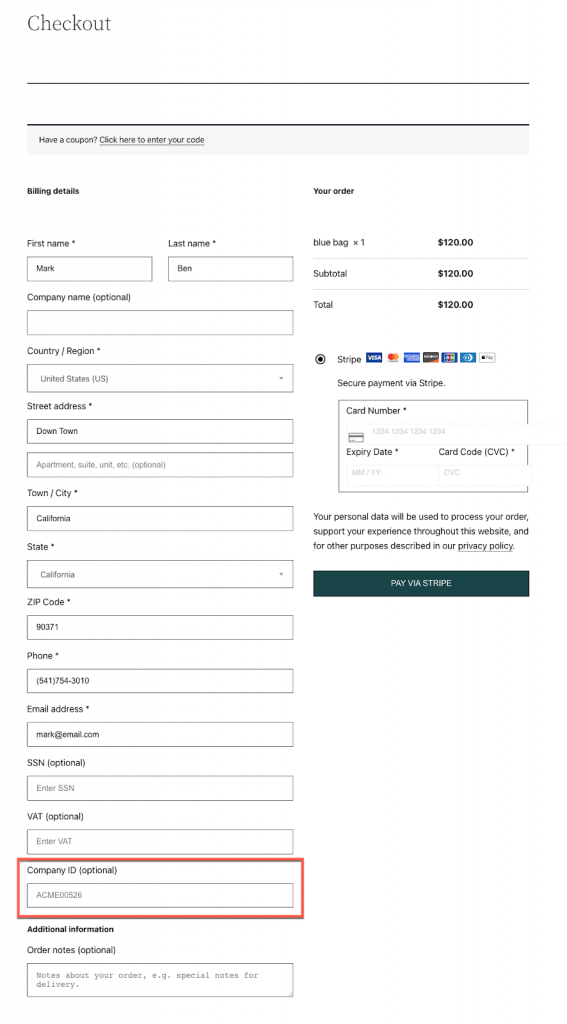
The fields that you have added will be displayed along with the other default fields on the checkout page.
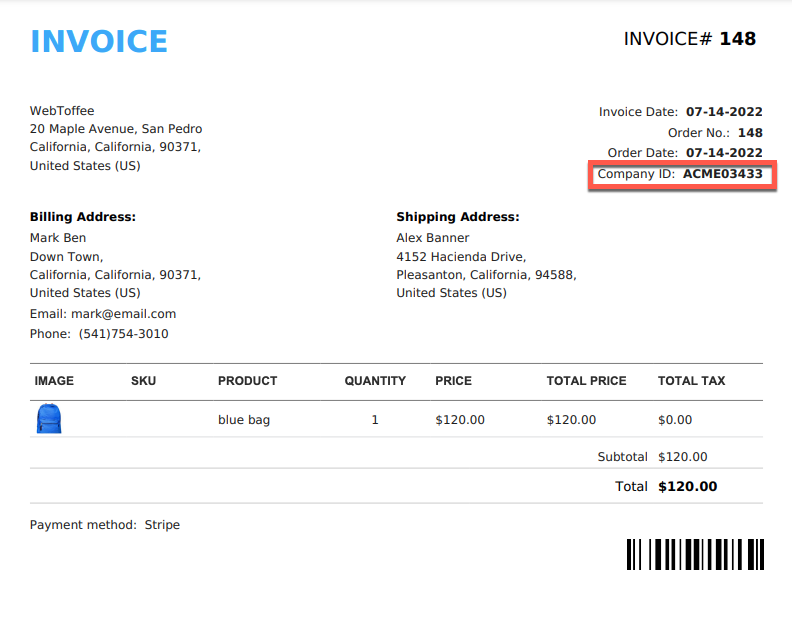
The same fields will also be visible on the WooCommerce invoice.
Conclusion
Custom fields in checkouts and invoices are a necessity for many WooCommerce businesses, if not for all. By using a simple invoice WooCommerce plugin, you can seamlessly attach such fields as per your requirements. So what are you waiting for? Get your plugin now and start customizing!
Has this article helped you? Do you need more information? We are looking for your feedback. Do let us know in the comments.