WebToffee’s Subscriptions for WooCommerce is a powerful plugin enabling seamless subscription-based e-commerce business management. This plugin allows creating and managing subscription products, ensuring a streamlined experience. This article explains the process of manually adding a subscription and editing existing subscriptions.
Adding subscription manually
Manually adding a subscription provides full control over the process. To add a subscription manually, follow these steps:
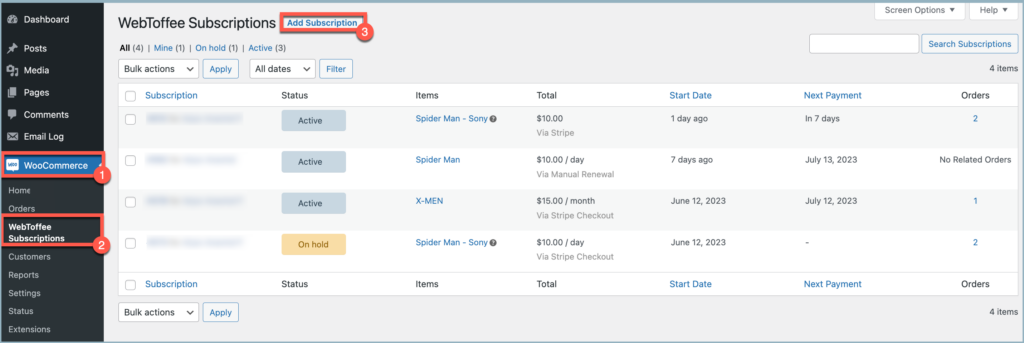
- Navigate to Add Subscription page.
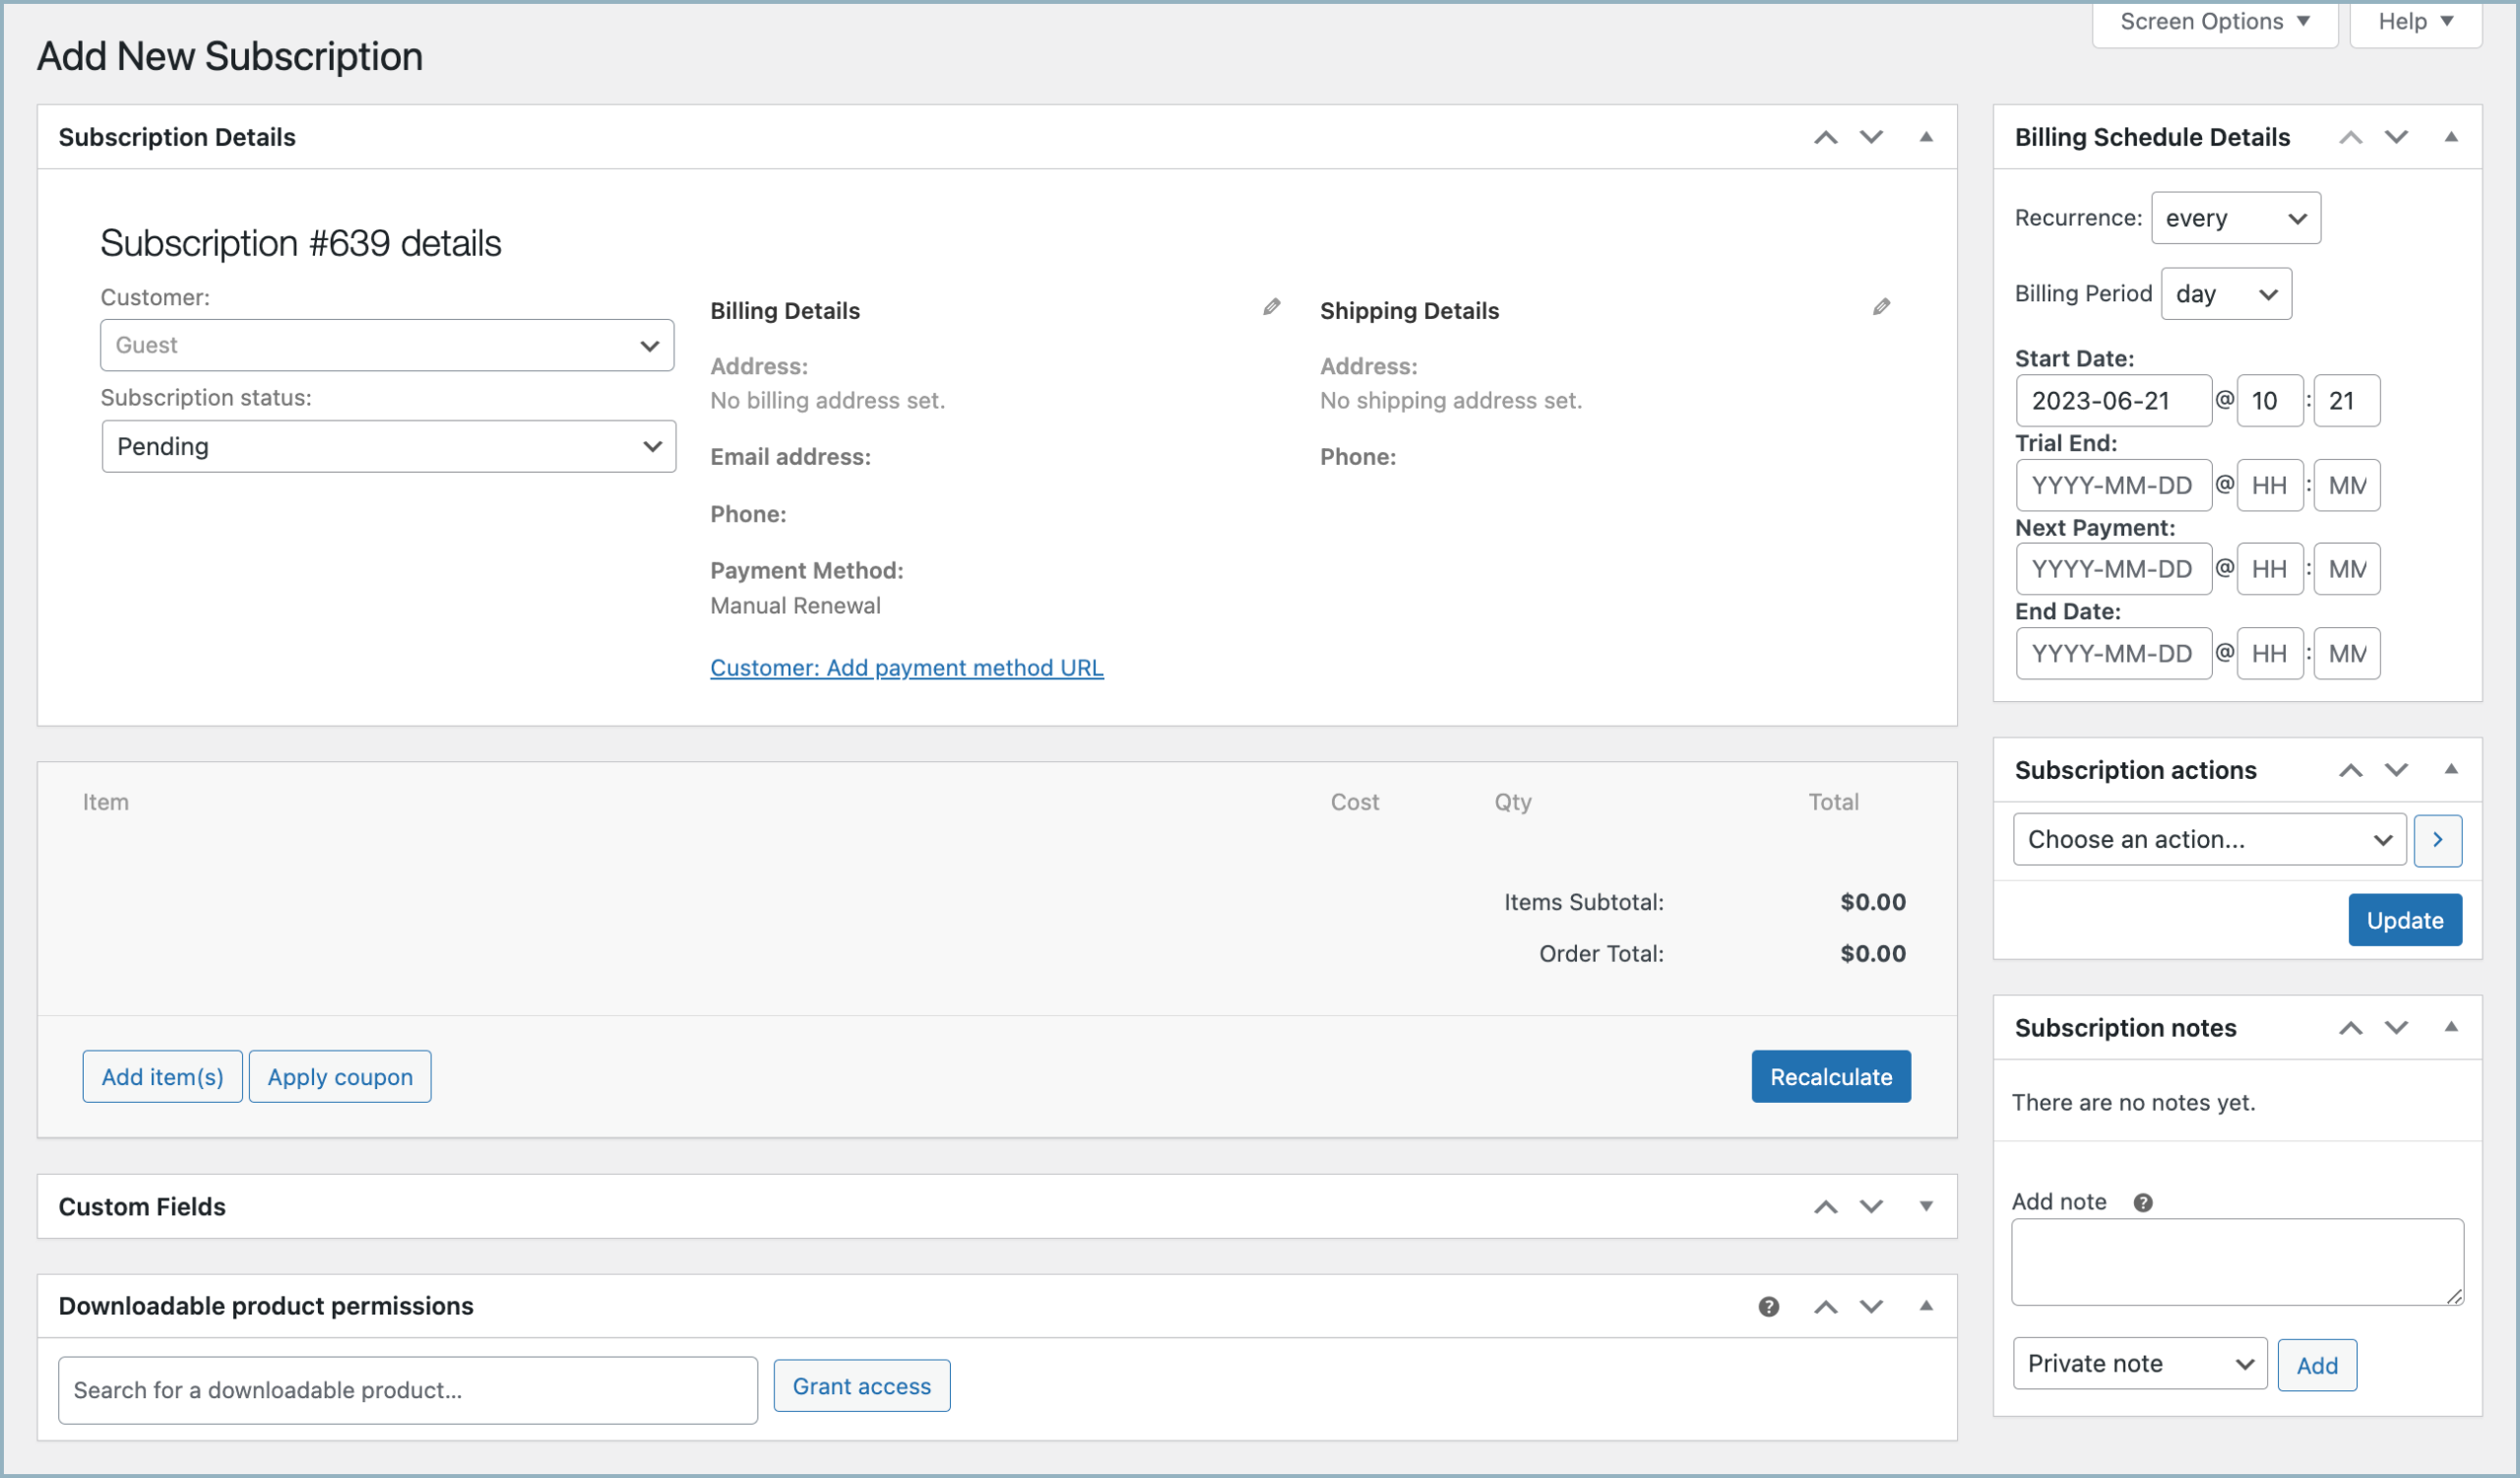
- From the Subscription Details section, link a customer to the subscription.
- Using the Billing Schedule Details section, set up the billing schedule.
- From the Item section, add products, shipping costs, taxes, and fees to the subscription.
- From the Subscription Action section, select Create a pending renewal order and click on Update.
From the WordPress dashboard, navigate to WooCommerce > WebToffee Subscriptions > Add Subscription.
Step 2: Link a customer to the subscription
Associating a subscriber with a subscription is crucial for effective management. Follow these steps:
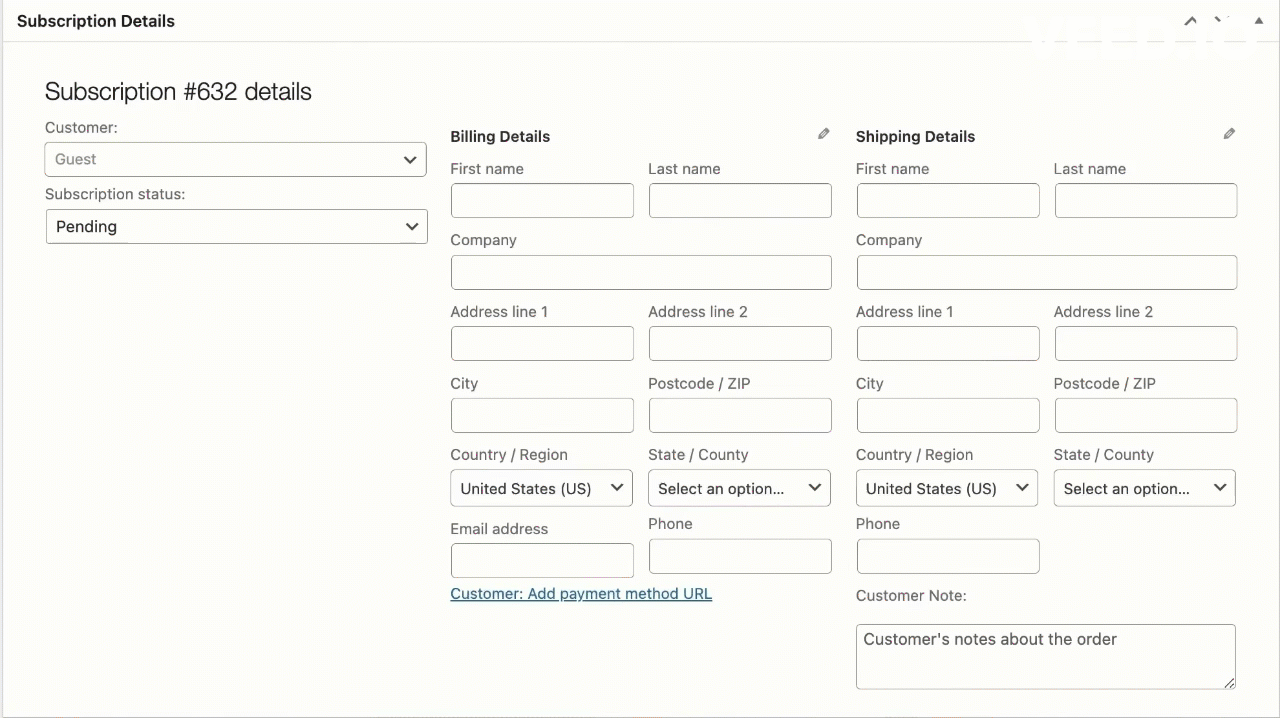
- Under the Subscription Details meta box, click the Customer search box
- Type the first few letters of the customer’s name or email.
- Choose the customer from the loaded list of accounts.
- The above-mentioned action will automatically load the billing and shipping address.
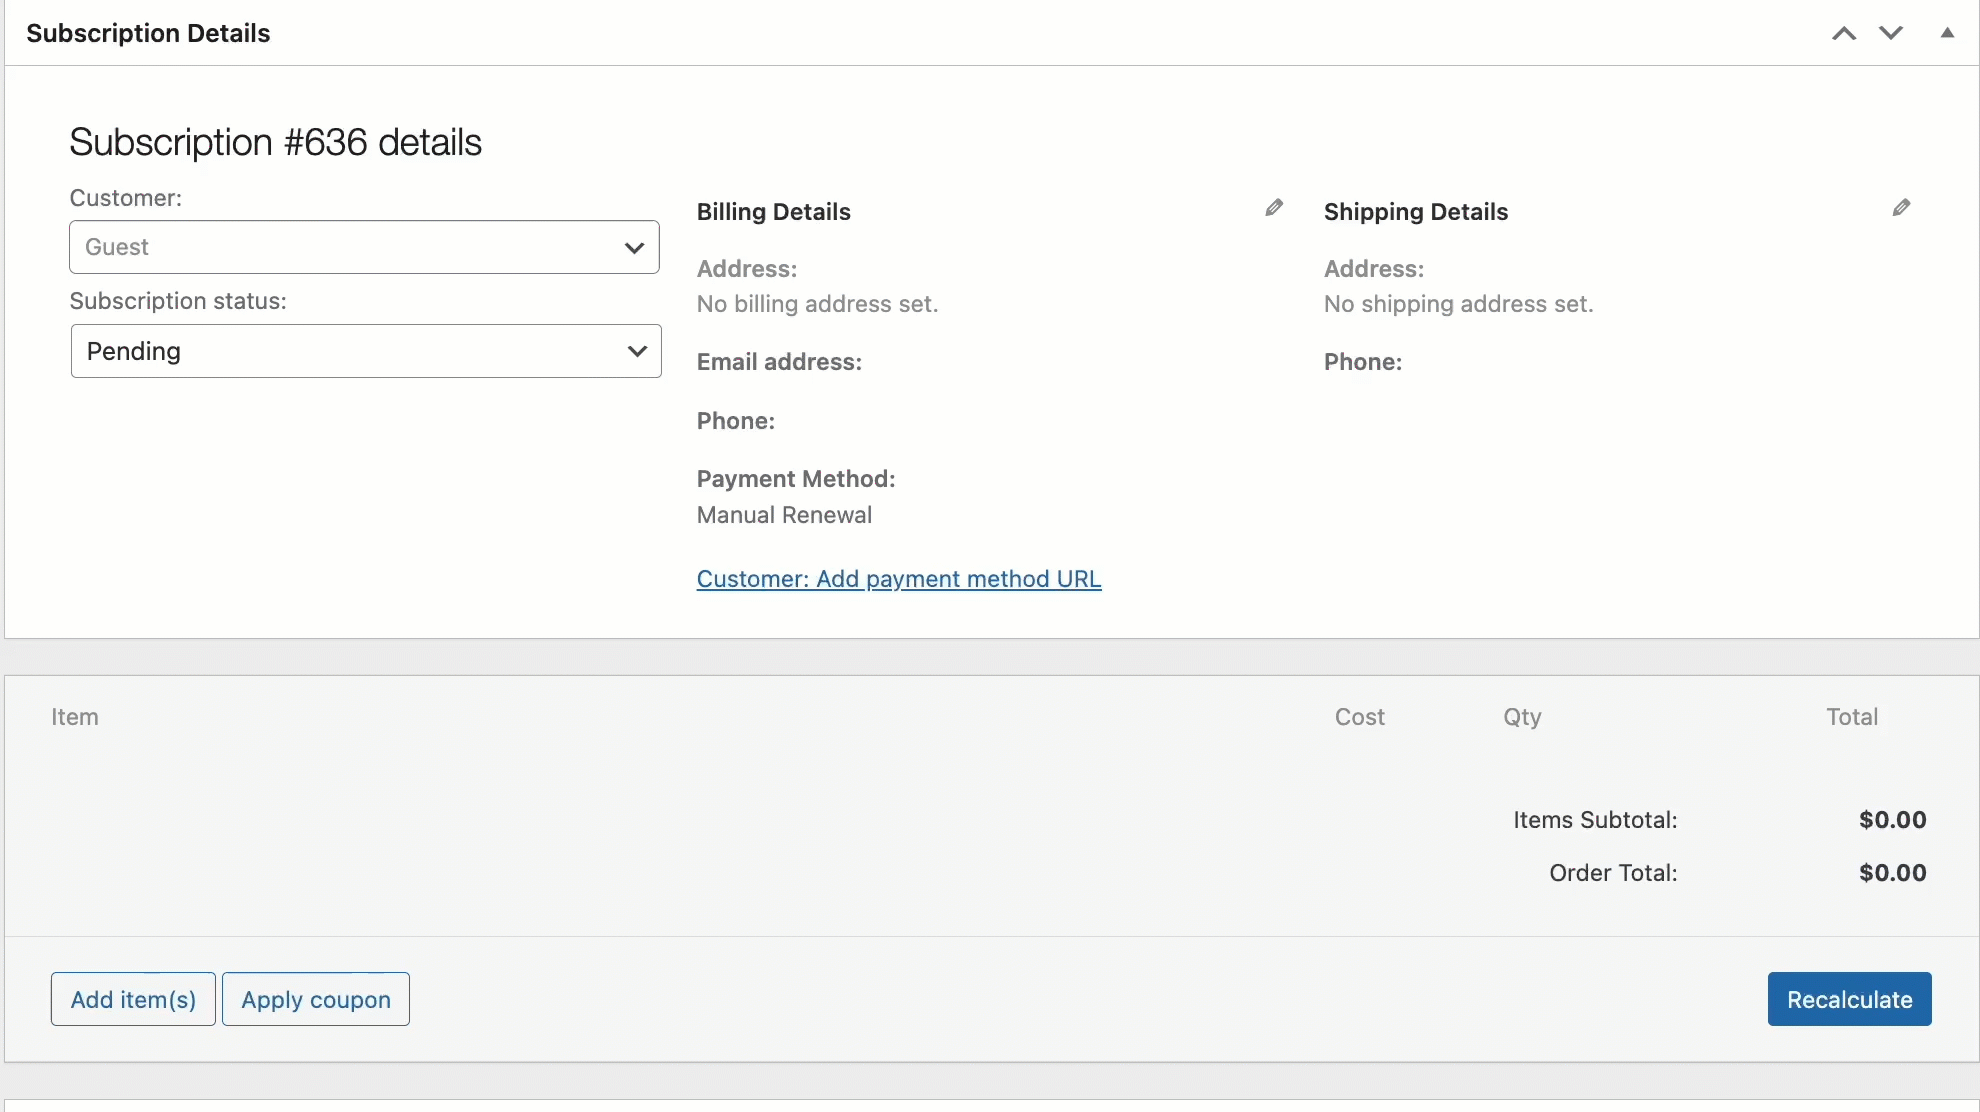
- Alternatively, it is possible to enter the details manually in the fields.
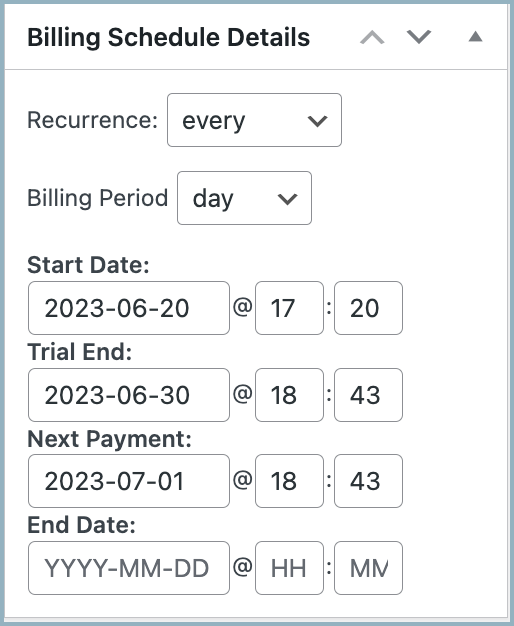
Step 3: Add a Billing Schedule
The billing schedule is a critical aspect of a subscription, it is used to determine the start date, trial period, and expiry of the subscription. Follow these steps to set up the billing schedule:
- From the Recurrence section, select the billing interval for the subscription.
- From the Billing Period section, select the billing period in days, weeks, months, or years.
- In the Start Date section, enter a date or use the calendar to choose a date. The start date must be in the past.
- In the Trial End Date section, enter a date or use the calendar to choose a date (optional).
- On the Next Payment Date section, enter a date or use the calendar to choose the next recurrence of the subscription.
- In the End Date section, enter a date or use the calendar to choose a date for the subscription expiry. Leave it empty for a lifetime subscription.
- In the provided example, the subscription without an expiration date will commence on June 20, 2023. The customer will enjoy a free trial period until June 30, 2023. Subsequently, the initial payment will take place on July 1, 2023, and subsequent renewals will occur daily.

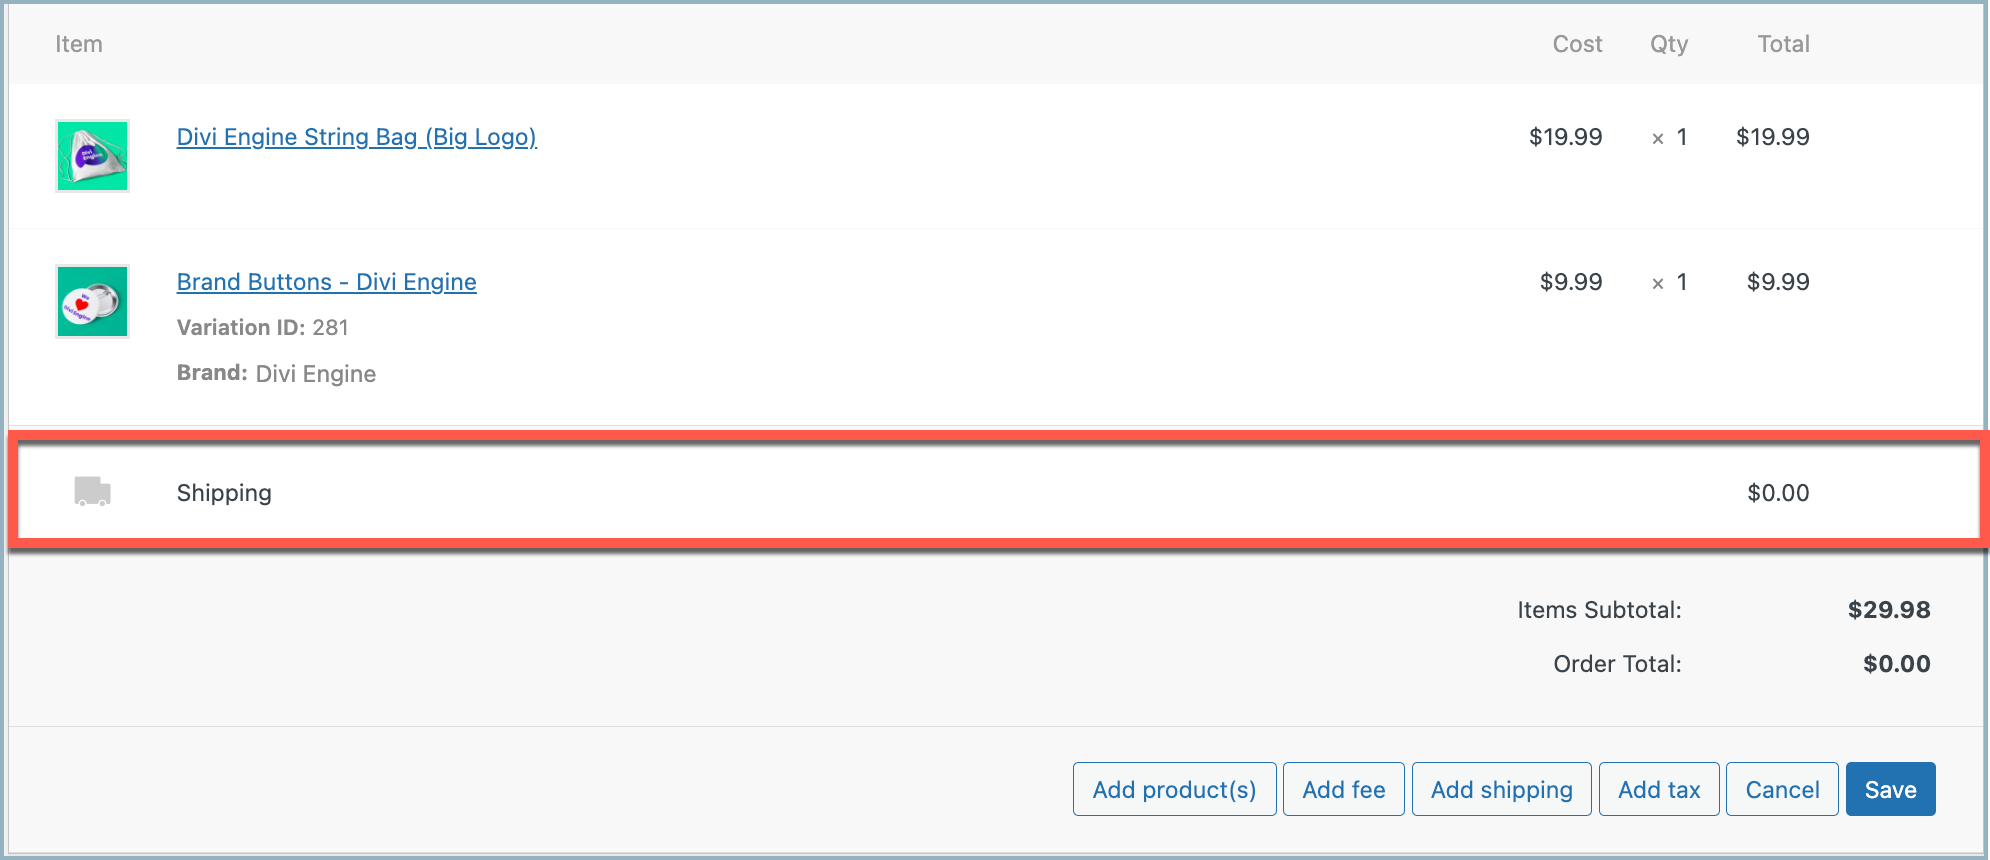
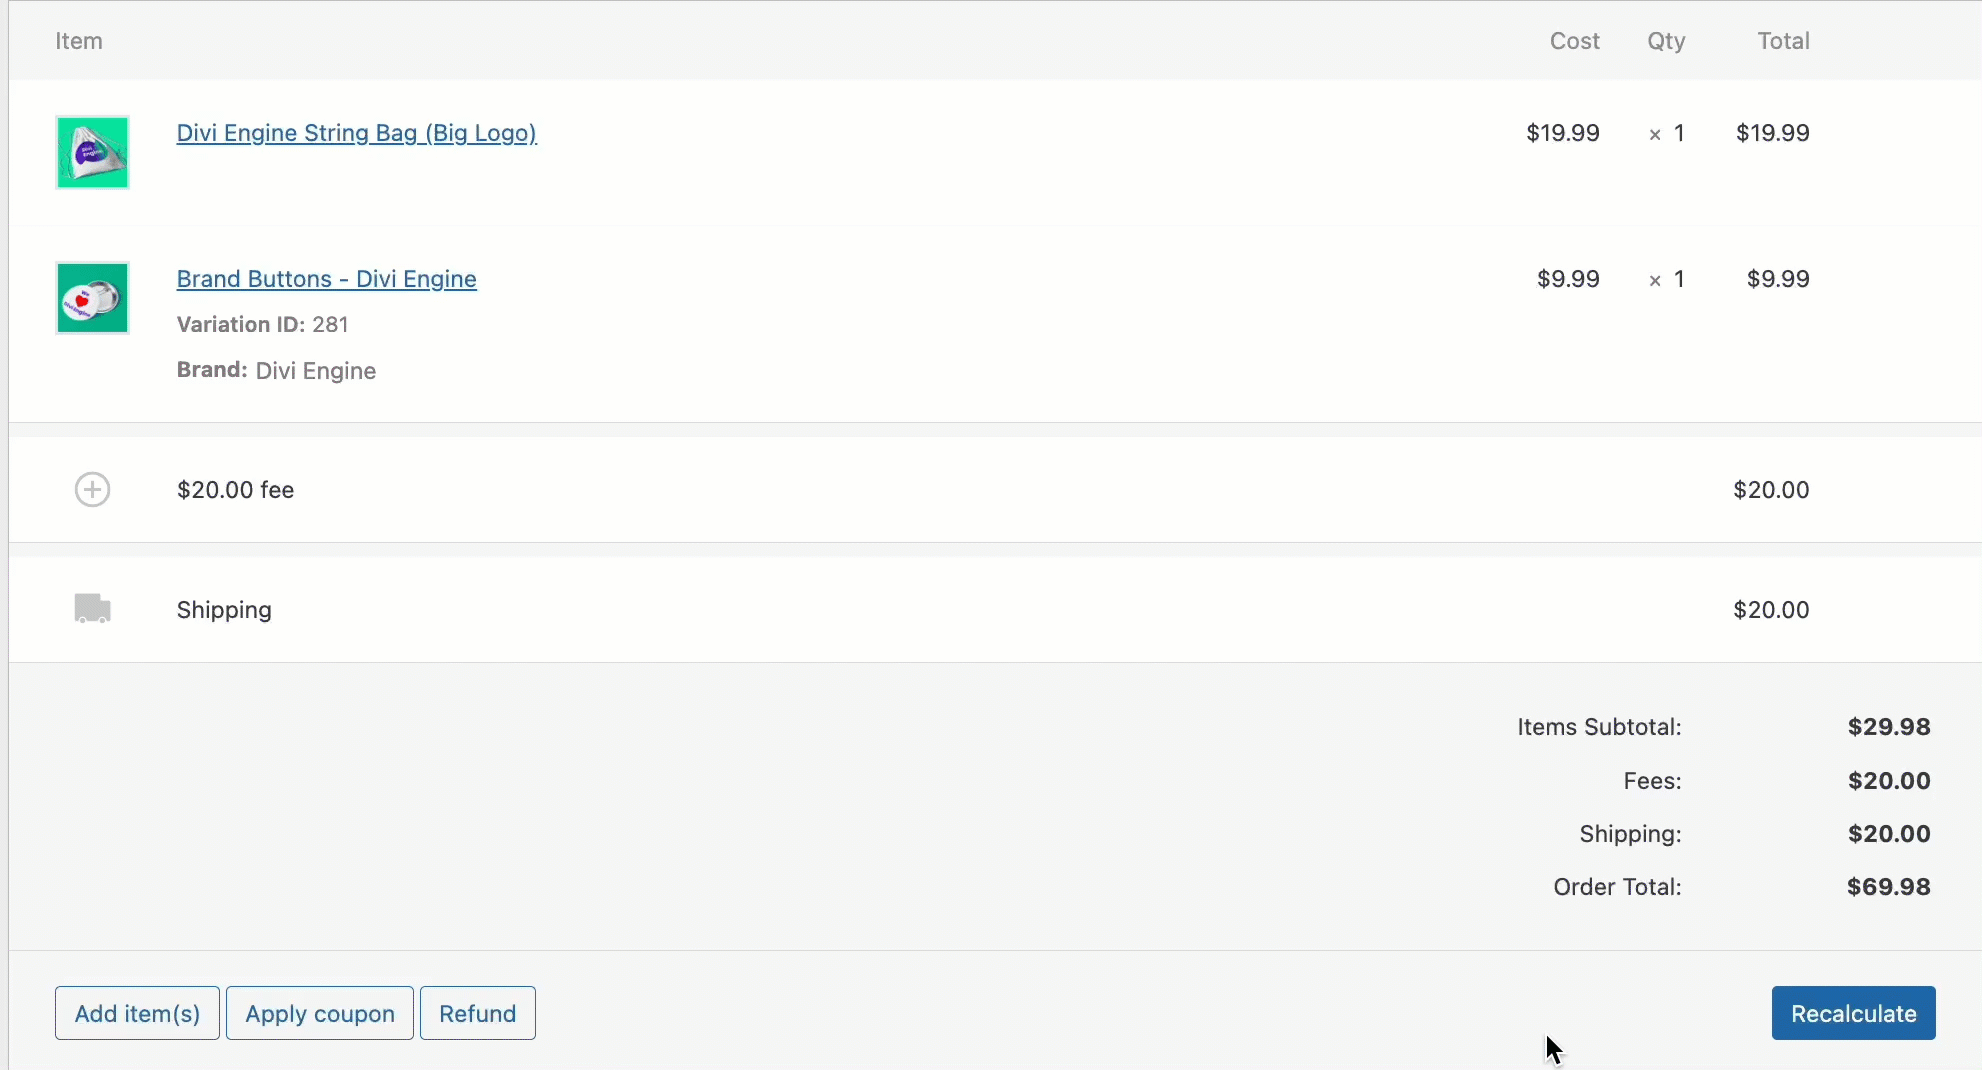
Step 4: Add Items (Products, Fees, Shipping, Tax)
To add a subscription product along with fees, shipping costs, and tax details, follow these steps:
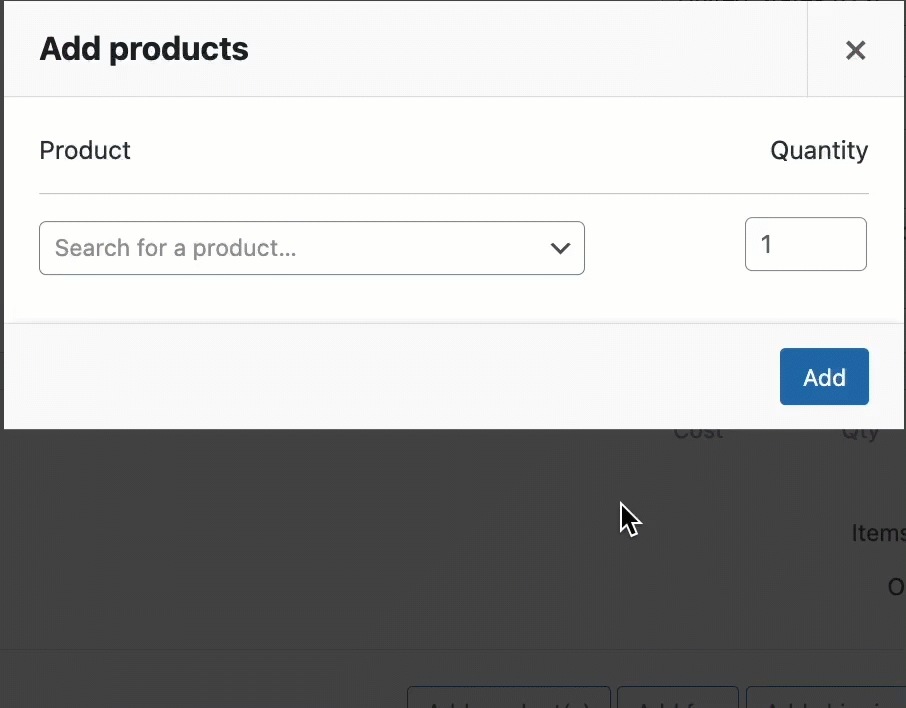
- Click the Add item(s) button in the Subscription Items meta box, it will open the below shown section.

- To add products,
- Click on Add products(s).
- Search for the desired product by name.
- Select the product and click on Add, multiple products can be selected.
- To add fees,
- Click on Add fee.
- Enter the fixed amount or percentage to be charged on each renewal and click on OK.

- To add shipping details,
- Click on Add shipping.
- A generic Shipping item will be displayed in the Subscription Items meta box.

- Click on the edit icon next to the shipping line to add a shipping category and rate of shipping.

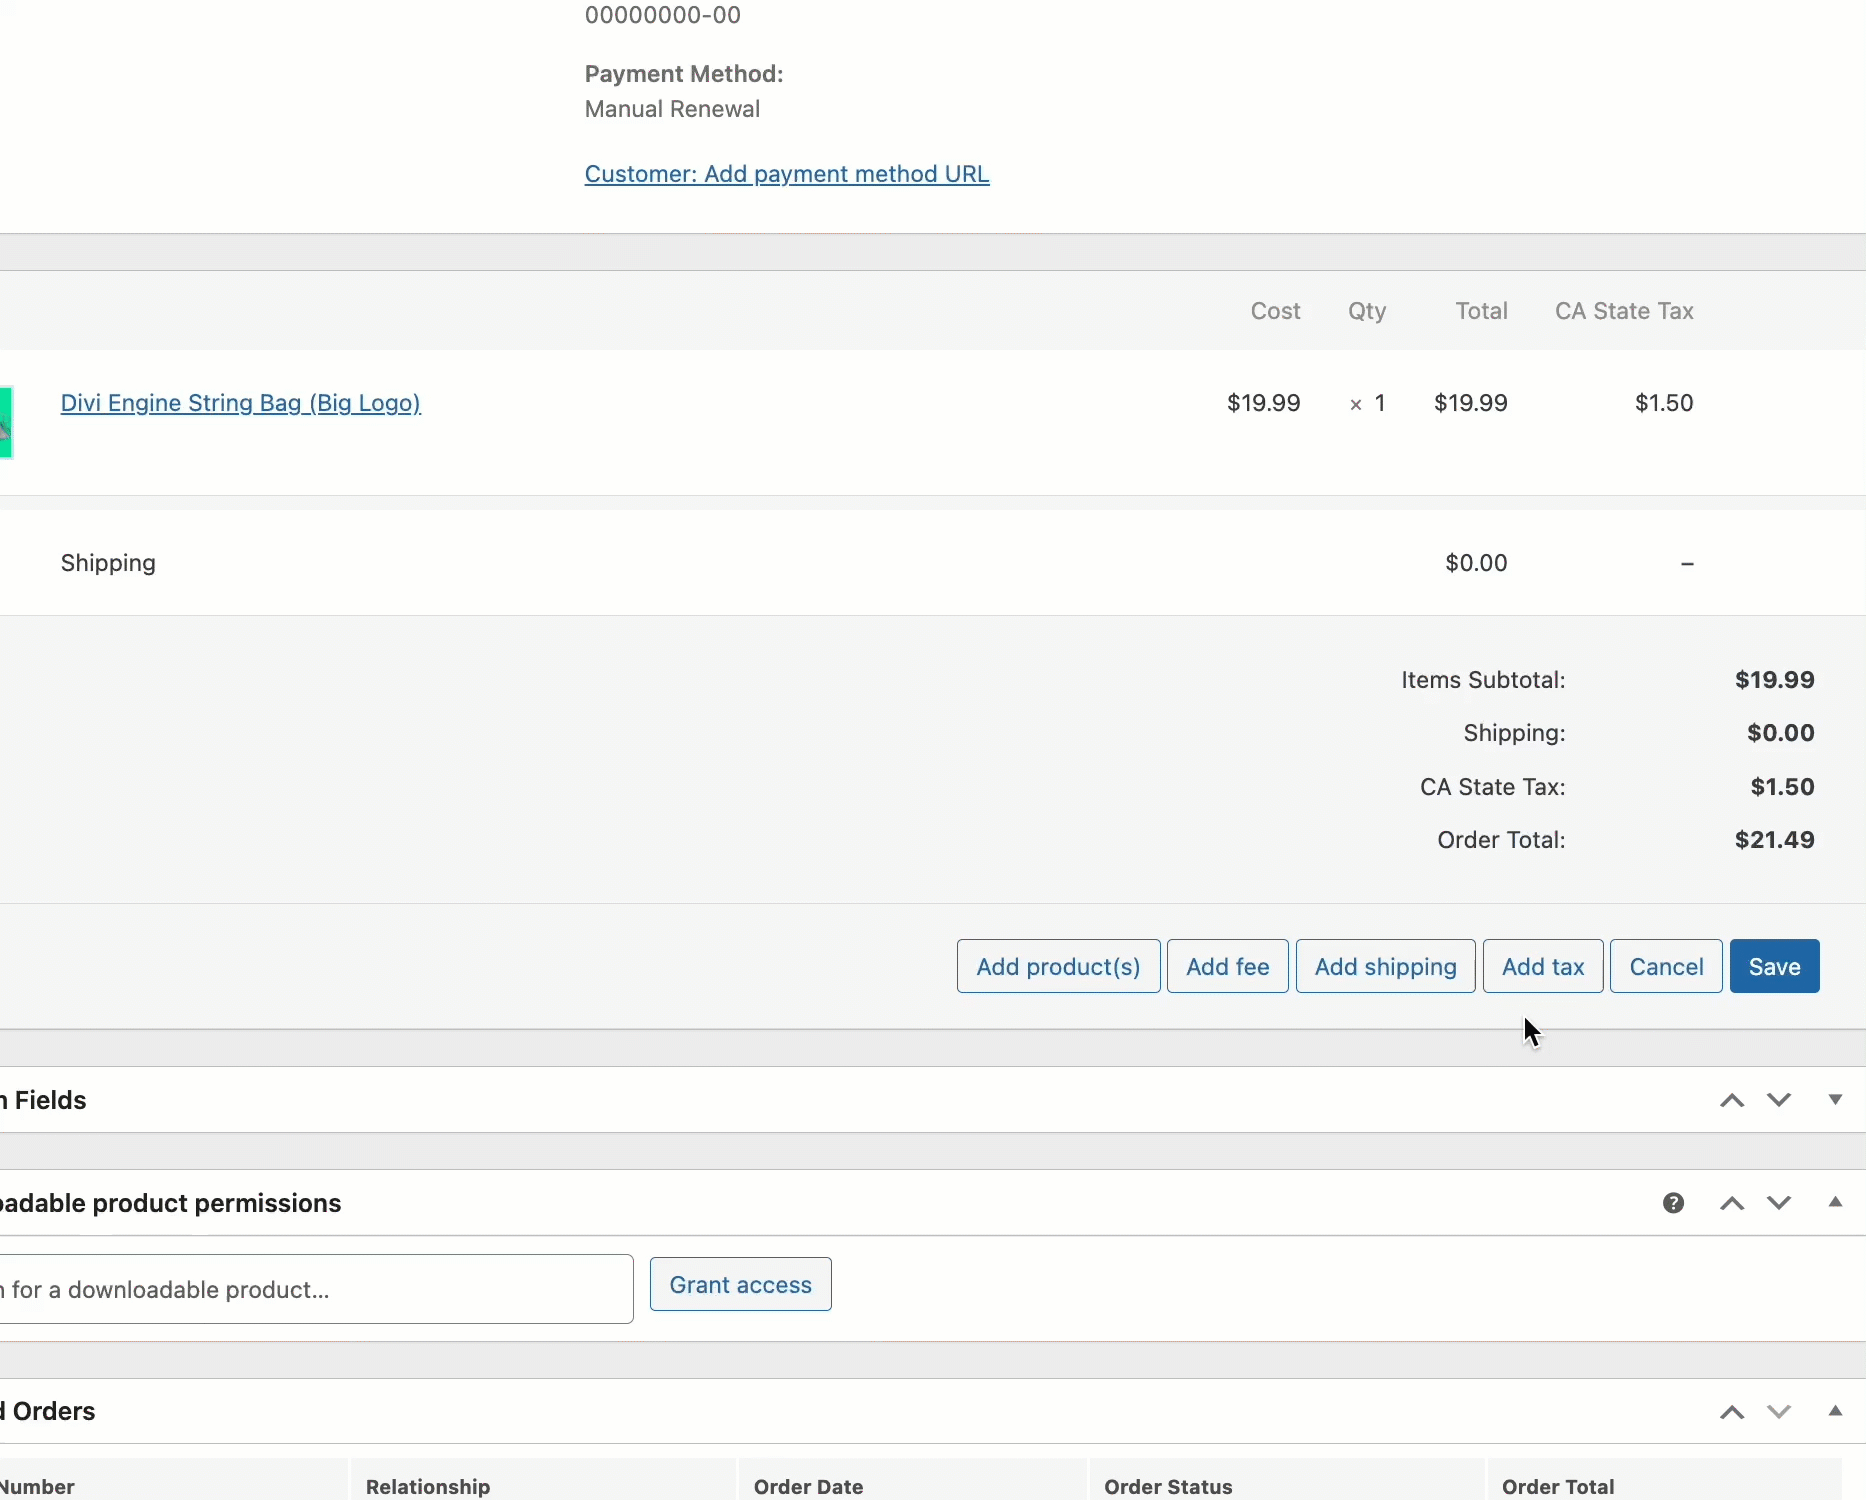
- To add tax,
- Click on Add tax.
- Choose the applicable tax rates from the configured options.
- Click on Add.
- Click on Save and then on Recalculate to calculate the tax.

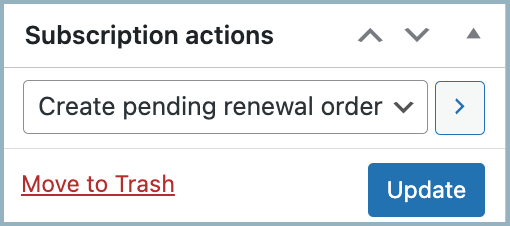
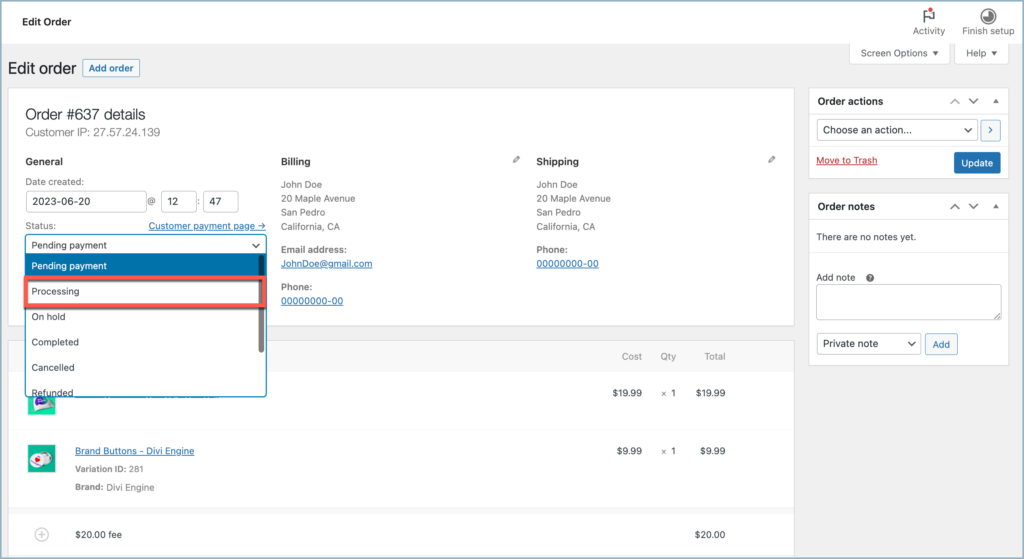
Step 5: Creating a Pending Renewal Order
Create a Pending Renewal Order by following these steps to record the transaction and guarantee it reaches the customer:
- From the Subscriptions Actions meta box, select Create Pending Renewal Order.
- Click on Update to create the order.
A renewal order in pending status will be created in the Related order meta box as shown below:

Step 6: Activate the Subscription
The Subscription will only get active only if payment is done towards it. This can be done in two ways
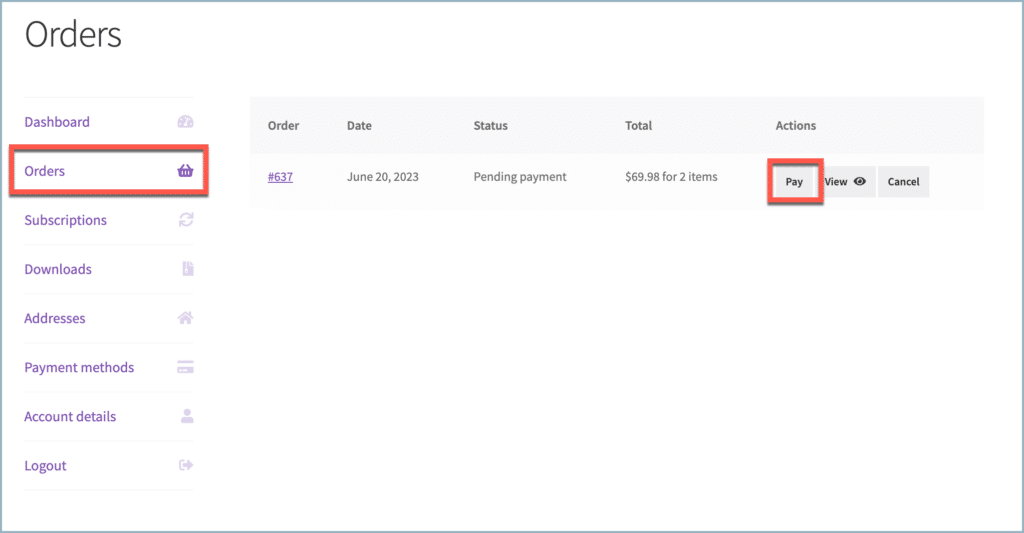
- Once a subscription is created from the back end with the status of pending renewal, a new subscription order will be added to the customer’s (Subscriber) account. This can be located in the customer’s account from My Account > Orders as shown below. The subscriber can then make a payment using the Pay option from the Orders section to activate the subscription.
- Alternatively, the store owner can manually update the order status to Processing/Completed upon receiving the payment, from WooCommerce > Orders.
Edit an existing subscription
It is possible to make edits to an existing subscription; however, there are certain limitations regarding which aspects can be modified. It is important to be aware that any changes made will only affect future recurrences and not past occurrences.
To edit an existing subscription, follow the given steps:
- From the WordPress dashboard, navigate to WooCommerce > Webtoffee Subscriptions.
- Click on the Subscription ID of the desired subscription, which redirects you to the Edit Subscription page.
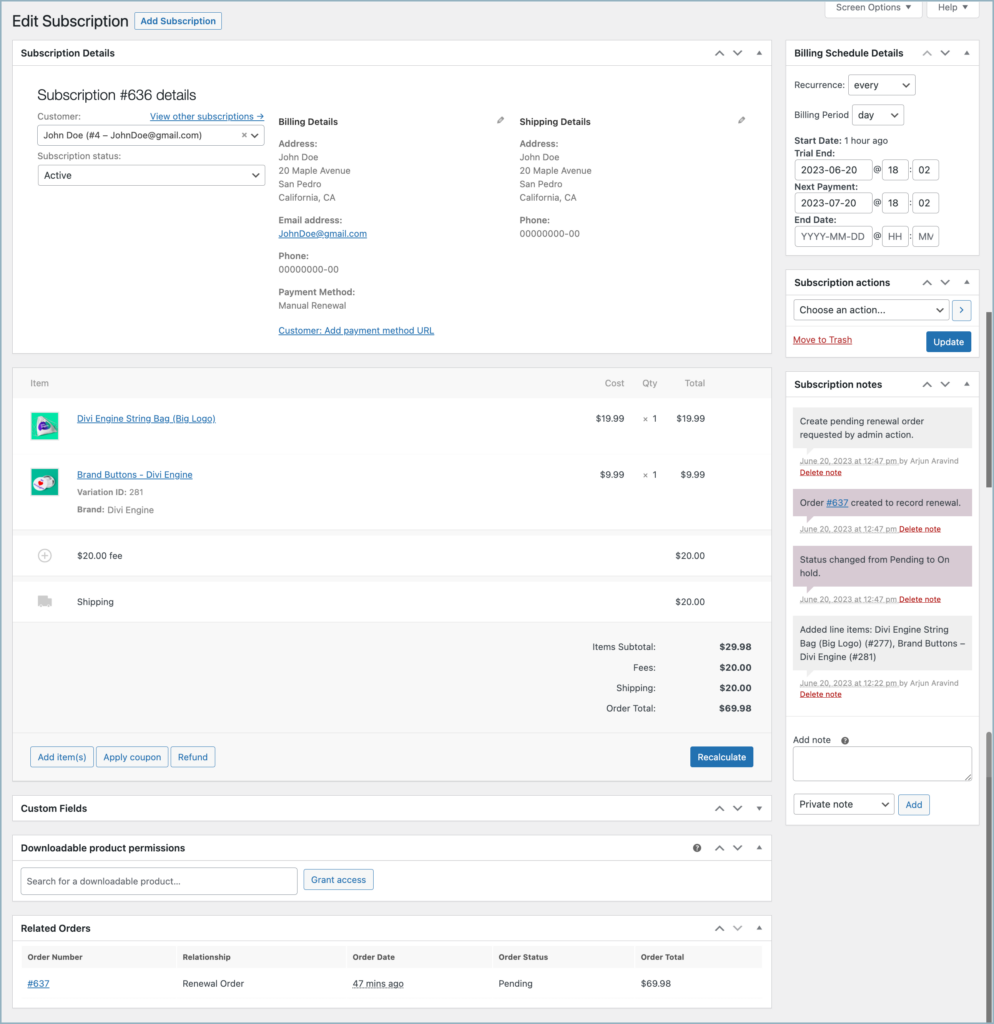
Change billing schedule
Using the Billing Schedule Details section on the Edit Subscription page, it is possible to modify the subscription’s end date, next payment date, trial end date, or recurring schedule according to the needs.
After editing, click on Update to save the subscription.
Change Recurring Totals
In case of the need to edit the existing product, shipping, tax, or fee:
- Select the edit icon inline to the desired field to edit the data.
- Edit the field.
- Click on Save.
- Click on Recalculate to recalculate the totals.
- Click on Update to save the subscription.
Change Subscription Status
By default, all currently active subscriptions are assigned an Active status, ensuring that customers can enjoy the associated benefits. However, in exceptional cases such as manual transactions, failed payments, disputes, and other circumstances, the admin has the option to manually update the subscription status as needed.
To edit the subscription’s status:
- Click the Subscription Status select box in the Subscription details meta box.
- Select a new status for the subscription
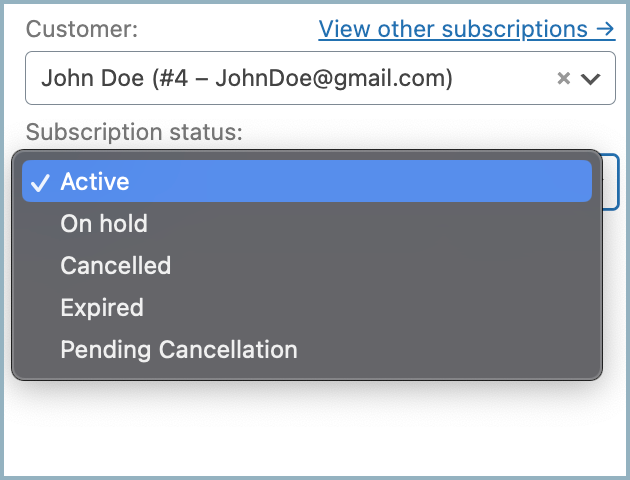
Click on Update to save the subscription
Meg Wileczek
April 1, 2024
Can I add another person’s billing details to a subscription for a customer? I have a donor who wants to pay for the annual subscription renewals of a friend.
Sanjai Valsan
April 11, 2024
Hi Meg,
Thanks for reaching out!
Unfortunately, our plugin does not provide an option to modify the billing address for subscription renewals.
Lizzi Hawkins
March 23, 2024
Hi there, one of the benefits of the Subscription for WooCommerse was that members can manage their subscriptions. I cant see how to do this in your documentation. Can you advise?
Sanjai Valsan
April 1, 2024
Hi Lizzi,
Thanks for reaching out!
Members can indeed manage their subscriptions by accessing their My Account page and navigating to the Subscriptions section. Here, they can view their active subscriptions and perform various actions such as updating payment methods or canceling subscriptions if needed. We apologize for any confusion caused by the lack of explicit mention in our documentation.
Patrick
May 9, 2023
Is it possible to restrict the total number of subscribers at any one time (using some sort of inventory).
For example, if I may only have 30 subscriptions available. Once 30 people are subscribing, then the product is ‘fully booked’.
When a customer cancels the subscription, then that becomes available to purchase again?
Thanks
Hema
May 15, 2023
Hello Patrick,
Thanks for reaching out.
We do not have such a feature in our plugin as of now. We will make sure to add them to our backlogs.
Linda
March 13, 2023
I’ve edited the users subscription to change the delivery address, (as per their request) for all future subscriptions, and it shows on the back end of our website, to be changed, but this isn’t pulling through to their latest scheduled subscription order – it has defaulted to the original delivery address. Can you tell me why this hasn’t worked? Will the customer have to cancel the current subscription, and start again? Many thanks
Earl Hickey
February 14, 2023
Is it possible to set the start time of a subscription manually?
Mike
February 21, 2023
Hello Earl,
We understand your requirement. Currently, that option is only available for manually created subscriptions from the admin panel.
Joe
January 27, 2023
Hi, does the subscription plugin quote for shipping like a typical physical product in Woo, if so, does it request a quote for each renewal or use the same quoted shipping rate from first order? Our couriers’ cost fluctuate somewhat with fuel levies.
Mark
March 9, 2023
Hi Joe,
Greetings from Webtoffee! Shipping charges are set during the time of initial order and the same prices are charged for every renewal.
Lise
April 18, 2022
Hi,
Is there a way to set a different price for future recurrences? (except manually)
I would like to set 18€ for the first month and 15€ from the 2nd month on.
Alan
April 19, 2022
Hi,
We understand the requirement, but our plugin currently does not support this feature. We have added it to the development backlogs. But you can always edit the product price manually.
Chris Roy
April 19, 2022
So I can change the product price and from this point on the new prices will be charged for all existing subscriptions?
Alan
April 20, 2022
Hi Chris,
By editing the subscription order, you can change the product price and other parameters as described in the article.
Please note: The changes will be effective only for that particular subscription order.
Joe
August 21, 2021
Is it possible to reinstate a cancelled subscription? Client status is currently ‘cancelled’ (for non-payment). The client now want to pay to start subscription again.
Mark
August 27, 2021
Hi Joe,
Thanks for reaching out. Customers can resubscribe to canceled subscriptions from My account > Subscriptions page. They can place it as a new order.
Leanna Baker
May 31, 2021
I need the user to be able to order a subscription, but pay by check (or other manual) payment. Currently I get a “Sorry, it seems there are no available payment methods which support subscriptions” error.
Ernest Ho
March 12, 2021
Is it possible to change the delivery schedule for a physical product?
Mark
March 16, 2021
Hi Ernest,
The plugin creates subscription renewal orders based on the renewal frequency that you set up for the product.
Ernest Ho
March 17, 2021
thanks Mark. So the renewal frequency dictates the delivery schedule and the two can’t de-couple, correct?
Nelly
February 18, 2021
Hello,
is it possible for the customer to change the products in their recurring monthly subscriptions, or request the admin to change them somehow?
Mark
February 19, 2021
Hi Nelly,
Unfortunately, there is no option to edit existing active orders. Customers would require to cancel and place new orders. Sorry for the inconvenience.
Steve Griffiths
January 28, 2021
Can Customers update their Credit Card details themselves (for example when their Card expires and then receive a new one)?
Mark
January 29, 2021
Hi Steve,
You can use the change payment method option to update the credit cards for active subscription. Refer the link.
Andy
January 25, 2021
Can different shipping options be added so a customer can select from for example UK= free, Europe = £10, USA = £20?
Mark
January 29, 2021
Hi Andy,
This can be set up via the Woocommerce shipping settings as usual.
Gaby Prothero
January 15, 2021
hi there, please can you tell me if it is possible for customers to amend/pause their weekly subscriptions if they are going on holiday etc? we sell flowers on subscription so clients need to be able to manage their own accounts. Thanks
Mark
January 25, 2021
Hi Gaby,
Users can suspend their subscription order anytime from their My account > Subscription page and reactivate it.
ugochukwu Dinneya
November 19, 2020
hi Shesna,
I am trying to make a subscription package that would charge upfront 6 months, 9months and 12 months. How can i do it with your plugin?
Mark
November 20, 2020
Hi,
You can set the upfront amount as sign-up fee via the product edit page for each product or variations.