This blog explains how to add payment methods-related information to WooCommerce invoices. We will be using the WebToffee WooCommerce invoice plugin to add such additional data to invoices.
Having all the relevant information embedded within the invoice is helpful for the store owner and the customer. Mentioning payment methods in the invoice is a good practice to avoid any disputes in the future regarding payment. To make subsequent follow-ups on returns, refunds, etc., it is essential to know the mode of payment.
WooCommerce PDF Invoice and Packing Slip plugin by WebToffee offer the feature to allow payment methods to appear on the invoice.
Video Tutorial
Check out our tutorial to know how the payment method is included in the WooCommerce invoice.
Install Plugin
Note: The free plugin WooCommerce PDF invoices and shipping documents should be installed and activated on the store first. This is because the premium plugin works as an extension of the free version.
After purchasing the Print Invoice, Packing Slip & Credit Notes Plugin for WooCommerce, the plugin will be available as a zip file in the API Downloads section of your MY ACCOUNT page.
- Download the zip file from API Downloads by logging into your WebToffee MY ACCOUNTS page.
- Log in as the WordPress Admin of your online store.
- Navigate to Plugins > Add New to upload the downloaded plugin.
- Choose the plugin file to upload.
- Finally, activate the plugin.
How To Include Payment Method In Invoice?
Lets take a look at how you can easily add information regarding the payment method to the invoices automatically generated in WooCommerce.
- Navigate to the invoice settings
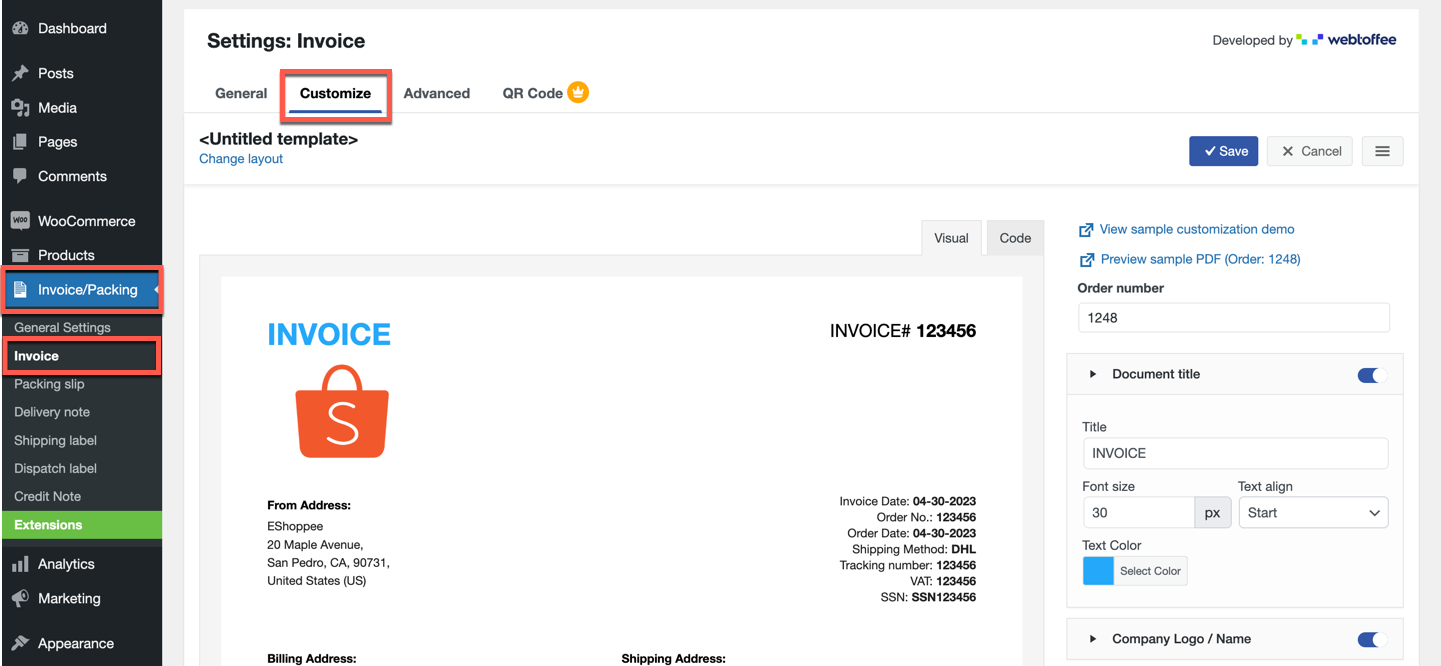
Once the plugin installation is complete, go to Invoice/Packing > Invoice from the WordPress menu.
You will land on the General page, where you can configure your invoices with provisions to create invoice numbers, insert additional order or product metadata, and more. Take a look at customizing WooCommerce invoices to know more.
Once that is done, go to the Customize tab.
- Add payment method to invoice
In the Customize tab, click on the Change layout link and select an invoice layout that you find suitable (Make sure to select a layout that supports adding Payment Method).
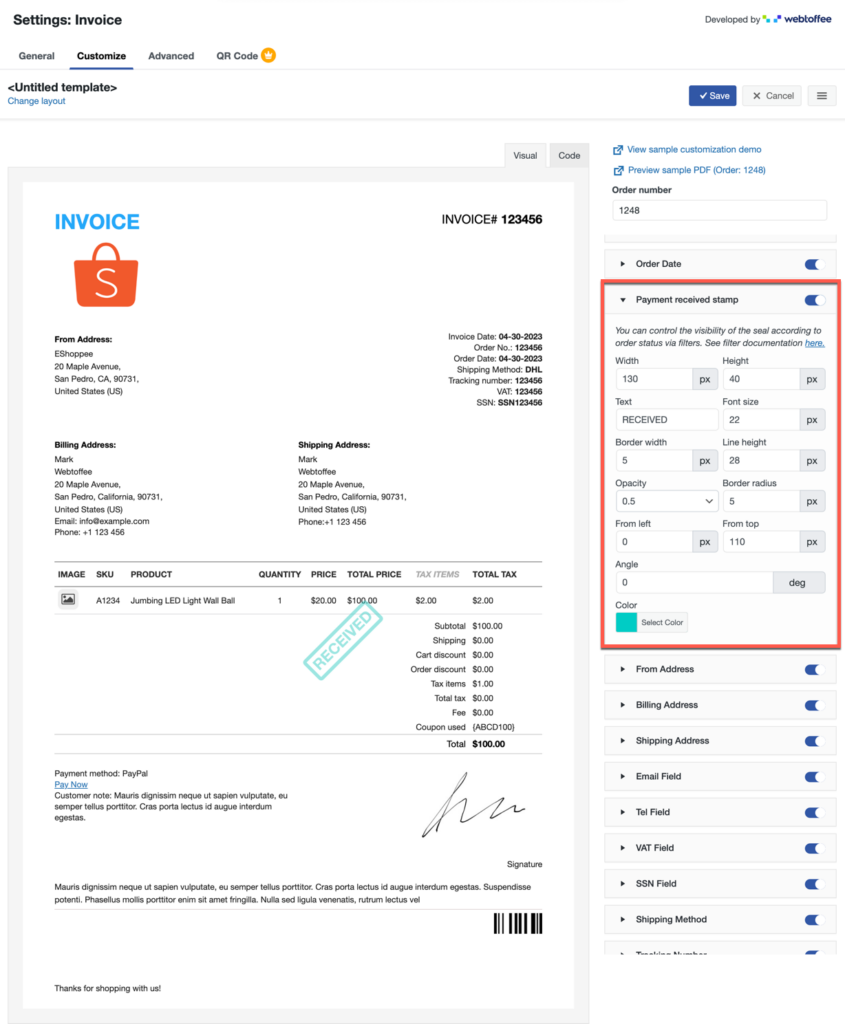
Scroll down the page and find the Payment Method toggle among the customizable elements on the right side of the page.
Enable the toggle and change the payment text if you want.
- Save the template
Once done, click on Save and save the configurations to a template.
Click on the menu icon on the top-right of the page and tap on Activate to make this the default template.

The Customize tab offers various options to configure the look and feel of the invoice. You can create new invoice templates from existing layouts. Each layout differs in its appearance and arrangements of elements and constituent colors.
You may also add a Payment received stamp on the invoice with the toggle button of the same name.
That is it! You don’t actually have to do any specific settings to get the payment information displayed on your invoice. Just by enabling the plugin’s invoice option, all the relevant information pertaining to the invoices is added to it by default.
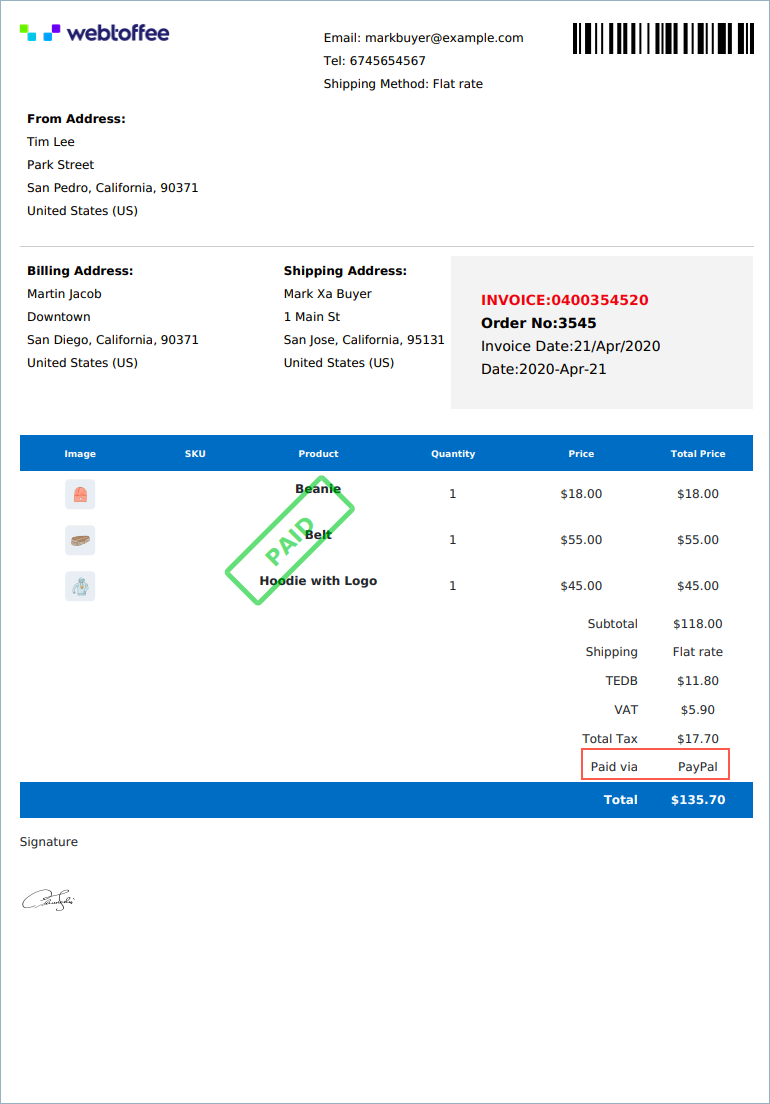
The resulting invoice will have the payment information in it. Here is the screenshot of such a sample invoice.
Conclusion
To sum up, adding information regarding the payment method used is crucial for businesses. Following the steps outlined in this guide, you can quickly add data pertaining to the payment method to your WooCommerce invoices.
Hope you found what you were looking for. Do let us know what you think about this in the comments below.
All-In-One - Generate PDF Invoice, Packing Slip, Labels & Delivery Note.
Used by 20,000+ WooCommerce Stores
#1 in Customer Satisfaction
WebToffee Guarantee: Get Your Money Back if You Are Not Satisfied With The Product
Buy Now!