With Print Invoice, Packing Slip, Delivery Note & Label Plugin for WooCommerce(Pro) plugin, you can print, download and manage WooCommerce invoices.
Plugin features
- Attach invoice in PDF format in the WooCommerce order email.
- Set up a custom invoice number with prefix/suffix/number series.
- Append additional order or product meta details into the invoice.
- Allow to customize the invoice using the inbuilt templates and modify them to suit your needs.
Check out the video tutorial to set up the plugin.
All right, now let’s get down to set up an invoice.
Get started
- First of all, install and activate the plugin, a new menu Invoice/Packing appears in the WordPress dashboard.
- Head on to Invoice/Packing > Invoice menu. The invoice settings window will open up.
OR - Go to General Settings > Documents tab > Invoice > Settings.
Basic setup
The settings included in the general tab are as shown below:
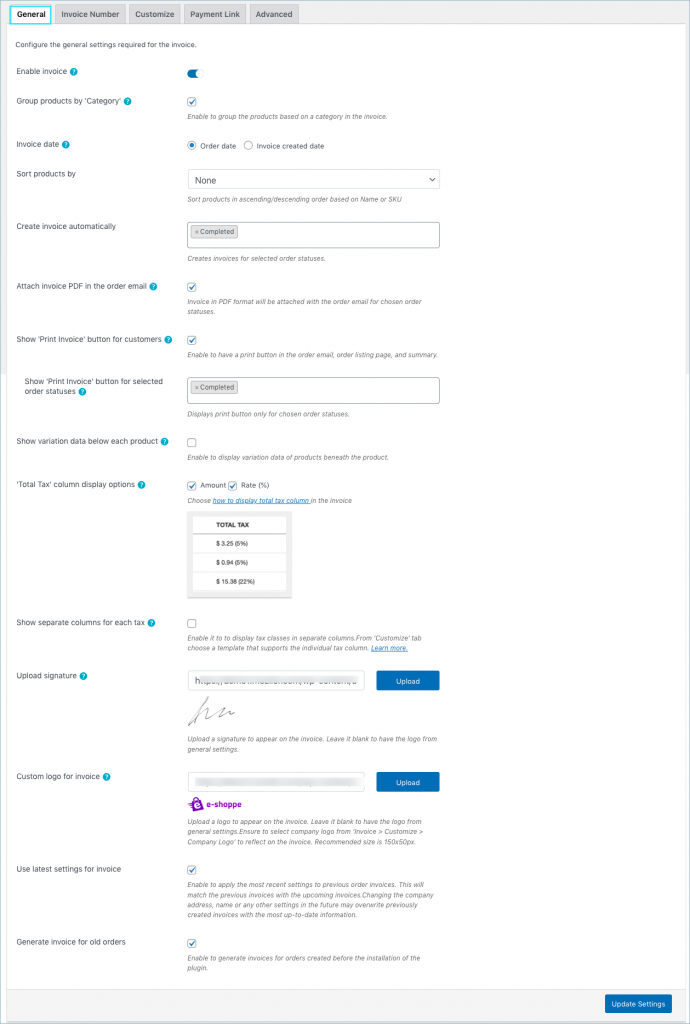
- Enable invoice: Disable to remove the invoice view/print provisions for orders. The admin can still customize the template and set the invoice number.
- Group products by ‘Category’: Enable to group products based on category.
- Invoice date – You can choose between the order date or invoice created date.
- Sort products by: Sort products based on Name and SKU.
- Create invoice automatically – Creates invoices for chosen order statuses. You can select multiple statuses based on your requirements.
- Attach PDF invoice in the order email: Enable to attach PDF version of the currently active invoice template in the order email.
- Enable print invoice button for selected order statuses: You will be able to display a print invoice button for your customers.
- Show variation data below each product: To include variation data of the product in the invoice, enable this option.
- ‘Total tax’ column display options: Displays the total tax column in any of the selected formats. Available formats are: Amount, Rate(%), Rate(%) with amount.
For example, If $500 is the total price and the tax rate is 20%, then, the total tax will be displayed in the invoice in the following manner:- Amount-$100
- Rate(%)-20%
- Rate(%) with amount – $100(20%)
- Show separate columns for each tax: Enable to have individual columns for tax in the invoice. If multiple taxes are set up in your store, each tax item will be displayed separately in individual columns. The various tax display formats are: Amount, Rate(%), Rate(%) with amount, Separate columns for Rate(%) and Amount.
- Upload signature: If you want the signature to be displayed in the invoice, upload it in this field.
- Custom logo for invoice: Upload a custom logo different for the invoice. Leave it blank, to populate the default logo.
- Use latest settings for invoice: Enable to apply the most recent settings to previous order invoices. This will match the previous invoices with the upcoming invoices. Caution: Changing the company address, name or any other settings in the future may overwrite previously created invoices with the most up-to-date information. On disabling, the previous invoices will not be updated to the latest settings.
- Generate invoices for old orders: Enable to generate invoices for all orders created before plugin installation.
Finally, click on the Update Settings button to save the settings.
Custom invoice number
Next, you can set up a custom invoice number with prefix/suffix/number series or even mirror the order number as an invoice number respectively.
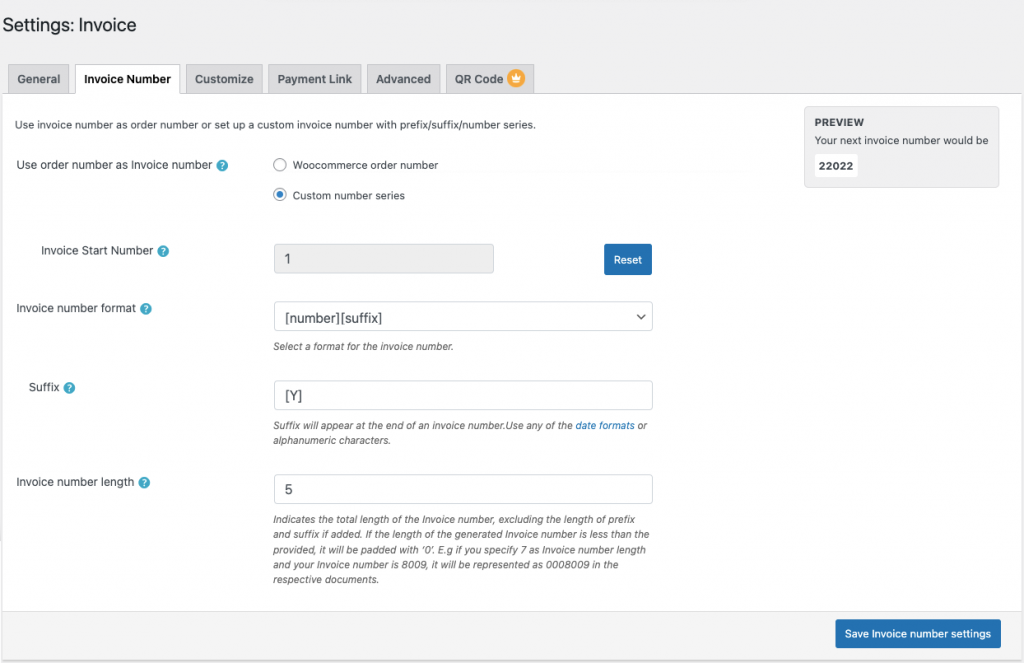
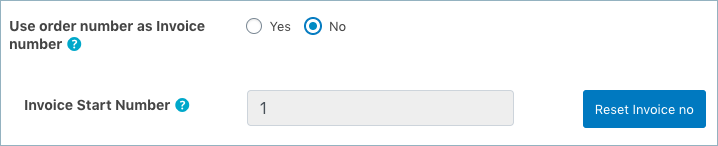
Use the order number as invoice number: Choose Yes to use the order number as the invoice number. To have a custom invoice number, select No and input the necessary details into the respective fields.
Invoice Start Number: Enter the Invoice Start Number.
Invoice number format: Specify the format in which the invoice has to be generated. For example, [prefix][number][suffix]

Suffix: Enter the suffix that will appear at the trailing end of the invoice number. You can use any of the date formats or alphanumeric characters as a suffix as shown in the image below.
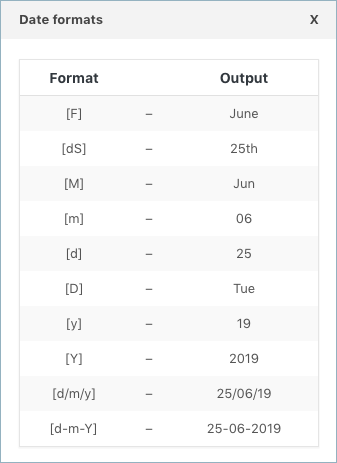
Invoice number length: Indicates the total length of the invoice number padded with zeroes. For example, Input invoice number length as 7 with initial number as 8009. then, the newly generated number will be 0008009, padded with 3 zeroes.
Update and reset the invoice number format settings by clicking on the Update and Reset button.
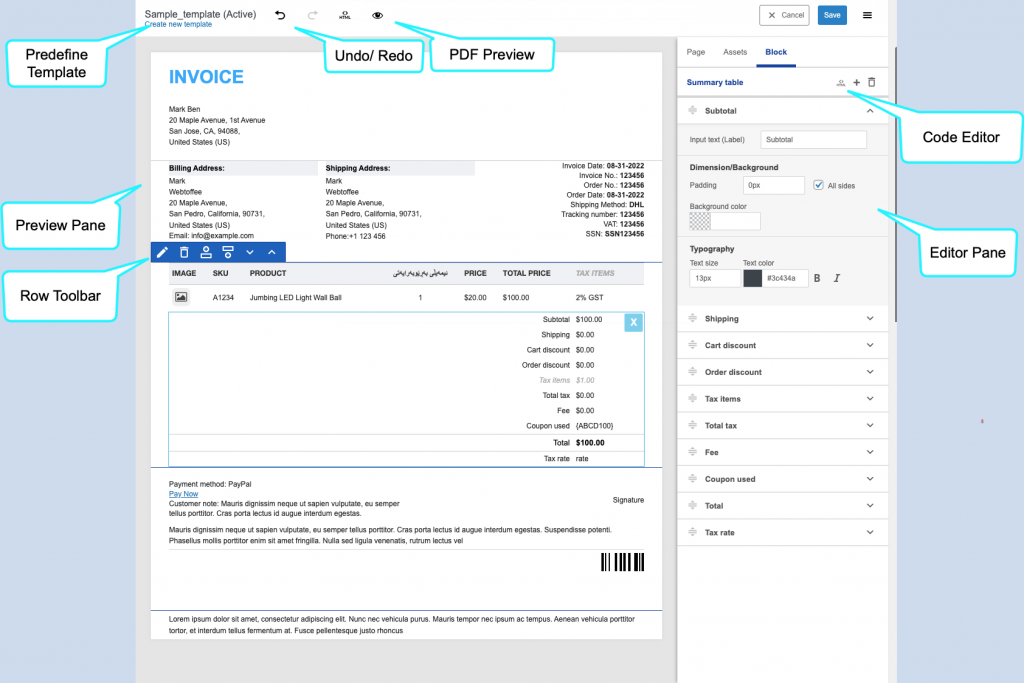
Customize and preview
The customizer is intuitive, dynamic, and flexible to work on. It consists of the following:
- Preview pane
- Editor pane
- Predefined templates
- Undo/Redo buttons
- Code editor
- PDF preview
Refer to this detailed guide to know more about dynamic customizer.
Payment Link
Adds a payment link in your invoice to let customers pay later. Upon clicking on the payment link, your customers will be redirected to your store’s payment/checkout page. Refer to the detailed guide
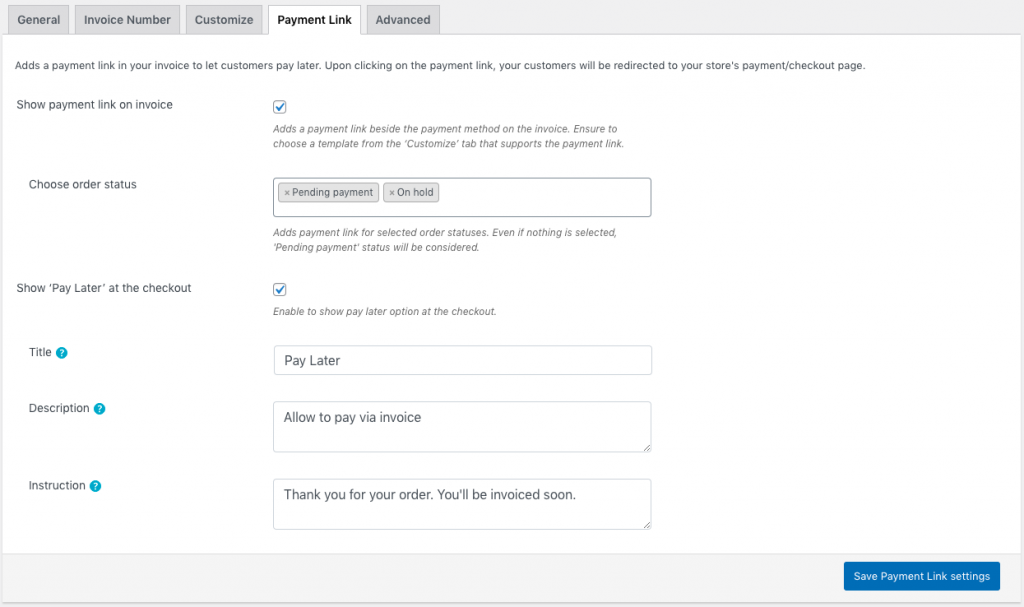
- Enable Show payment link on invoice to add a payment link beside the payment method on the invoice. Ensure to choose a template from the ‘Customize’ tab that shows the payment method.
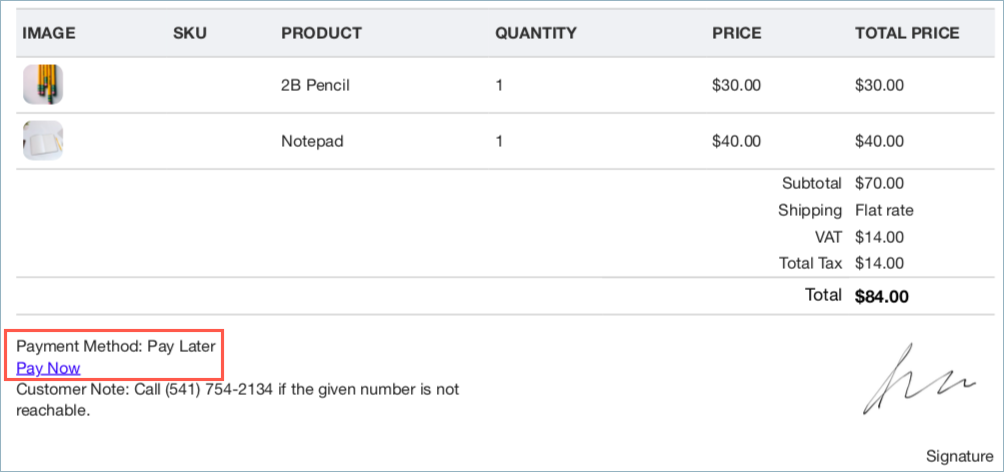
- Choose order status: Adds payment link on the invoice based on selected order statuses. If you don’t make any selection, then ‘Pending payment’ status will be considered. That is, a ‘Pay now’ link will be added to all the invoices with order status as pending payment.
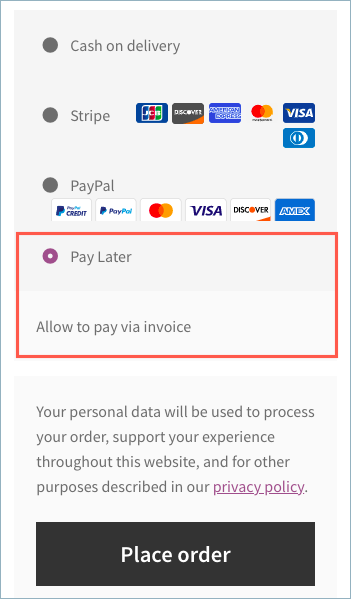
- Show ‘Pay Later’ at the checkout: Enable to show pay later option at the checkout.
- The title specified here will appear as the payment option at the checkout. For example: Pay Later
- Description will appear just below the title on the checkout page. For example: Allow to pay via invoice.
- Instructions will be shown on the thank you page after placing the order. For example: Thank you for your order. You’ll be invoiced soon.
Advanced settings
Configure advanced settings to display order/product meta details beneath the product in the invoice. Learn more
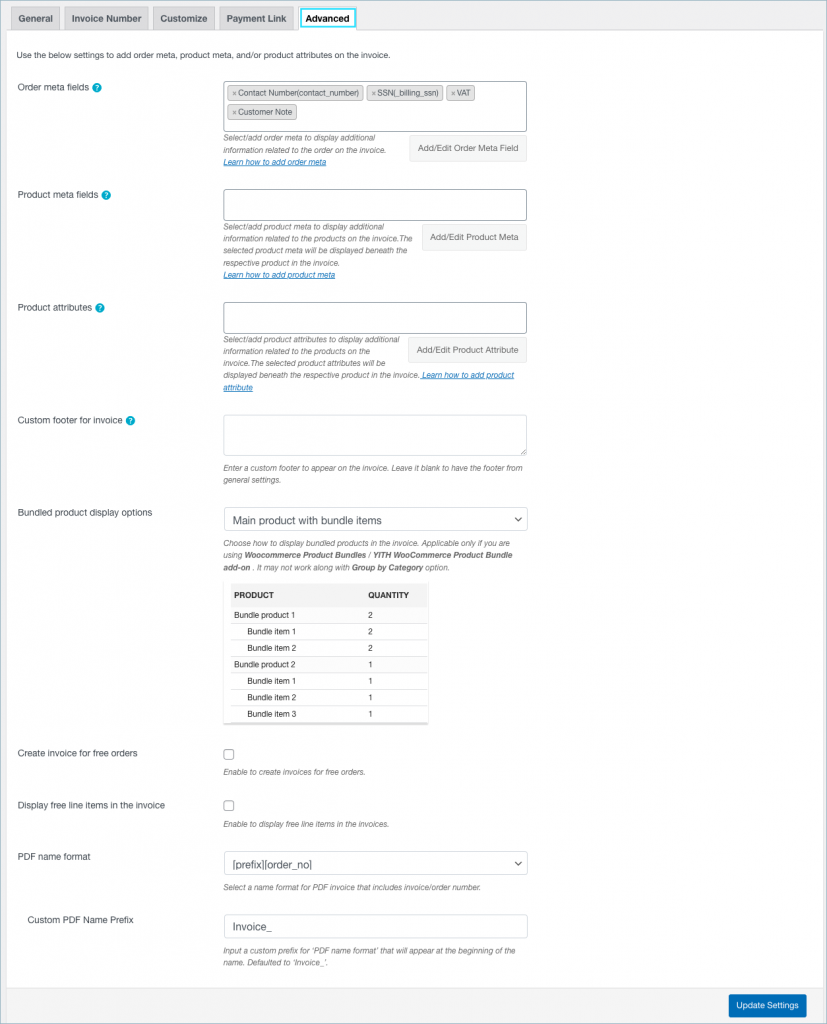
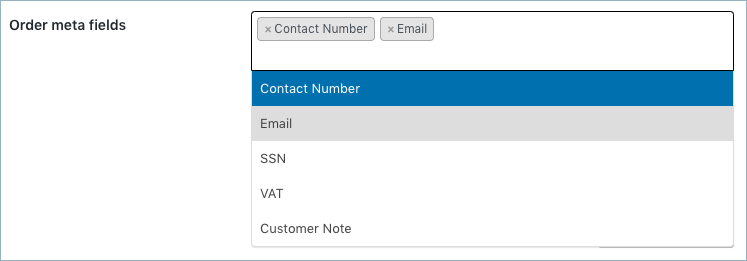
Order meta fields
Append additional order information in the invoice by selecting the required item from the drop-down. You can select a field from the list of default fields.
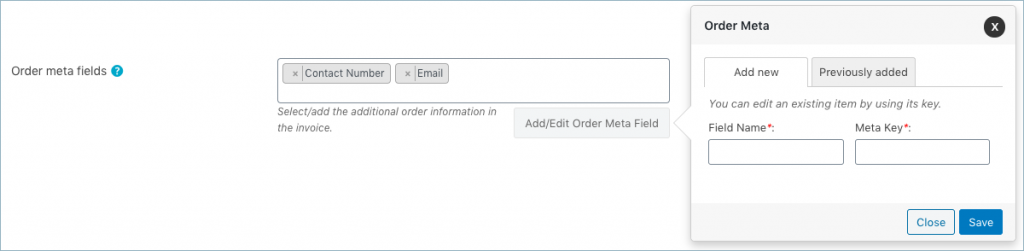
- Click the Add/Edit Order Meta Field button to create custom meta fields.
- From the Add new tab specify a custom Field Name and the respective Meta Key to add a new order meta.
Get the order meta keys from the custom field section of the WooCommerce Order page.
- To view, edit or delete previously added meta, click on previously added tab.
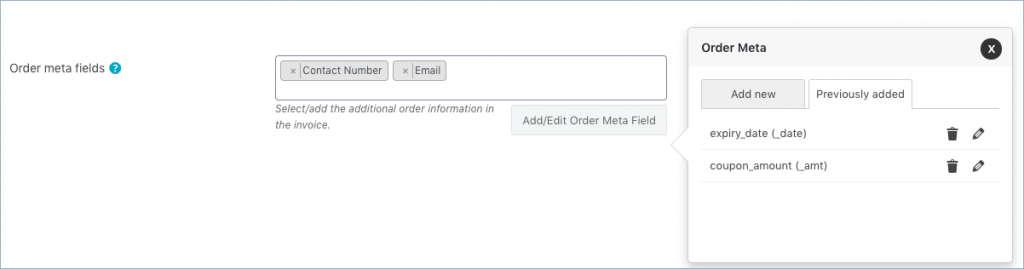
You can edit/delete previously added order meta.
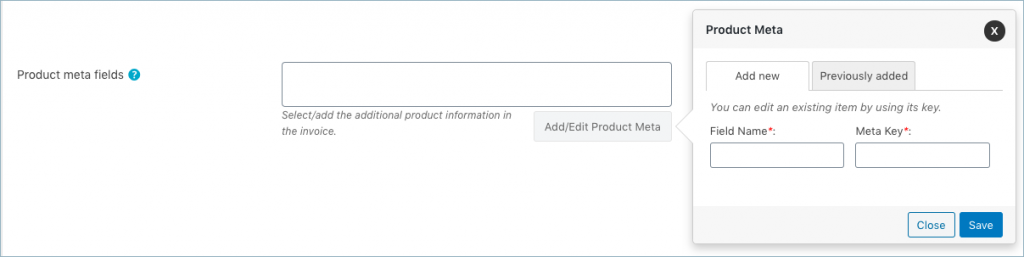
Product meta fields
- Append additional product information in the invoice by adding product metadata.
- Click the Add/Edit Product Meta to add a new product meta field by providing a custom field name and the respective meta key for the field. Get the meta key of a product from the respective third party plugin that you are using.
- For example, the meta key for the weight of a WooCommerce product is _weight.
To view, edit or delete previously added product meta, click on previously added tab.
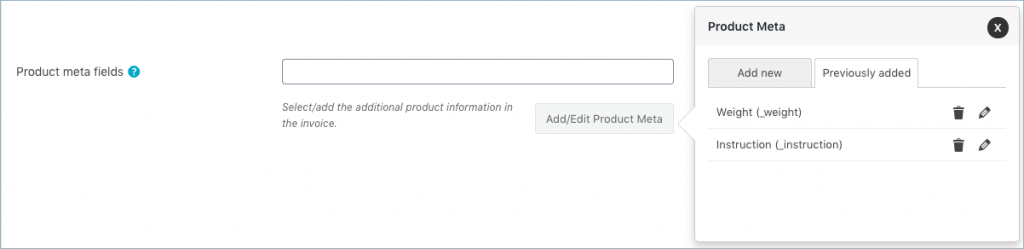
You can edit/delete previously added product meta.
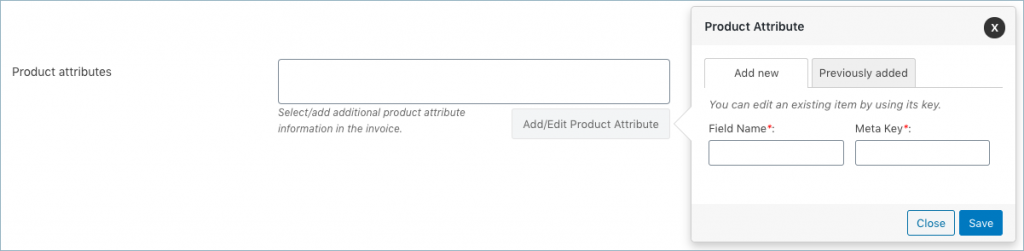
Product attributes
- To have product attributes in the invoice, simply add them by using the Add/Edit Product attribute button.
- Add new tab will give you options to specify the field name and the corresponding meta of the product attribute.
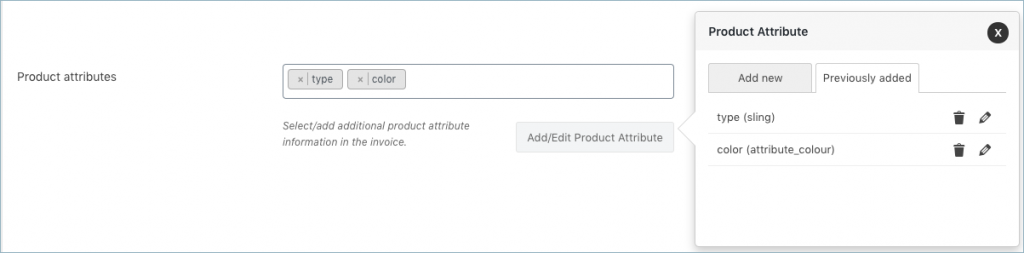
Likewise, you can view, edit, or delete previously created attributes from the previously added tab.
Custom footer
Custom footer for invoice: Key in with a custom footer for the invoice in the text area. If left blank, then the default footer from General settings will be loaded.
Bundled product display options
This option is only applicable if you are using WooCommerce Product Bundles / YITH WooCommerce Product Bundle add-on
Create invoice for free orders
Generate invoices for free orders: Enable to generate invoices for free orders.
Display free line items in the invoice
Enable to display free line items in the invoice.
Custom PDF name
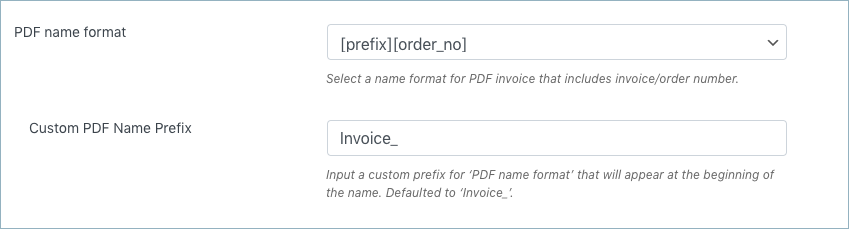
- PDF name format: Select a name format for a PDF invoice that includes the invoice/order number.
- Custom prefix: Input a custom prefix for ‘PDF name format’ that will appear at the beginning of the name. Defaulted to ‘Invoice_’.
At last, click on the Update Settings button to save the changes.
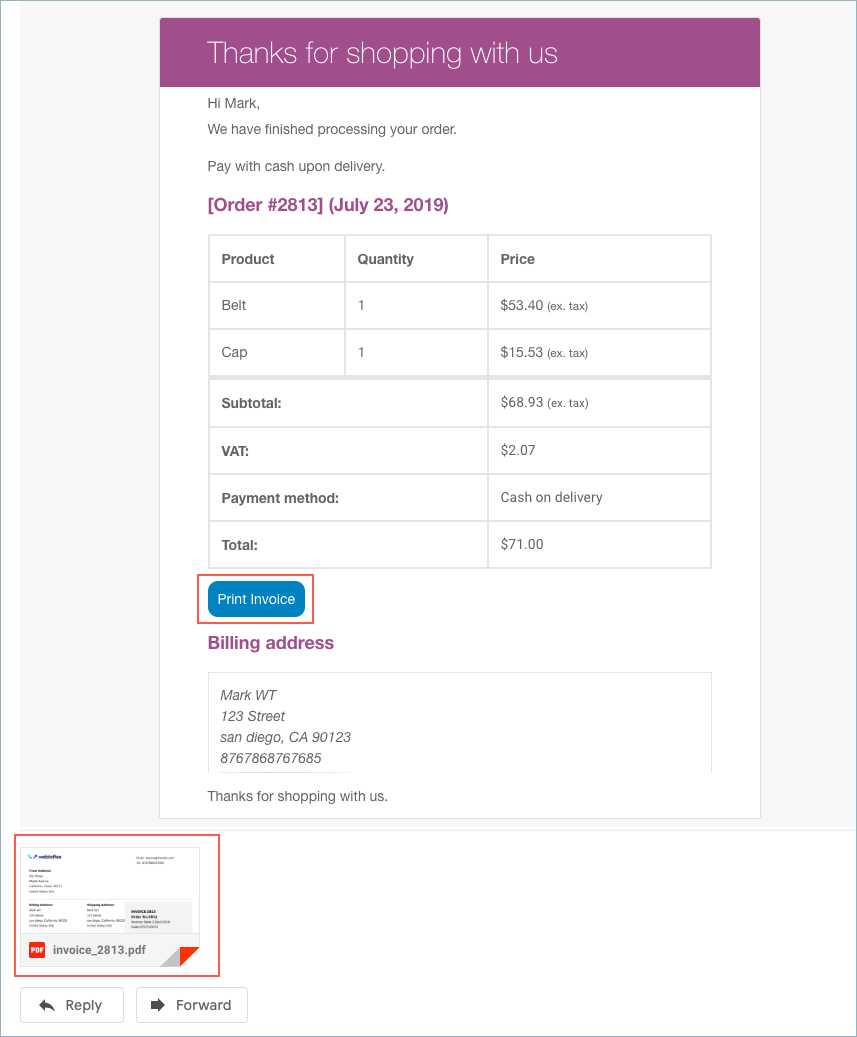
PDF invoice attachment
PDF attached to the order mail with download and print provisions are as shown below.
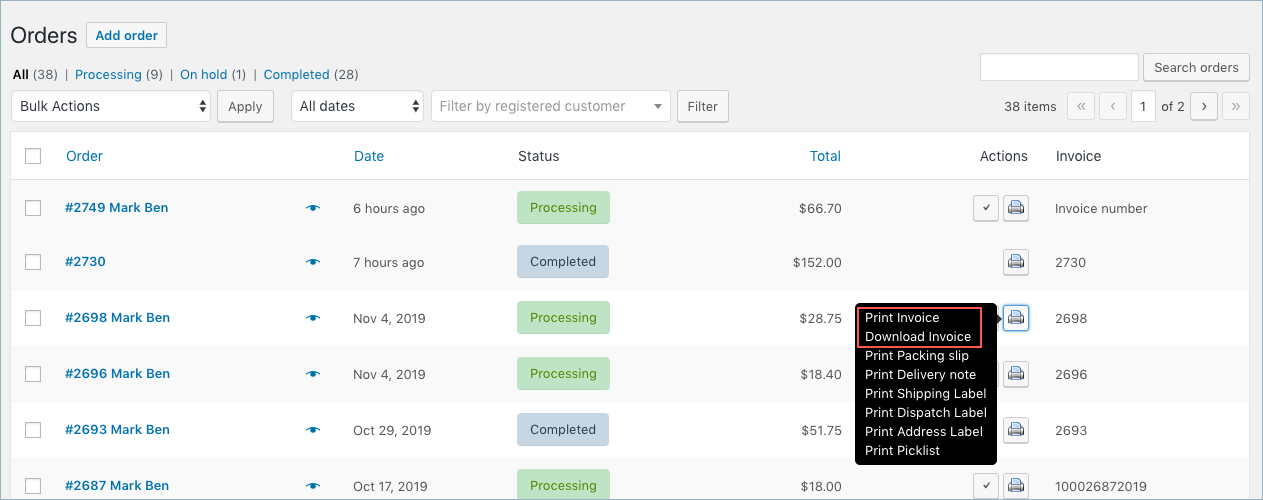
Print/download invoice
Print or download the invoice from the WooCommerce Orders page as shown below:
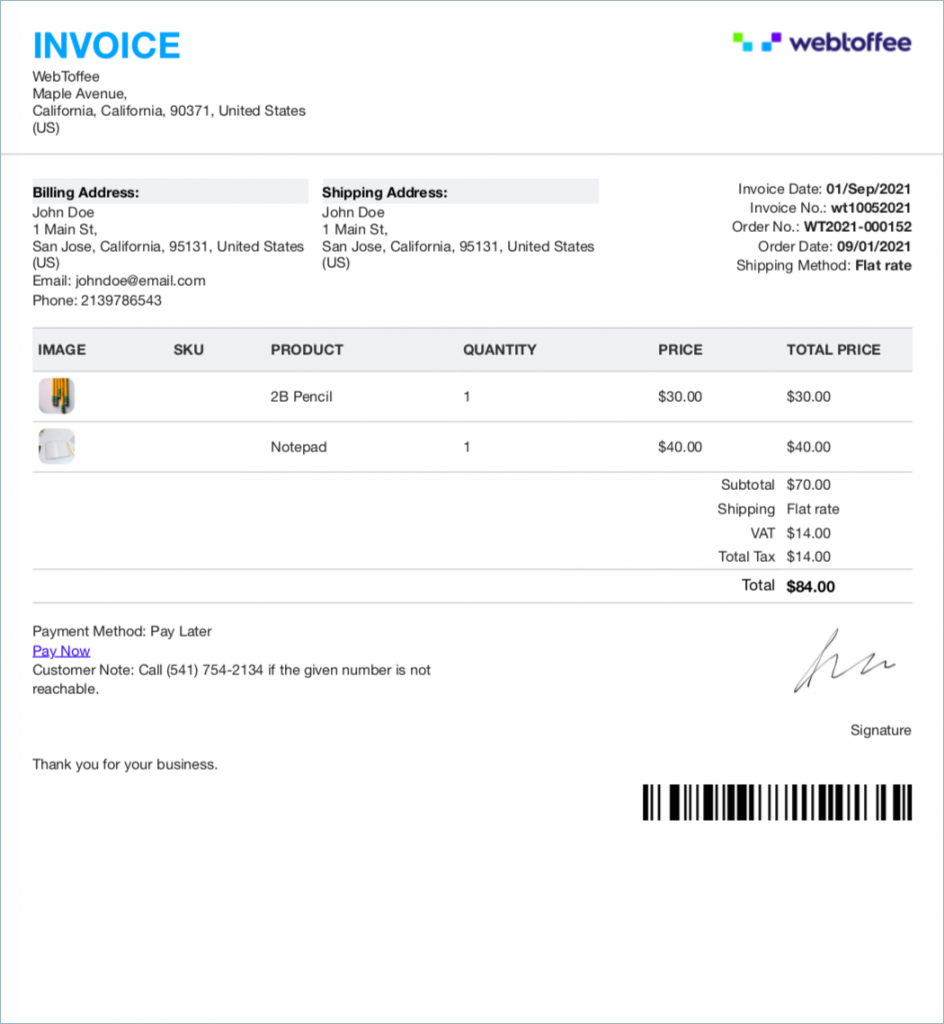
Sample invoice
A sample invoice will be as shown below:
Abhilash
January 17, 2022
Hi,
I purchased invoice packing list plugin, the main reason to go with premium plan is to activate barcode to show in pdf format. in our website we have product SKU and Ean options, so we need both should shown in pdf format.
when we receive email its showing ean but in the pdf format only sku.
please help with this.
Purchase product under user name “accounts@petsclubuae.com”
Mike
January 17, 2022
Hi Abhilash,
As we have discussed the same requirements in the Support Desk, more communication related to this will be shared there.
Herve
March 27, 2023
Should be great to share
Iveta Chuchlová
December 1, 2021
Hi,
I have two questions:
1) How can I set the footer in the invoice to be displayed at the bottom of the pdf and not right below the product table
2) One company is a seller, second company is a sender. How to get them both on the invoice and ev. other documents?
I have both companies set up in general settings, but at the first one it is not possible to add any adresse.
Manh Hung Nguyen
November 21, 2021
Hi,
How can i hide some fields from Variante Product in product table?
Mike
November 23, 2021
Hi Manh,
Thanks for reaching out to us.
You can disable the “Enable variation data” option located at the invoice general setting page to disable the variation data.
Javier Camacaro
October 15, 2021
Hi,
This plugin can generate invoices for multistore webs?
Thanks
Mike
October 17, 2021
Hi Javier,
Our plugin supports a multisite environment. Could you please brief us on what you meant by multistore and how it is set up?
Gastón
January 19, 2021
Is there a way to have the ability to use more than one template (with different data) at the same time? Like a christmas and new year template both being able to be used.
Mark
January 25, 2021
Hi Gaston,
Sorry to let you down but we support only one template at a time now.
Pavel
September 18, 2020
I have 2 currencies on my shop: Ruble and Euro.
I setting price in Euro but showing on product – Ruble. I’m using WOOCS plugin to convert currency.
How can i set RUB (currency after convert) in PDF?
Thanks.
Mark
October 19, 2020
Plugin takes the currency symbol from the order details. Please reach us via support forum for further assistance.
Roshane Johnson
September 13, 2020
I want to add that the customer paid with Visa/Mastercard
eg.
VISA ending 4255
(Authorization Code 32343)
How do I go about this so its automatically generated when a client purchases with a credit card?
Mark
September 14, 2020
Assuming that these data are saved with the order details, please get back to us with the meta key in which these data are saved in your database.
Christopher
October 25, 2018
Hi,
Can you add custom fields creacted by “checkout editor pro”? – Didn’t see this in the documentation.
Many thanks in advance!
Regards,
Christopher
Mark
October 26, 2018
Hi Christopher,
You can add custom fields to labels via the Add Existing Order Meta option available under the settings. You can enter the meta key and field name to print the meta. To get the corresponding meta keys, please contact corresponding plugin developers or you may refer their articles.
heidi3
October 23, 2018
cannot add woocommerce aditional fields to invoice !!!!!!!!
whole point we purchased it
Mark
October 24, 2018
Hi,
We have reached you via support ticket regarding the issue. Please respond via the same.