Adding custom fields to WooCommerce invoices might seem like a lot of customization and editing work. But, WebToffee’s WooCommerce PDF Invoices, Packing slips, and Credit notes pro-add-on for WooCommerce makes the process a lot easier.
Let’s take a look at the steps for adding custom fields to WooCommerce invoices.
- Install the basic/ free plugin WooCommerce PDF Invoice, Packing Slips, Delivery Notes and Shipping labels (free) plugin.
- Then install the WooCommerce PDF Invoices, Packing slips, and Credit notes pro-add-on to your site.
- Go to WooCommerce > Invoice/ Packing > Invoice from WordPress dashboard.
- Then navigate to Invoice > Advanced.
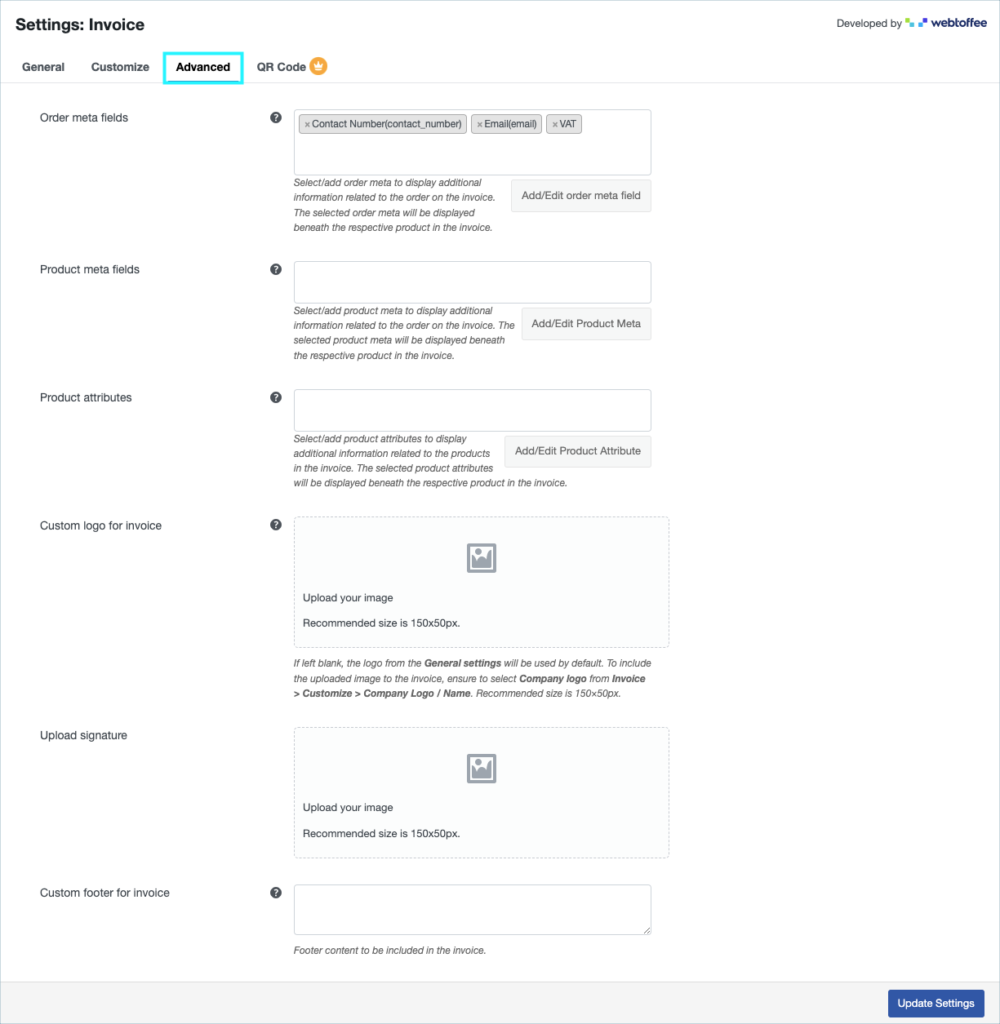
Advanced settings
From the invoice settings window, move on to the Advanced tab. You can add:
- Order meta
Add order meta
The plugin allows adding additional order information like Delivery date, Payment date, Place of supply, VAT, GSTIN, ABN, etc., or any other company tax ID as order meta in the invoice. You can add order meta in two ways:
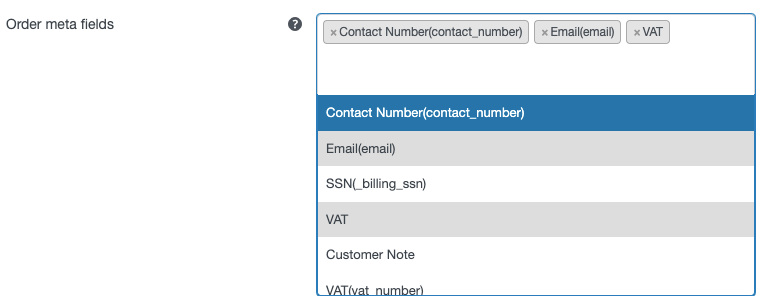
Method 1: Select a required item from the Order meta field drop-down. The list of default order metadata populated in the drop-down are as shown below:
Method 2: To add other custom order meta details (probably from another third-party plugin) other than the ones displayed in the drop-down,
- Click on Add/Edit Order Meta Field.
- Into the popup that appears, from Add New tab section, key in custom Field Name and its corresponding Meta Key.
- Then, click on the Save button.
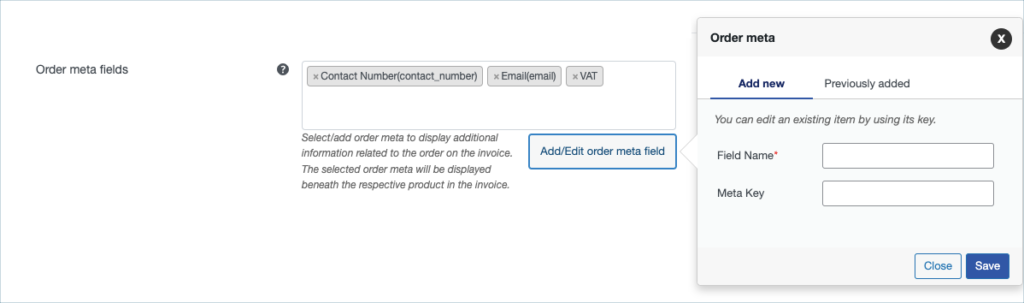
For example, to add a custom VAT number in the invoice populated from the plugin EU VAT Number for WooCommerce, you will have to key in an appropriate field name and its corresponding meta key in the checkout meta key fetcher pop up as shown below:
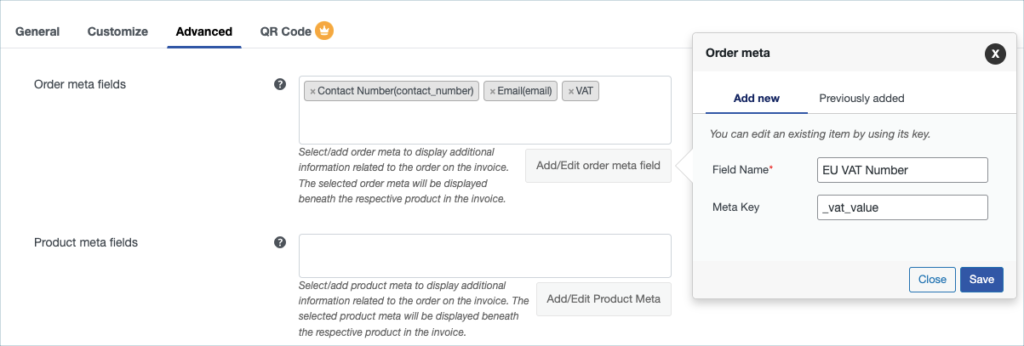
Get the meta key for the VAT Number (_vat_value) from the respective plugin’s documentation.
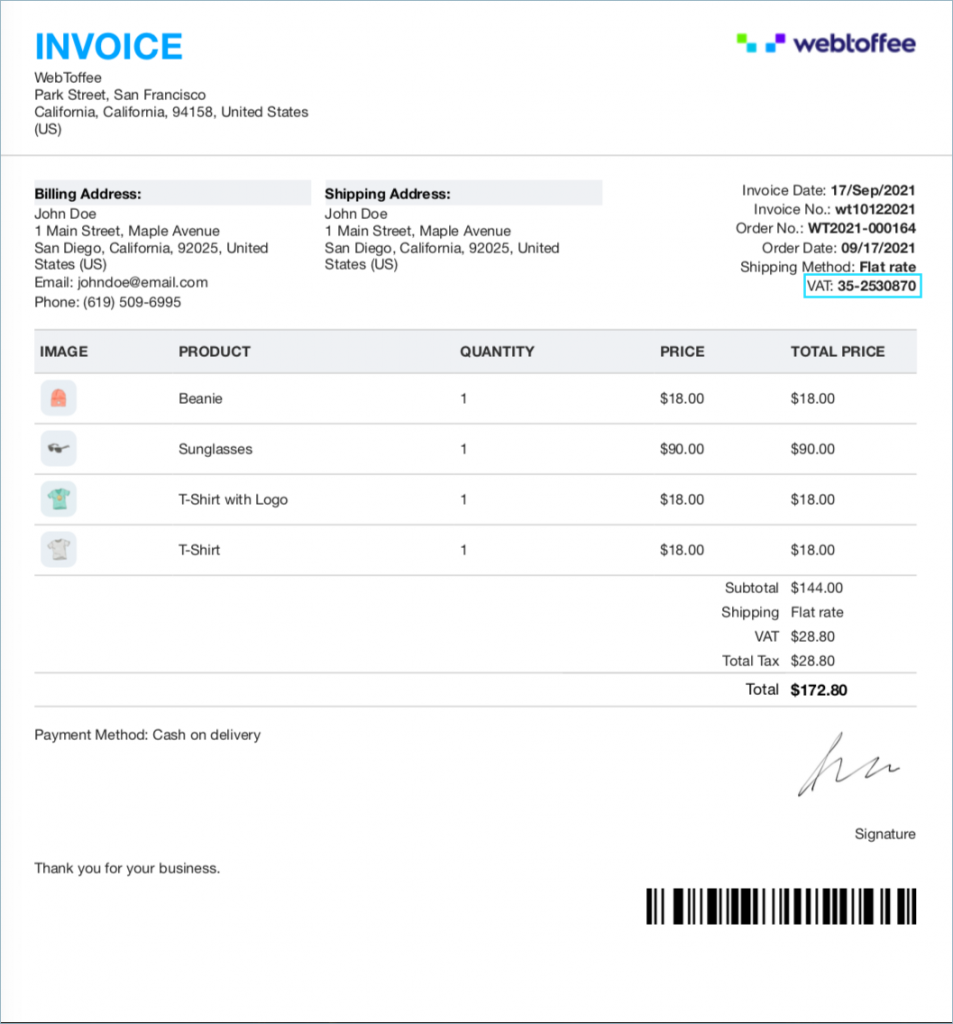
Sample invoice with the VAT
The invoice with its order meta EU VAT Number will be as shown below: