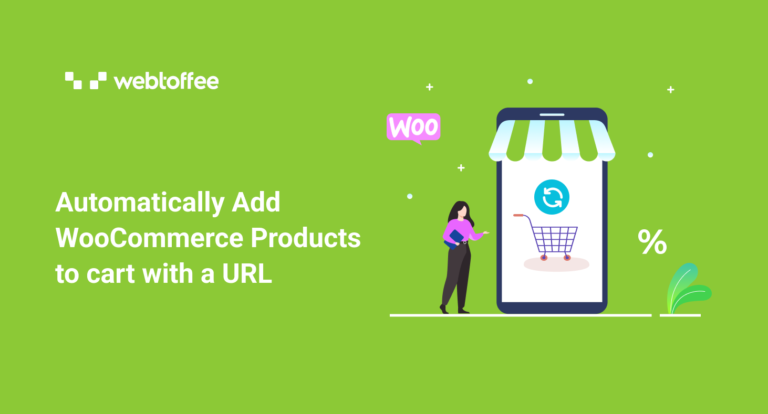
Optimizing the purchase process is an effective way to increase conversions in eCommerce. This article will discuss a simple technique to optimize the purchase process and reduce friction on your WooCommerce store using ‘Add to Cart URLs.’
Imagine you see an ad on social media, and when you click on it, you’re taken to a product page. There, you add the product to your cart, go to checkout, and maybe even use a coupon code. It’s a bit of a process, right?
What if we could make it quicker by taking you straight to the checkout page with the product in your cart and the discount already applied? That would be awesome!
In this article, we will explain how to make these ‘Add to Cart URLs’ in WooCommerce with automatic discounts. If you run a WooCommerce store, you can use this trick in your marketing campaigns to effectively increase sales and conversions.
Let’s dive in.
Why You Should Use Add-to-Cart URLs in WooCommerce?
The first and major reason for this automation is that it saves a considerable amount of time. By providing a direct link to the shopping cart with products pre-added, you reduce the number of steps a customer needs to take to complete a purchase. This can increase conversion rates, especially for impulse buys.
Also, it can be useful for marketing purposes, promotions, or email campaigns where you want to make it as easy as possible for customers to add items to their cart. You can use Add to Cart URLs to apply specific promotions or discounts to items automatically when they are added to the cart. This can be an effective way to encourage customers to take advantage of special offers.
To create Add to cart URLs in WooCommerce, we will be using the premium WooCommerce URL Coupons plugin by WebToffee.
The plugin enables you to:
- Create unique and shareable URLs for individual coupons on your website.
- Add specific products to the cart when clicking on the URL.
- Redirect the customers to specific pages on your website when clicking on the coupon URL.
Follow the below steps to create WooCommerce Add to Cart URLs with auto-applied discounts:
Step 1: Install the WooCommerce URL Coupons Plugin
The WooCommerce URL Coupons plugin by WebToffee is a premium plugin, so you need an active license to use the plugin.
After purchasing the plugin, you will receive an email with a link to download the plugin zip file. You can also download the plugin file from the My Accounts page.
- Now, log into your WordPress admin console and go to Plugins > Add New.
- Click on Upload Plugin and upload the plugin zip file.
- Click on Install Now to initiate the installation.
- Then, tap on Activate plugin.
This will add the plugin to your WooCommerce store. You will now have to generate a coupon URL, which, when clicked, will add a specific product to the cart.
Step 2: Create a WooCommerce Coupon
You should now create a coupon; it can be a product-specific coupon or a simple general coupon. In this example, let’s generate a product-specific coupon.
- Go to Marketing > Coupons, and click on Add New.
- Generate a coupon code and add a description (optional).
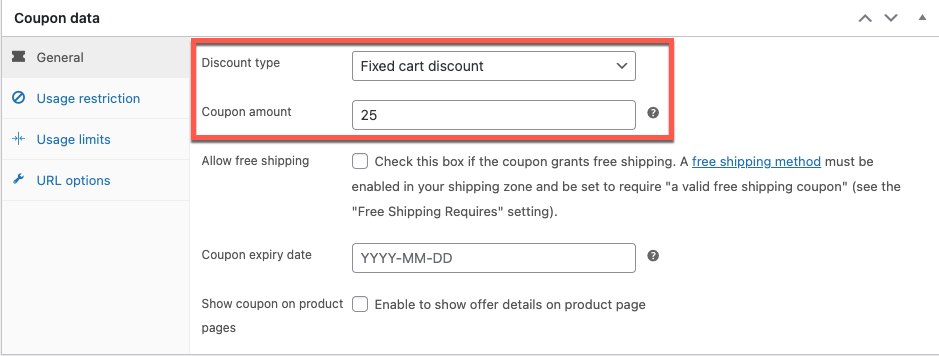
- In the Coupon data widget General tab, specify a discount type and amount.
Note: If you just want to add the product to the cart when clicking on the link (and do not want to offer any discounts, keep the coupon amount as 0.
Step 3: Select the Products to be Automatically Added
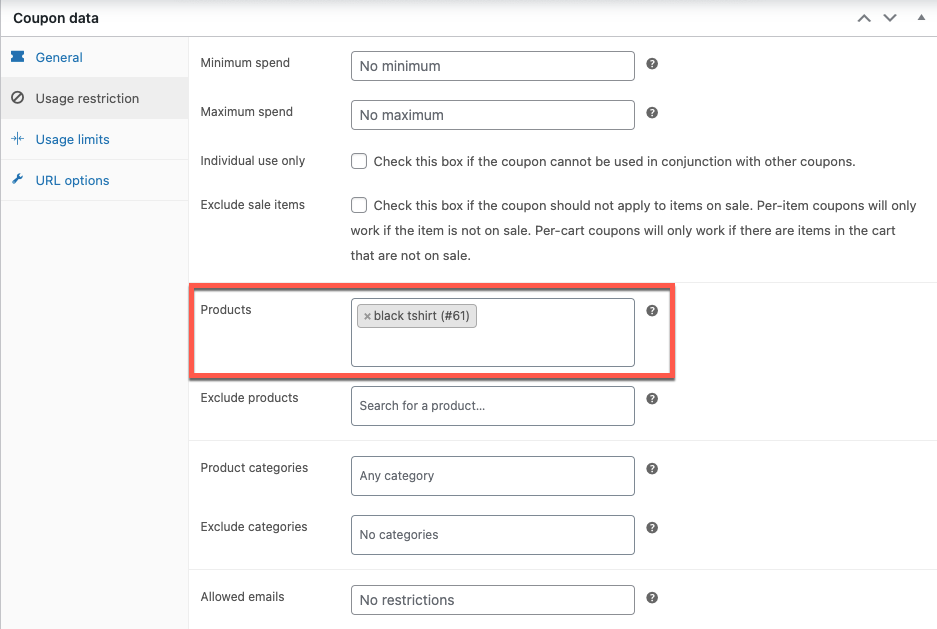
Now, go to the Usage restriction tab and specify the product to which the coupon should be applied.
Step 4: Create Add to Cart Coupon URL
Go to the URL options in the same Coupon data widget.
Enter the URL slug under Unique URL.
Specify the product that you want to automatically add to your WooCommerce cart under Add products to cart.
Specify what should happen after adding the product to the cart. You can redirect to a specific page on your site or to a URL. Since we want to land on the Cart page, choose Page and select the Cart page.
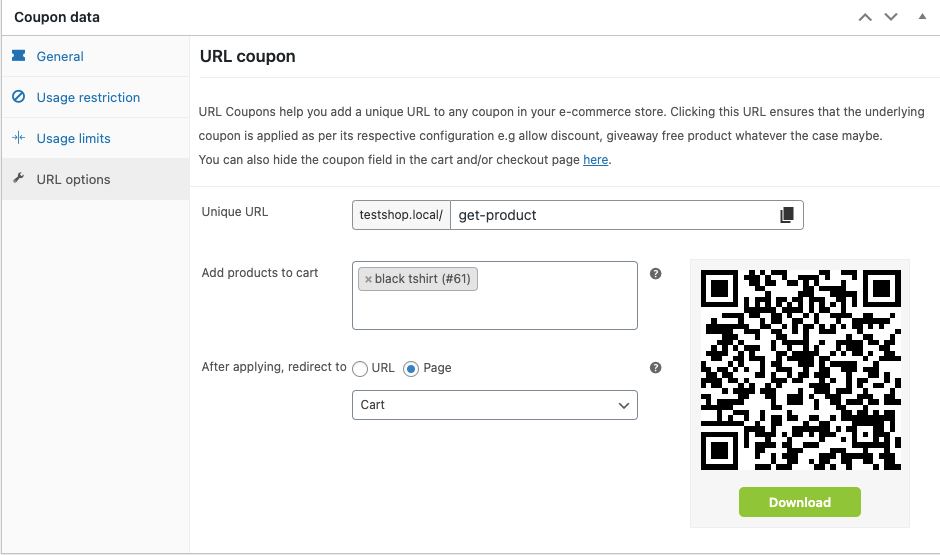
Then, click on Publish to save the coupon URL.
On completing the above-mentioned steps, the coupon will get created in your store. You can now place the unique URL you have generated while setting up the coupon in your promotional posts and social media campaigns.
For instance, you can post a blog on your store’s blogging site to promote a particular product. Embed the link you have generated in key anchor texts (generally, product images are hyperlinked). When a user clicks on the link, they will be redirected to their cart page with the product automatically added to it.
Here is an example.

This way your customers will be fully aware of the functionalities and the needs of a product before they have to make a purchase decision. It could help you secure more purchases.
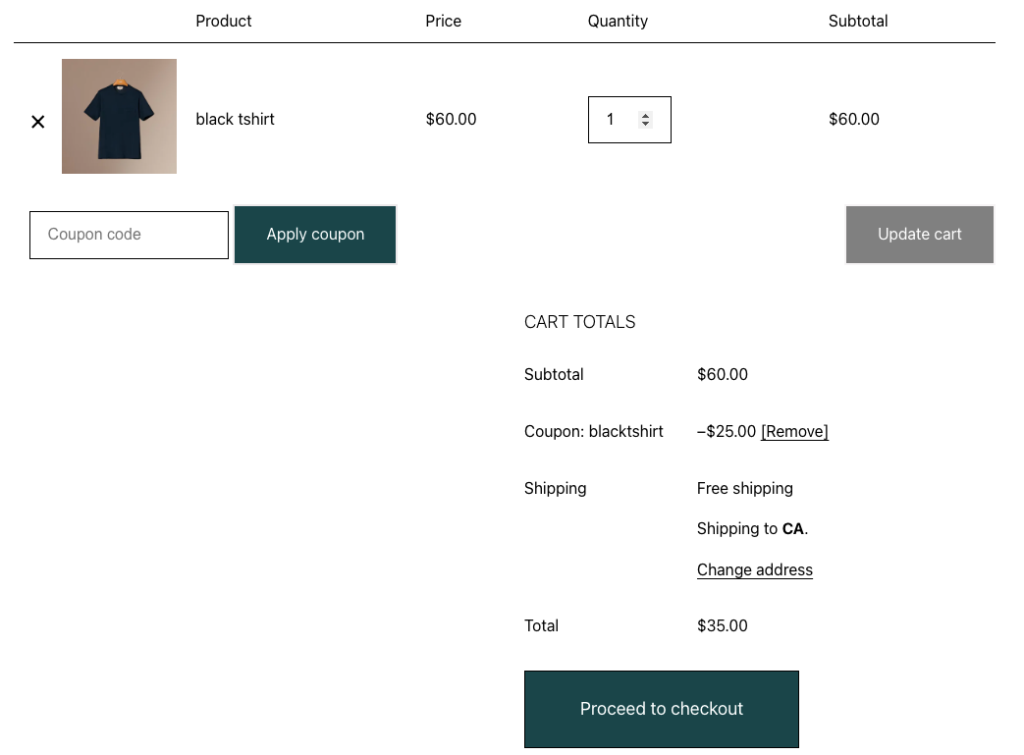
Customers will be redirected to this cart page when clicking on the link.
You can improve the quality of this order by persuading your customers to buy more items from your store. Take a look at this article on showing related products in WooCommerce to understand more about this.
Conclusion
A WooCommerce store admin is always looking for ways to improve the store’s revenue. Automatically adding WooCommerce products to the cart is one of the easiest ways to do this. URL coupons for WooCommerce deliver just that.
In addition to the discussed product-specific coupon URL, you will also get a QR code from the plugin. This QR code can be used as an alternative to the coupon link (if that feels more convenient).
Moreover, the coupon URL plugin is compatible with WooCommerce coupon plugins such as WebToffee’s WooCommerce smart coupons. This would help you generate more restrictive coupons.
Hope this article was informative. Do let us know what you think in the comments.