Stripe users in Australia can accept Bulk Electronic Clearing System (BECS) Direct Debit payments from customers with an Australian bank account.
As part of the payment process, businesses must collect a mandate that includes the customer’s bank account details (account holder’s name, the Bank-State-Branch or BSB number, and the bank account number) and must also accept the mandate Service Agreement. This authorizes the business to debit the account.
BECS settings
- Firstly, install and activate the Stripe Payment Gateway for WooCommerce plugin.
- From the WordPress dashboard, go to WebToffee Stripe > General Settings > Local Gateways.
- Head on to BECS.
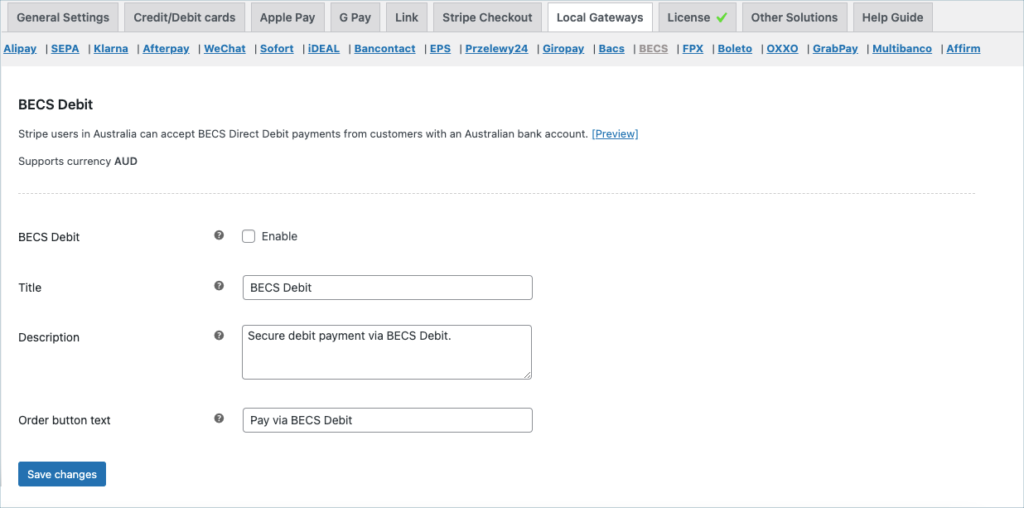
- BECS Debit: Enable to accept payments through BECS.
- Title: Enter a custom title for BECS payment. This title will be visible on the checkout page.
- Description: Enter a custom description for BECS payment. This description will be visible on the checkout page.
- Order Button Text: Enter a custom text to be displayed on the payment button.
Finally, click on the Save changes button to update the plugin settings.
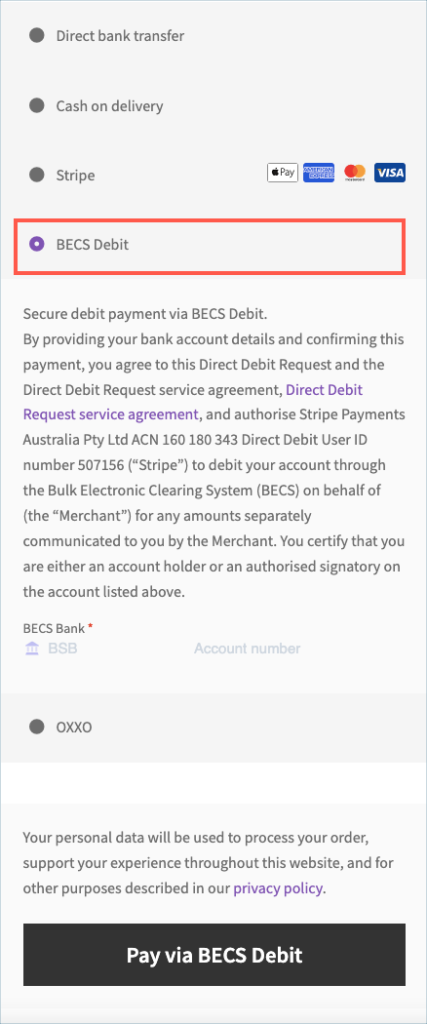
Payment workflow
- The customer selects BECS Direct Debit at checkout.
- The customer completes the Direct Debit Request.
- The customer gets a notification that the payment is complete.
Adding webhook endpoint
To receive the order status updates in a timely manner, it is recommended to add your site’s webhook to the stripe dashboard. Follows the steps in – Setting up Webhooks and Supported events article to add a webhook endpoint.