eCommerce enterprises use credit notes to provide credit to their customers. Credit notes can be used as proof of a sales return by store owners. They are therefore a suitable option if an invoice is submitted incorrectly or if it hasn’t been paid.
Many eCommerce businesses may find a credit note to be a helpful tool. However, a lot of platforms, including WooCommerce, lack built-in capabilities for credit notes.
Every store will eventually need to provide a refund, and in order to ensure proper administration, you must generate credit notes and offer them to the refund requesters.
Fortunately, there is a pretty simple solution to this problem. Making a Credit Note from a refunded order is simple with the WooCommerce PDF invoice, packing slips, and credit notes plugin by WebToffee.
How is credit note useful for WooCommerce stores?
A credit note is a document that guarantees credits to a customer. Credit notes in WooCommerce may be given in lieu of a refund or replacement.
Customers can use the credit note to make any partial or full refund purchases.
Credit notes can be useful in a variety of scenarios, such as:
- The moment when an out-of-stock item has been successfully ordered by a customer, at which point the order status is complete.
- A customer unintentionally received an invoice for a bigger sum than was originally agreed.
- Providing a refund to a dissatisfied customer.
- If you offer subscriptions, and a subscriber’s plan has been downgraded before the next subscription cycle starts and the customer invoice has been generated, you want to refund them.
A credit note is a practical, time-saving solution in each of the above scenarios. For eg, if a customer successfully purchases an out-of-stock item, you can use refunds to cancel the invoice and prevent generating a negative purchase invoice.
Create a credit note in WooCommerce using the WooCommerce credit note plugin
Using the premium version of the WooCommerce PDF Invoices, Packing Slip, & Credit Notes makes it incredibly simple for you to print, download, and personalize credit notes for your online store.
Step 1: Install the plugin
The premium plugin can only be activated if the free version of the plugin is already installed and activated on the store. So, do make sure to install and activate the free plugin WooCommerce PDF invoices, packing slips and delivery notes plugin in your store before proceeding to the following steps.
Steps to install and activate the premium plugin,
- First, you need to download the .zip file from WebToffee > My account > Download.
- You can add a new plugin by going to Plugins > Add New in your WordPress dashboard.
- Click on Upload Plugin and choose the plugin zip file that you received after purchasing the WooCommerce PDF invoice/packing slip plugin.
- The installation will begin once you click on Install Now.
- To activate the plugin, click the Activate button.
Following these steps will add the plugin to your WooCommerce store.
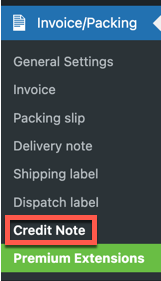
Step 2: Configure WooCommerce credit note document
To create a credit note, go to Invoice/Packing > Credit Note from your WordPress dashboard.
You can configure the general settings required for the credit note here.
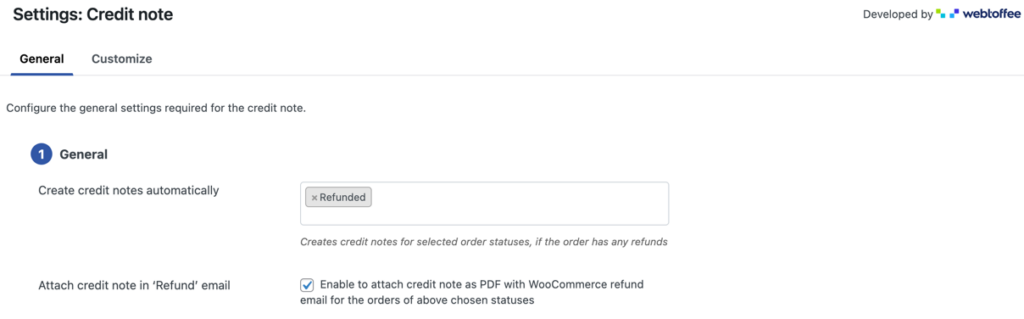
Create credit notes automatically: Select the order status which when reached would trigger the automatic generation of the WooCommerce credit notes. Credit notes are usually generated when an order is refunded, so by default ‘Refunded’ is selected as the order status to automatically generate the credit notes.
Attach credit notes in ‘Refund’ email: Enable or disable attaching the credit note PDF to the refund emails sent out to customers.

Sort Products by: You can sort products in the ascending or descending order of their names or SKUs.
Show variation data below each product: Include the variation data of each product under the product name in the product table.
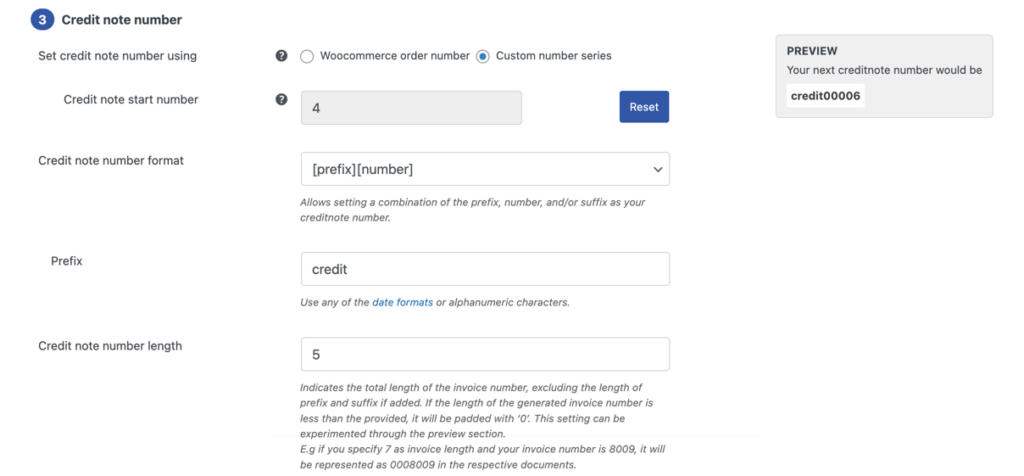
Set credit note number using: Specify the numbering you want to follow for your credit notes. The WooCommerce credit notes can either have the order number of a custom number sequence. If you select Custom number series and fill out the sections with the relevant information to create a unique credit note number.
Credit note number format: To be specific about the format in which the credit note must be produced. For example, [prefix][number][suffix]. This field lets you enter any of the date formats or alphanumeric characters displayed in the popup window.
Credit note number length: This option lets you adjust the overall length of the credit note number. The generated credit note number will be padded with a zero if its length is less than what is specified. For instance, if you choose 7 for the credit note number length and your credit note number is 1987, the credit note number will appear in the relevant documents as 0001987.
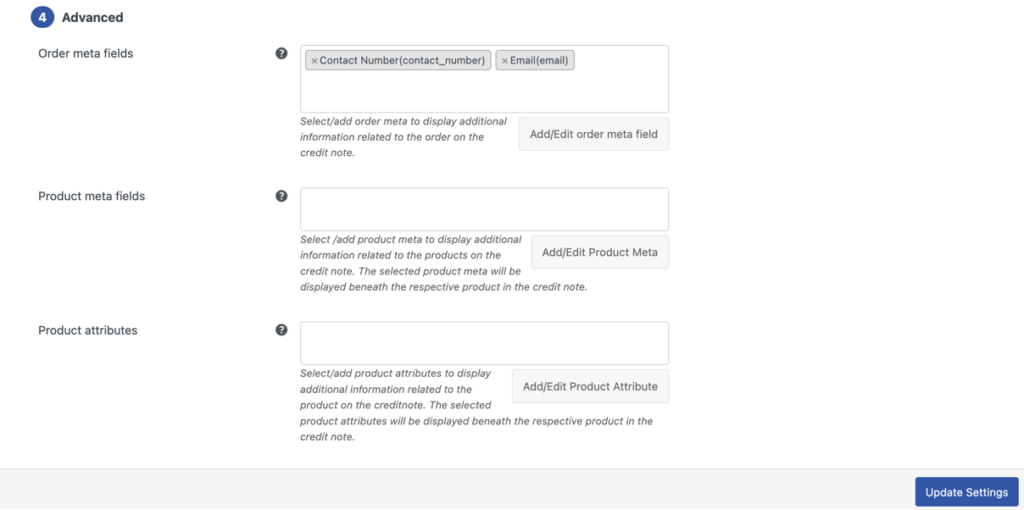
Order meta fields: By choosing the needed item from the drop-down, you can add more order details to the credit note.

In order to create new meta fields, click the Add/Edit order meta field button and provide a custom field name and the corresponding meta key for the field. Alternatively, you can choose a field from the list of default fields.
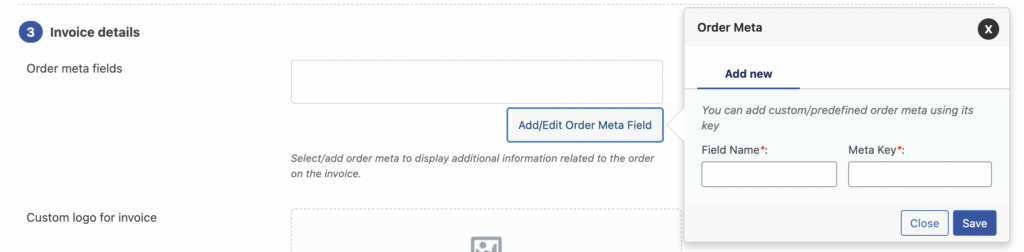
In the custom fields section of the WooCommerce Order page, find the order meta keys.
Product Meta fields: Choose/add further product details to the credit note.
Like Order Meta Fields, to create a new product meta field, click the Add/Edit Product Meta button and enter a unique Field Name and the corresponding Meta Key.
Product attributes: the option helps you to display more product information below the product.
Show variation data below each product: Enable this option if you want the product variation information to be included in the credit note.
To save the settings, click the Update Settings button.
Step 3: Customize the WooCommerce credit note layout
Use the built-in templates to customize the credit note and make any changes.
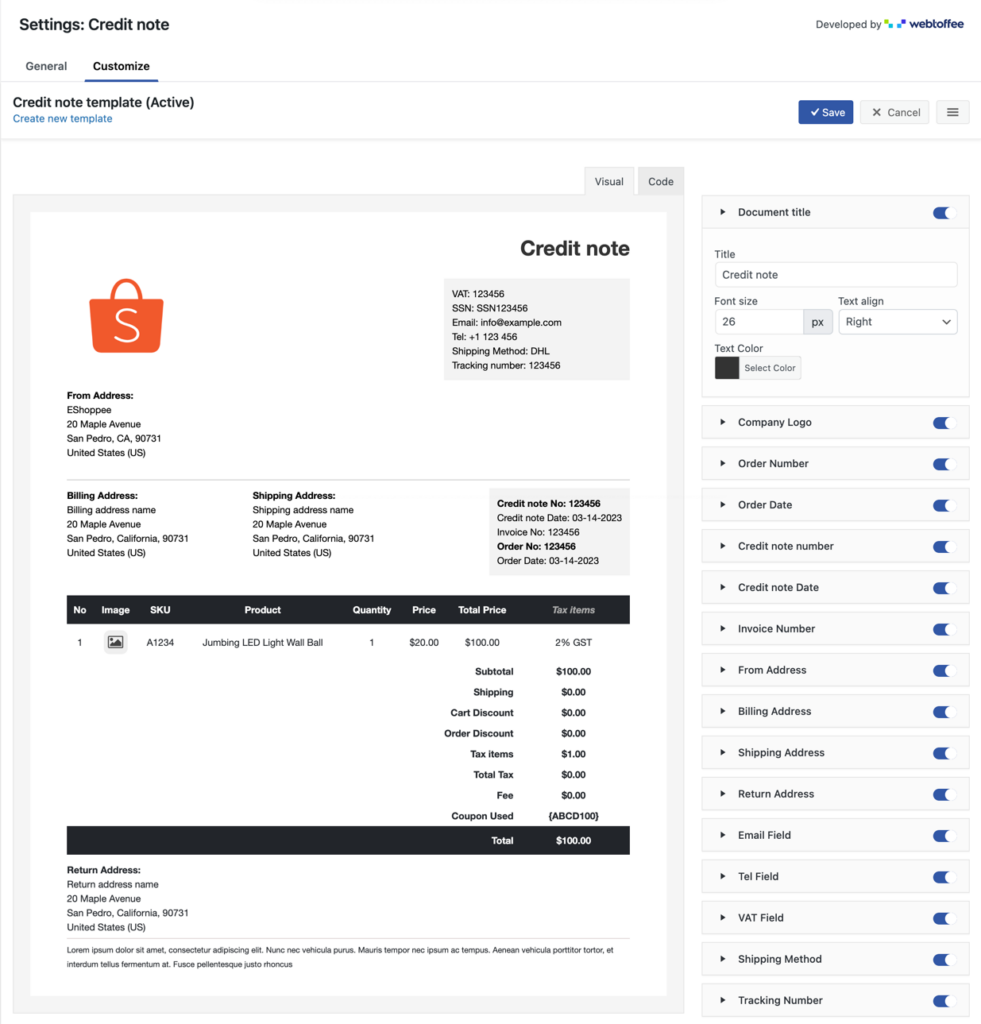
You add the columns or custom fields by simply toggling the buttons on the left-hand side of the customize tab. Also, can view the live preview of changes on the credit note template.
Including a return address in a credit note that also serves as a return label for customers who return their ordered products.
Creating a new template for a credit note is as easy as the steps below,
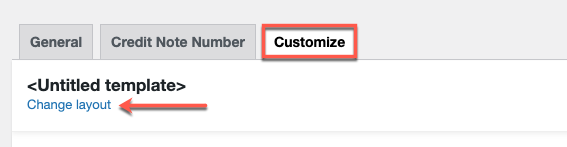
Tap change layout > select the template > select any layout from the pop-up menu.

Save the layout after making the necessary changes. Once you’ve saved, activate the template to continue using it for your credit note.
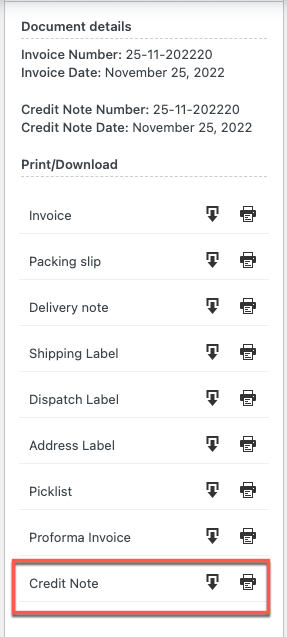
Print Credit Note
On the WooCommerce Orders tab, as seen below, you can even print or download the credit note for refunded orders.
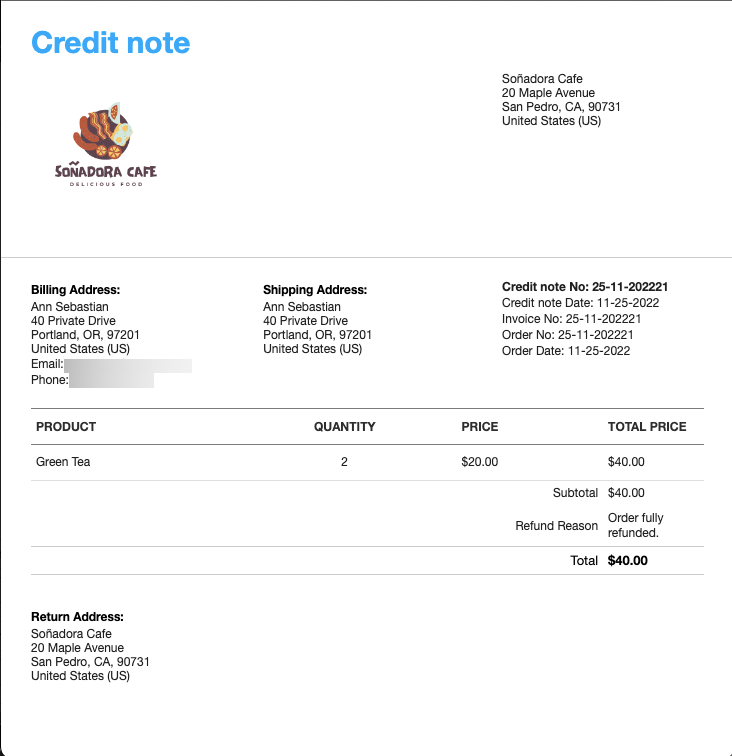
Sample Credit Note
The image below shows the sample Credit Note in WooCommerce
Wrap Up
In the event that a consumer returns a purchase or is unsatisfied for any other reason, credit notes in WooCommerce provide your online businesses with a quick and easy option to provide complete or partial refunds. The ability to quickly generate credit notes is an effective weapon to have at your fingertips for any error or circumstance that calls for a compromise. Once you have configured the ability to generate credit notes for your WooCommerce store, you may quickly print these from your order page.
Hope this article leads you in the right direction. We encourage you to read how to print dispatch labels in WooCommerce.
Please leave a comment if you enjoyed this article. Your suggestions inspire us.
Stay tuned for more helpful tips.