Issuing and printing WooCommerce shipping labels a headache for you? Don’t know how to customize the label template to match your band? This article will deal with customizing shipping labels for WooCommerce orders with the help of the WooCommerce shipping label plugin.
In Woocommerce, shipping labels are an integral part of logistics and order fulfillment. Not having a clear and organized Woocommerce shipping label would result in delivery errors and poor customer experience.
When your business and orders grow, you’ll need an effective system for creating and managing shipping labels.
What are shipping labels?
Shipping labels are identification stickers attached to packages transported by carriers. The labels on your packages contain information about the package and its contents.
During the delivery process, the shipping label relays information needed to guide packages to their appropriate destinations and enable tracking.
The details and design of the label depend on the e-commerce store, but the fundamental information remains the same. The document houses names, addresses, weights, and barcodes for shipments.
How to create and customize WooCommerce shipping labels for free?
You can configure WooCommerce shipping labels to be auto-generated using a free plugin.
The WooCommerce PDF invoices and shipping labels plugin offers some basic features such as customizing the document template. Let’s take a look at how you can do that.
Step 1: Install the plugin
From the WordPress dashboard, go to Plugins > Add New to install the free plugin.
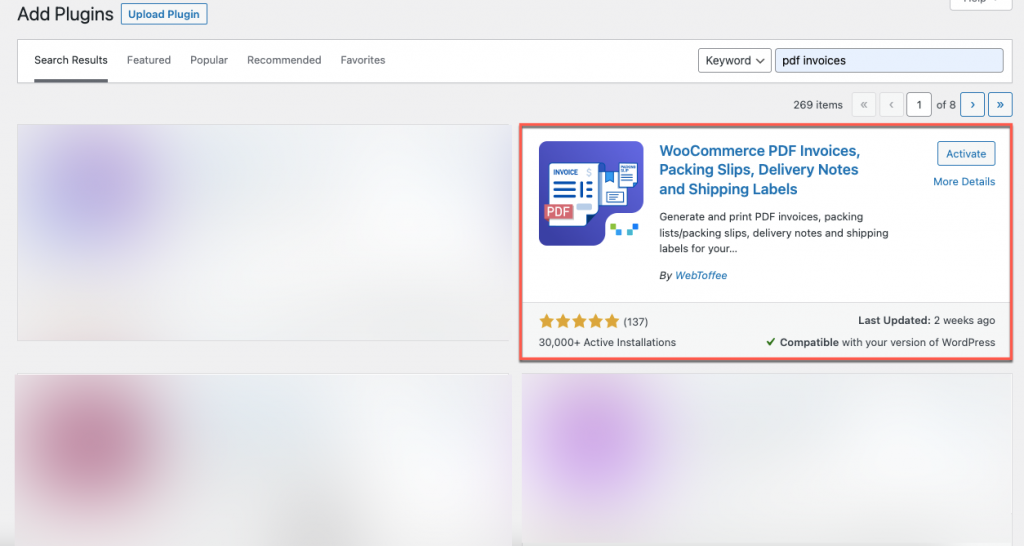
Type the keyword ‘WooCommerce PDF invoices, packing slips, delivery notes, and shipping labels’ in the search bar and locate the WebToffee plugin from the results. Proceed to install and then activate the plugin.
Step 2: Set up WooCommerce shipping labels
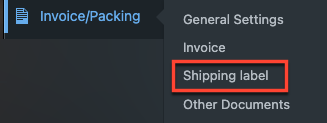
From the WordPress dashboard, go to Invoice/Packing > Shipping label.
This will take you to the General page of shipping labels.

The free version of the plugin only enables you to set full-page shipping labels. To generate shipping labels of custom sizes, use the premium version of the plugin.
Step 3: Customize the WooCommerce shipping label template
Click on the Customize tab to land on the page where you can customize the document.
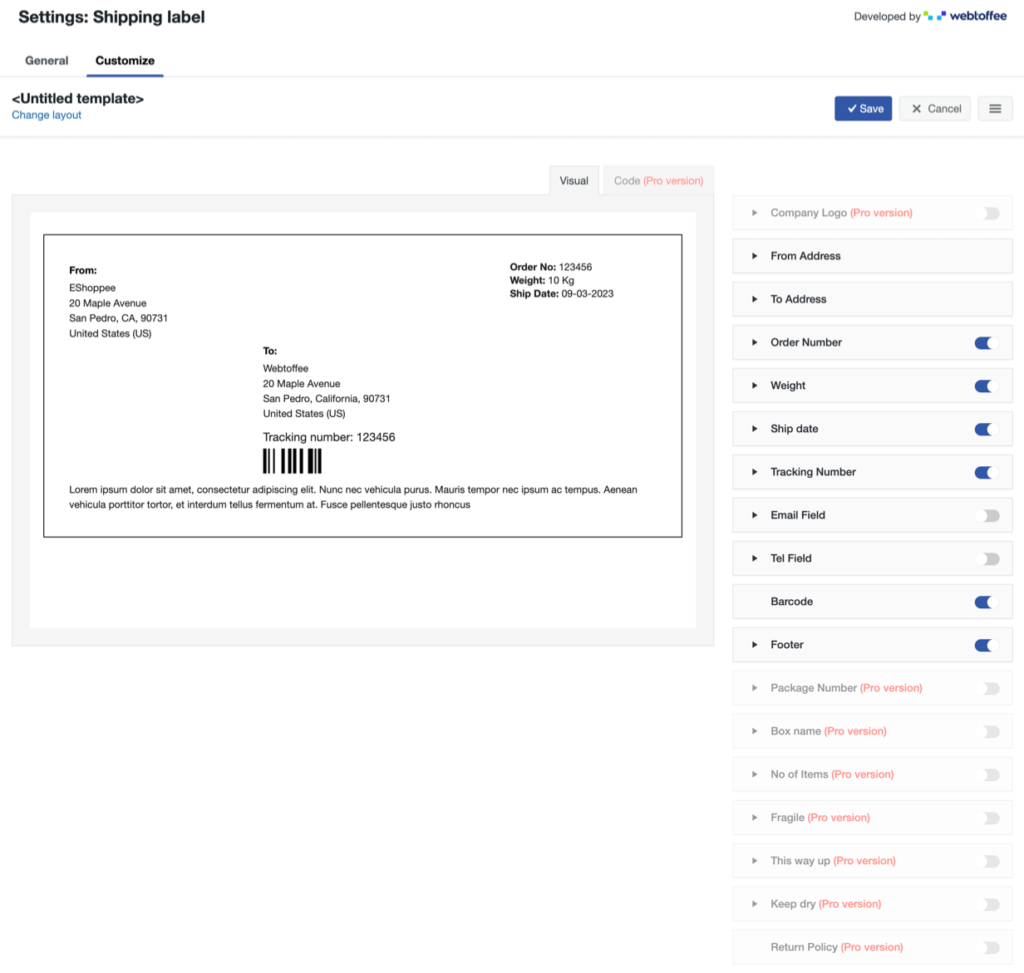
All the elements that are customizable in the template are available on the right-hand side of this page. You can enable/disable or edit the element properties from there. Any changes made can be dynamically previewed from the visual editor in the middle.
After the necessary changes, click on the Save button.
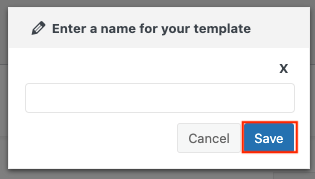
Upon saving, a pop-up will appear to enter the name for the template, add a name and click the Save button.
After saving, Activate the template to continue using it for your shipping label.
Some of the advanced features are only available in the Premium version of this plugin. So, let’s familiarize ourselves with the pro version!
Advanced shipping labels customizations
To access advanced features of the WooCommerce plugin, install and activate the premium version of the WooCommerce shipping labels plugin on your WooCommerce store after purchase.
Set up WooCommerce shipping label customizations
Similar to the basic version, from the WordPress dashboard, go to Invoice/Packing > Shipping label.
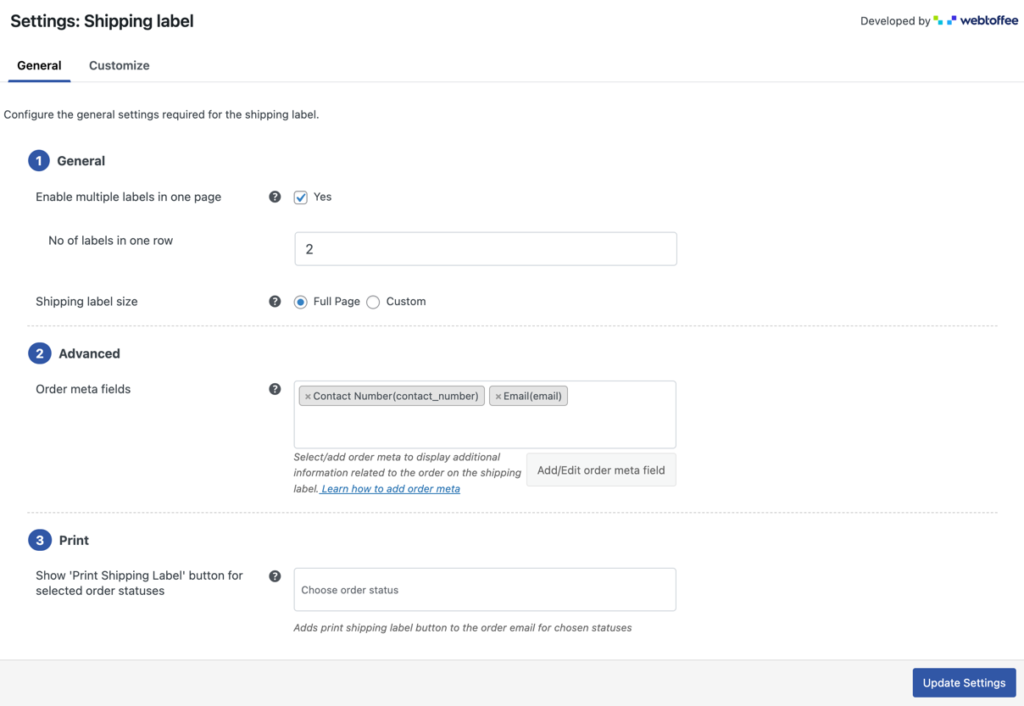
Here you can configure the general settings needed for the shipping label.
Enable multiple labels in one page – Specify if you want to add multiple shipping labels in a single page. If so, specify how many labels you want to add in one row. Shipping Label Size – You can customize the size of the shipping label in two ways:
- Full Page – Printing the label with this option will result in it taking up the entire page.
- Custom – You can choose the size of the label to print using this option. By entering size values for width and height (in inches), you can create your own unique shipping labels.

Order meta fields – Add additional order-related fields to your WooCommerce shipping labels with this option. If the field that you want is not available by default, you may create new fields with the Add/Edit order meta fields option.
Show ‘Print Shipping Label’ button for selected order statuses – Specify the order status emails to which the shipping labels print button has to be attached.
After the necessary changes, click the Update Settings button to save the changes.
Customize the shipping label
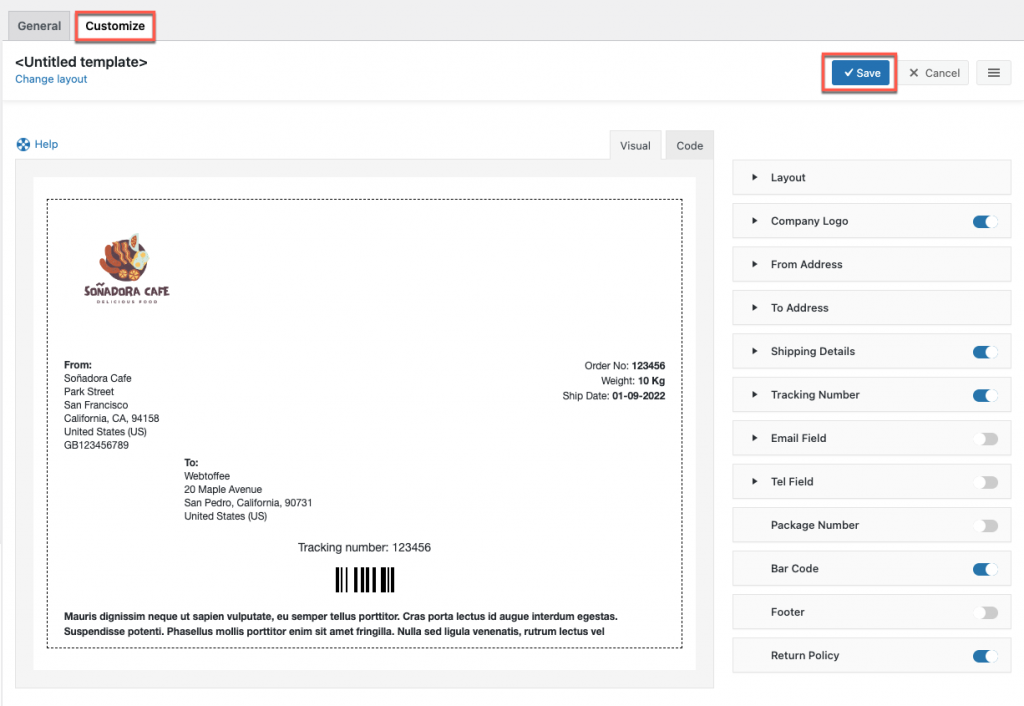
Click on the change layout hyperlink to select a template that you find suitable for your store’s shipping labels.
You can then customize the shipping label template with the help of the customizable elements on the right-hand side of the page.
In the premium version, you can add a company logo or name, can change the layout border to – solid, dotted & dashed. As well as, able to add a return policy to your shipping label.
After the necessary changes, click the Save button to save the template.
Once saved, activate the template from the menu bar. All shipping labels generated thereafter will follow the customized template that you have activated.
Sample Shipping Label
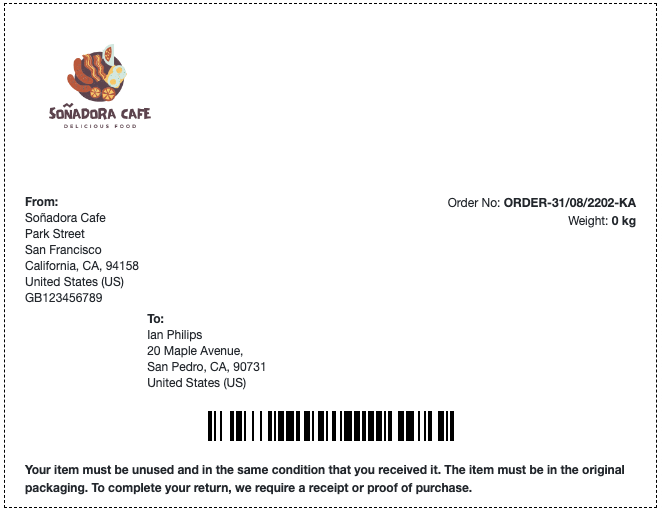
Below is a sample shipping label generated for a WooCommerce store.
Closing Thoughts
When you have a business to run, you won’t have time to waste manually generating shipping labels for each order individually.
The WooCommerce print shipping label plugin enables you to automatically generate, customize and print your labels in no time and with little effort.
Hope you found this article to be informative. Do let us know what you think in the comments below.
