Displaying customers the available offers is a good way to drive sales. Display Discounts for WooCommerce plugin shows details about existing WooCommerce Coupons on product pages. Display Discounts for WooCommerce plugin works with default WooCommerce coupons and also with WebToffee Smart Coupons for WooCommerce plugin coupons (BOGO deals). Coupon properties on the front end are based on the usage restrictions set in the back end.
The plugin can be installed as a stand-alone or as an add-on to the Smart Coupons for WooCommerce plugin.
Menu position
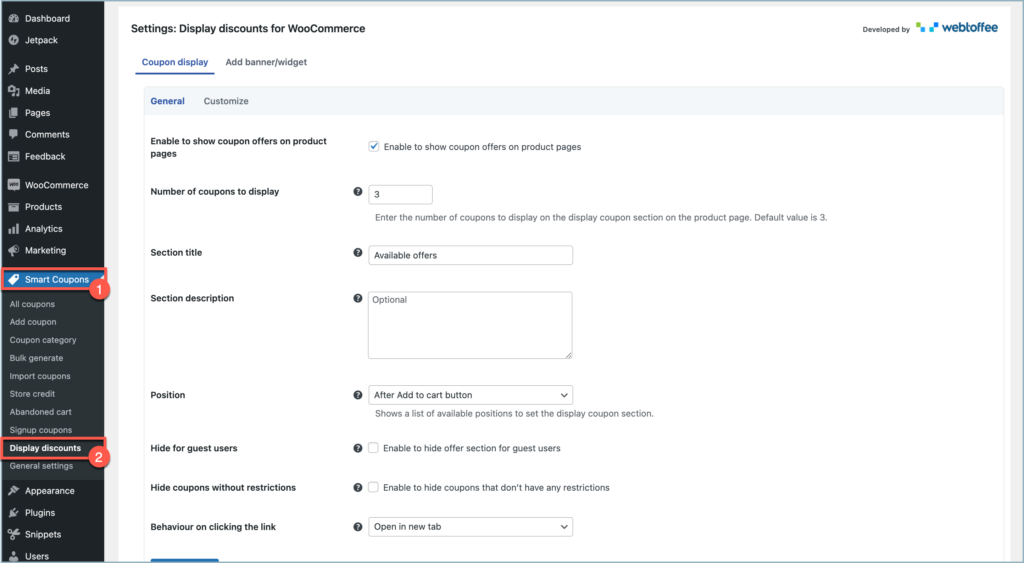
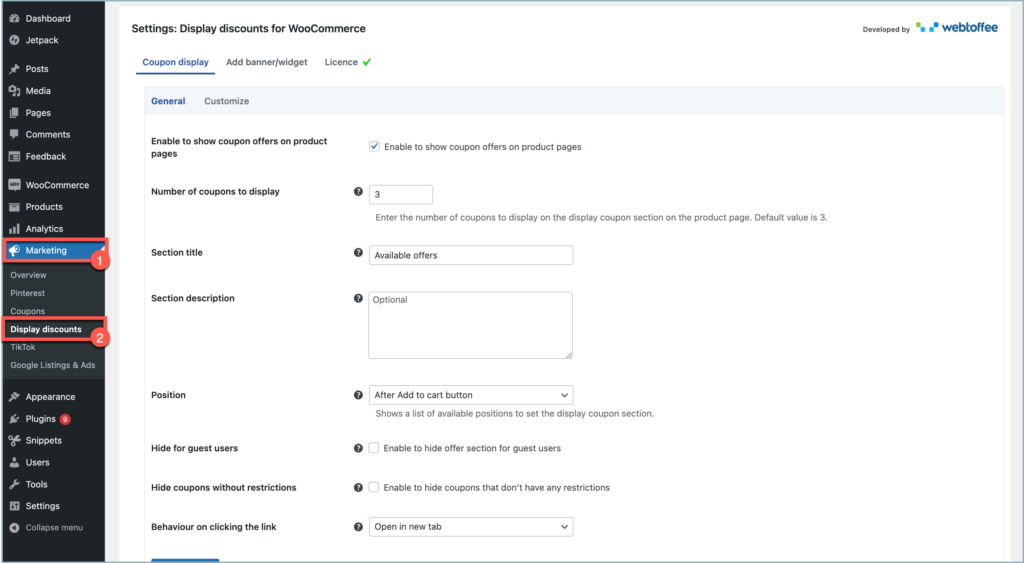
In a standalone installation, the plugin’s menu is added to the Marketing tab in the dashboard. The menu is positioned under the Smart Coupons tab tab when installed as an add-on.
The below image shows the menu positions on installing the plugin.
License
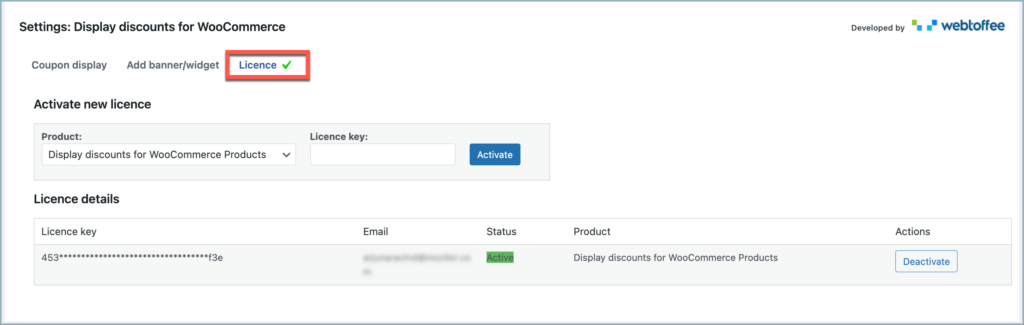
In a standalone installation, the plugin’s license activation tab is listed at Marketing > Display discounts > License tab. When installed as an add-on, the license activation tab is positioned at Smart coupons > General settings > License tab.
The image below shows the license activation screens on stand-alone and add-on installations.

Features of the plugin
- Display offer and coupon details on the product page.
- Templates for the coupons.
- Displays details such as coupon name, discount percentage or value, and coupon restrictions.
- Link to eligible product list.
- Create a custom banner/widget.
Coupon Display
The page has two sections.
- General
- Customize
General configurations tab
This tab allows configuring the general settings of the plugin. The general configuration page of the plugin is shown below.
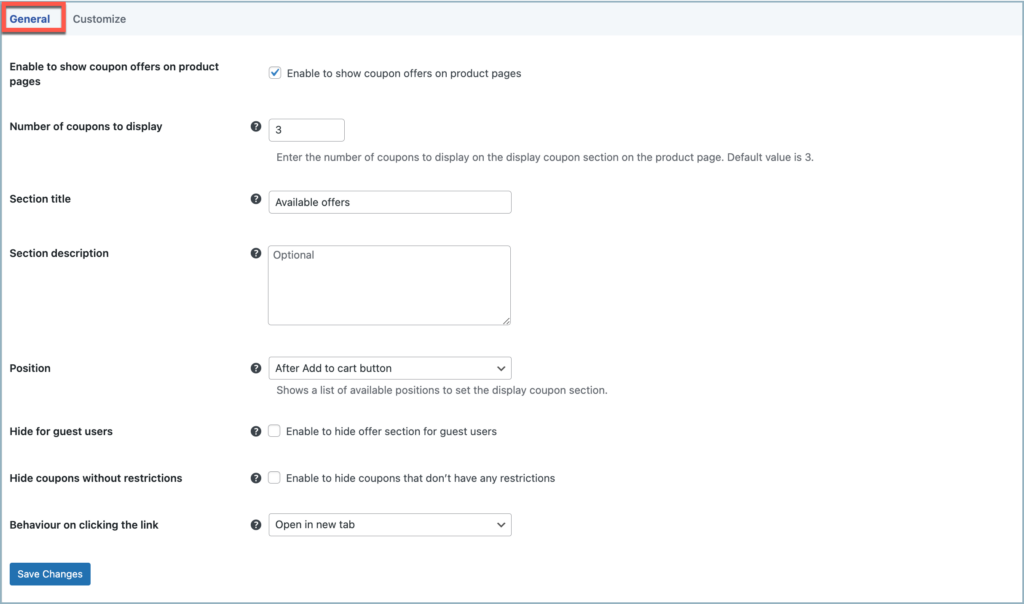
The configuration options listed in the general section are:
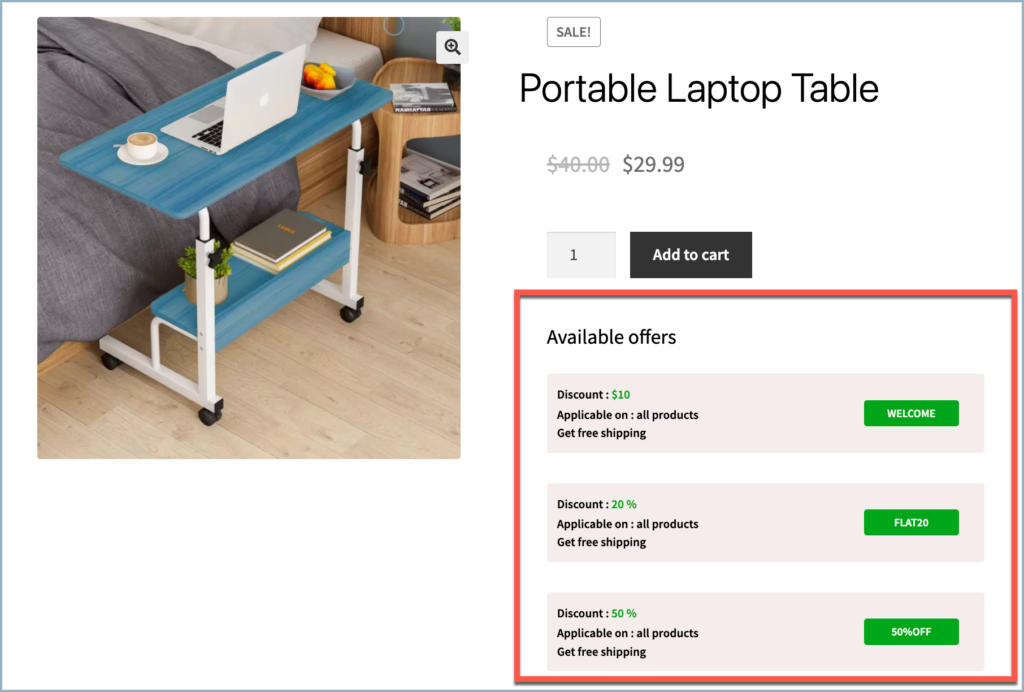
- Enable to show coupon offers on product pages – Enable to show the display coupon section on the product page. When disabled, the section is not visible in the front end, but it’s still configurable. The below image shows a product page with a display coupon section enabled.
- Number of coupons to display – Number of coupons to display on the display coupon section on the product page, regardless of the number of available coupons. Allows to enter values up to 10. If the site has more coupons available than the set limit, it gives priority to the coupons created most recently.
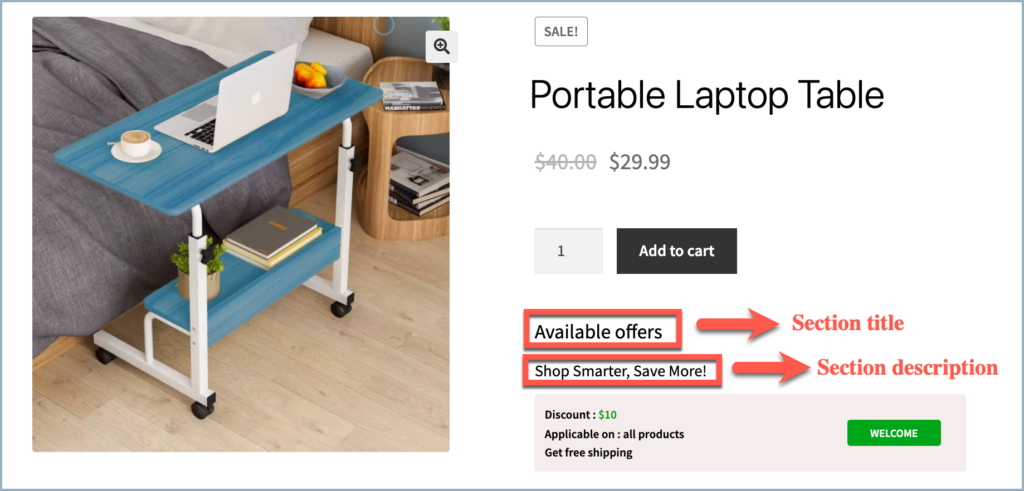
- Section title – The display coupon section on the product page will show this text as its title
- Section description – The display coupon section on the product page will show this text as its description.
- Position – Lists the available positions to display the display coupon section in the product page. Works based on default WooCommerce hooks in the theme. The options available are as follows:
- After add to cart button
- Before add to cart button
- After single product summary
- After product meta end
- Before product meta start
- Hide for guest users – Enable to hide the display coupon section on the product page for guest users. When enabled, the guest users can also view the offers.
- Hide coupons without restrictions – When enabled, only coupons with usage limits/restrictions, including expiry restrictions are displayed. When disabled, all the coupons will be displayed subject to the custom settings.
- Behaviour on clicking the link – When enabled, shows a link to eligible products for a given coupon. Allows to open the link on a new page or on the same page.
Click on Save Changes to save the configuration.
Customize layout tab
The display coupon section on the product page is configured with the features listed under this tab.
The configuration options available in this section are :
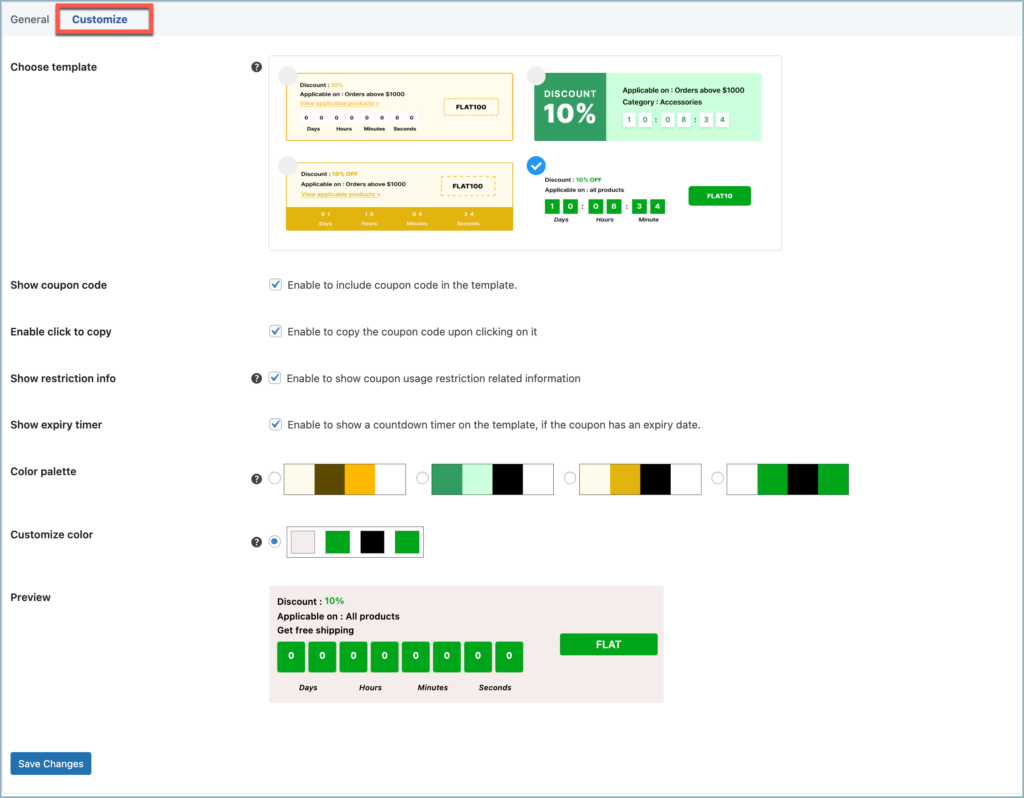
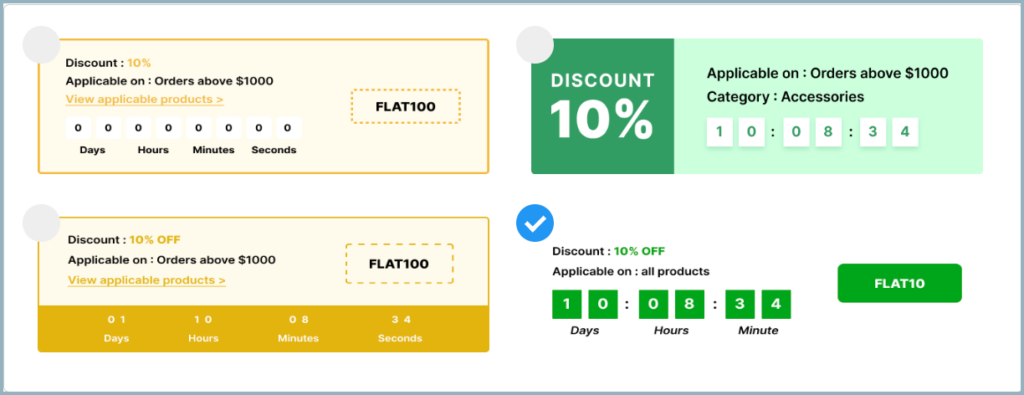
- Choose template – Lists the easy-to-use templates for the coupons. There are 4 templates available by default.
- Show coupon code – Enable to include coupon code in the template. Hiding the coupon may allow the user to auto-apply offers. This requires enabling Smart Coupon for WooCommerce plugin.


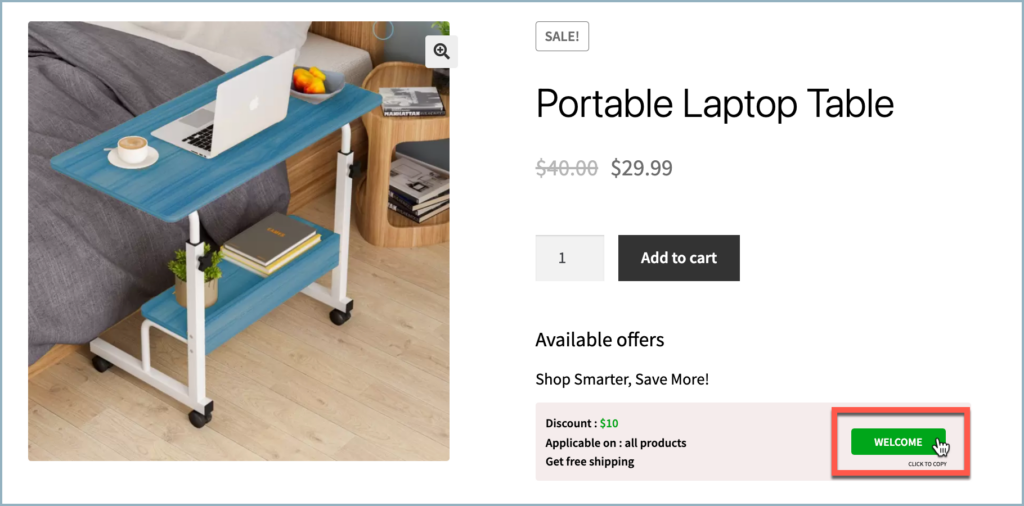
- Enable click to copy – Enables the click-to-copy text option on the coupon. The below image shows the click-to-copy option enabled.
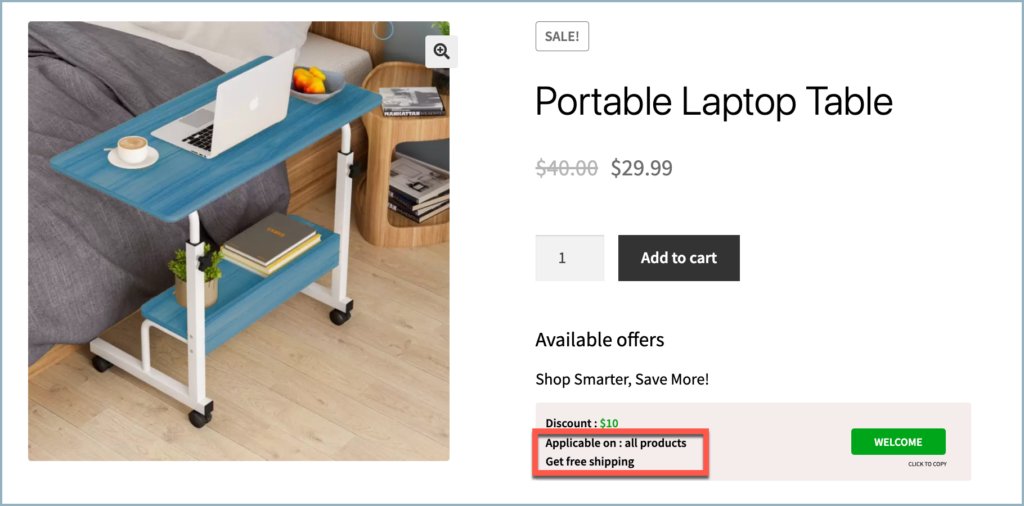
- Show restriction info – When enabled, shows the coupon restrictions on the coupon. The below image shows a coupon with restrictions.
- Show expiry timer – Enable to show a countdown timer on the coupon. The timer will appear only if the coupon has an expiry date. The following image shows a coupon with an expiry timer set.

- Color palette – Allows selecting a color combination for the coupon template. 4 pre-configured color options are available.
- Customize color – Apart from the pre-configured color options, one can also opt to personalize the colors of the coupon template using this feature.
- Preview – Preview the changes to the coupons using this section.
Click on Save Changes to save the configuration.
This section allows creating and managing custom coupon banners or widgets. The tab will display a list of all the created banners or widgets for easy management along with the options to edit, delete, and enable or disable the Banner or widget.
At any given time, only a single banner or widget can be activated.
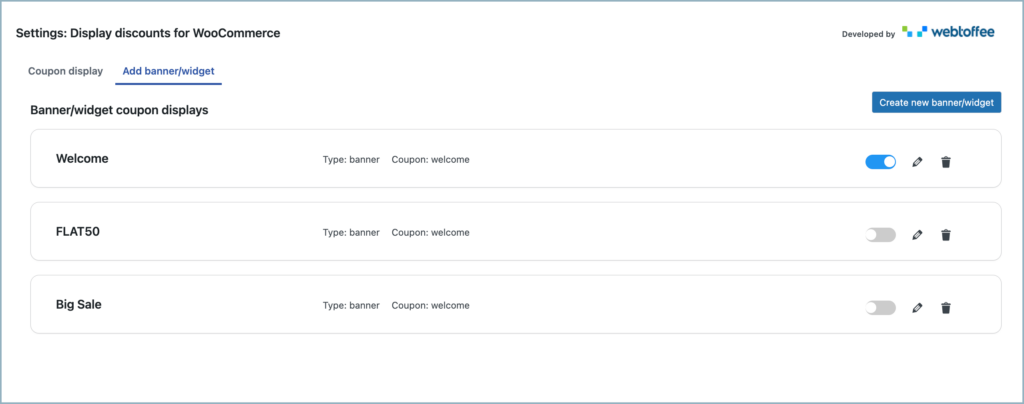
- Create new banner/widget – To create a new banner or widget, one can click on the Create new banner/widget button in the top right corner.

Configure banner/widget
Clicking the Create New Banner/Widget button displays the Configure Banner/Widget page. This page allows setting the basic properties of the banner or widget. The features under this page are:
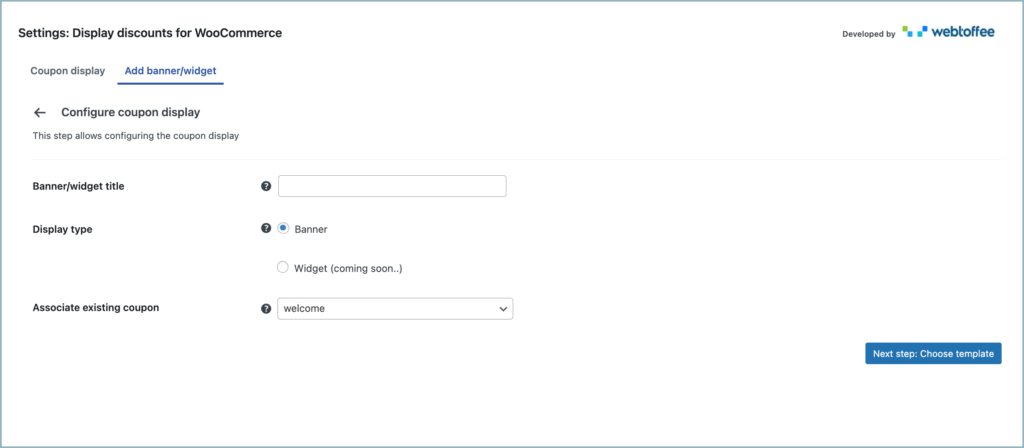
- Banner/widget title – This name will be used to identify the banner or widget in the list of available banners/widgets within the Add banner/widgets page.
- Display type – One can choose to display the coupon either as a Banner or a Widget (Coming soon).
- Associate existing coupon – To link an existing coupon from the store to the banner/widget, select a coupon from the drop-down.
The Widget option is still under development. For the time being, the plugin only allows to create the coupon banners.
Banner template
This page allows to pick on the pre-packed banner templates included with the plugin.

Click on Next step: Customize for banner Customization.
Banner customization
This page allows customizing the appearance and aesthetics of the banner in the front end.
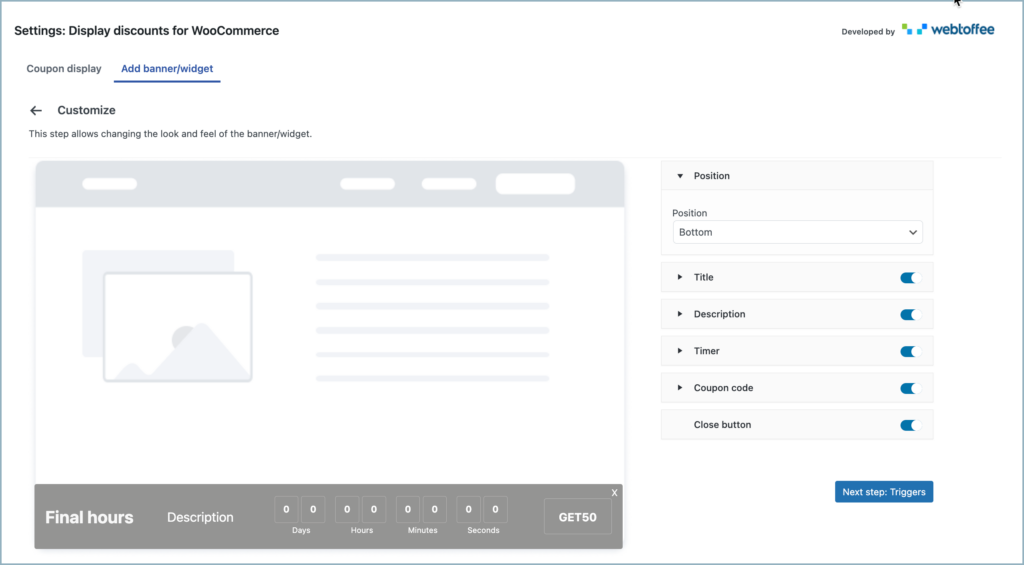
The right-hand side of the page provides several configuration options for customization, allowing users to adjust various settings according to their preferences. Meanwhile, the left-hand side offers a live preview of the banner in the front end. The available configuration options are:
- Position – Allows to choose a location for the banner to display, either at the top or bottom of a selected page.
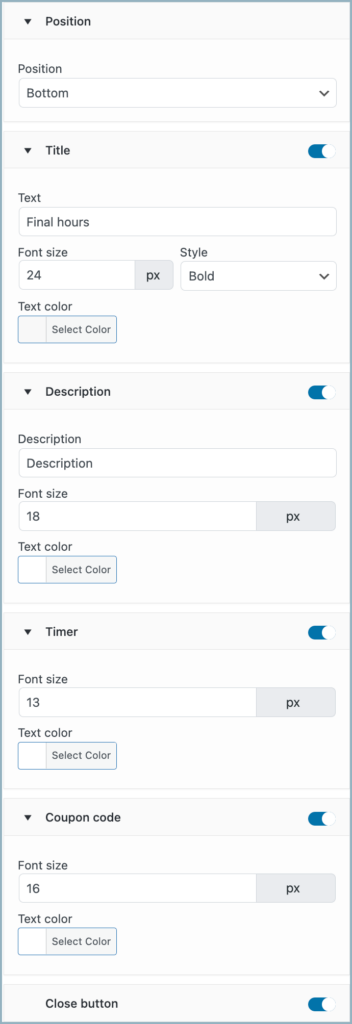
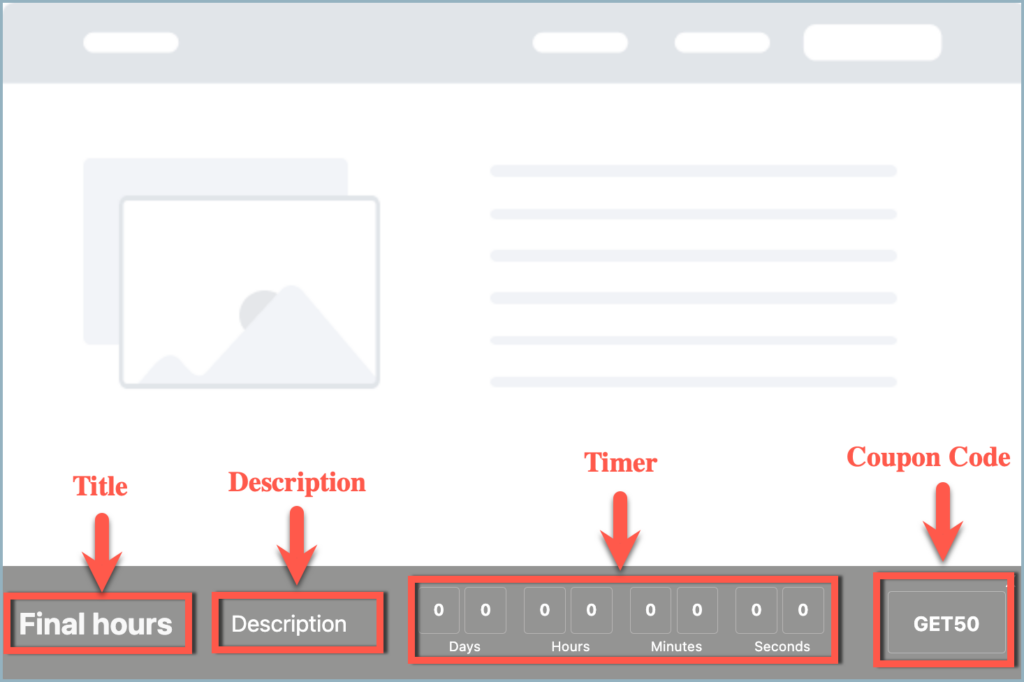
- Title – Allows to customize the title of the banner. Additionally, use the toggle to show/hide the title.
- Text – This text will display as the title of the banner.
- Font Size – Allows to adjust the font size of the banner title.
- Style – Allows selecting a style for the banner title, the available options are Bolder, 800, bold, 600, 500, normal, 300, 200, and lighter.
- Color – The palette will allow to alter the color of the banner title.
- Description – Allows to customize the description of the banner. Additionally, use the toggle to show/hide the description.
- Text – This text will display as the description of the banner.
- Font Size – Allows to adjust the font size of the banner description.
- Color – The palette will allow to alter the color of the banner description.
- Timer – Allows to customize the timer section on the banner. Additionally, use the toggle to show/hide the timer.
- Font Size – Allows to adjust the font size of the timer components.
- Color – The palette will allow to alter the color of the timer components.
- Coupon code – Allows to customize the coupon code on the banner. Additionally, use the toggle to show/hide the coupon code.
- Font Size – Adjust The font size of the coupon code with this option.
- Color – The palette will allow to alter the color of the coupon code.
- Close button – The close button is located in the top-right corner of the banner. Toggle the button to enable or disable it.
Banner Triggers
This page list the available triggers and the corresponding actions. Actions could include, where to display banner like in pages or posts. The banner will be displayed when any of the triggers is initiated.
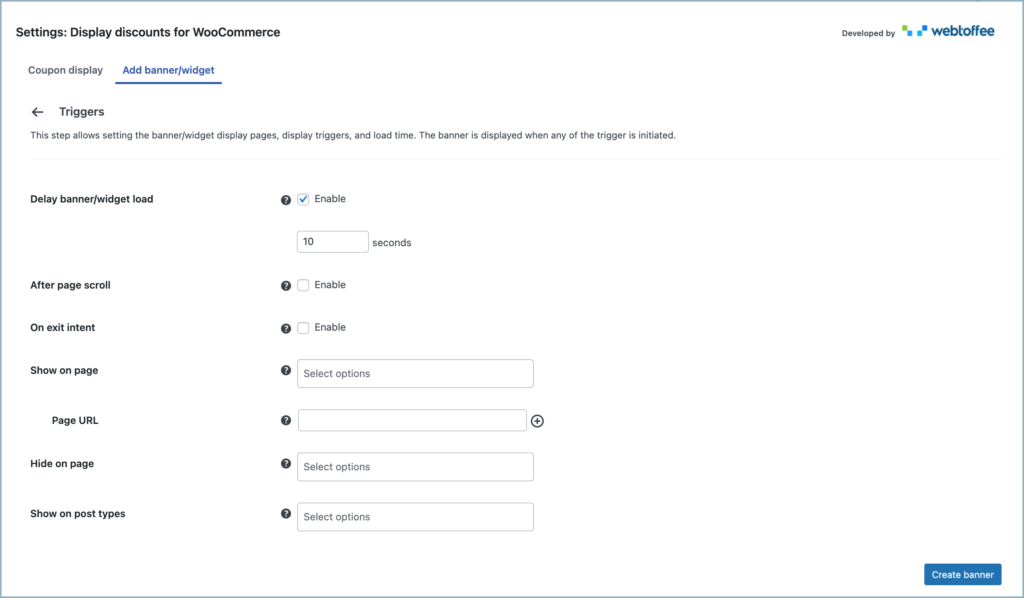
The available triggers for the banner are:
- Delay banner/widget load – If enabled, the banner will appear after the specified amount of time has elapsed since opening a page. The time delay is set in seconds.
- After page scroll – If enabled, the banner will be displayed once the customer has scrolled through a set portion of the page.
- On exit intent – When enabled, the banner will display if the user moves their cursor in close proximity to the close window button.
If multiple triggers are enabled, the coupon/banner will be displayed upon the first trigger that gets activated.
The other customization options available in the tab are:
- Show on page – Lists the pages where the banner can be displayed. Multiple pages can be selected at a time. Keep empty to display the banner in all the pages.
- Page URL – In addition to the available options in the “Show on page“ section, one can also showcase the banner on any other page by entering the page URLs in this field. Add multiple URLs by clicking on the “+” icon.
- Hide page –It allows the listing of pages where the banner should not be displayed.
- Show on post type – Allows to Choose the post type for displaying the banner. Keep empty to display the banner in all the posts.
Click on Create banner button to save the configurations and create the banner.

James
November 15, 2023
Hello, is it possible to display coupons on specific products? Because there are different coupons that can be used. I don’t want customers to see coupons for other products.
Arjun
November 16, 2023
Hi James,
Thank you for reaching out to us. If you have any product or category restrictions in place for the coupons, then the coupons will only be visible for eligible products. Additionally, if you want to hide coupons without any restrictions in place, you can also do that from the general settings of the plugin.
Abu hamza
February 26, 2023
Display discount for woocommerce plugin does have payment method restrictions?
Mike
March 9, 2023
Hi Abu,
Currently, the payment method restriction will not be shown in the coupon display. You can only enable the restriction for the coupon’s usage.