Custom fields on checkout pages are like special boxes where customers can share specific details about their order. This helps the store owners understand their preferences and meet their needs accurately. The WebToffee’s WooCommerce PDF Invoices, Packing Slips, and Credit Notes plugin provides the option to add custom fields to the checkout page. To add a custom field on the checkout page:
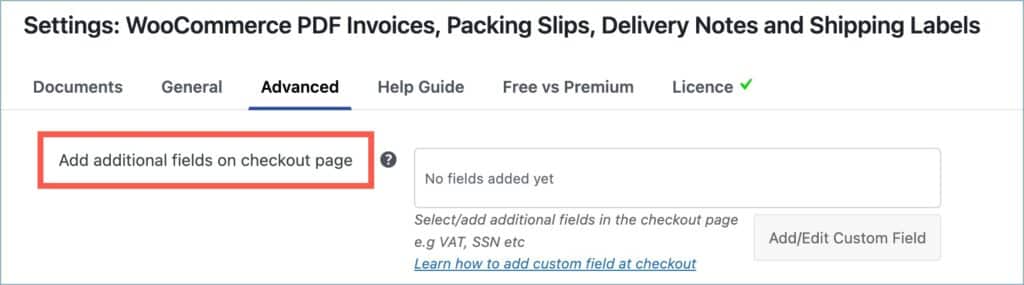
- From the WordPress dashboard, navigate to Invoice/Packing > General Settings > Advanced tab.
- Head to the Add additional fields on checkout page option.
- Click on Add/Edit Custom Field.
- In the Checkout Field Inserter, under the Add New tab, add all the required custom field data.
- Click on Save.
Adding custom fields
Follow the steps below, to add a custom field on the checkout page:
- Navigate to Invoice/Packing > General Settings > Advanced.
- Head to Add additional fields on checkout page option. The plugin provides two predefined custom fields ‘SSN’ and ‘VAT’. Store owners can choose from the predefined fields and also create new custom fields of their liking.
- To choose a predefined custom field, click on the preferred custom field from the dropdown and click on Update Settings. The custom field will be added to the checkout page.

- To add a new custom field, click on Add/Edit Custom Field. A Checkout Field Inserter box will open up.

- Inside the Checkout Field Inserter, type in the Field name, Meta Key, and the Placeholder. Now click on Yes or No to make the field mandatory or optional (Let’s take an example of adding a custom field called “Order note” to the checkout page).
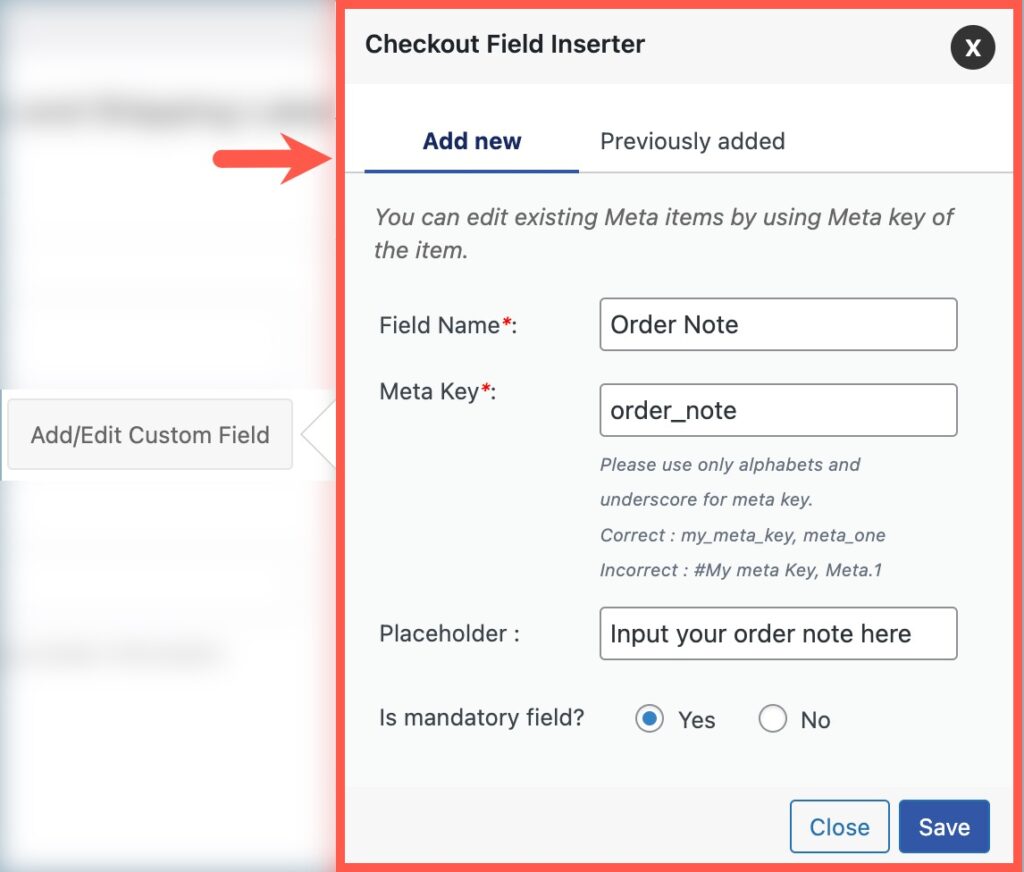
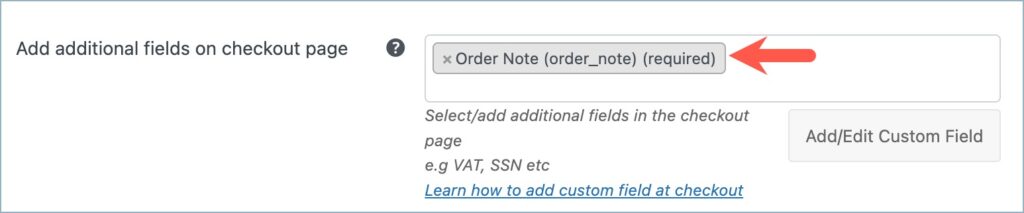
- Click on Save. The custom field is now added to the checkout page.
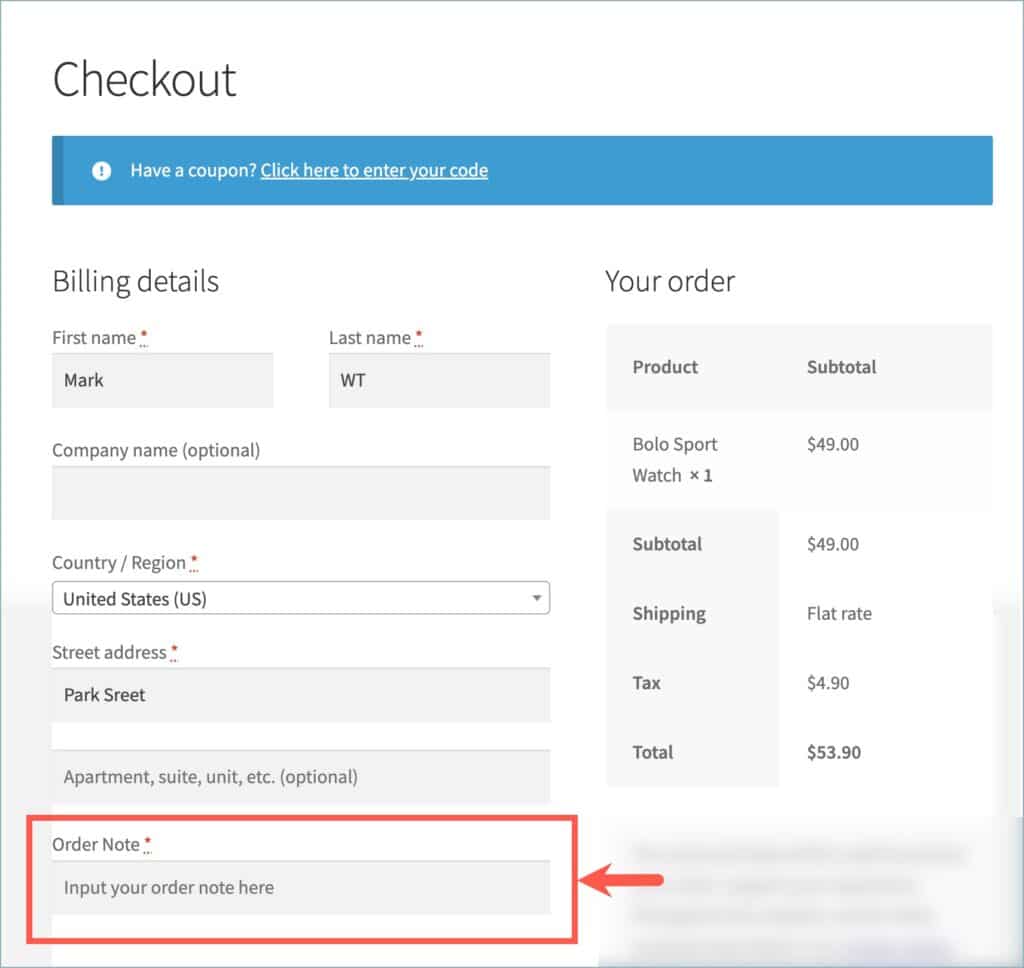
- The image below shows a checkout page with a custom field(Order note) in it.
Editing custom fields
Store owners can edit previously added custom fields in the Checkout Field Inserter. To edit a custom field:
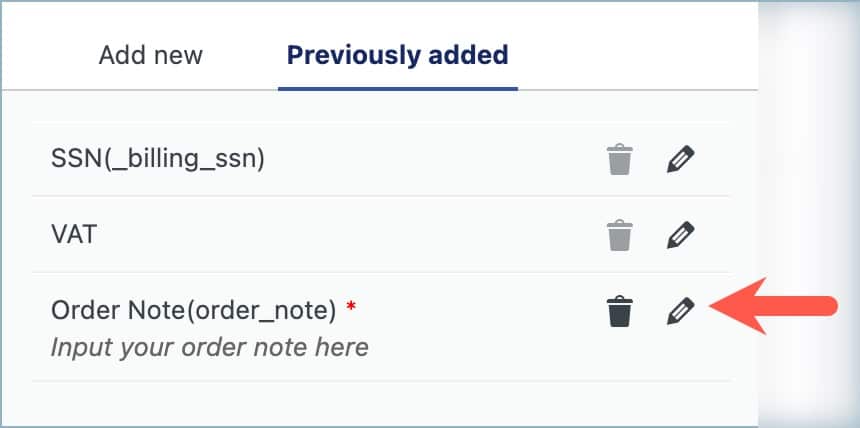
- Click onthe Previously added tab in the Checkout Field Inserter. The tab will list all the custom fields including the default custom fields provided by the plugin (SSN and VAT).
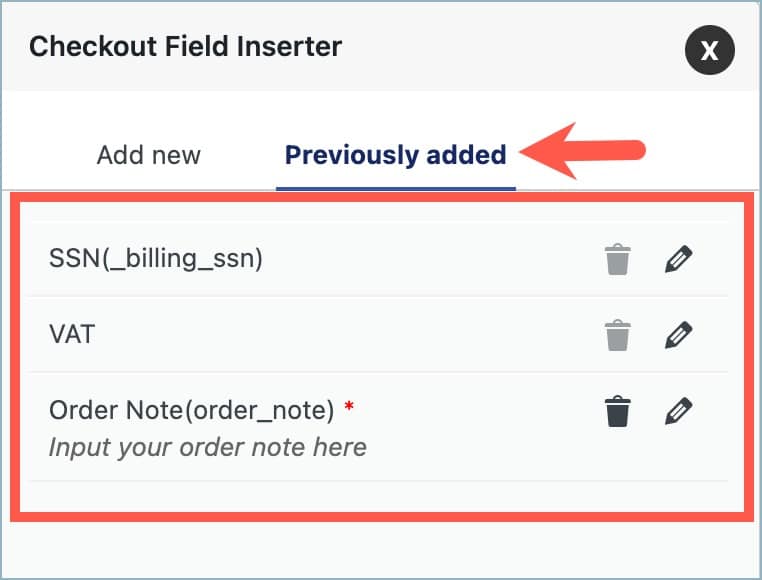
- Click on the Edit icon present against the preferred custom field.
- Make the necessary changes in the edit window (Store owners cannot edit the Meta Key of the custom field).
- Click on Save and update the changes.
Deleting custom fields
To delete a custom field (other than the default ones):
- Under the Previously added tab, click on the Delete icon present against the preferred custom field. A confirmation dialog box will pop up.
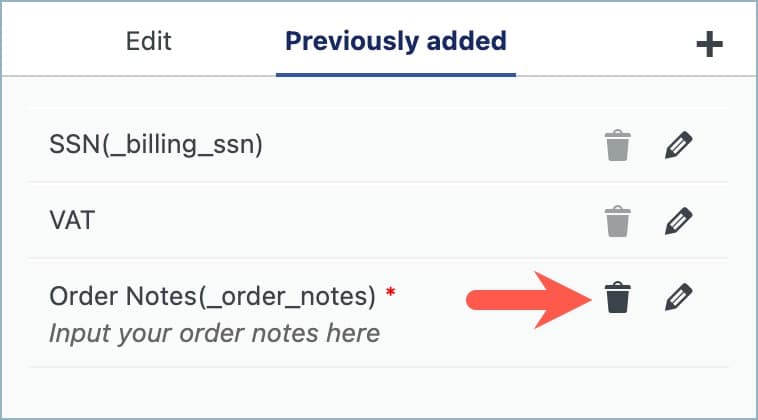
- Click on OK and complete the deletion.
Displaying the custom field in the Invoice document
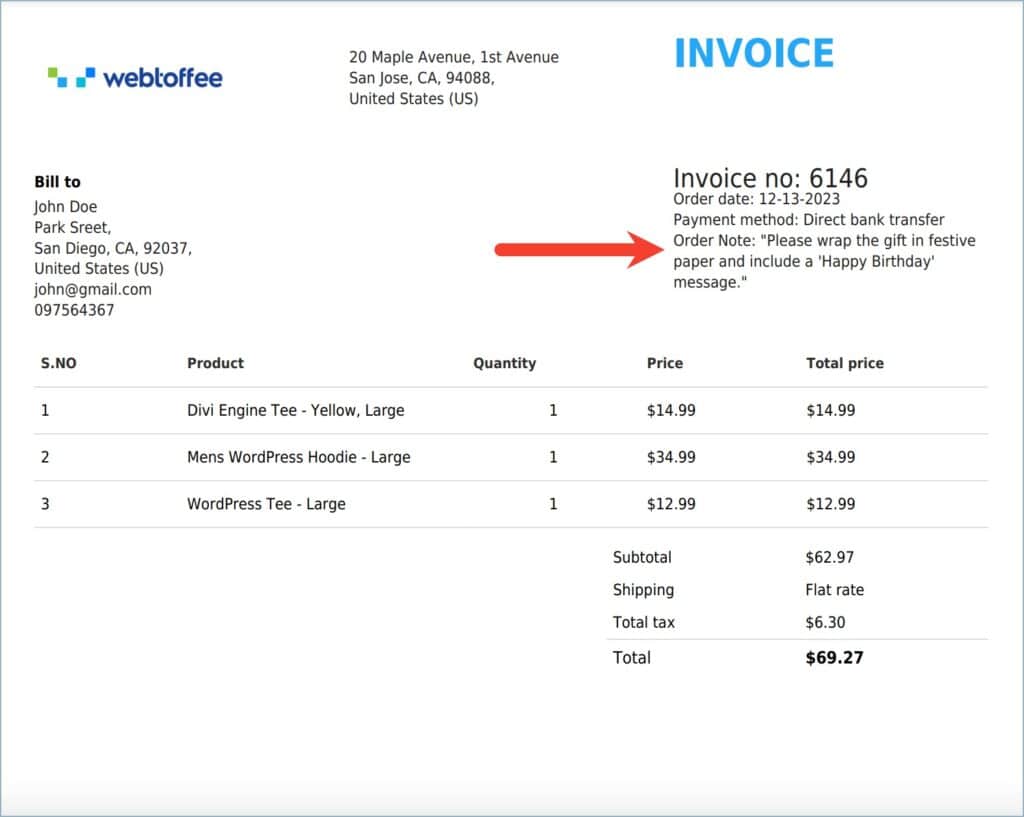
To display the custom field (‘Order Note‘) in invoice documents:
- Navigate to Invoice/Packing > Invoice > Advanced.
- Head to Order meta fields option.
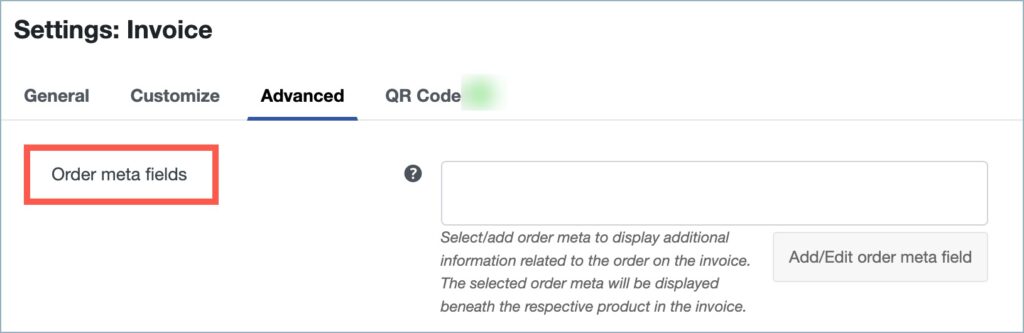
- From the dropdown, select ‘Order Note‘(order_note).

- Click on Update Settings and save changes.
The image below shows a WooCommerce invoice document with the custom field(‘Order note‘) in it.
Comment (1)
Terri
November 9, 2022
Hi, is there any way to move the custom checkout field below the Order Notes field? Right now the custom field sits between the Phone Number field and the Email Address field…
Thanks!