Often store owners want to display custom checkout fields in the invoice. Print Invoice, Packing Slip, Delivery Note & Label Plugin for WooCommerce allows you to add checkout fields in the invoice as order meta.
For instance, you can ask the customer to input the VAT, GSTIN, ABN, etc., or any other company tax ID relevant to your business at the checkout. You can link this ID as order meta to display in the invoice.
Let’s take a look at the steps for adding custom VAT data in the WooCommerce invoice.
- Firstly, install and activate PDF Invoice/Packing plugin for WooCommerce on your site.
- Then, from WordPress dashboard, navigate to Invoice/Packing.
Adding custom checkout field
To add additional custom fields at the checkout:
- Go to Invoice/Packing > General Settings > Advanced.
- Head on to the option Add additional fields on checkout page. You can add the checkout field in two ways:
- By selecting from Predefined options
- By adding a new custom field
Predefined checkout fields
The plugin provides two pre-defined checkout labels as SSN and VAT.
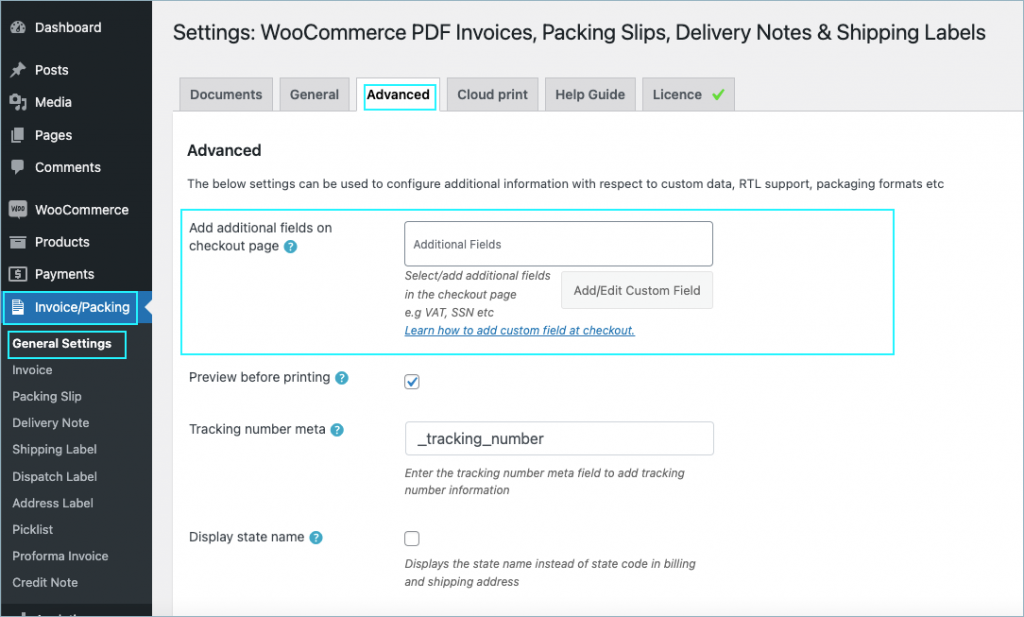
Select the required item to appear as labels at the checkout. The buyer can enter the data into the fields on checkout.
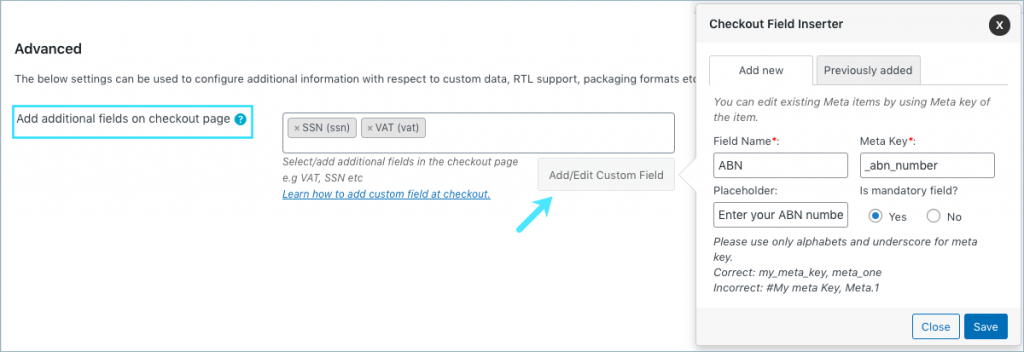
Add/edit custom field
To add a new custom field at the checkout other than the pre-defined options:
Click on Add/edit custom field button. Into the pop-up that opens up enter the Field Name, Meta Key, Placeholder. Also mark Yes if the field is mandatory. Then, Save.
Then, click on Update settings.

To edit or delete existing fields, move on to the Previously added tab. Click on the edit or delete icon against an item.
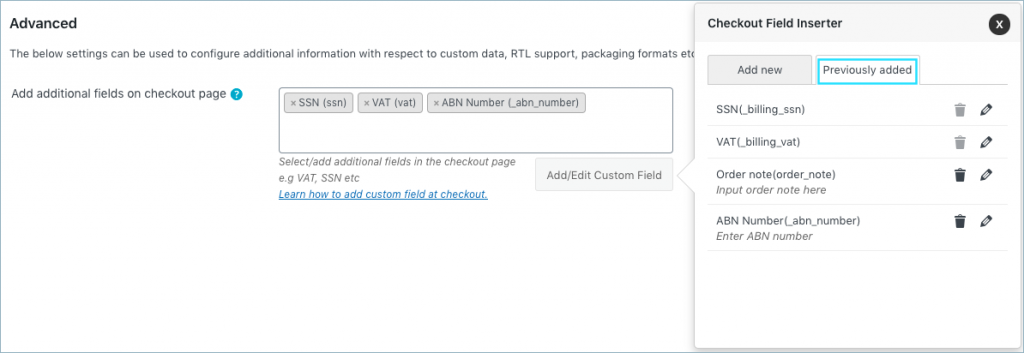
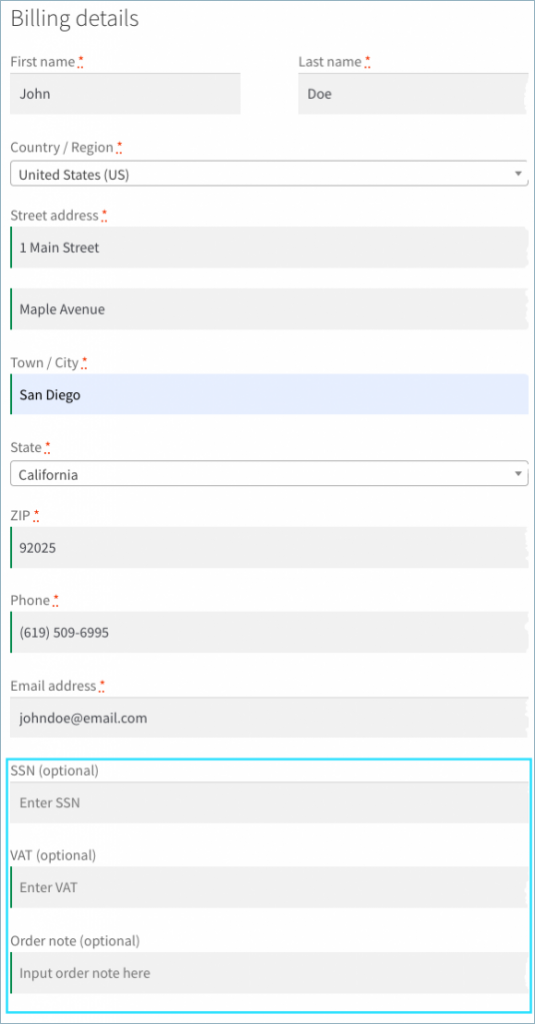
Custom field at the checkout
As per the above example, three additional fields appear at the checkout field as shown below:
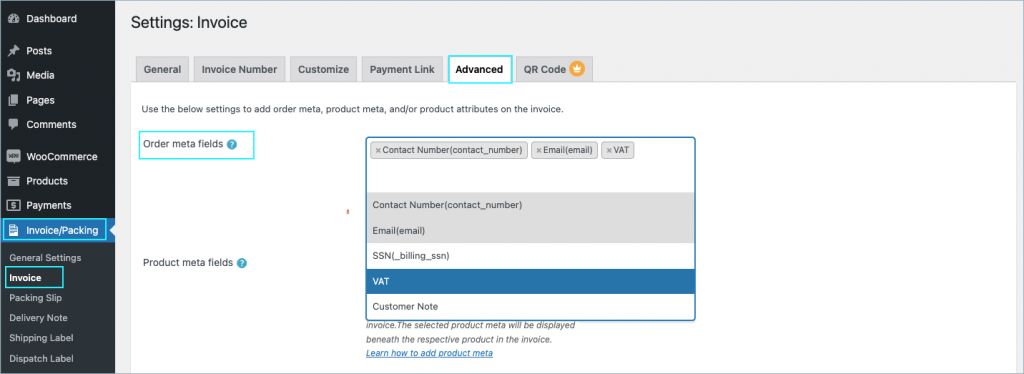
Show VAT in the invoice
The plugin displays VAT data in the invoice as an order meta. Follow the steps below to add meta in the invoice:
- From the WordPress dashboard, go to Invoice/Packing > Invoice.
- Head on to the Advanced tab.
Predefined VAT
In the order meta field, choose VAT. Now, the VAT data will be shown on your invoice.
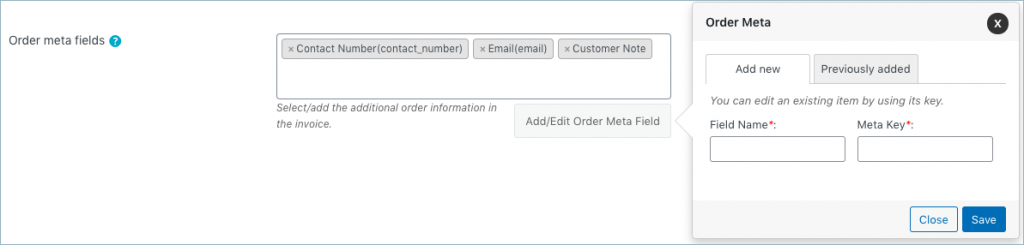
Custom VAT
To add other custom order meta details (probably from another third-party plugin) other than the ones displayed in the drop-down,
- From the VAT meta field, click on Add/Edit Order Meta Field button.
- Into the popup that appears, from Add New tab section, key in custom Field Name and its corresponding Meta Key.
- Then, click on the Save button.
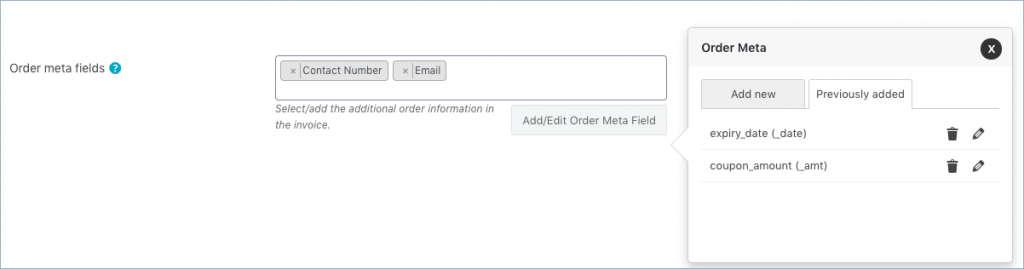
You can modify or delete existing order metadata from the Previously added tab.
Finally, click on the Update settings button to save the changes.
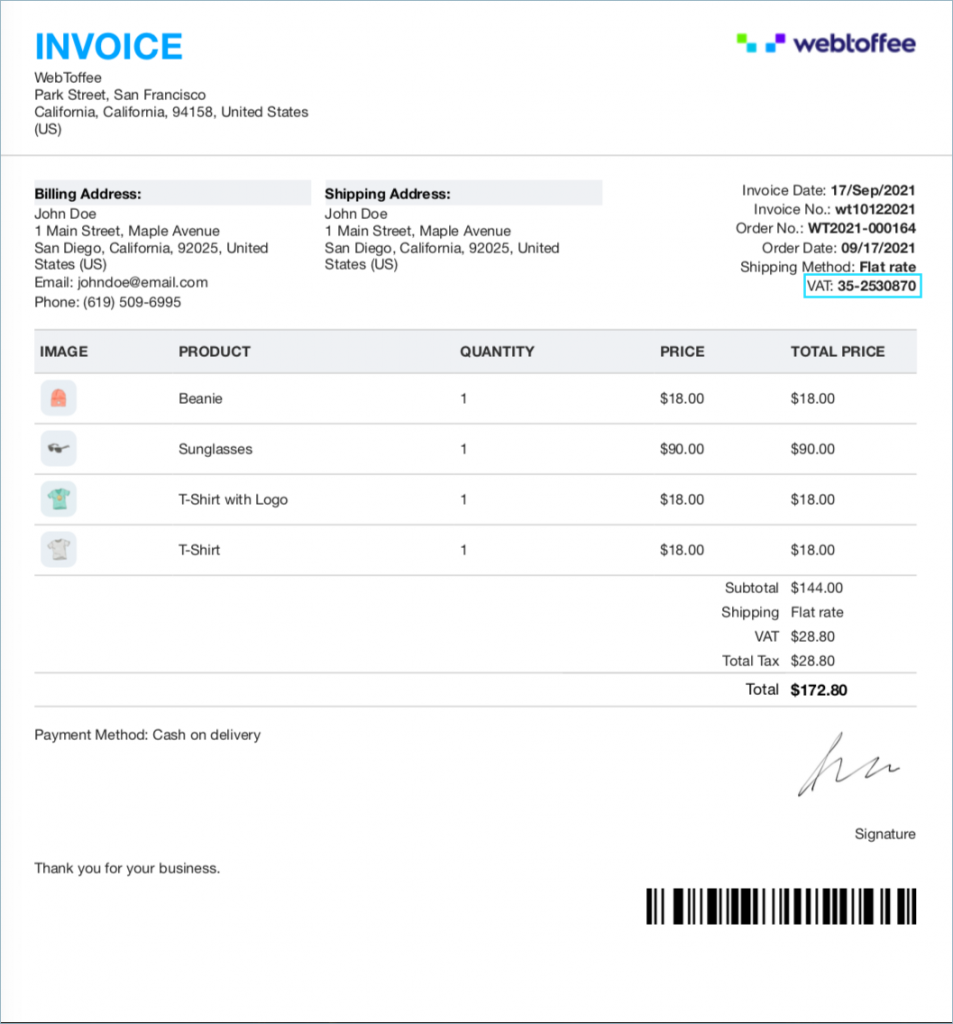
Sample invoice with VAT
A sample invoice with the custom VAT will be as shown below:
Related articles:
Comments (2)
Rodd Clarkson
November 28, 2022
My invoice is adding (incl. tax …) after the subtotal and total instead of displaying the VAT (or GST in my case) as a separate field and the layout of this information is different and lays out poorly with wrapped lines.
What’s going wrong?
Mike
December 4, 2022
Hi Rodd,
Thanks for reaching out.
To exclude tax in the subtotal field and display it in separate rows, go to Invoice/packing > General Settings > Advanced > Display price in the product table and select ‘Exclude tax’.