Smart Coupons for WooCommerce, an extended coupon plugin, that allows you to set up a stunning sales countdown timer in banner/widget display formats. Follow the given steps to set up stunning coupon banners as shown below.

Countdown timer/Coupon banner for WooCommerce
The plugin allows you to embed coupon banner/ countdown timer in your store in two ways.
- By inserting the short code manually into any of your pages .
- Automatically by ‘Injecting coupons’.
Although, both ways will ensure a coupon banner announcing the offer to your visitors.
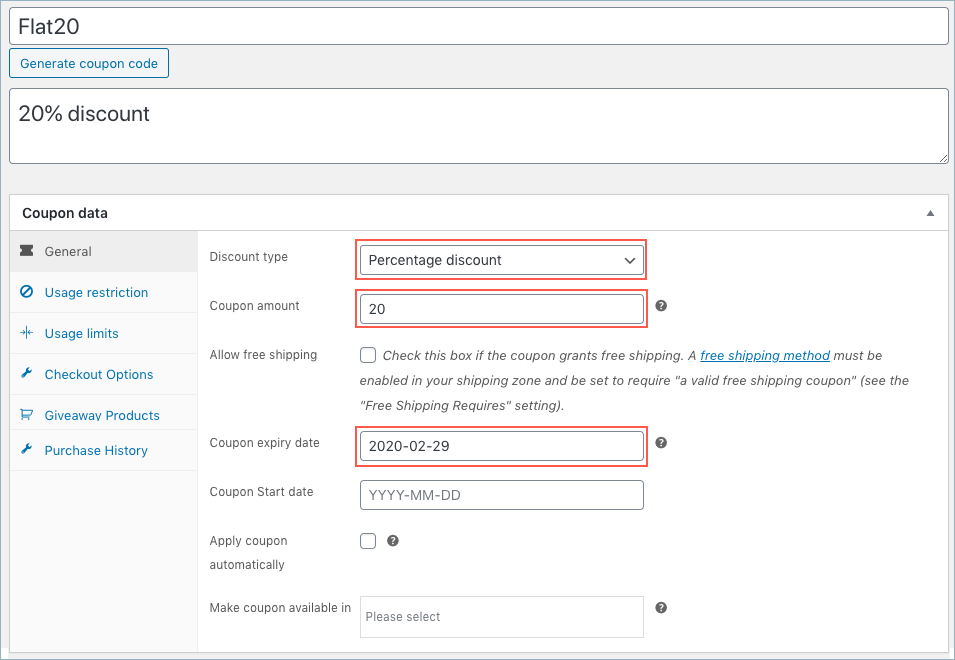
Prerequisite-Creating a basic coupon
You can begin by creating a simple coupon with an expiry date. In addition, you can provide other properties for the coupon from the usage restrictions tab, usage limits tab, checkout options, giveaway products, or purchase history tab to behave in specific manners.
Injecting and associating a coupon
- First of all, install and activate the plugin.
- Go to Smart coupon > General Settings.
- Head on to the Coupon banner tab.
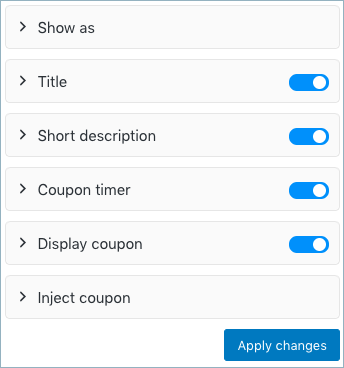
- The coupon banner tab consists of two sections: Settings and Customize as shown below:
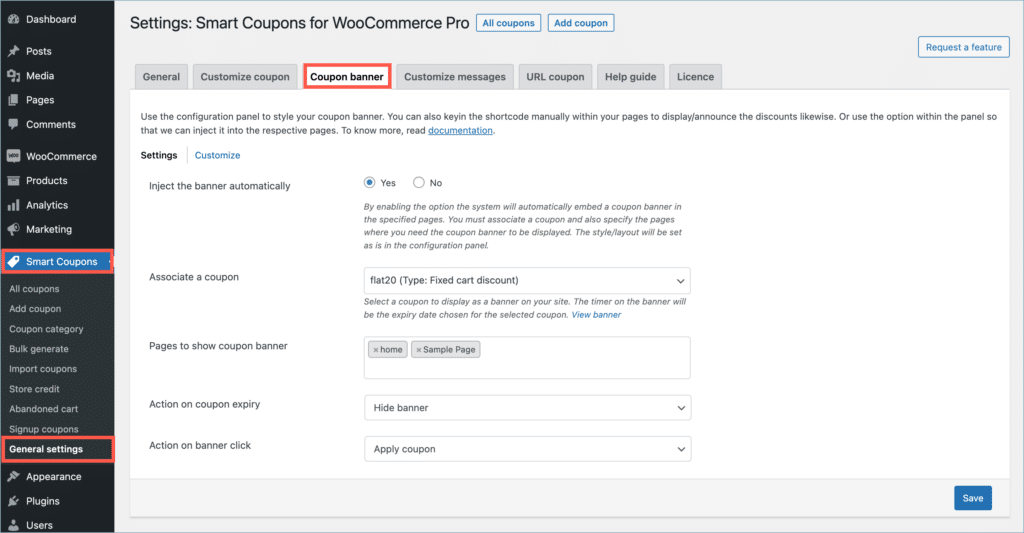
Settings
Injecting the banner automatically
- Choose yes to inject coupon automatically. You must associate a coupon and also specify the pages to display the coupon banner.
Associating a coupon
- It is necessary to associate a coupon and specify the pages where the coupon banner will appear. The banner will appear as set in the customize section.
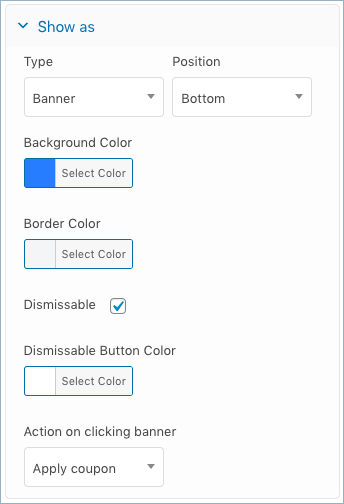
- Type: Select a banner or widget by choosing the appropriate option from the Type drop-down.
- Position
- On choosing the banner type, you can position the banner to be either top or bottom of the page.
- On choosing the widget type, you will get additional options to place the widget on the top left, top right, bottom left, bottom right or even provide custom height and width to position the widget.
- Background/Border Color: Choose an appropriate color for the banner from the color palette.
- Dismissable: Select the checkbox to have a dismissable close button for the banner. On enabling, you will get an option to choose the dismissable button color.
- Action on coupon expiry:
- Action on clicking banner
- Apply coupon: On clicking the banner, the coupon will be auto-applied.
- Redirect to URL: On choosing to redirect to a custom URL on click, an additional field to specify the redirection link will be appended. You can even choose the link to be opened in a new tab.
Customize
- Next, let us see how the above-created coupon can be displayed as a banner/widget at the front end of your site. For that, switch to the Customize section.
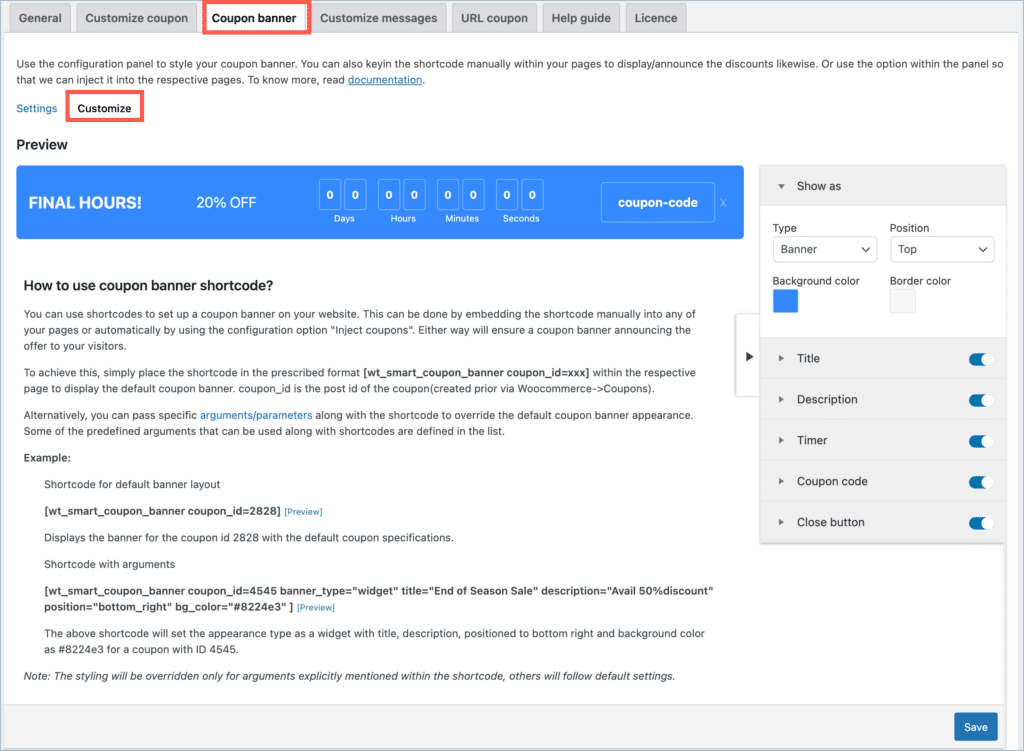
- The coupon banner window displays a coupon banner template and each item in the coupon banner can be customized from the configuration panel placed on the right side of the window. The changes done in the customization panel are simultaneously reflected in the sample coupon banner template. The various customization options for the coupon banner/widget as shown below.
- Each option of the customization panel can be toggled to control its visibility. You can click on the expand button against each option to load its customization properties.
Show as Banner or Widget
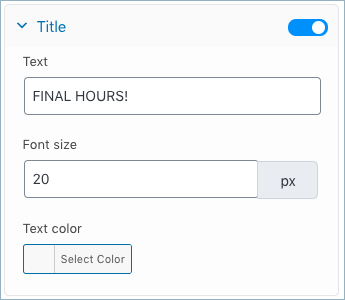
Title
- You can key in with a suitable title for the coupon banner that should appear on the banner along with its font size and text color.
Short description
- You can key in with a short description for the coupon banner that should appear on the banner along with its font size and text color.

Coupon timer
- A real-time coupon countdown timer will be displayed on the coupon banner on the basis of the coupon expiry date. Its font size, text color, border color, and background color can be adjusted from this panel.
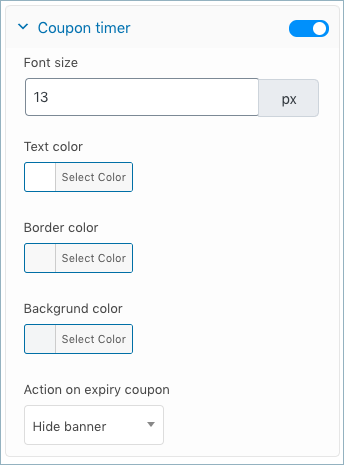
In addition, you can choose action on coupon expiry either to hide the banner or to simply display the text as it is.
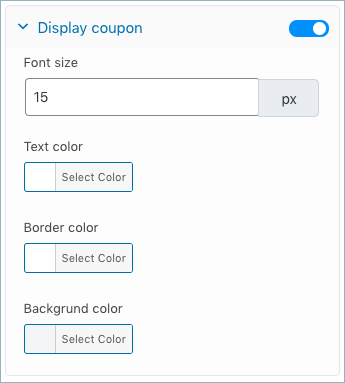
Display coupon
The font size, text color, border color and background color of the coupon code that is displayed on the banner can be adjusted from this panel.
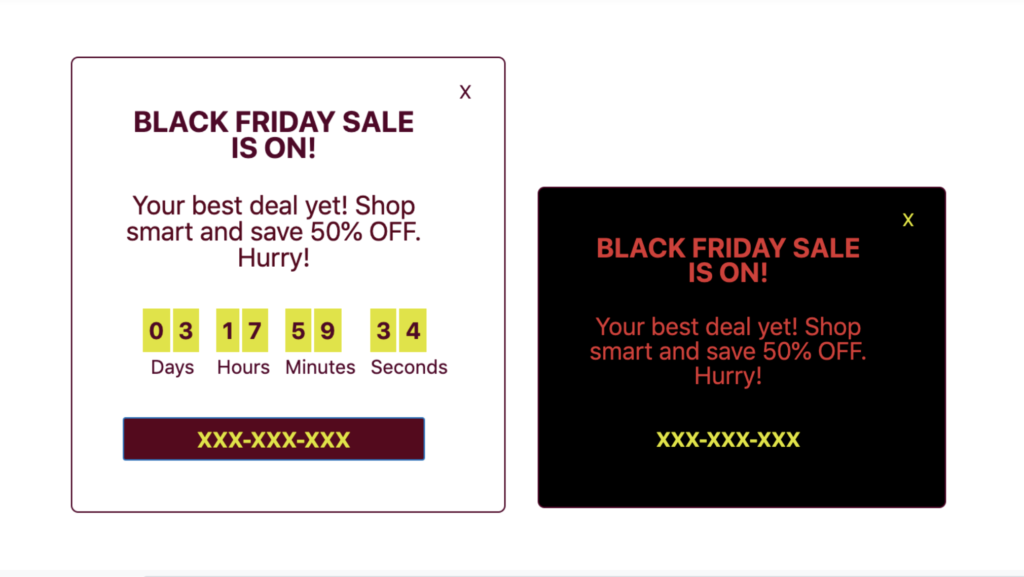
On applying the changes, you can view a customized coupon banner in the front end as shown below:
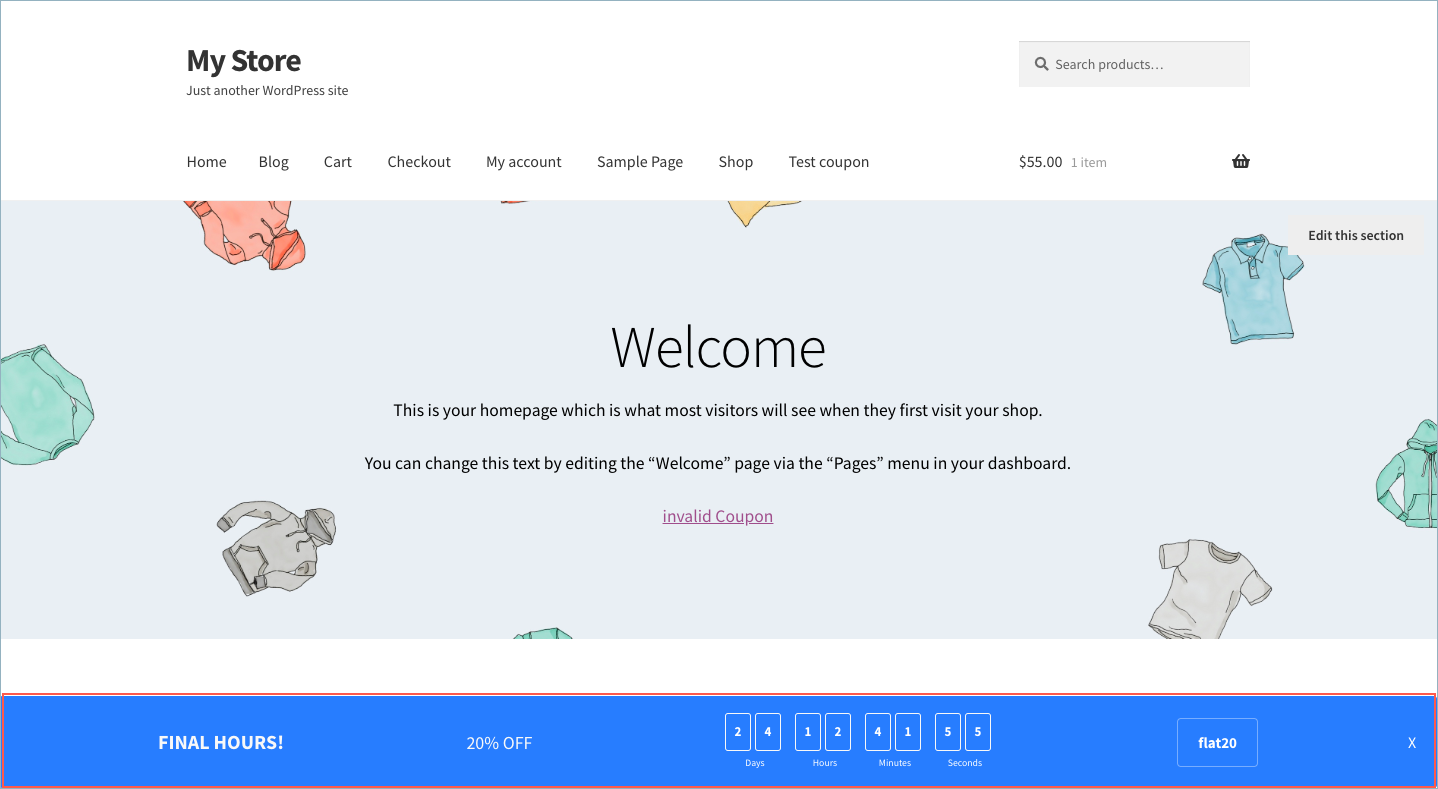
You can see the coupon banner with a real-time count down timer in it. On clicking the banner you can opt for the coupon to get applied directly on your cart amount or to redirect to a particular URL as per the underlying settings configured for the banner.
Using shortcode for banners/countdown timers
- You can use shortcodes to set up a coupon banner on your website. This can be done by embedding the shortcode manually into any of your pages announcing the offer to your visitors.
- To achieve this, simply place the shortcode in the prescribed format [wt_smart_coupon_banner coupon_id=xxx] within the respective page to display the default coupon banner. coupon_id is the post id of the coupon(created prior via Woocommerce->Coupons).
- Alternatively, you can pass specific arguments/parameters along with the shortcode to override the default coupon banner appearance. Some of the predefined arguments that can be used along with shortcodes are defined below.
Example:
- Shortcode for default banner layout
[wt_smart_coupon_banner coupon_id=2828]
Displays the banner for the coupon id 2828 with the default coupon specifications. - Shortcode with arguments
[wt_smart_coupon_banner coupon_id=4545 banner_type=”widget” title=”End of Season Sale” description=”Avail 50%discount” position=”bottom_right” bg_color=”#8224e3″ ]
The above shortcode will set the appearance type as a widget with title, description, positioned to bottom right and background color as #8224e3 for a coupon with ID 4545.
Note: The styling will be overridden only for arguments explicitly mentioned within the shortcode, others will follow default settings.
Conclusion
The coupon banners/sales countdown timers can be a productive option for gaining visitors’ attention from your site and thereby boosting overall sales.
Know more about the plugin Smart coupon for WooCommerce.
Comment (1)
Jim
May 4, 2020
Smart coupon for WooCommerce is really a great timer plugin for WooCommerce. I use it on several stores and it works great.