If you own a busy online store, it is quite common for you to receive a huge amount of orders each day. Order, Coupon, Subscription Export Import for WooCommerce helps you import/export all your orders from one store to another in an efficient and quick manner. To export WooCommerce orders:
- Select the post type as Order.
- Select an export method.
- Filter data.
- Map and reorder export columns.
- Use advanced options/ batch export and scheduling.
Export Orders
To export WooCommerce orders:
- Click on WebToffee Import/Export(Pro) > Export.
If you want a file only for reference purpose, then you can export the line items either in Separate rows or in Separate columns.
You can select this option in the last step of export.

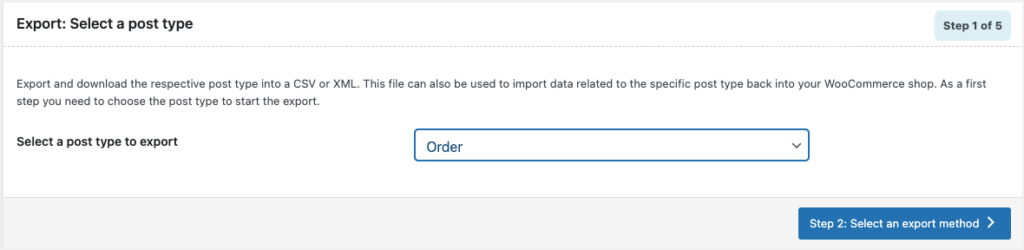
Step 1: Select a post type
As a first step, you need to choose the post type as Order.
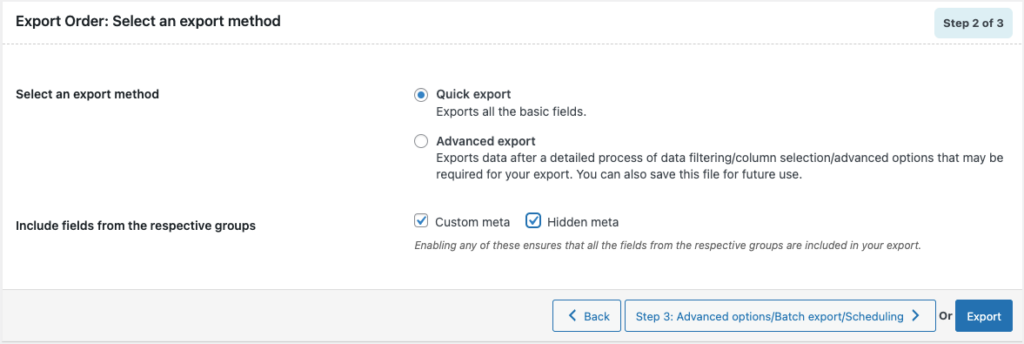
Step 2: Select an export method
Choose from the below options to continue with your export:
- Quick export from DB
- Based on a pre-saved template
- Advanced export
Let us have a look at each of these export methods:
Quick Export
- exports the basic/standard fields of the respective post type.
- To include fields from Custom meta and Hidden meta select the respective group’s checkboxes.
- Click the Export button to complete the action or proceed to Step3 for advanced options.
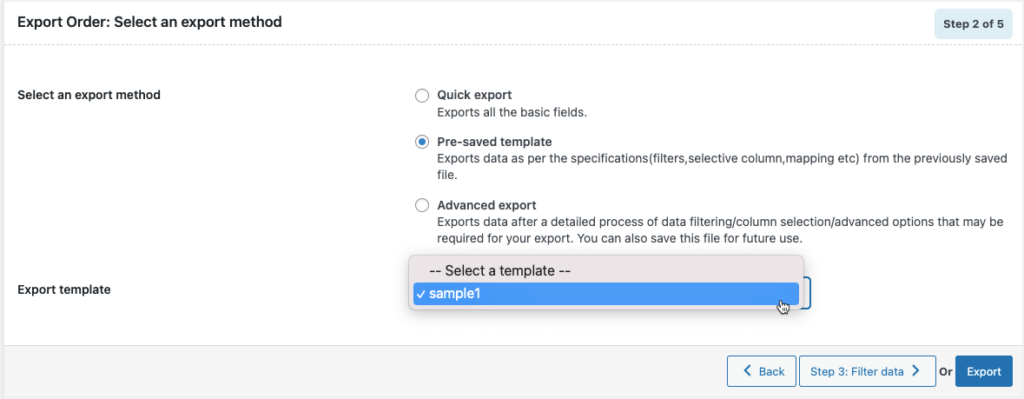
Pre-saved template
- exports data as per the specifications(filters, selective column, mapping.. etc) from the previously saved file.
- By selecting this option, one can choose a previously saved template from the Export template drop-down.
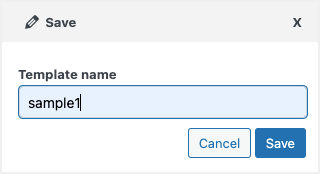
Note: The template will be listed in the drop down only if you have saved it in previous exports, if you go through the Advanced export, at Step 5 you will get an option to save the template. Once you save that, next time when you want to export a pre-saved template, it will be populated within the drop down.
- Click the Export button to complete the action or proceed to Step3 to filter data.
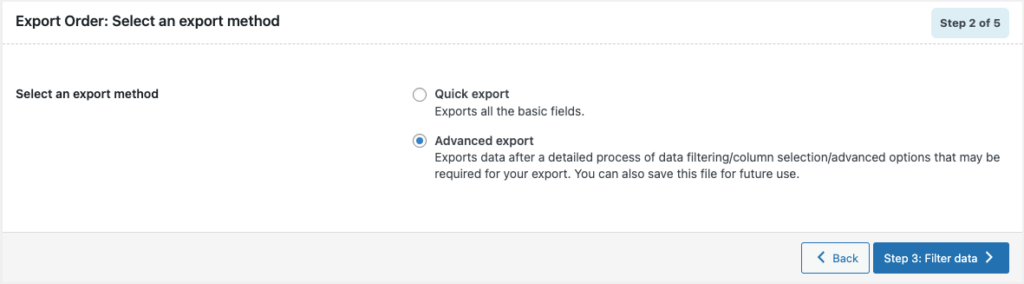
Advanced Export
- Takes you through a detailed process of filtering/column selection/advanced options that may be required for your export.
Note: You can also save this file as a template for future use.
- Click on Step3 to filter data.
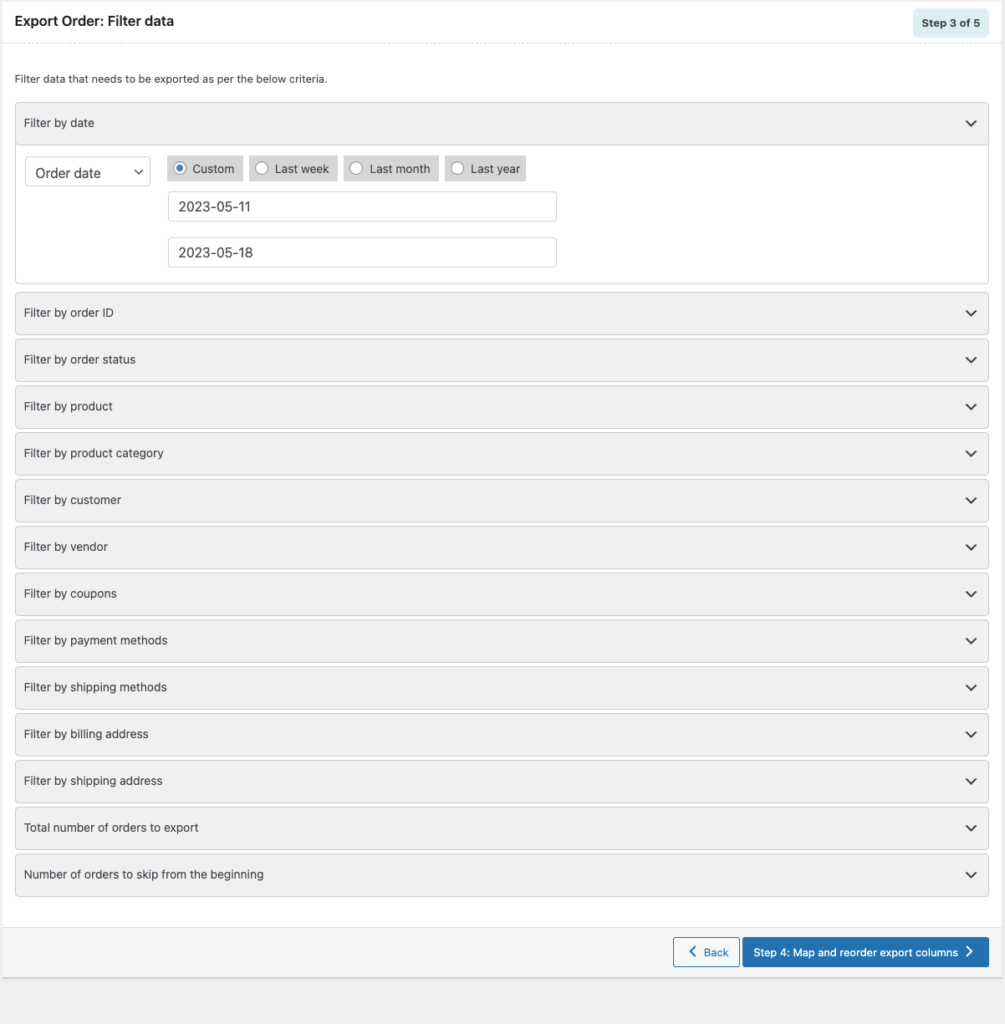
Step 3: Filter data
Filter data that needs to be exported as per the below criteria.
- Date: Here, you can filter on the basis of Order date, Modified date, Paid date and Completed date.
- Order ID: This will export specific orders based on the entered IDs.
- Order Status: Filter orders by their status type. You can specify more than one type for export.
- Product : Export orders containing specific products. Key-in the specific product names to export orders accordingly.
- Product Category: Export orders that belong to specific product categories.
- Customer: Input the customer email to export orders pertaining to only specific customers.
- Vendor: Input the vendor email to export orders pertaining to only specific vendors.
- Coupons : Enter coupons codes separated by comma to export orders on which these coupons have been applied.
- Payment method: These include bank transfer, cash on delivery and check payments.
- Shipping method: These include flat rate, free shipping and local pickup.
- Billing address: Specify the billing address.
- Shipping address: Specify the shipping address.
- Total number of orders to export : The actual number of orders you want to export. e.g. Entering 500 with a skip count of 10 will export orders from 11th to 510th position.
- Number of orders to skip from the begining: The number of orders to be skipped from the beginning should be specified here. e.g. Enter 10 to skip the first 10 orders from export.
Step 4: Map and reorder export columns
If necessary, the column names in this section can be edited. When you choose a pre-saved template, you will see the preferred names and choices that were last saved. One can also move the columns to reorder the arrangement.
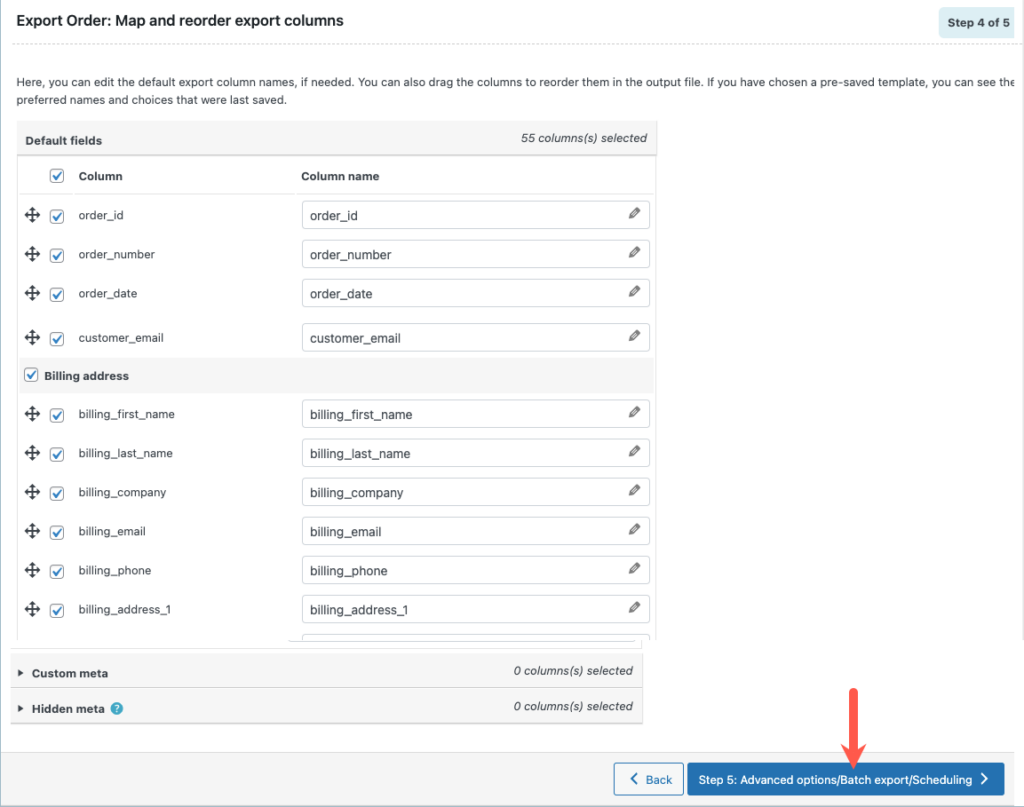
- Here, one can map and reorder the export columns under the following 3 fields:
- Default fields
- Meta(Custom fields)
- Hidden meta
- Click on Step 5 to proceed.
Step 5: Advanced Options/Batch Export/Scheduling
- On reaching Step 5, the following window will appear, from where one can:
- Exclude Already Exported: Option ‘Yes’ excludes the previously exported orders.
- Exclude line items: Choose ‘Yes’ to exclude and ‘No’ to include line items.
- Export line items in: You can export in Default mode if you are migrating orders. For exporting a reference file, you can either choose Separate columns or Separate rows.
- Export file name: To specify a filename for the exported file. If left blank the system generates a default name.
- Export File Format: Both CSV and XML file formats are available.
- Delimiter: Separator for differentiating the columns in the CSV file. Assumes ‘,’ by default.
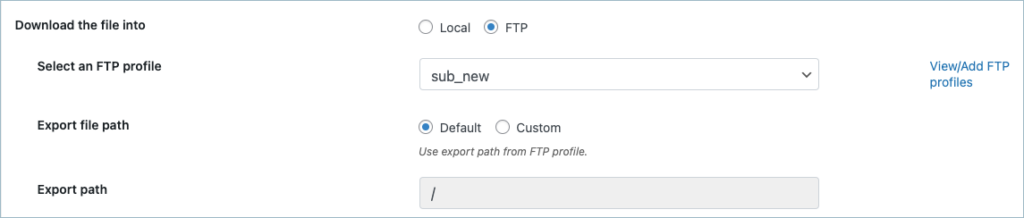
- Download the file into: Here, you can choose between Local and FTP. On opting FTP, choose an FTP profile and specify the export path.
Note: On expanding Advanced options, one can set the number of records that the server will process for every iteration within the configured timeout interval. If the export fails due to timeout you can lower this number accordingly and try again.
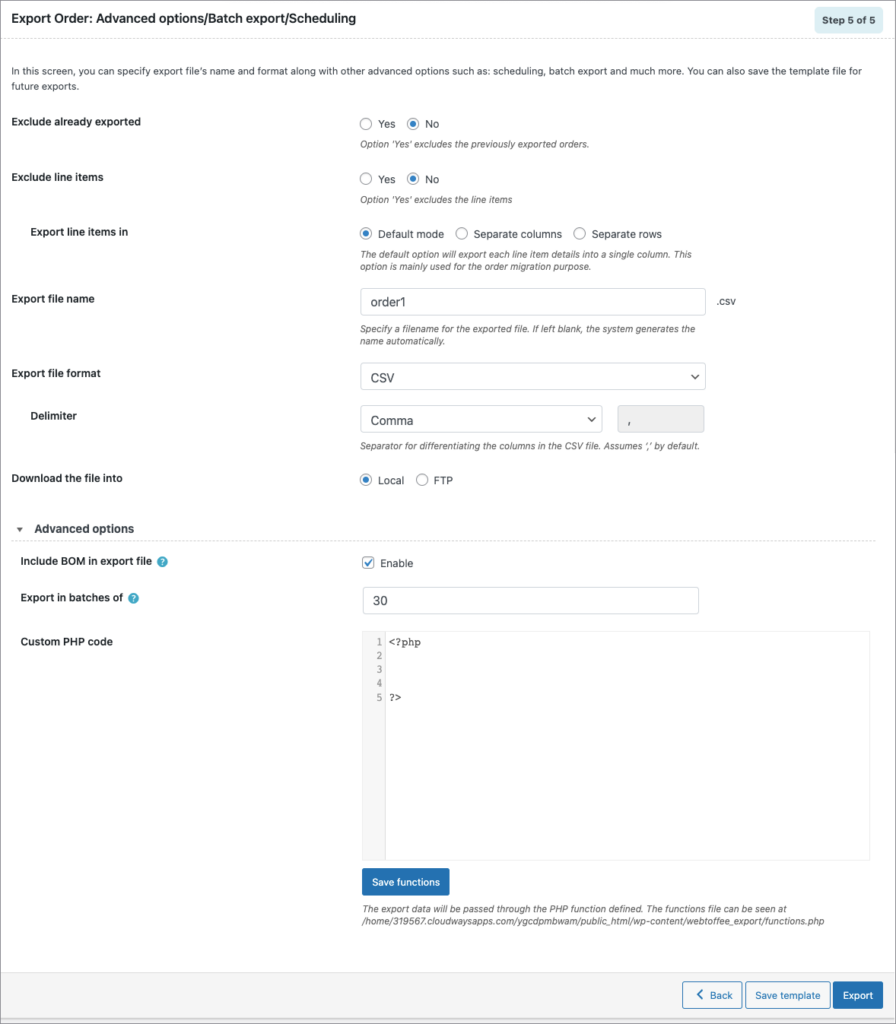
- Save the template file for future export as shown below(if needed).
- Click on Export and export or schedule the export to finish.