If you own a busy online store, it is quite common for you to receive a huge amount of orders each day and coupons are the potential tools to market your store products. The free version of the Order / Coupon / Subscription Export Import Plugin for WooCommerce helps you to import/export all your orders and coupons from one store to another in an efficient and quick manner.
To import WooCommerce orders / coupons:
- Click on WebToffee Import/Export(Basic) > Import.
Import Orders
Download : Sample Order CSV.
For successful import, make sure to add the coupon code in the format code:xxx in the CSV file, where xxx is the coupon code. 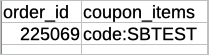
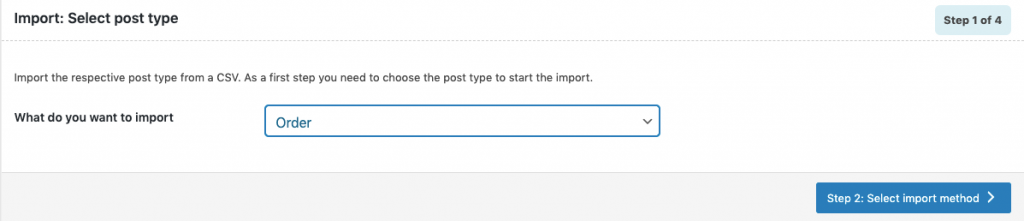
Step 1: Select a post type
As a first step, you need to choose the post type as Order.
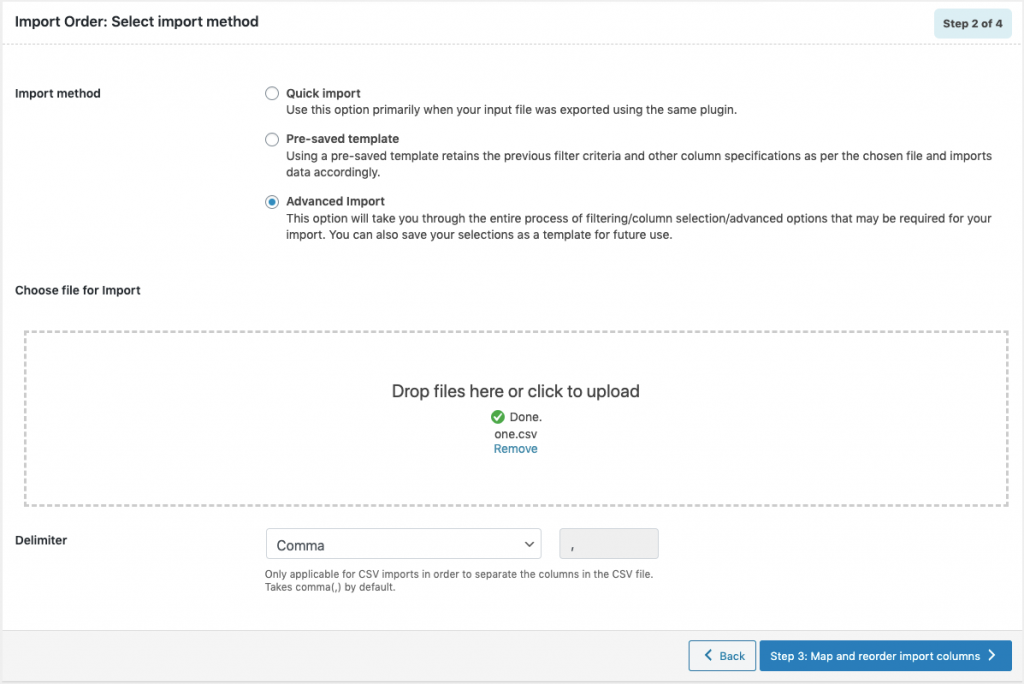
Step 2: Select an import method
Choose from the below options to continue with your import:
- Quick import : Preferred if your input file was exported using the same plugin.
- Pre-saved template : Retains the previous filter parameters and other column specifications as per the chosen file and imports data accordingly.Note: The template will be listed in the drop down only if you have saved it in previous exports, if you go through the Advanced export, at Step 4 you will get an option to save the template. Once you save that, next time when you want to export a pre-saved template, it will be populated within the drop down.
- Advanced import:Imports data after a detailed process of filtering/column selection/advanced options. This file can be saved for future use.Note: You can also save this file as a template for future use.
Step 3: Map import columns
The column names appearing in this section can be edited if required. The preferred names and choices that were last saved can be viewed on choosing a pre-saved template.
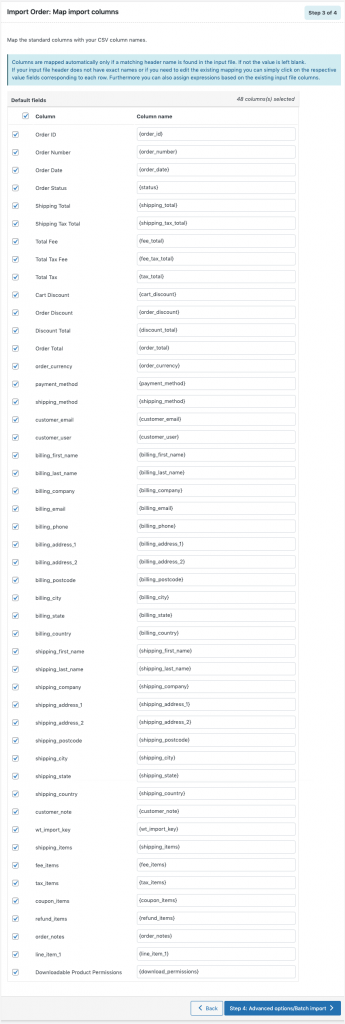
Regarding Date format: Default date format is YYYY-MM-DD. To import order date in DD-MM-YYYY format, use the expression: {order_date@d/m/Y} while mapping.
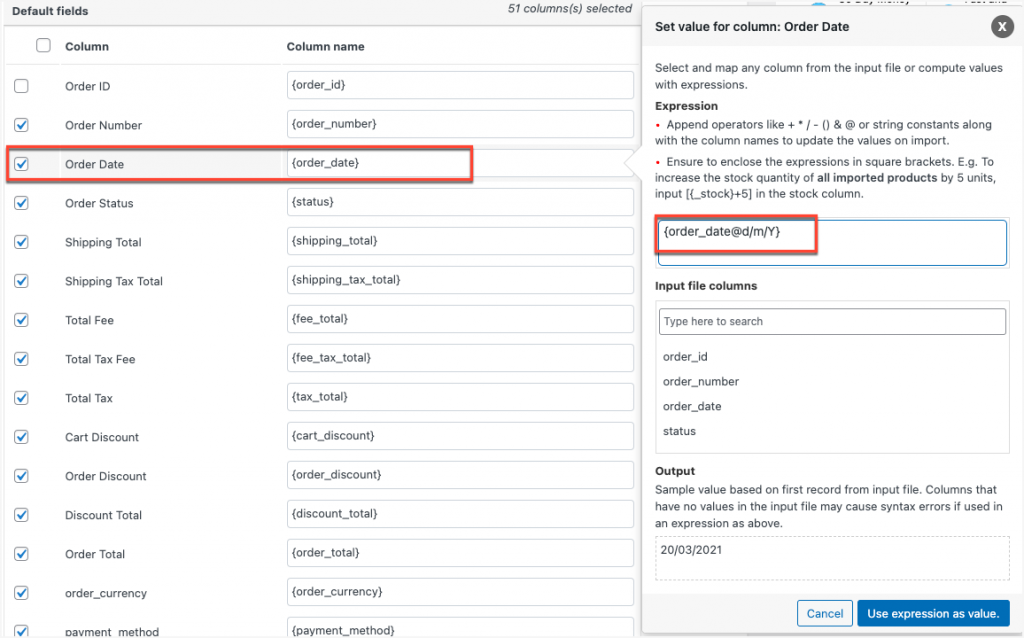
Evaluate field
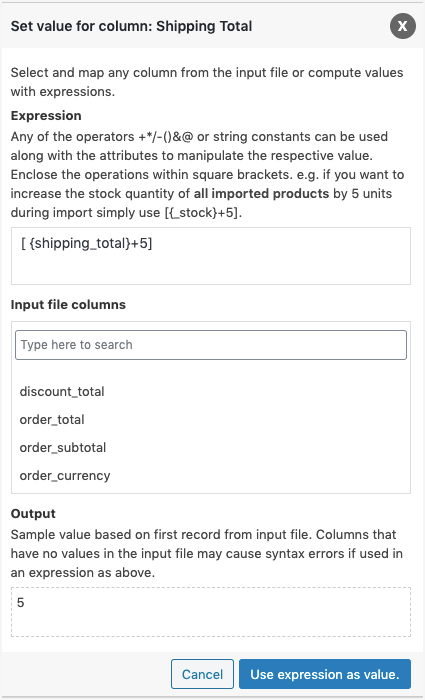
Evaluate field can be used to append a value/expression to an existing item while importing. It basically selects/maps any column from the input file and compute the values with expressions and creates output.
- Expression: Any of the operators +*/-()&@ or string constants can be used along with the attributes to manipulate the respective value.
- Input: Select the column from the dropdown which has to be modified.
- Output: Sample value will be created based on the first record from input file.
- Click on Step 4 to proceed.
Step 4: Advanced Options/Batch Import
On reaching Step 4, the following window will appear, from where one can import in batches and link products using SKU instead of Product ID. One can either Skip or Update the entry If order exists in the store.

- Save the template file for future (if needed).

- Click on Import to finish.
Import Coupons
Download : Sample Coupon CSV.
Step 1: Select a post type
As a first step, you need to choose the post type as Coupons.
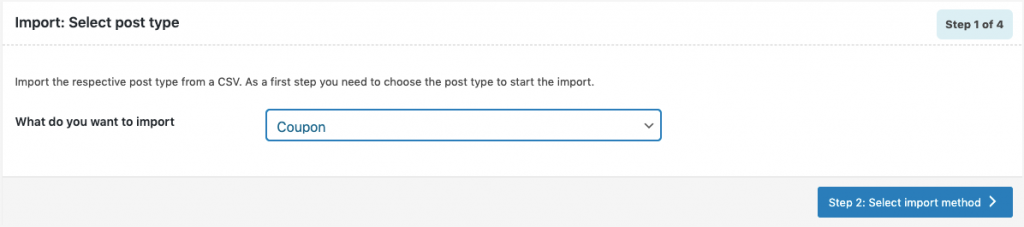
Step 2: Select an import method
Choose from the below options to continue with your import:
- Quick import : Preferred if your input file was exported using the same plugin.
- Pre-saved template : Retains the previous filter parameters and other column specifications as per the chosen file and imports data accordingly.Note: The template will be listed in the drop down only if you have saved it in previous exports, if you go through the Advanced export, at Step 4 you will get an option to save the template. Once you save that, next time when you want to export a pre-saved template, it will be populated within the drop down.
- Advanced import:Imports data after a detailed process of filtering/column selection/advanced options. This file can be saved for future use.Note: You can also save this file as a template for future use.

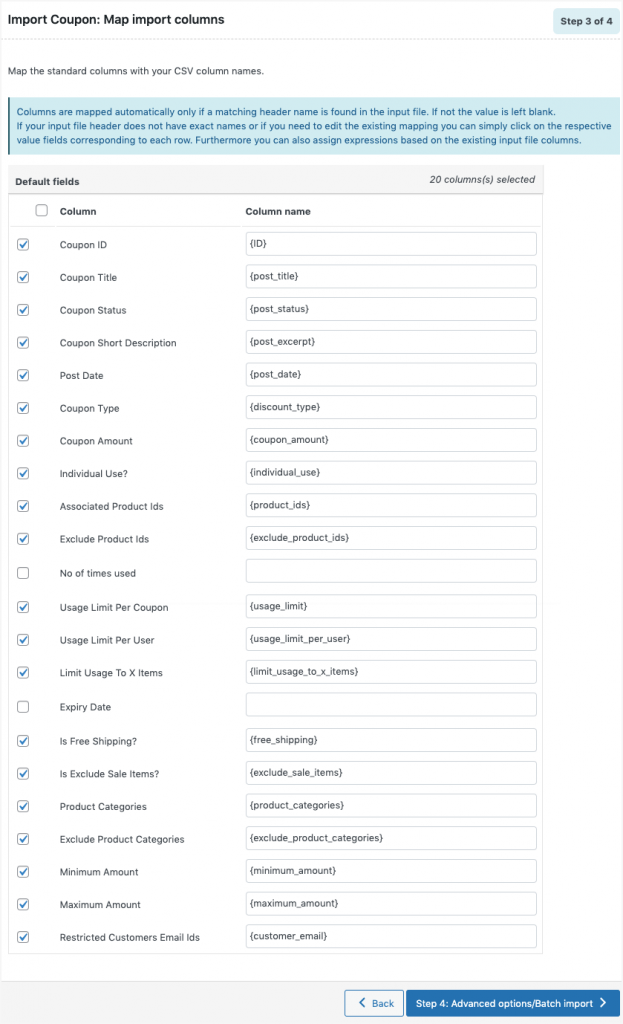
Step 3: Map import columns
The column names appearing in this section can be edited if required. The preferred names and choices that were last saved can be viewed on choosing a pre-saved template.
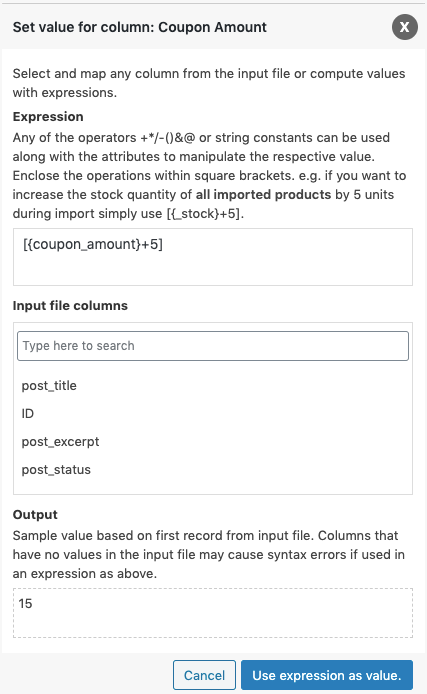
Evaluate field
Evaluate field can be used to append a value/expression to an existing item while importing. It basically selects/maps any column from the input file and compute the values with expressions and creates output.
- Expression: Any of the operators +*/-()&@ or string constants can be used along with the attributes to manipulate the respective value.
- Input: Select the column from the dropdown which has to be modified.
- Output: Sample value will be created based on the first record from input file.
- Click on Step 4 to proceed.
Step 4: Advanced Options/Batch Import
On reaching Step 4, the following window will appear, from where one can import in batches. One can either Skip or Update the entry If the coupon exists in the store.
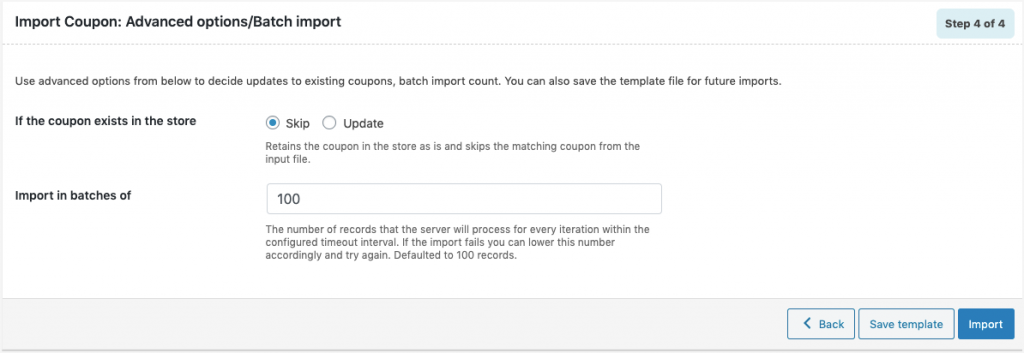
- Save the template file for future (if needed).
- Click on Import to finish.
Know about Exporting orders and coupons.


Comments (2)
Jennifer
November 17, 2022
Hello! I’d like to import my customers and their orders to Woo from Shopify. Is there a way to do this so the orders stay associated with the correct customer. For example, if my customer Jane activates her account on my new wordpress/woo site, she will see all of the orders she made on my shopify site previously.
Alan
November 25, 2022
Hi,
Yes, you can import users and orders from Shopify to Woocommerce if you are somehow able to create CSV files in the correct format. Below are the links to the sample CSV files of both order and user. Please create a CSV file in the exact same format as in the sample file to import users and link them with the orders. The user and order will be linked using the email address.
https://www.webtoffee.com/wp-content/uploads/2020/10/Sample_Users.csv
https://www.webtoffee.com/wp-content/uploads/2021/03/Order_SampleCSV.csv