Overview
The WebToffee plugin, WordPress Backup & Migration (Pro) helps to migrate and backup the entire WordPress/WooCommerce website. This includes all the wp-content and database.
What does the plugin provide?
Apart from the basic plugin features, the plugin provides:
- Export scheduling
- Provides both FTP and SFTP storage options.
- Import/export database excluding files
- Advanced support within the plugin module
Prerequisite
Ensure that the zip or zlib extension is enabled.
Installation and Activation
After purchasing, the WordPress Backup & Migration(Pro) plugin will be available as a zip file in the API Downloads section of your My Account page.
- Log in to your WebToffee My Account page.
- Download the zip file from API Download.
- Log in to the WordPress Admin panel of your online store.
- Navigate to Plugins > Add New to upload the plugin.
- Upload the zip file to install and activate the plugin.
Getting Started
Once activated, a new menu, WordPress Migration Pro appears in the WordPress dashboard sidebar menu. Let us now navigate through it and explore.
You can navigate to the WordPress Backup & Migration Pro plugin in two ways:
- WordPress Migration Pro from WordPress dashboard.
- Plugins > Installed Plugins > WordPress Backup & Migration Pro > Settings (the user will be taken to the Settings window.)
The plugin consists of three different sub-modules :
- Backup & Migration
- Settings
- Logs
Backup & Migration
All the export, import and backup related activities are carried out by Backup & Migration module. This section consist of four subsections:
- Create Backup
- Import/Restore
- Help
- License
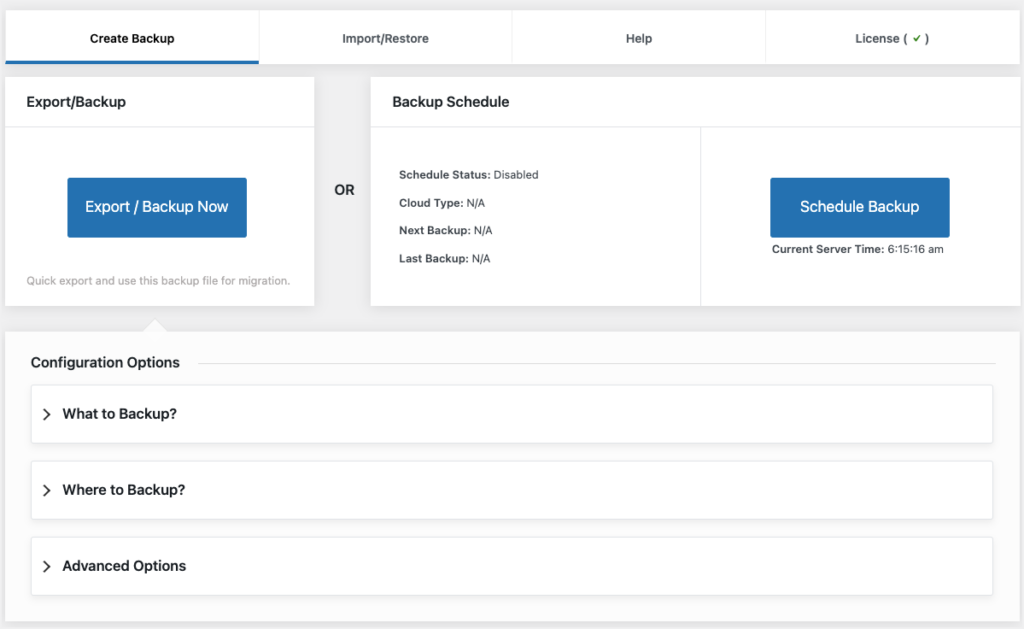
- Create Backup : consists of all the basic export and backup configurations. To customize the selection, head on to the configurations section, where we have:
- What to Backup?: Here, you can backup WordPress database, files or both.
- WordPress database: Under this, select the tables you want to backup.
- WordPress files: Here, select the files you want to backup.
- Where to Backup?: From local to cloud storage locations, you can select the preferred backup location.
- Local: Exports file to local storage.
- FTP/SFTP: Provide the required details and click on Backup now to export data to FTP/SFTP storage.
- Google drive: Authenticate your account with Google drive and export.
- Amazon S3: Authenticate your account with Amazon S3 and export.
- Dropbox: Authenticate your account with Dropbox and export.
- OneDrive: Authenticate your account with OneDrive and export.
- Advanced options: Here, you can process the backup in a more advanced way. The options include:
- Compression method: Choose among Zip, Tar, GZip.
- Cleanup by age: Number of days you want to keep the backup.
- Data size limit per request: Defaulted to 50 mb.
- Number of database records per request: Defaulted to 10000 records.
- Number of files to process per request: Defaulted to 1000 files.
- What to Backup?: Here, you can backup WordPress database, files or both.
- Import/Restore : All the import actions and recent restore activities will be shown here.
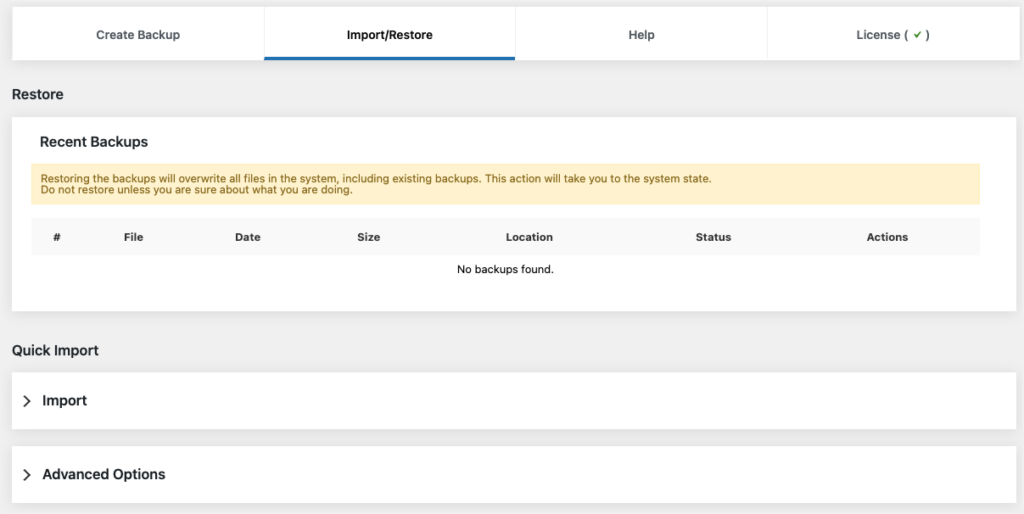
- Restore: Recent backups will be listed here.
- Quick Import: The import actions can be done here. Select the import from locations from:
- Local: Imports file from local storage.
- FTP/SFTP: Provide the required details and click on Import to import data from FTP/SFTP storage.
- Google drive: Authenticate your account with Google drive and import.
- Amazon S3: Authenticate your account with Amazon S3 and import.
- Dropbox: Authenticate your account with Dropbox and import.
- OneDrive: Authenticate your account with OneDrive and import.
- Help : Where the documentation and support page links are available.
- License : Where you can activate the plugin with license keys.
To know more about each section in detail, refer to: Backup and migrate the entire WordPress website.
Settings
In the Settings module, all the basic plugin settings are configured. All the cloud storage connections are established in this module which caters to easy migration.This module has five subsections:
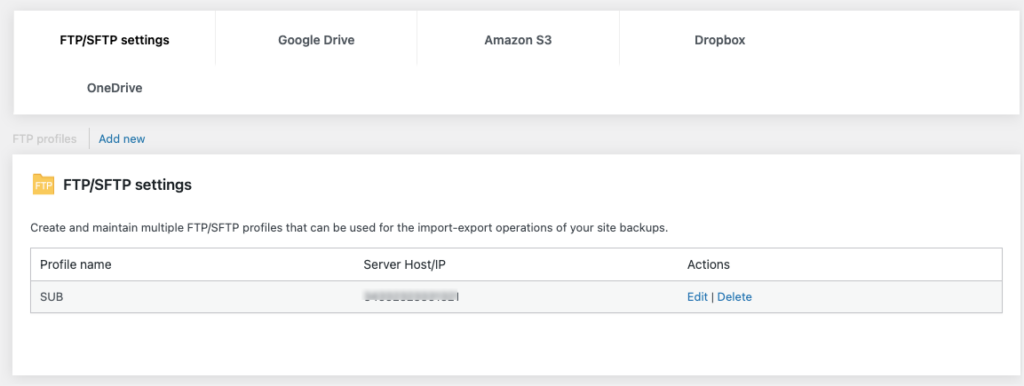
- FTP Settings: Create and maintain multiple FTP profiles. These profiles can be used for import/export of site backups.
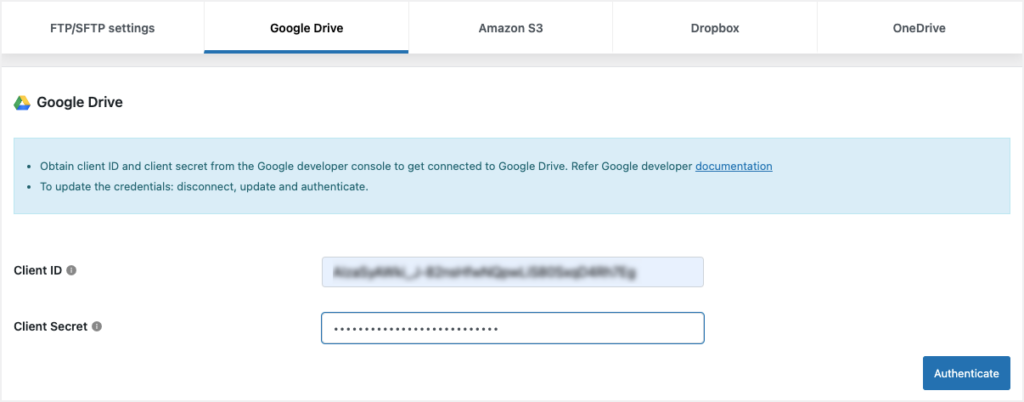
- Google Drive: To get connected, enter the Client ID and Client Secret. These data can be collected from Google developer console.
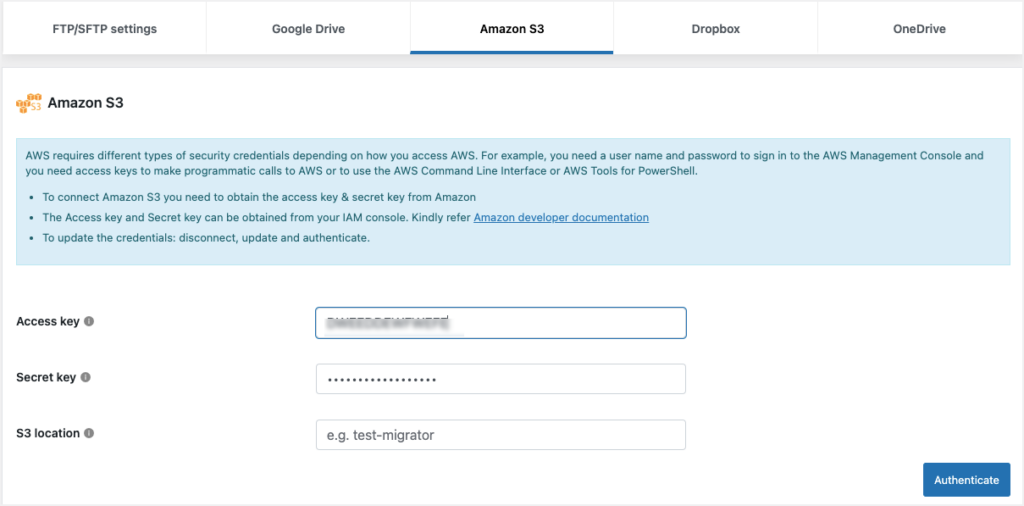
- Amazon S3: To get connected, collect the Access key, Secret key, and S3 location from your IAM console.
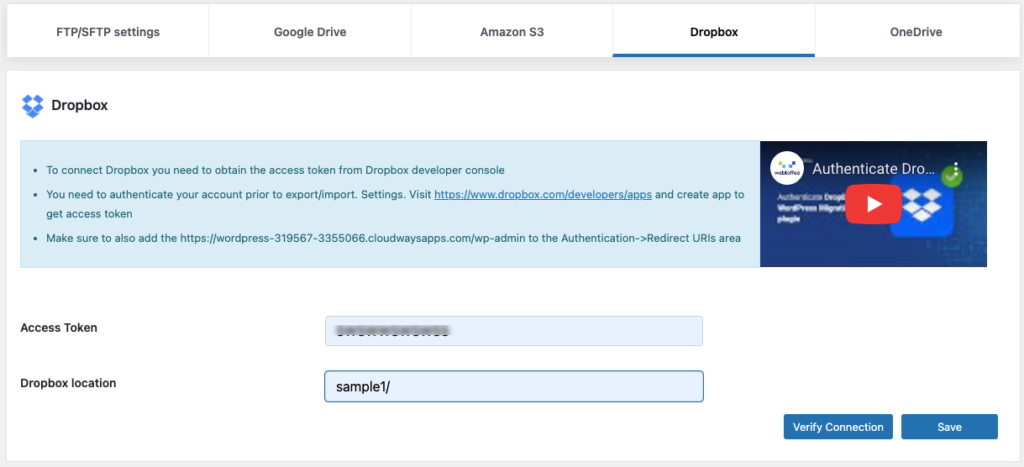
- Dropbox: To get connected, collect the access token and Dropbox location from the Dropbox developer console.
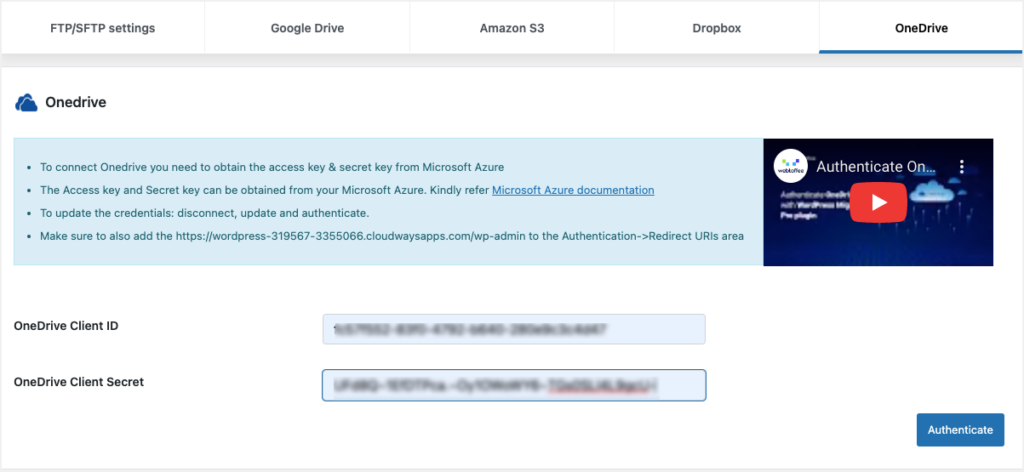
- OneDrive: To establish the connection, collect the OneDrive Client ID and Client Secret value from the Microsoft Azure account. Add the required URI in the redirect URI section of the Microsoft account to update the authentication.
To know more about each section in detail, refer to: Configuring settings and establishing connections.
Logs
To reach the Logs section: Click on the menu: WordPress Migration Pro > Logs
The Logs section lists developer logs mostly required for debugging purposes with the following options:
- View: to view detailed logs.
- Delete: to remove the log.
- Download: to share the log report with the support team in case of issues.

Related articles: