Buy Now Pay Later also known as BNPL is a great payment option to have on your WooCommerce store. It offers a win-win situation for WooCommerce shop owners and customers. Shop owners can increase their sales and conversion rate whereas customers can buy their favorite products without paying upfront.
Apart from a payment option, enabling Pay Later can also be a great sales strategy. It helps in increasing sales and conversion by enabling easy checkout options for your customers. They can place an order without entering any credentials or payment details. Customers can also choose interest-free equated monthly installment (EMI) plans that enable them to pay a specific amount monthly.
What are the Benefits of PayPal Pay Later in WooCommerce?
Now let’s see in detail what are the major benefits of having PayPal Pay Later on your WooCommerce store.
1. Improve sales
Enabling Pay Later on your WooCommerce store will increase sales and conversion rate. You can extend your services to more customers by letting them pay in partial amounts or EMIs. This helps those customers who can’t afford to pay the full amount upfront especially when you are selling expensive products.
2. Faster checkout
Pay Later also helps in enabling a faster checkout process on your WooCommerce store. Customers need not enter any credentials, this simplifies the checkout process resulting in a faster checkout. The faster the checkout process is the lesser the chance for cart abandonment. So enabling Pay Later can also help in reducing cart abandonment.
3. Push Customers to spend more
You can upsell products on your store by enabling Pay Later on WooCommerce. Let’s say you are selling Apple AirPods and AirPods pro on your WooCommerce store for $99 and $199 respectively. When someone came looking for the $99 priced regular AirPods you can push them to purchase the more superior AirPods Pro for $199 with Pay Later options. This way you can double the cart value.
4. Reduce payment fraud risk
PayPal Pay Later can reduce the payment fraud risk on your WooCommerce store. Customers do not have to pay anything or enter any payment information to place an order. This reduces the payment-related security risks on your eCommerce store. Also, PayPal is a secured payment gateway using SSL protocol with 128-bit encryption.
5. Customer loyalty
You can build customer loyalty by making them eligible for Pay Later options. This builds trust among your customers and they keep buying products from your store. They will often use the Pay Later options to reduce the burden of paying a huge amount upfront.
6. Attracts new customers
Enabling Pay Later not only keeps your existing customers satisfied but also attracts new customers to your store. Pay Later gives you an edge over your competitors, as customers love credits and EMI options. This way you can attract new customers to your store and keep them satisfied.
With that being said, let’s see the step-by-step process to enable PayPal Pay Later on your WooCommerce store.
Before we begin you should be aware that PayPal Pay Later is restricted to the following countries. Australia, France, Germany, Italy, Spain, United Kingdom, and United States. Make sure you meet the requirements of your country to be eligible for Pay Later.
Let’s see what are eligibility requirements for the United States.
- Should be a US-based PayPal merchant
- Have a US-based website.
- All transactions should be in US dollars (USD).
- Have one-time payment integration.
- Abide by the PayPal Acceptable Use Policy.
- Shouldn’t edit Pay Later messages with additional content, wording, marketing, or other materials.
Now that you are aware of the eligibility requirements, let’s proceed:
- Plugin installation
• Open your WordPress dashboard.
• Go to Plugins > Add New.
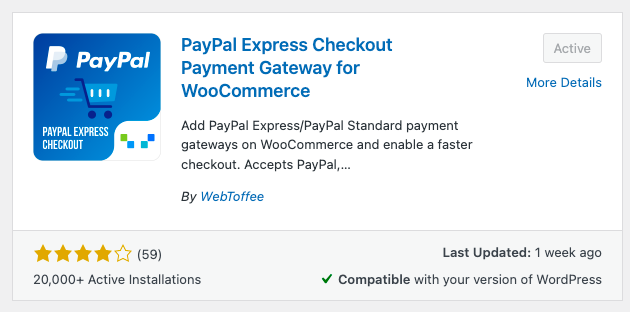
• Search for the PayPal Express Checkout Payment Gateway plugin.
• Install and Activate the plugin. - Connecting with PayPal
• Go to paypal.com and log in to your business account.
• If you don’t have a business account, click Sign up to create one.
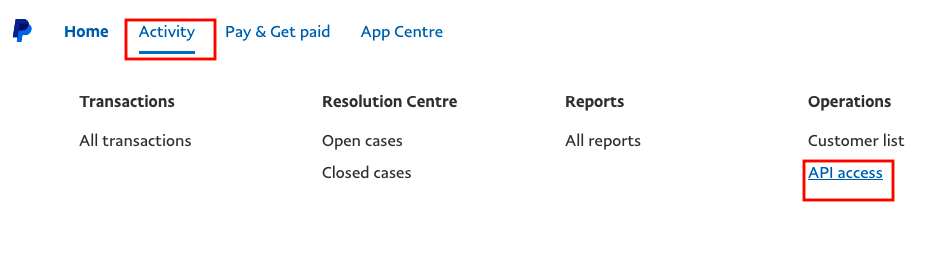
• After logging in, select API Access under the Activity tab.
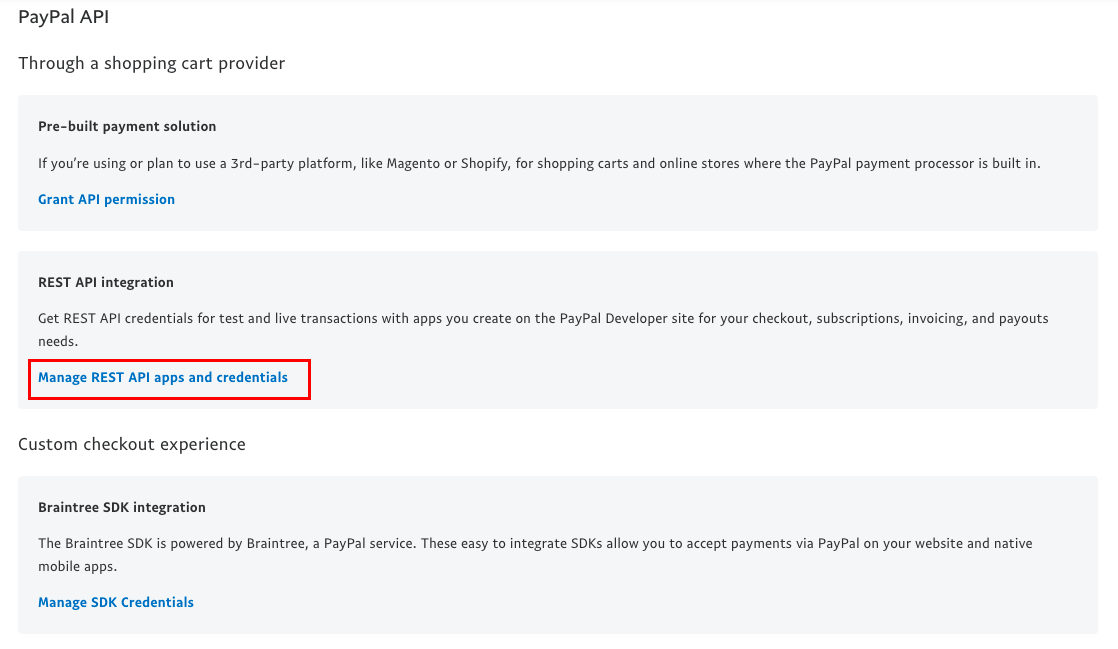
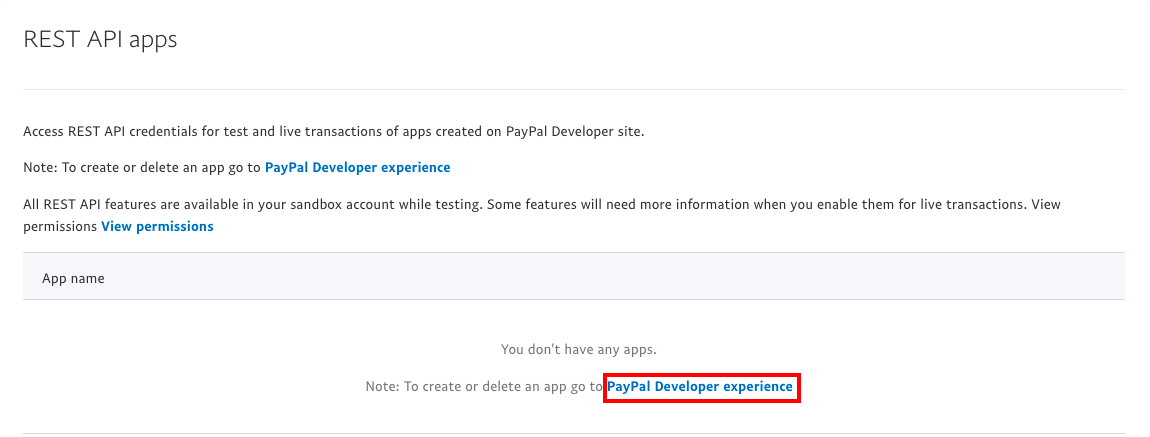
• Scroll down to REST API integration and click Manage REST API apps and credentials option from PayPal API options.
• Click on PayPal Developer experience to connect your shop with PayPal.
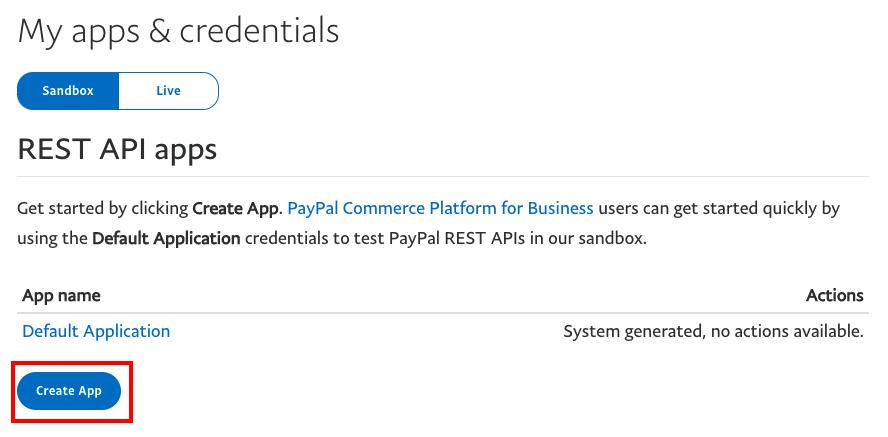
• Choose from Sandbox mode or live mode. For this article, I will be using a sandbox account.
• Click Create App to proceed.
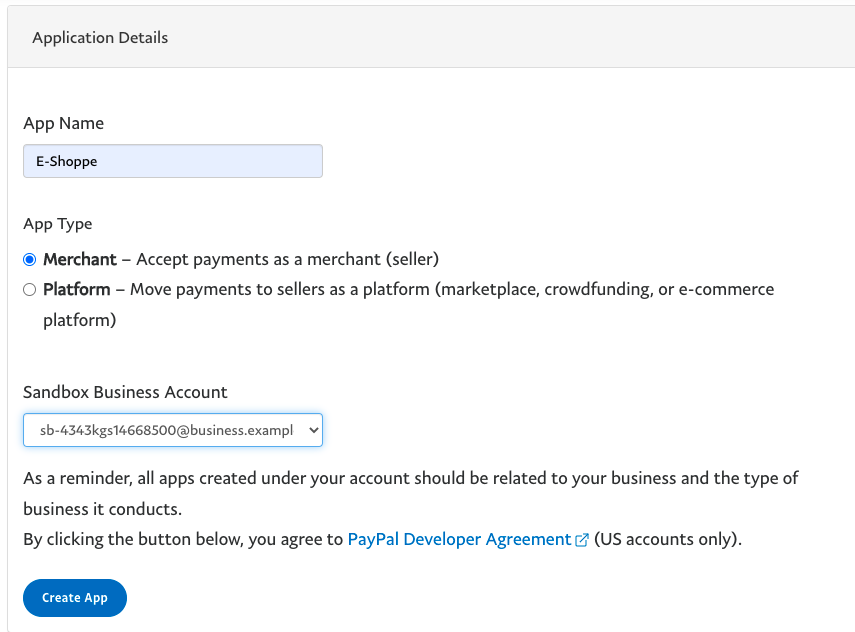
• Enter an App Name.
• Select Merchant as App type to accept payment as a seller.
• Click Create App to complete the setup.
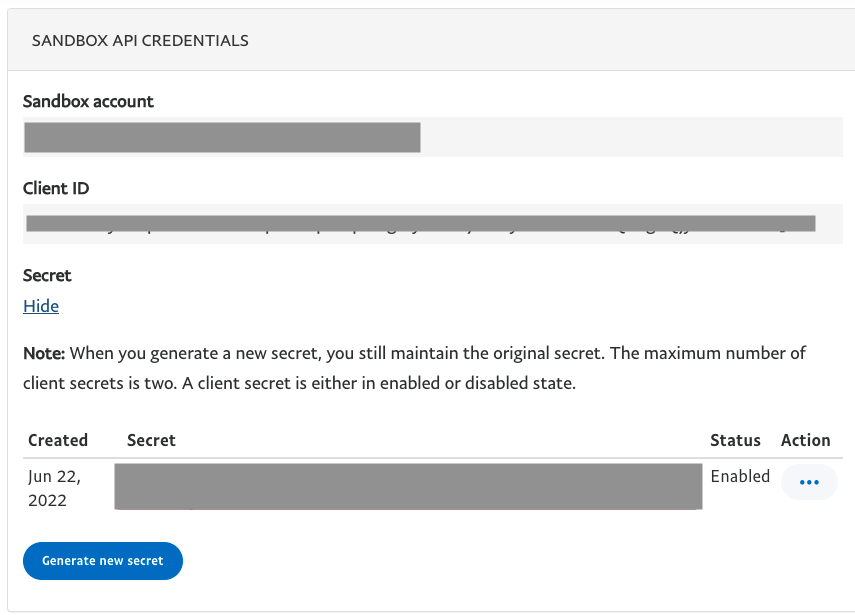
• You will be taken to the Sandbox API credentials page. There you can see your Sandbox account along with Client ID and Secret.
• The secret key is hidden click on Show to reveal.
• Copy the Client ID and Secret, we need to add these credentials to our WooCommerce payment options. - Configure PayPal credentials
• Go to WooCommerce > Settings on your WordPress dashboard.
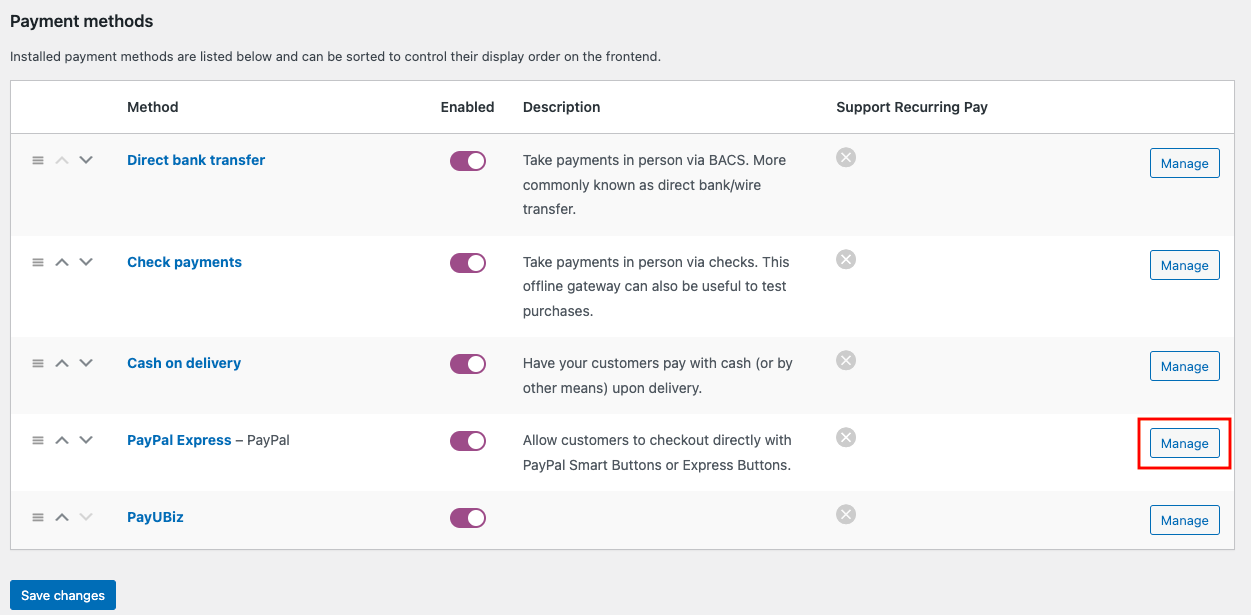
• Select the Payments tab and enable PayPal Express.
• Click on Manage to configure the PayPal payment gateway on your WooCommerce store.
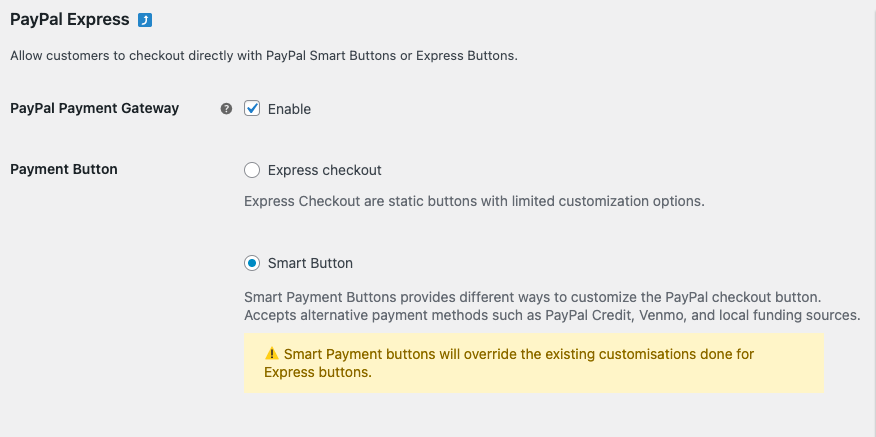
• Enable the PayPal Payment Gateway checkbox.
• Select Smart button as the Payment Button.
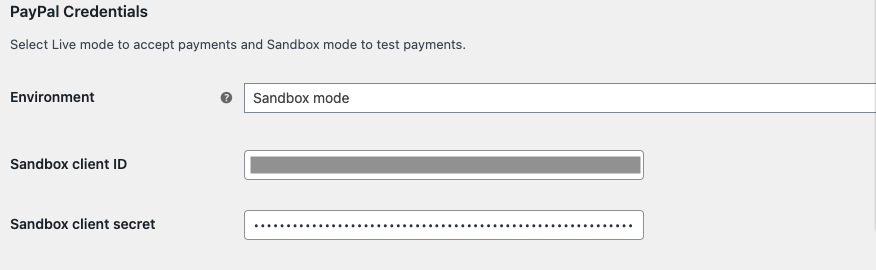
• Scroll down tothe Environment optionand select Sandbox mode for testing the payment and Live mode for accepting the payment.
• Enter the Client ID and Secret in the provided fields.
• Scroll down to the bottom and click Save changes to apply the settings. - Testing the payment
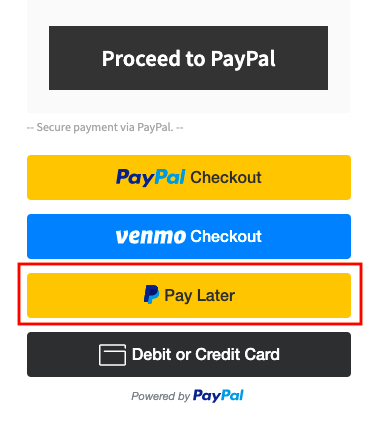
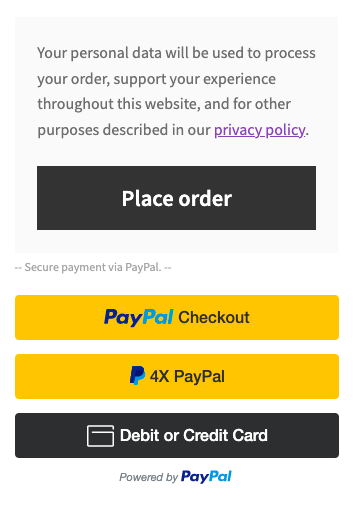
Go to any product page on your WooCommerce store and proceed to checkout.
You can see the Pay Later button on the checkout page.
In some countries, users can see a 4x PayPal button that allows them to pay the bill amount in four equated installments.
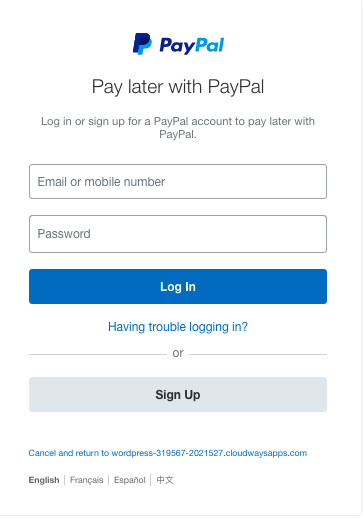
On clicking Pay Later you will be directed to the PayPal login page.
Log in with your credentials.
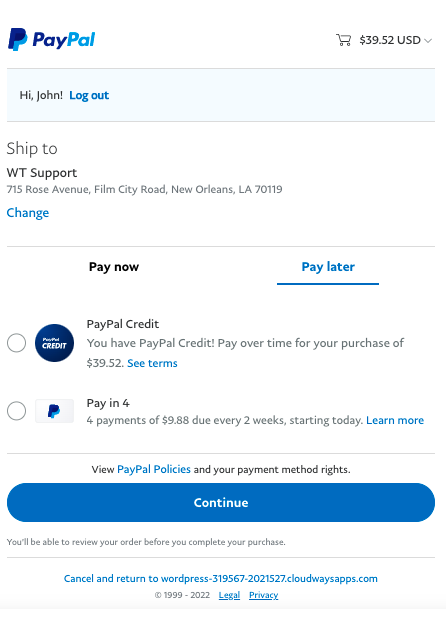
Select the Pay Later option and choose your Pay Later method.
You can choose from PayPal Credit or Pay in 4 installment options.
Click Continue.
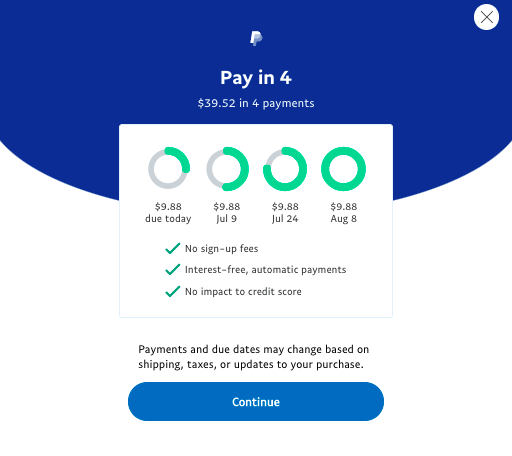
The total amount will be divided into 4 payments.
Click Continue to proceed.
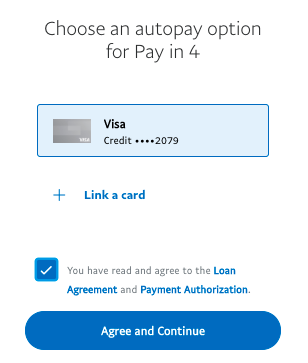
Link your card for enabling the auto-pay option for installments.
Click Agree and Continue.
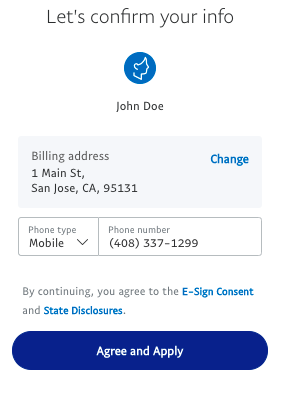
Confirm your billing address and Click Agree and Apply.
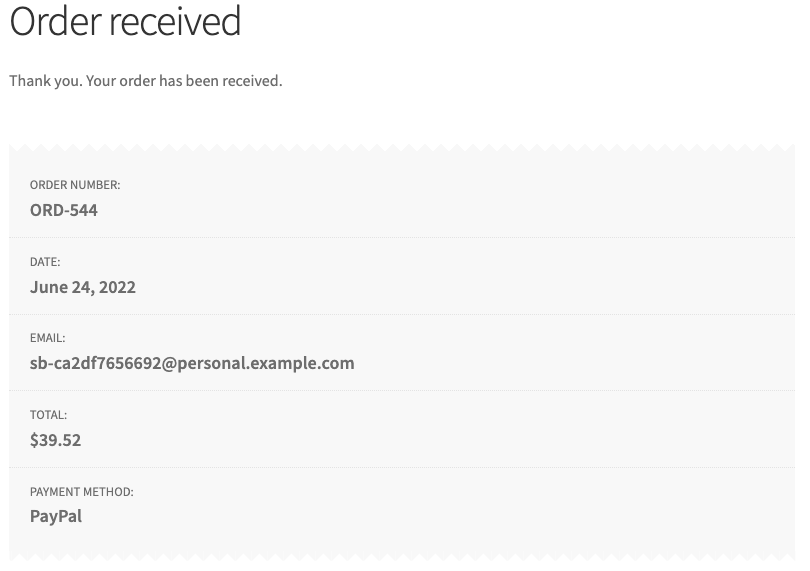
Click Continue to confirm the order.
Your order will be placed and you will be directed to the confirmation page.

Summing Up
There are many other payment gateway options available for WooCommerce that support Pay Later. However, PayPal has global acceptance and accepts international payments seamlessly. The plugin mentioned in this article also helps you to enable smart checkout options like location-based payment methods and other user-specific payment options.
Hopefully, this article has helped you set up PayPal Pay Later options on your WooCommerce store. Do let us know your thoughts below.
Also Read: How to fix Unpaid Order Cancelled – Time Limit Reached error in WooCommerce?


Comments (2)
Stan
August 2, 2022
How can I get the estimated payments, broken into 4 installments, to show on the product page above the “Add to Cart” button? (We have WP, Woocommerce and Elementor installed on our site.) Thanks!
Mark
August 29, 2022
Hi Stan,
We understand your requirement. However, since the Pay in 4 options is provided by PayPal itself after verifying user eligibility, it cannot be show on the product page. It is loaded by PayPal itself once redirected into the PayPal page.