The Import Export Suite for WooCommerce Plugin helps you to import and export multiple post types from one online store to another. You can either import the data directly into the store or schedule the action for later.
Steps to schedule import
To schedule the import:
- Navigate through WebToffee Import Export (Pro)> Import.
- To initiate import, select the required post type.
- Select the import method and map the import columns.
- On reaching step 4, click on Import/Schedule button.
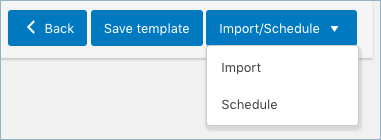
- On clicking the Schedule option, the cron schedule window will appear on the screen.
Types of cron schedulers
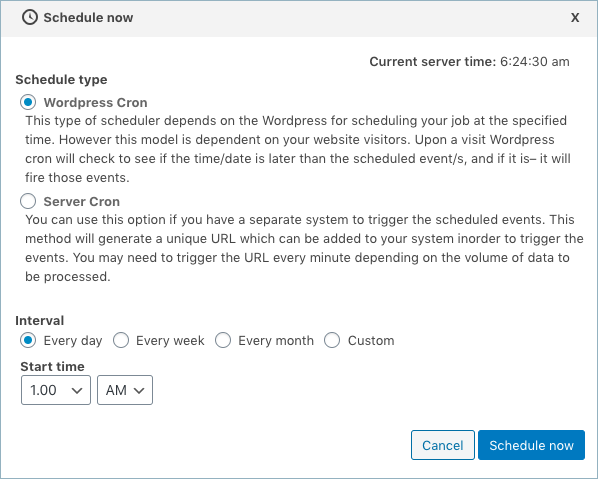
The plugin supports two different schedule types:
- WordPress Cron: Upon a visit, WordPress cron will check to see if the time/date is later than the scheduled events, and if it is– it will fire those events. You can use this option as it:
- schedules your job at the specified time.
- is dependent on your website visitors.
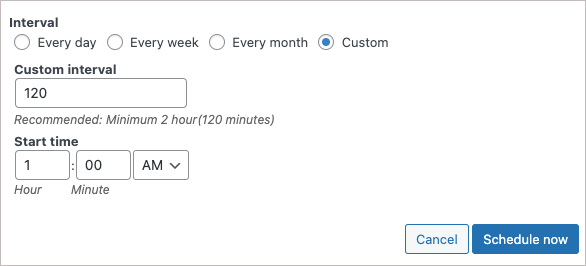
On setting the interval as custom, you will have to set the custom interval option in minutes as shown below.
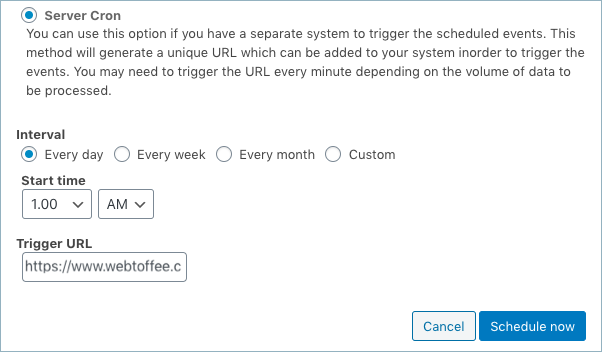
2. Server Cron: Depending on the volume of data to be processed, the URL may need to be triggered every minute. You can use this option :
- to generate a unique URL, that can be added to your system in order to trigger the events.
- if you have a separate system to trigger the scheduled events.
Also, the import/export can be scheduled on a daily, weekly, monthly, custom basis. You can also configure the time at which the import has to be scheduled.
- Click on Schedule now to finish.
Related articles:
Andrew
March 11, 2024
Hello, I emailed support without hearing back. I am trying to automate our CSV import, but I don’t have a way to get the updated cron link which seems to change after every use. Is the URL link supposed to be static? An email would be great.
Hema
April 2, 2024
Hello Andrew,
Thanks for reaching out. Our customer support team couldn’t find your email. Kindly contact the customer support via this link to get your issue resolved.
meriem
September 9, 2021
hello ,
it have been one moth that i’m trying to do schedulede to my csv file but it did not work for me .
i need your help to fixe the problem please
Mark
September 14, 2021
Hi,
Please reach us via support.