GrabPay is a payment method developed by Grab. GrabPay is a digital wallet – customers maintain a balance in their wallets that they pay out with.
In order to pay with GrabPay, customers are redirected to GrabPay’s website, where they have to authenticate the transaction using a one-time password. After authenticating, customers will be redirected back to your website.
Grabpay supports payment in SGD, MYR.
Stripe accounts in the following countries can accept GrabPay payments with local currency settlement.
- Malaysia
- Singapore
Settings: Grabpay
- Firstly, install and activate the Stripe Payment Gateway for WooCommerce plugin.
- From the WordPress dashboard, go to WebToffee Stripe > General Settings > Local Gateways.
- Head on to GrabPay.
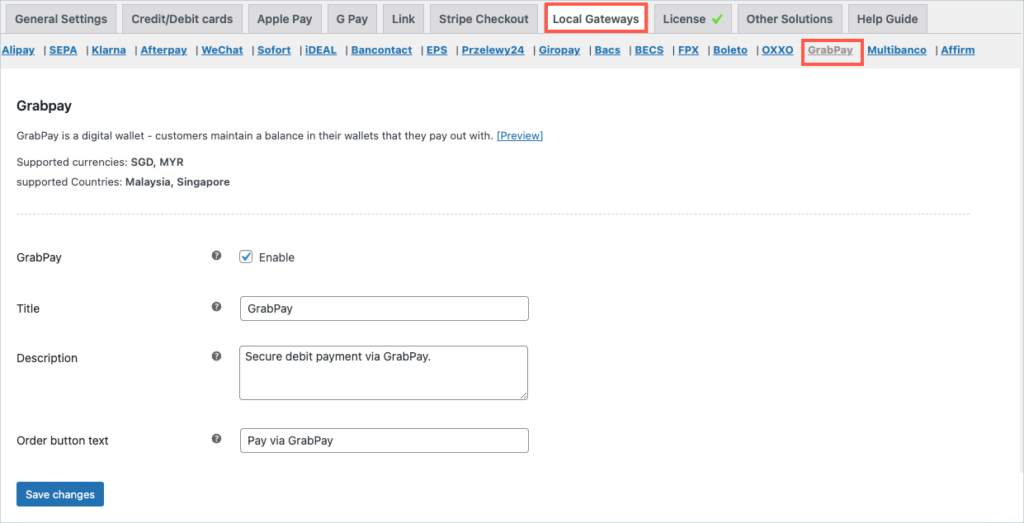
- GrabPay: Enable to accept payments through Grabpay.
- Title: Enter a custom title for GrabPay. This title will be visible on the checkout page.
- Description: Enter a custom description for GrabPay payment. This description will be visible on the checkout page.
- Order Button Text: Enter a custom text to be displayed on the payment button.
Finally, click on the Save changes button to update the plugin settings.
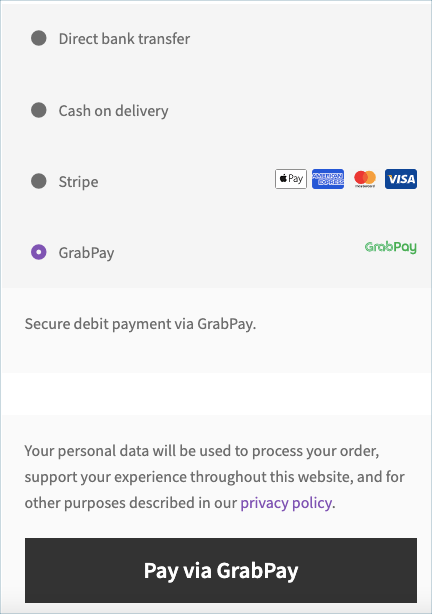
Pay with GrabPay
- Customers pay with GrabPay by redirecting to the GrabPay website to authorize the payment.
- After that, they will automatically be redirected back to the website. You will get immediate notification on whether the payment succeeded or failed.