Due to its convenience, availability, and speed, online shopping has gained enormous popularity over the past decade. Consumers can now purchase peacefully in the comfort of their own homes without any hassle. Online shopping stores are becoming more and more common.
Online shopping has become commonplace, which makes starting an E-commerce venture or taking your business online a good idea. The hard work is behind you if you’ve already established a WordPress website and added the WooCommerce plug-in. Next, you can upload your digital products like audio/video files or pdf files into WooCommerce and advertise them to your customers.
If you’ve just launched a WooCommerce store, or you’d like to accelerate the process of uploading products to your existing store, learning how to import products is crucial. Bulk product imports save you a great deal of time, as well as minimize human errors.
In this article, we provide you with two ways to import WooCommerce products with a CSV file,
- Using the built-in product importer of WooCommerce;
- Using a third-party plugin;
When importing your digital goods, WooCommerce’s inbuilt importer will do the job, but if you want more flexibility and advanced options, you can use the Product Import Export plugin for WooCommerce by Webtoffee.
Before we hop into that, you must have a product CSV file before we begin. For users who want to migrate their digital products to another site, you can export your WooCommerce products to a CSV file. Once you have the product CSV file, you can start importing WooCommerce products to your store.
Let’s get started!
What are CSV files?
The Comma-Separated Values (CSV) format is a plain text file that contains comma-separated data. CSV files are commonly used for exporting and importing complex data between applications.
WooCommerce also has a built-in product CSV importer, and both WordPress and WooCommerce provide full support for exporting and importing data in the CSV format. This implies that you may use a single CSV file to import, export, and update all of your products.
Additionally, if you’re switching from another e-commerce platform, CSV files may be helpful. You may frequently export your whole product catalog as a single CSV file, depending on your current platform. Then, you can upload this file to your brand-new WooCommerce store to get completely stocked shelves right away.
For a flawless import, the CSV file needs to be UTF-8 encoded. Learn how to save a CSV or Excel file in UTF-8 encoded.
You can import WooCommerce digital products from one site to another using the built-in feature of WooCommerce.
Let’s go over the procedure step-by-step.
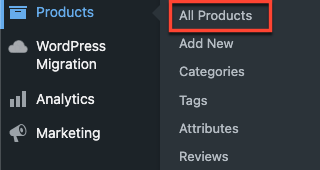
Step 1: Navigate to Products
From your WordPress dashboard, Go to Products > All Products
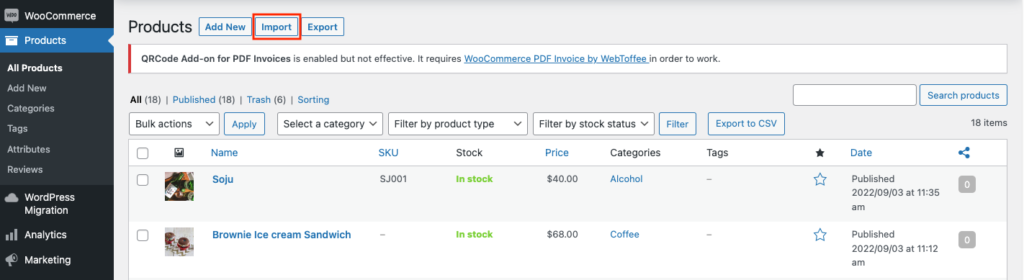
Click on the “Import” button near Products.
Step 2: Upload CSV File
To import your digital products into your WooCommerce store, upload your CSV file in this step. Additionally, it enables you to update existing products if necessary.
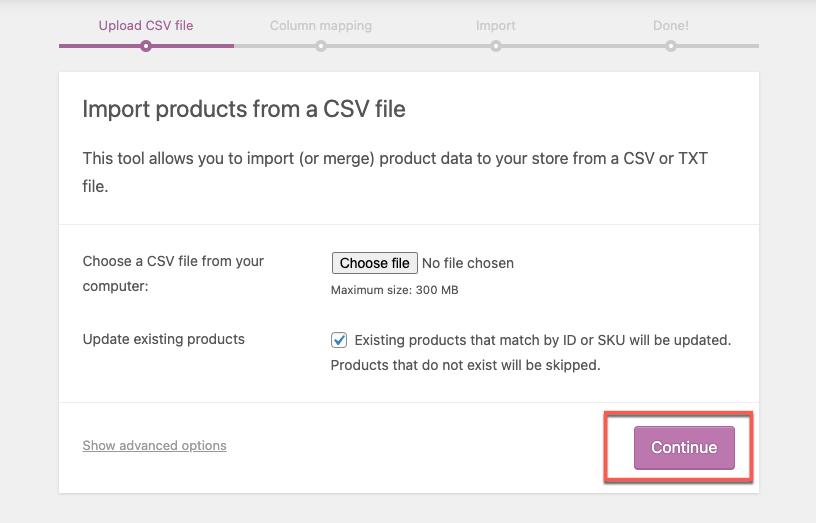
Once you have chosen a CSV file to upload, click Continue to proceed.
Step 3: Map CSV Fields to Products
Choose which fields in your CSV file to ignore and map to the fields in the CSV with that in your WooCommerce store.
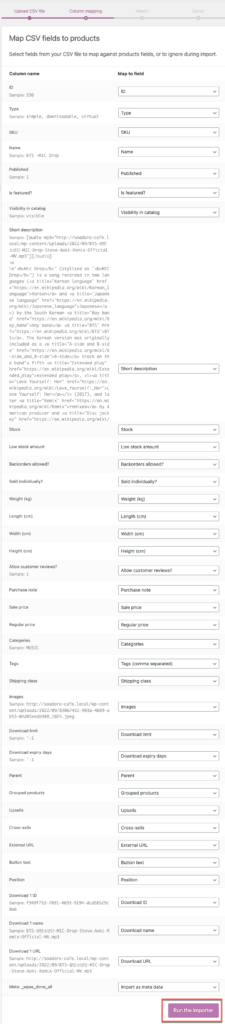
If you are happy with the options, click Run the importer button.
Digital products will be imported into your WooCommerce Store.

To import WooCommerce digital products using the plugin, simply follow the instructions listed below.
Step 1: Install the Plugin
From the WordPress dashboard, go to Plugins > Add New.
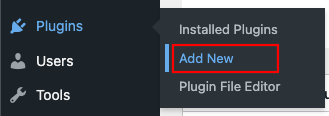
Enter the search term “Product import” in the search box on the Add Plugin page. From the results, install and activate the Product Import Export plugin as shown below.
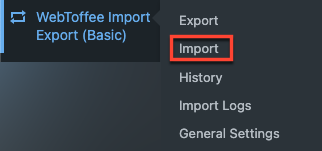
Step 2: Navigate to the Webtoffee Import Export (Basic)
From the WordPress dashboard, click the Import under the WebToffee Import Export (Basic) option in the menu bar.
Step 3: Choose the Post Type as Product
You will be taken to a window where you can select the post type as ‘Product’ when you click the import menu.
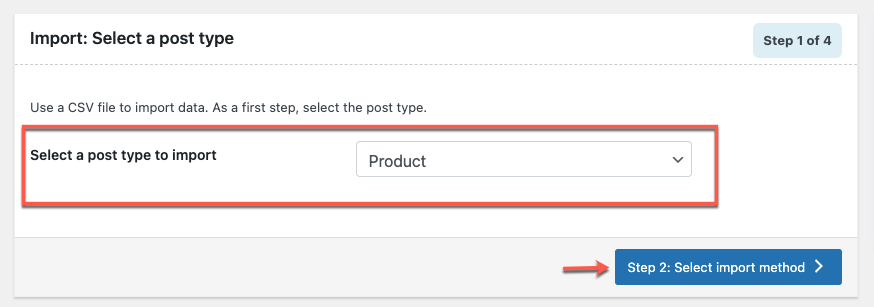
After the post type selection, click on the Step 2: select import method button.
Step 4: Select an Import Method
You can import products using the plugin’s two methods: Quick import and Advanced import.
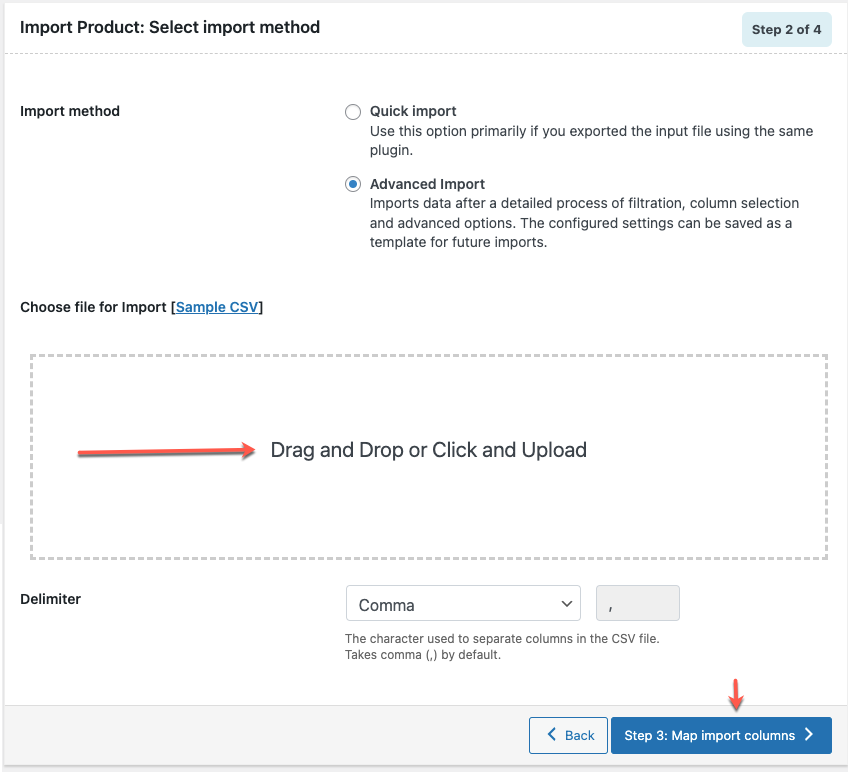
We’re using the advanced import option because it offers filters and customizations for selective import. You can reference the plugin documentation to learn more about the various import techniques.

If you want to try with a sample CSV file – you can directly download the sample CSV files placed near the Choose file for Import.
To import the CSV file, you need to upload it from your local computer.

After uploading, click on Step 3: Map Import Columns button.
Step 5: Map Import Columns
The import mapping feature lets you map the column headers in the CSV file to the WooCommerce product data fields. If you are importing from a different eCommerce platform, such as Magento, Shopify, etc., then the mapping section is crucial.
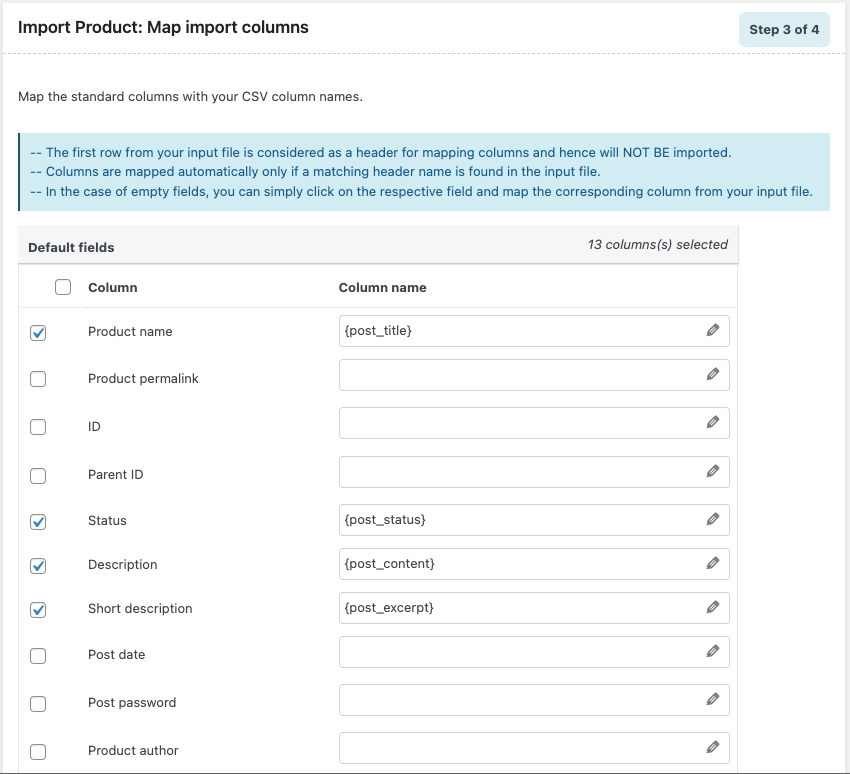
Once you have mapped the CSV file, you need to move on to the next and final step of the importing product by clicking on Step 4: Advanced option/batch import button.
Step 6: Import Products
The plugin offers you some critical import options in this phase. It includes,
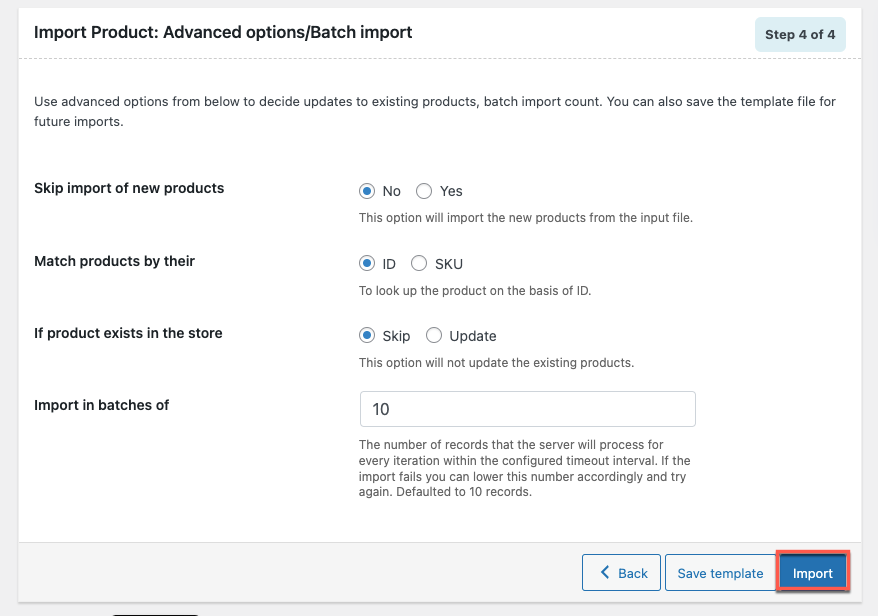
- Update existing products in your store
- Import new products
- Set up the batch count for batch import
After finishing, you can save the import template for later use in future imports. You can now click the Import button to start the process. All the digital products in the CSV will begin to be imported and appear in your WooCommerce store.
In the free version of the plugin, you can avail of the following features.
- Import and export simple, grouped, external/affiliate products.
- Import and export products by category, tags, etc.
- Export and import selected products
- Update products in bulk
For accessing advanced features such as;
- Import and export variable, subscription, and custom product types
- Automated scheduled import export
- Variable and custom product type support
- XML, TSV, and Excel file type support
Upgrade to the premium version of the Product Import Export Plugin for WooCommerce.
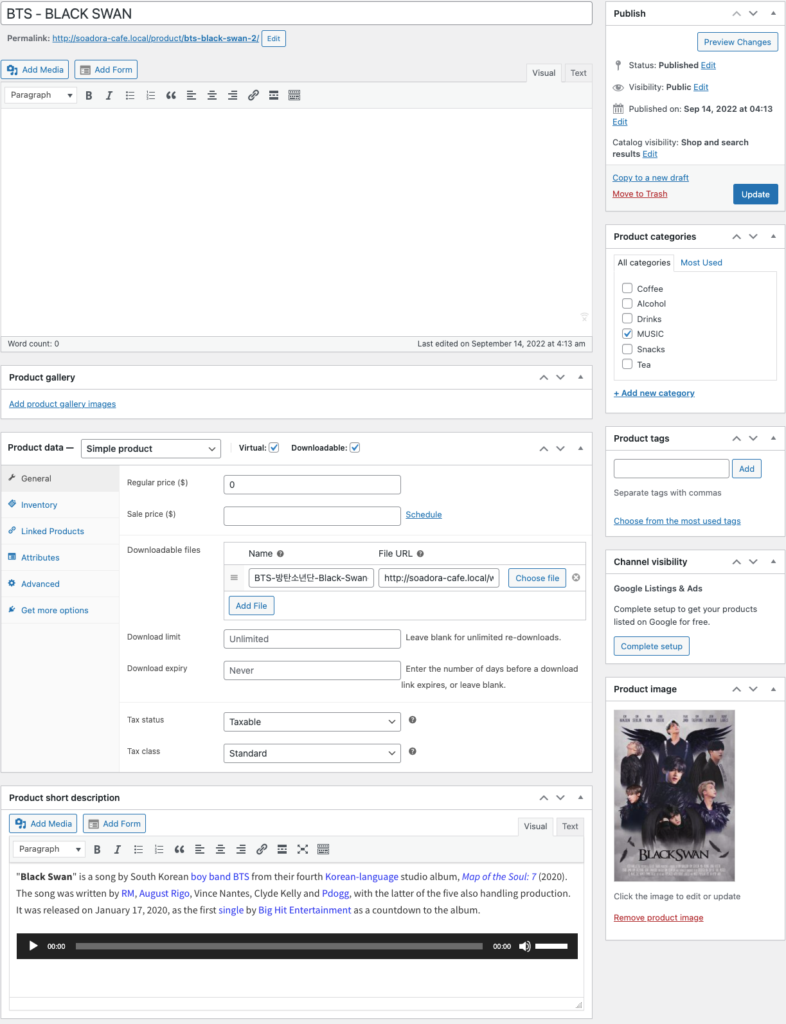
Sample Digital Product Imported Using CSV
As instructed in the CSV, the sample digital product—the Music File—is imported into WooCommerce.
Wrapping Up
In conclusion, adding products is one of the time-consuming chores of setting up an online business, particularly if you sell a variety of goods. But you can fill those shelves quickly with the aid of Comma-Separated Value (CSV) files.
The good news is that WooCommerce gives you a few options to import your products and save a lot of time. However, Importing, exporting, and updating products are common activities for online stores. A reliable solution will significantly reduce your workload when it comes to the process.
Hope this post helped you with it and pointed you in the right way.