This article explains in detail how to add Klarna payments to WooCommerce for free. We will be using the WooCommerce Stripe Payment Gateway plugin for the purpose. If you aren’t familiar with Klarna payments, read this article to learn more. By the end of this article, you will be able to add Klarna payments to your WooCommerce store.
Klarna is one of the smoothest and smartest payment processes for online storefronts. It offers interest-free installment options and pay-later options for your WooCommerce store. You can provide a range of payment options for your customers with Klarna.
Especially with Easy Installments and Pay Later options, you provide your customers with the option to buy their favorite products, even if they aren’t able to pay for them in full. They can take advantage of the Buy Now, Pay Later (BNPL) option and pay the amount later after purchase.
What are the payment options available with Klarna?
Klarna payment offers four payment options for your customers based on the customer’s country and the transaction amount. For each payment option, Klarna pays the full amount to you and handles the collection process from your customer. Following are the payment options available with Klarna.
- Installments – Your customers can pay the full amount in 3 or 4 installments which is completely interest-free.
- Pay later – Your customer pays the full amount 30 days after the purchase.
- Financing– Your customers can split the amount for multiple months and pay with interest. This method requires a credit check on your customers.
- Pay Now – Directly pay the full amount at the time of purchase using credit or debit cards.
The above options are available based on your customer’s country and the transaction amount.
Listed below are the different payment options available in different countries.
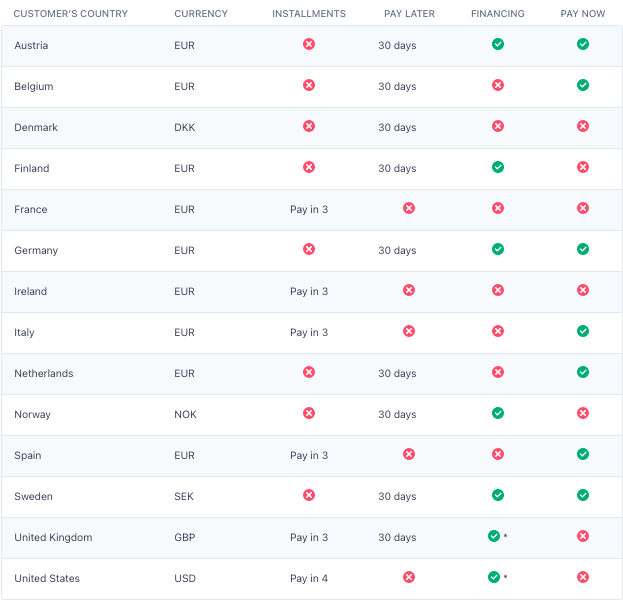
Credits: Stripe documentation
The following steps will guide you through adding Klarna payments to your WooCommerce store. We will be using the Stripe Payment Plugin for WooCommerce by WebToffee to add Klarna payment options.
- Installing the Stripe payment plugin for WooCommerce
• Open your WordPress dashboard.
• Go to Plugins > Add New.
• Search for the ’Stripe Payment Plugin for WooCommerce’ by WebToffee.
• Install and activate the Plugin - Connecting with Stripe
• First, you have to create a Stripe account. If you already have a stripe account, log in using the credentials and obtain the API keys.
• Now navigate to WebToffee Stripe > General Settings on your WordPress dashboard.
• Choose a Transaction mode under Stripe Credentials. Select Test mode if you want to test the payment, or go for Live mode to activate the stripe payment live.
• Let’s select Test mode here. Enter the publishable key and the secret key you obtained from Stripe API settings.
Leave the rest as default and click on Save changes. - Enabling Klarna payment
• Go to WebToffee Stripe > Local Gateways > Klarna.
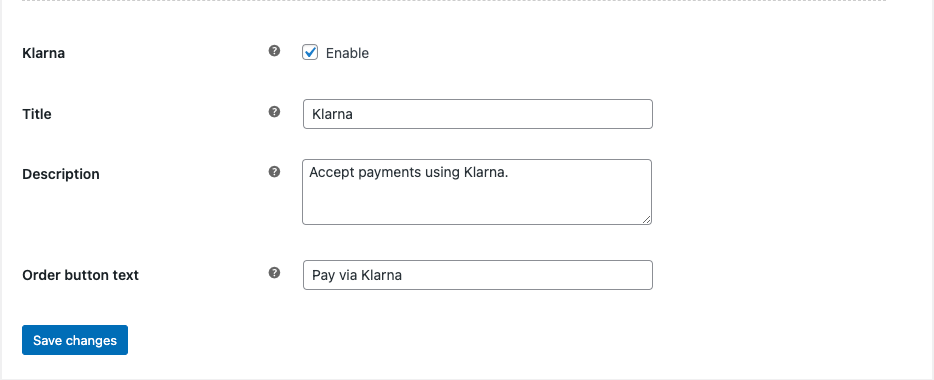
• Enable the Klarna checkbox to accept Klarna payments.
• Enter a Title and Description for the Klarna payment. The title and description will be visible on the checkout page.
• Add a button text for the Klarna payment button.
• Click on Save changes. - Testing Klarna payment
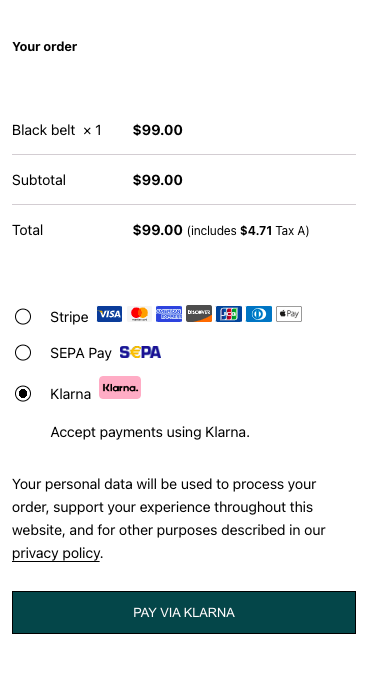
Add any product to your cart and proceed to checkout.
There you can see the Klarna payment option.
Select the Klarna payment option and click on the PAY VIA KLARNA button.
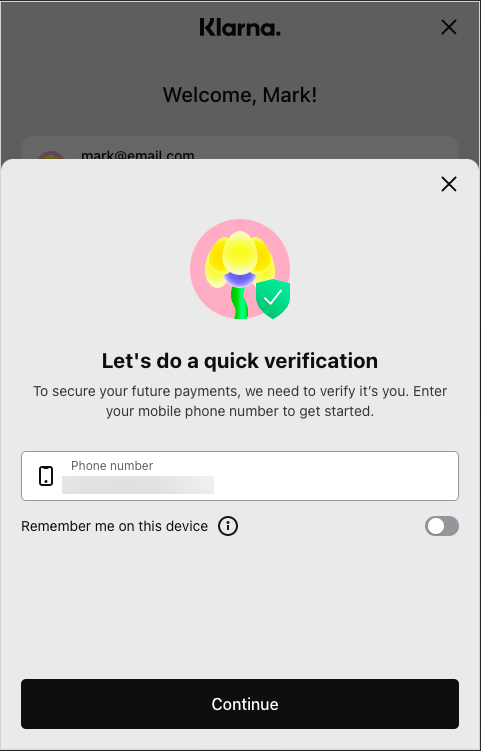
Enter your mobile phone number and verify the payment process.
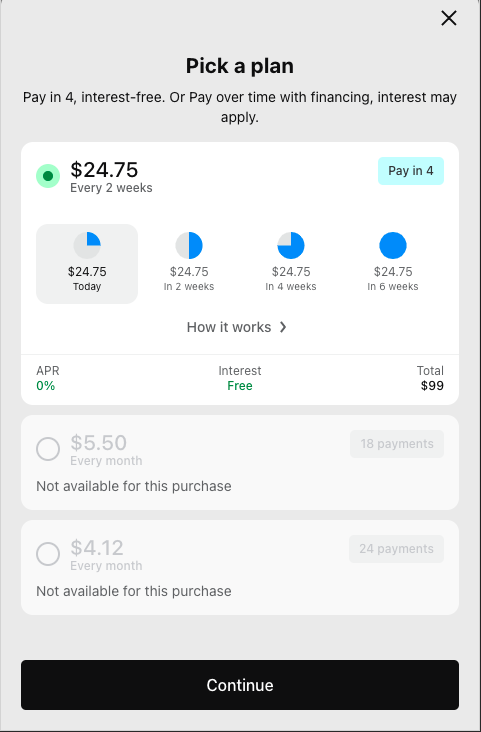
Pick a plan of your choice. The plan will be provided based on customer location and the transaction amount.
As you can see, here the only available payment option is Pay in 4.
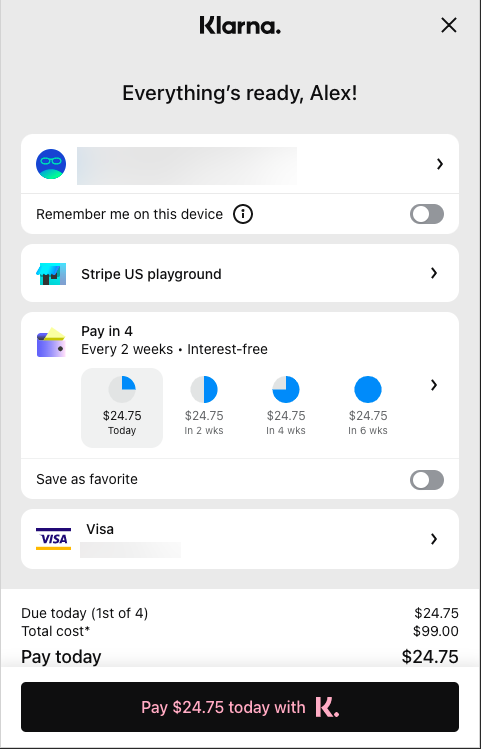
The total bill amount of $99 will be split into 4 interest-free installments which means $24.75 per installment.
Click on Continue to complete the payment.
Now you have to pay the first installment. Enter the card details and proceed to pay.
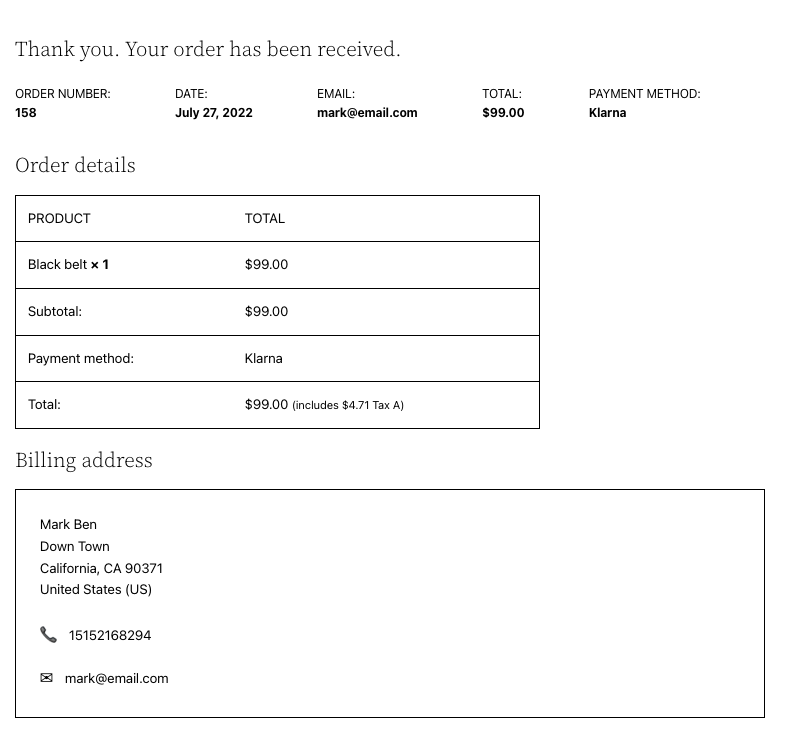
Your order will be placed, and you will be taken to the order confirmation page.
Benefits of adding Klarna payment to WooCommerce
As we said Klarna payment is one of the smoothest and smartest payment options for your WooCommerce store. It lets you give multiple payment options to your customers.
Now let’s see what are the benefits of adding Klarna payment to WooCommerce.
Increase sales
By giving pay-later and installment options on your WooCommerce store, you can allow your customers to purchase their favorite products even if they’re short on money.
Faster checkout
Klarna payments will simplify the checkout process by reducing the number of clicks. Your customers don’t have to enter any card details during checkout.
Evaluations
With Klarna, you can measure and evaluate improvements in real-time to ensure you get the best conversion from day one.
Summing up
Klarna payment enables your customers to purchase products with Buy Now, Pay Later, or Easy Installments options. This way you increase sales in your WooCommerce store. When adding payment options to your WooCommerce store you should consider your customers.
Please note that Klarna payment is only available in certain countries and not all the payment options are available in these countries.
The WooCommerce Stripe plugin we mentioned in this article also has a premium version with support for recurring payments. You may also be interested in reading our article on how to set up stripe checkout in WooCommerce. The plugin also lets you add other payment options like Apple Pay, Google Pay, SEPA, WeChat Pay, etc.
Was this article helpful? We would like to hear from you. Please share your feedback in the comments section.
