
Wondering how to enable smart checkout options in your WooCommerce store? Well, we are here to help you. Smart checkout is a better way of checkout option that allows you to offer faster checkout in your WooCommerce store with secure payment gateways and user-specific payment methods.
In this article, we will discuss smart checkout options for WooCommerce. Before we begin, let’s see what are the benefits of the smart checkout option in your WooCommerce store.
Benefits of having smart checkout in WooCommerce
- Faster checkout: Smart checkout simplifies the checkout process by reducing the number of clicks.
- Reduce cart abandonment: If you have faster checkout options in your WooCommerce store, the chances for cart abandonment are less.
- Increase customer experience: A smart button offers a better user experience when compared with the traditional checkout options.
- Secure payment: Using secured payment gateways will reduce the security risks while paying.
- Creates trust: When you offer safe and secure payment options in your WooCommerce store, your customers will feel safe and trust you.
- Alternative payment methods: Accepts alternative / local payment methods like Giropay, EPS, etc., based on buyer country.
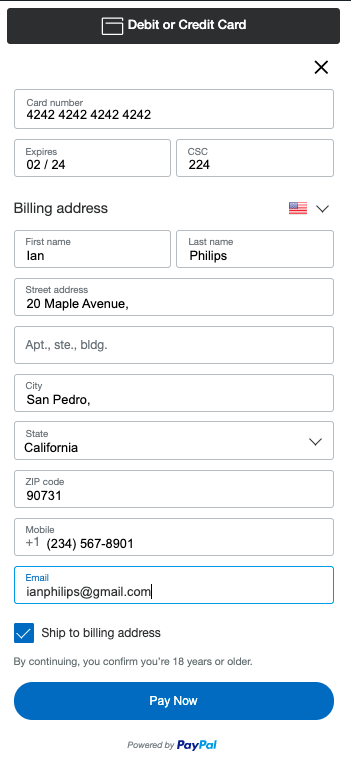
- On-site card payment: Customers can pay using Debit or Credit cards without leaving the site.
Steps for enabling smart checkout in WooCommerce
Step 1: Plugin Installation
Go to Plugins > Add New in your WordPress dashboard.
Search for PayPal Express Checkout in the plugin directory.
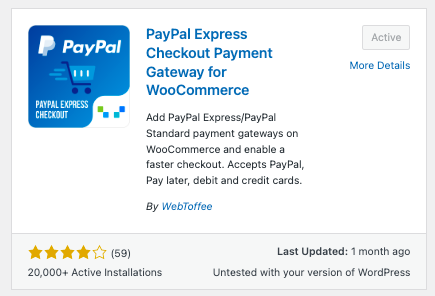
Install and Activate the plugin.
The plugin also has a premium version for $59.
Step 2: Creating PayPal credentials
Log in to your PayPal account.
If you don’t have an account Sign up for a new account.
After signing up, go to the Activity tab and select API access or from Account Settings > API Access.
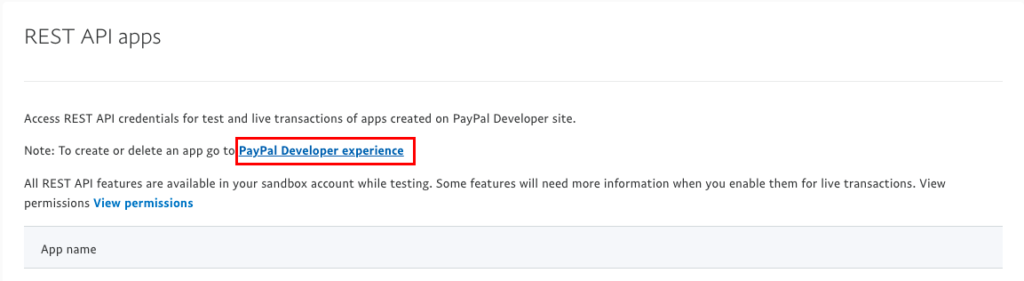
Select Manage REST API apps and credentials from the Rest API integration option.
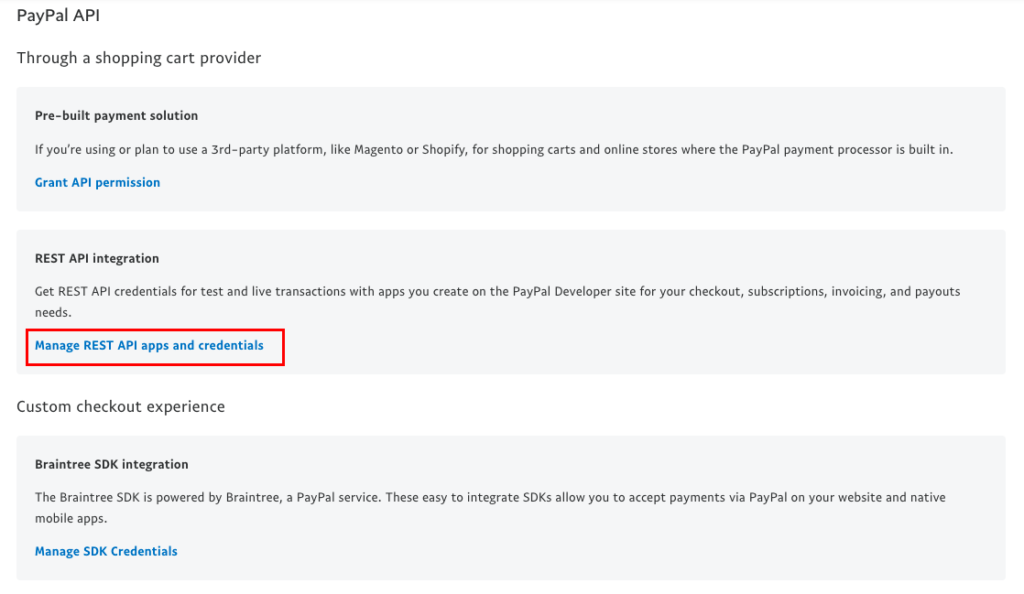
Click PayPal Developer experience to create an app for getting a client ID.
Enter an App Name and select App type as Merchant. In this article, we will be using a Sandbox account.
Click on Create App.
Click on Show under Secret to view the Secret key.
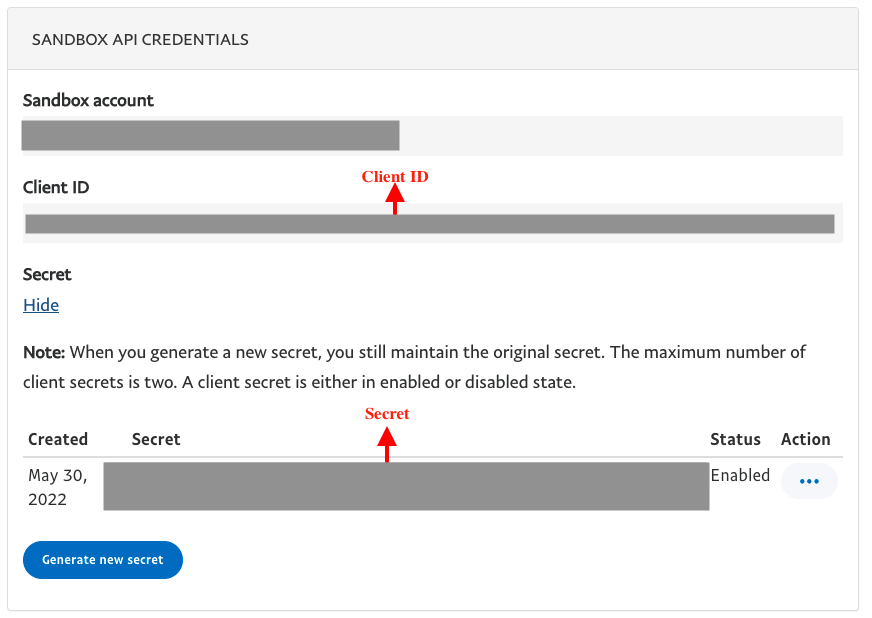
Copy the Client ID and Secret key.
Step 3: Plugin Configuration
Go to WooCommerce > Settings.
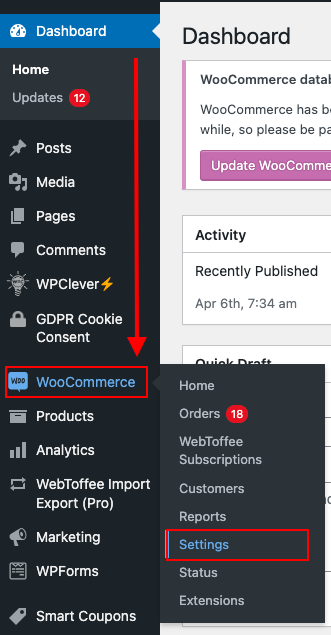
Select the Payments tab from the menu.
Enable the PayPal Express method.
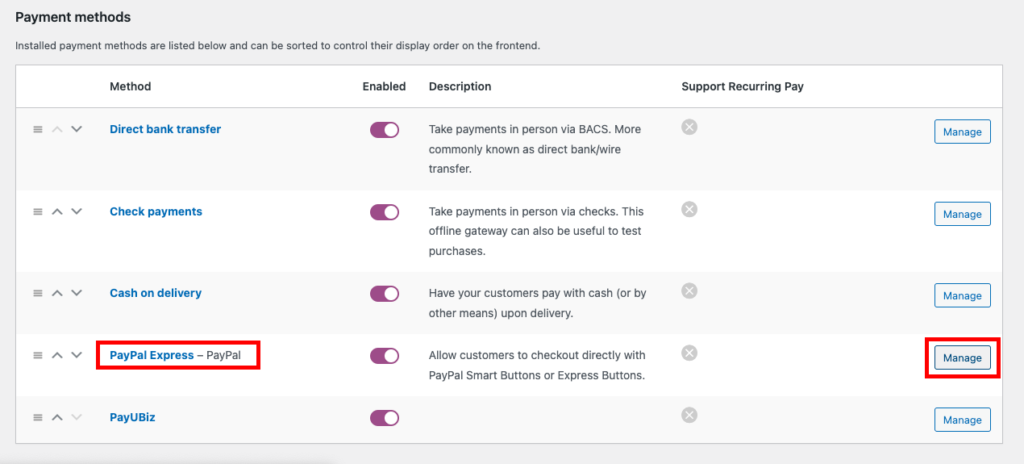
Click on the Manage option.
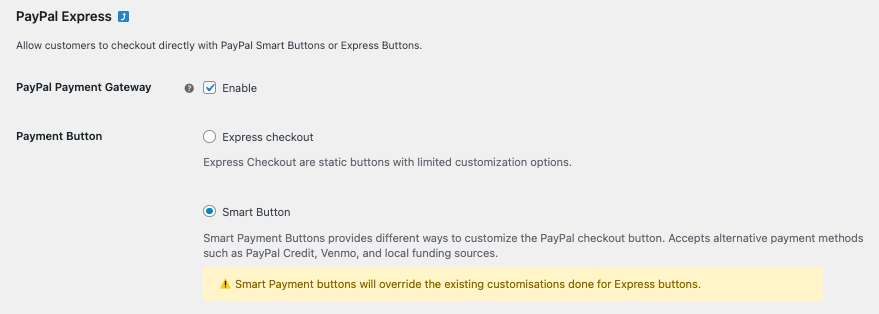
Enable the PayPal Payment Gateway checkbox.
Select Smart Button as the payment button.
Scroll down to PayPal Credentials.
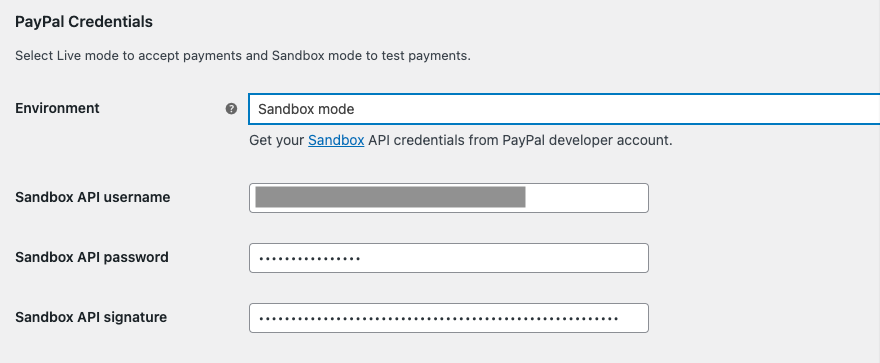
Select Sandbox mode for testing and Live mode to accept payment.
Enter the Client ID and Secret key we copied earlier in the provided area.
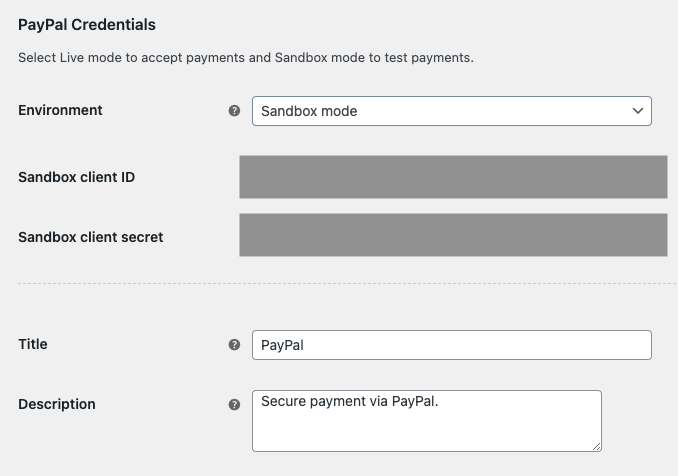
Add a title and description for the PayPal credentials.
Navigate to PayPal Smart Button to customize the payment button.
Here are the available options:
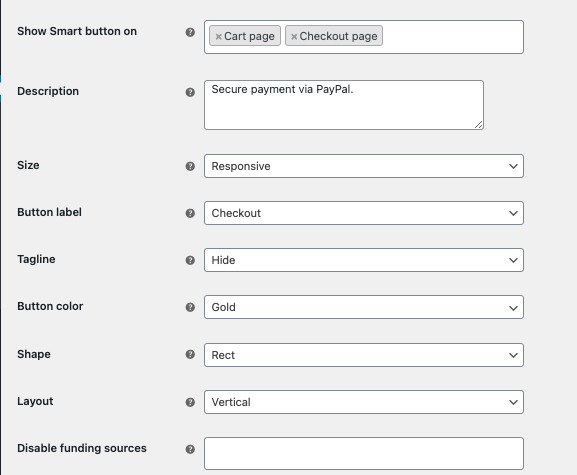
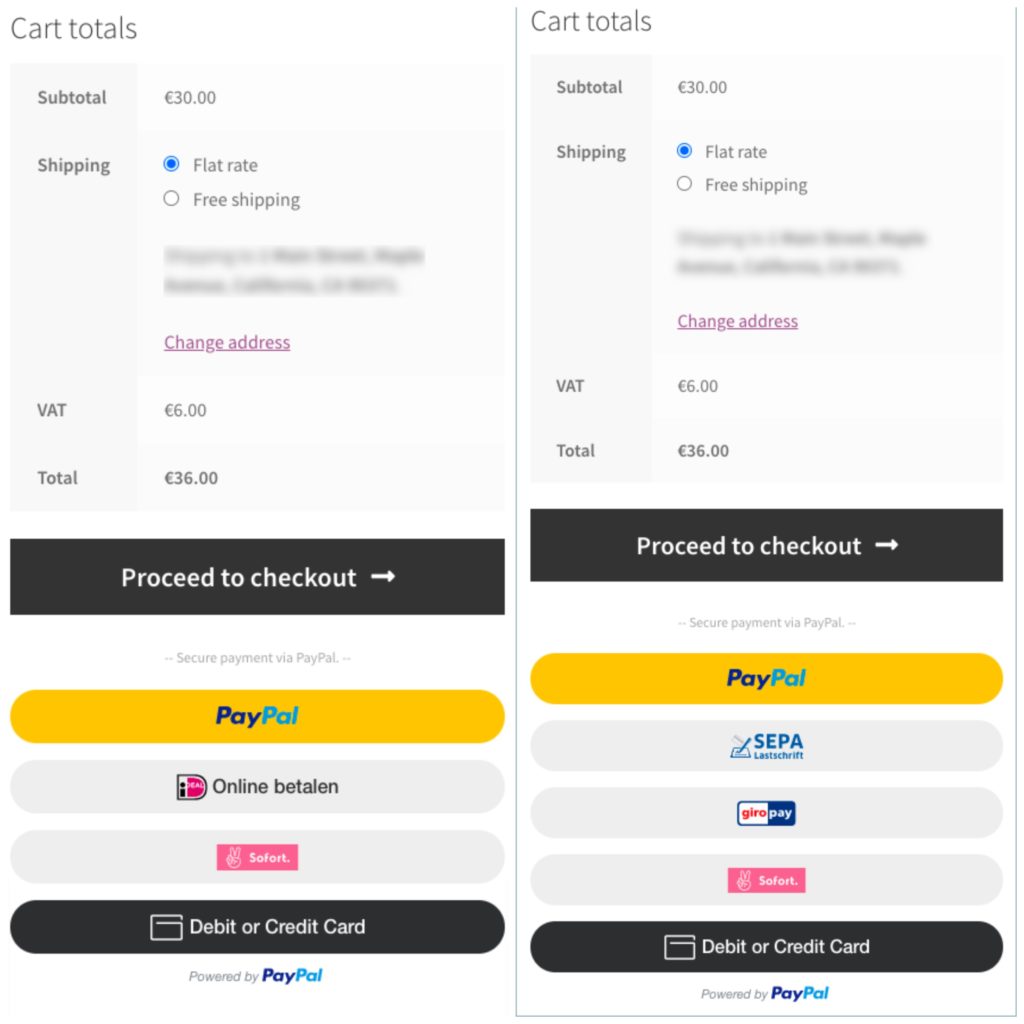
Show Smart button on: Select where you want to show the smart button. Either select cart page or checkout page or both.
Description: Add a button description in the text field.
Size: Select the required button size from the available options; Small, medium, large or responsive.
Button label: Select a button label from the given options
Tagline: Available in the horizontal layout.
Button Color: Choose a button color from Gold, Blue, Silver, White, or Black.
Shape: You can either select rectangle or pill as the button shape.
Layout: Choose the layout as either Vertical or Horizontal.
Disable funding sources: This lets you disable funding from specific sources.
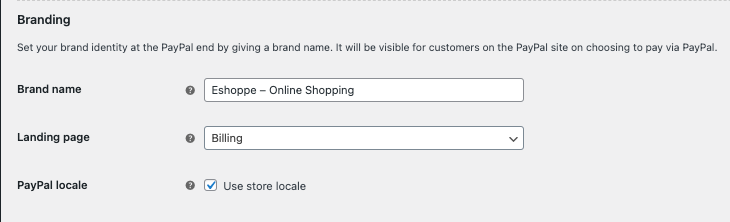
There are also some branding options available with the button, you can use it accordingly.
Scroll down to the bottom and enable the Log to record PayPal transactions into WooCommerce status logs.
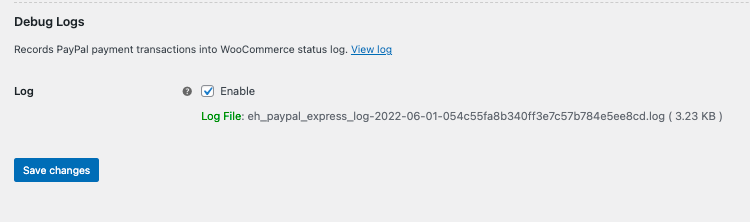
Click Save Changes.
Step 4: Testing the checkout
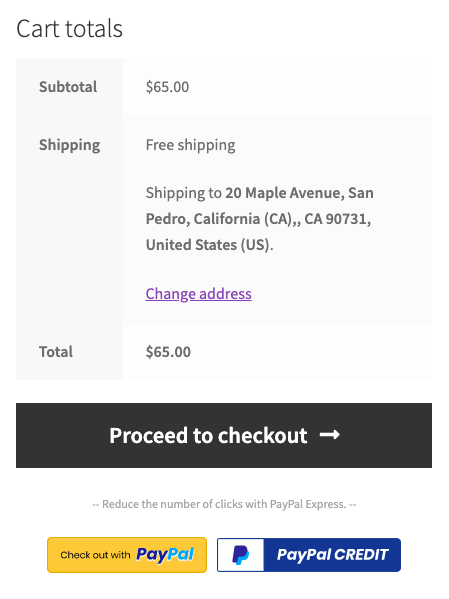
Go to the product page and add a product to the cart and proceed to checkout.
You can see our smart checkout button on the checkout page.
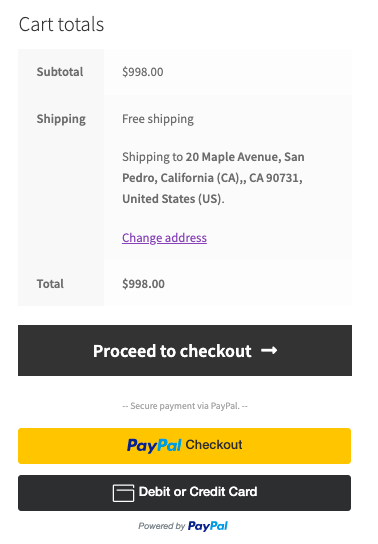
Click the PayPal checkout button and it will take you to the PayPal Payment page.

Customers can also pay using Debit/Credit cards without leaving the website.
The plugin also supports some alternative payment methods based on the customer’s country.
Enabling Express Checkout in WooCommerce
Now let’s see how we can enable the express checkout option in our WooCommerce store.
Step 1: Obtain API credentials
Log in to your PayPal account.
Go to the Activity tab and select API access.
Scroll down and find NVP/SOAP API integration (Classic).

Click Manage API credentials.
Click Show to reveal the credentials.
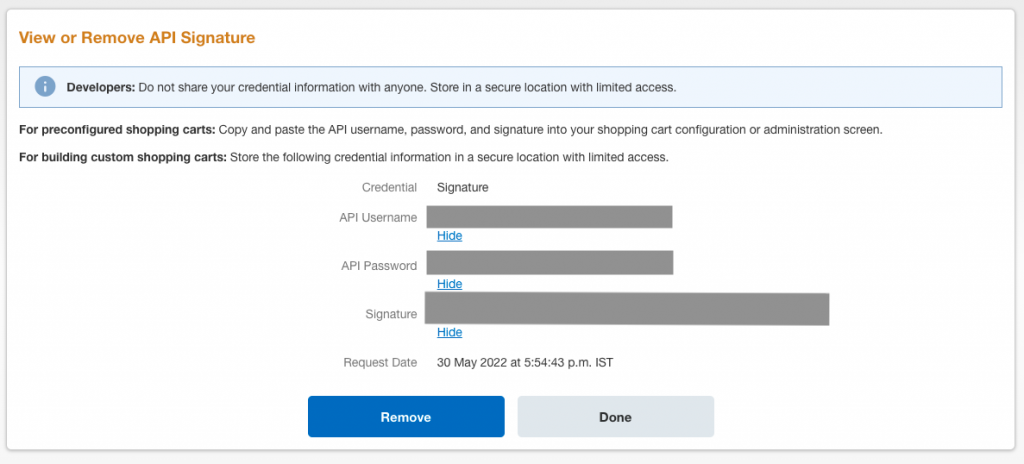
Copy the API Username, API Password, and Signature.
Step 2: Adding API credentials to the plugin
Go to WooCommerce > Settings.
Select the Payments tab from the menu.
Enable the PayPal Express method.
Click on the Manage option.
Select Express checkout as the Payment Button.

Add the Username, Password, and Signature in the respective fields.
Click Save changes.
Step 3: Testing Express checkout
Go to the product page, add any product to the cart and proceed to checkout.
You can see the express checkout button on the checkout page.
This will let you enable faster checkout in your WooCommerce store.
Wrapping Up
The smart checkout option is a nice feature for a WooCommerce store. It helps in faster checkout and increases customer experience. Try using the smart checkout button in your WooCommerce store and share your feedback in the comments section.
If you want additional features like pay later, smart checkout options on individual product pages, and much more purchase the premium version.