Overview
The Stripe Payment Plugin for WooCommerce(free) allows you to integrate Stripe payment into your WooCommerce store. Using the plugin you can accept payments via Credit/Debit Cards, Alipay, Apple Pay, Payment Request Button(GPay), Stripe Checkout, SEPA, Klarna, WeChat, Afterpay, and many other local payment gateways in your WooCommerce store.
Installation
You can install the plugin either from the WordPress plugin directory or as a zip downloaded from the WordPress.org website. You can learn more about the installation procedure by reading the article How to Install a Free Plugin from WordPress.
Pre-requisites
The plugin requires you to Signup and create a Stripe Account.
Getting started
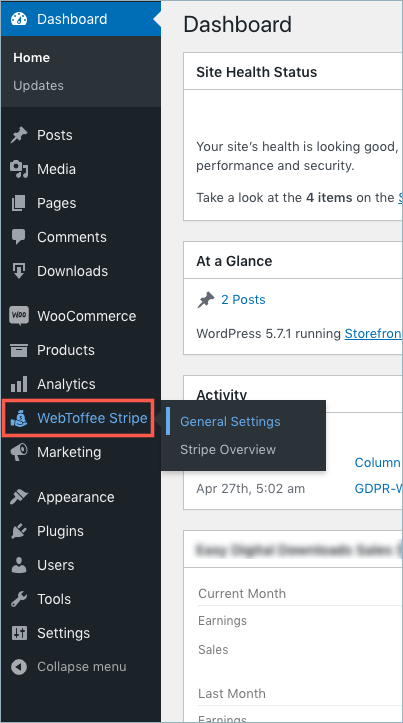
Once the plugin is installed and activated, you can navigate to plugin settings in two ways:
- Dashboard > WebToffee Stripe (or)

- Dashboard > Plugins > Installed Plugins > Stripe Payment Gateway for WooCommerce > Settings.


Configure Stripe in 3 steps
Step 1: General Settings
- First and foremost, you must have a Stripe account. It’s free to create a Stripe account. Stripe allows carrying out trial payments in test mode too. Refer to Stripe’s business information requirements.
- On signing up, go to Stripe dashboard > Developers > API keys.

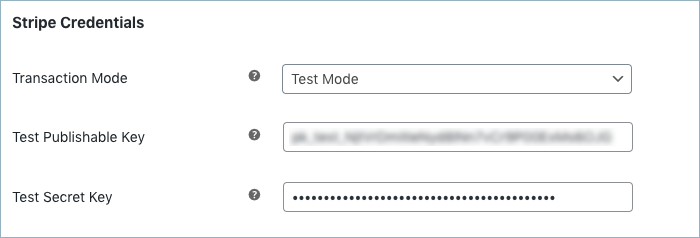
Step 2: Insert Stripe Credentials
- Navigate to WebToffee Stripe > General Settings.
- You can begin by inserting the appropriate keys in the stripe credential fields. API keys can be located in your Stripe dashboard.
- Choose test mode to trial run using test API keys. Switch to live mode to begin accepting payments with Stripe using live API keys.
- In test mode, insert the test secret key and test publishable key.
- In live mode, insert the live secret key and live publishable key.
Stripe Overview
Replicates a stripe dashboard view. Gives provision to manage orders, process partial/full refunds, and capture payments. Keep the option disabled, if you don’t want to have a stripe overview. Refer to know more on Stripe Overview.

Capture Payments
Capture Payment option is enabled by default to capture the payments immediately on successful transactions. However, if you wish to capture payment later then, keep the option disabled. Know more on how payments can be captured manually from stripe overview.

Payments can be captured later manually from the stripe dashboard or overview. Uncaptured payment will expire in 7 days. Learn more.
Step 3: Add Webhook endpoint
To receive the order status updates in a timely manner, it is recommended to add your site’s webhook in the stripe dashboard.
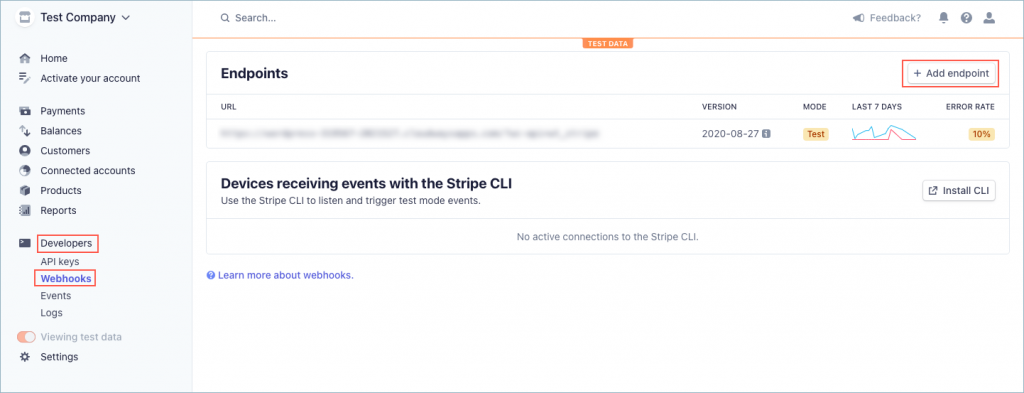
- First of all, copy the webhook URL of your site from the webhooks section.

- To insert the webhook, go to stripe dashboard > scroll down to the option Developers and select Webhooks. Then, click on Add endpoint button and insert your site URL.
List of webhook events that are compatible with the plugin are given below:
- charge.refund.updated
- charge.dispute.created
- charge.succeeded
- charge.failed
- checkout.session.expired
- source.chargeable
- source.failed
- payment_intent.succeeded
- payment_intent.payment_failed
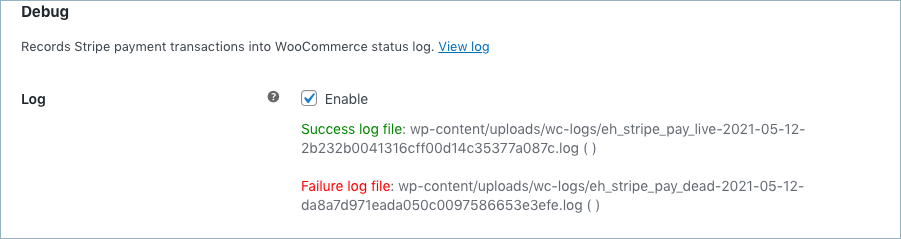
Debug
Records stripe payment transactions into WooCommerce status log.
Save the settings to update.
Step 4: Enable the corresponding payment gateway
The five types of payment gateways offered by the plugin are the following:
Payment via Credit/Debit Card
Accepts Stripe payments via credit or debit card.
Go to plugin settings or from the WordPress dashboard, go to WebToffee Stripe > General Settings. Head on to the Credit/Debit Cards tab.
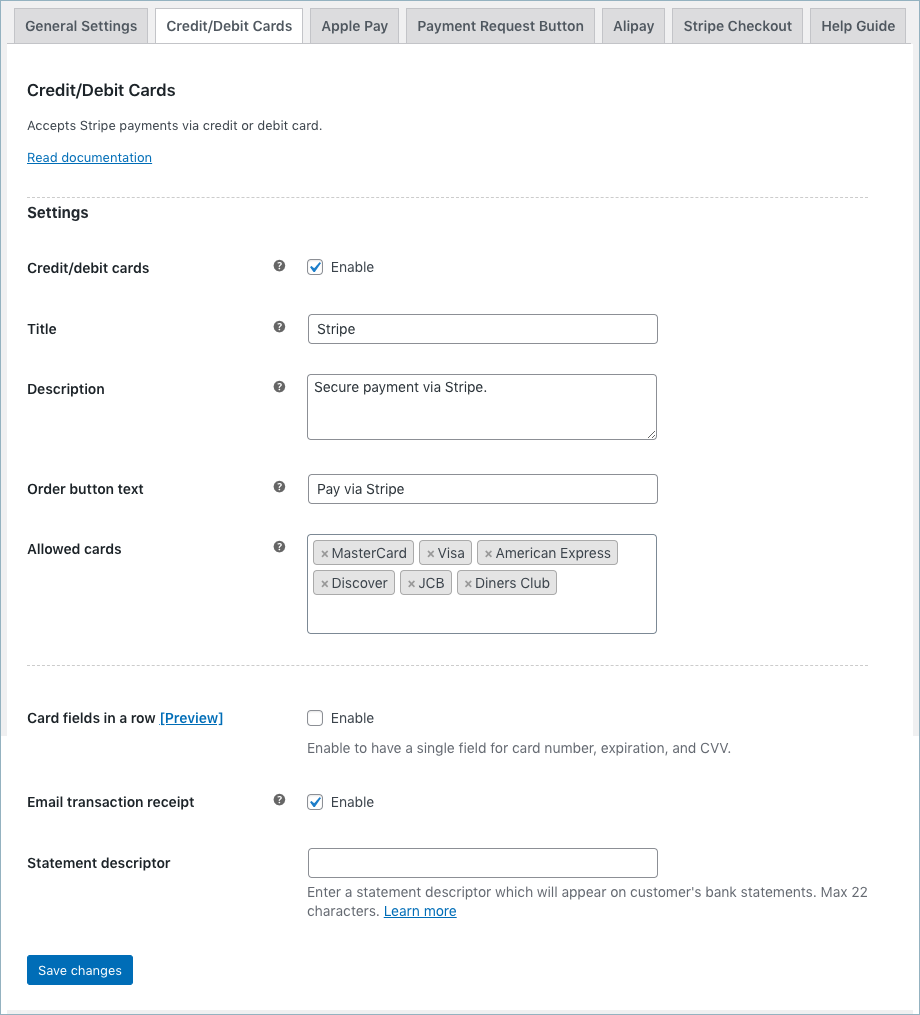
- Credit/Debit cards: Enable to accept credit/debit card payments through Stripe.
- Title: Input title for the payment gateway displayed at the checkout.
- Description: Input texts for the payment gateway displayed at the checkout.
- Order button text: Input a text that will appear on the order button to place an order at the checkout.
- Allowed Cards: Accepts payments using selected cards. Displays the Icons of chosen cards at the checkout. Cards supported by the plugin are the following:
- MasterCard
- Visa
- American Express
- Discover
- JCB
- Diners Club
- Card fields in a row: Choose the style in which you want to show your credit card form. When checked, the credit card form will display the credit card number field, expiry date, CVV, and postal code in a single field.

- Email Transaction Receipt: Enable this option to send transaction receipts via email to customers. Works in live mode only.
- Statement Descriptor: You can enter a statement descriptor that will appear on customers’ bank statements when they make or receive payments. A complete statement descriptor – either a single static descriptor or the combination of a prefix and suffix – must meet the following requirements:
- Contains between 5 and 22 characters, inclusive.
- Contains at least one letter.
- Does not contain any of the special characters < > \ ‘ ” *.
- Reflects your doing business as (DBA) name.
- Contains more than a single common term or common website URL. A website URL only is acceptable if it provides a clear and accurate description of a transaction on a customer’s statement.
Finally, click Save changes to save/update the plugin settings.
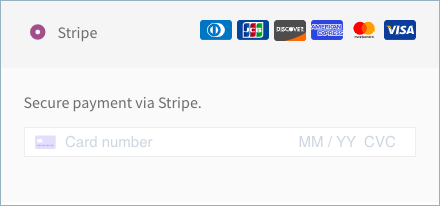
Credit/Debit card checkout using Stripe
After you configure all the settings, move to the checkout page to view the credit/debit card checkout process.
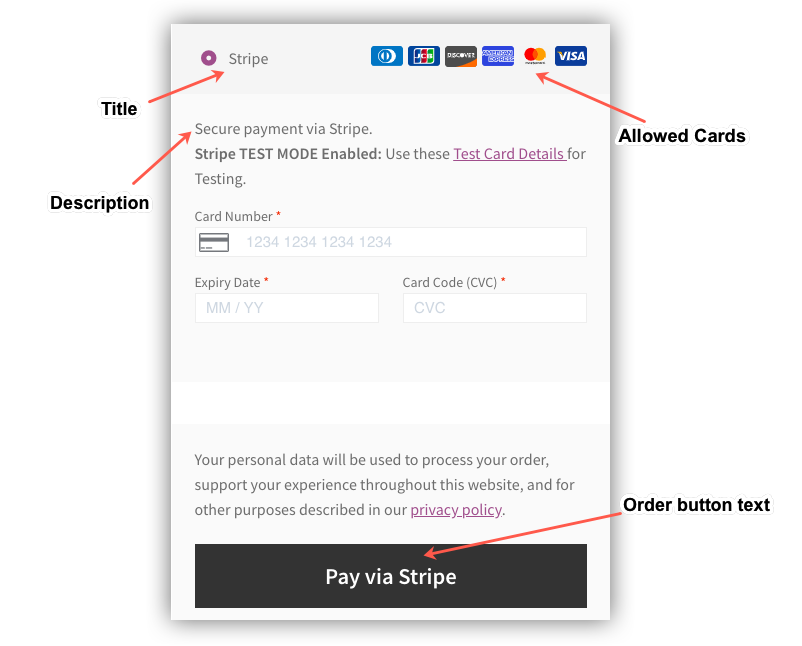
Specify the card details like the Card Number, Expiry Date, CVV, and then click on the Pay via Stripe button to continue the payment process.
Apple Pay
- Go to plugin settings or from the WordPress dashboard, go to WebToffee Stripe > General Settings.
- Head on to the Apple Pay tab.
Registration steps:
1. Download the domain association file and host it at /.well-known/apple-developer-merchantid-domain-association on your site.
2. Make that file available at https://example.com/.well-known/apple-developer-merchantid-domain-association.
3. Next, register your domain with Apple. Go to the Apple Pay tab in the Account Settings of your Dashboard. All domains, whether in production or testing, must be registered.
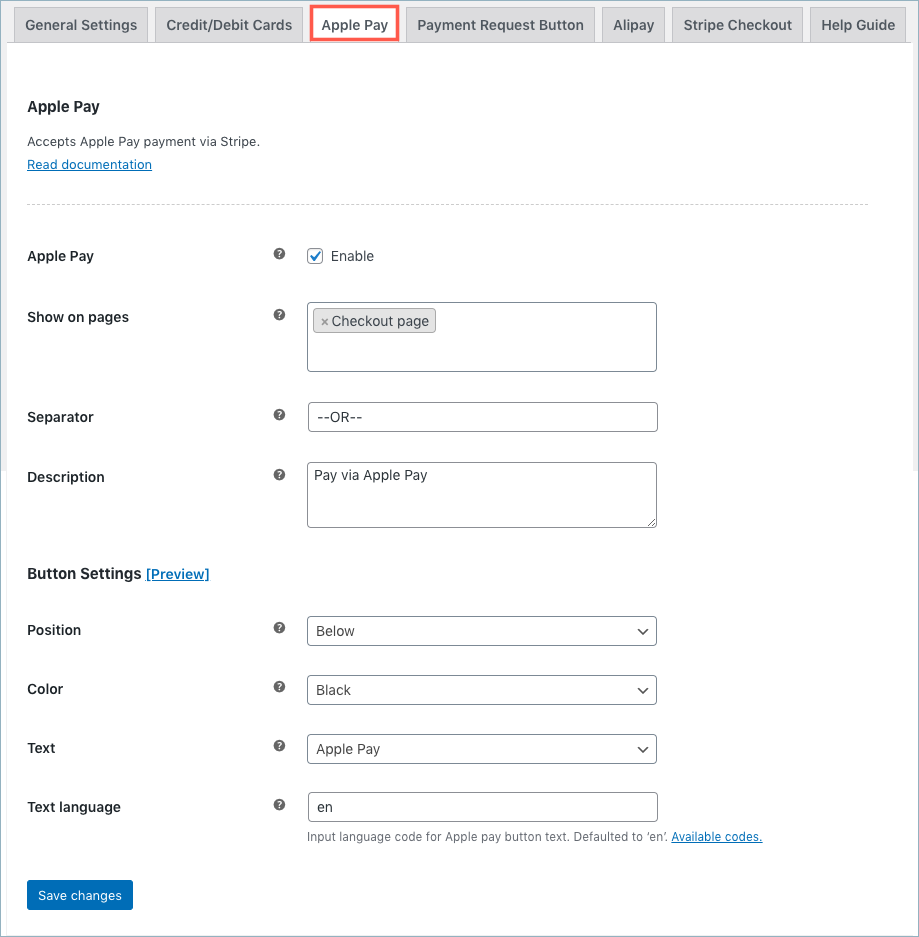
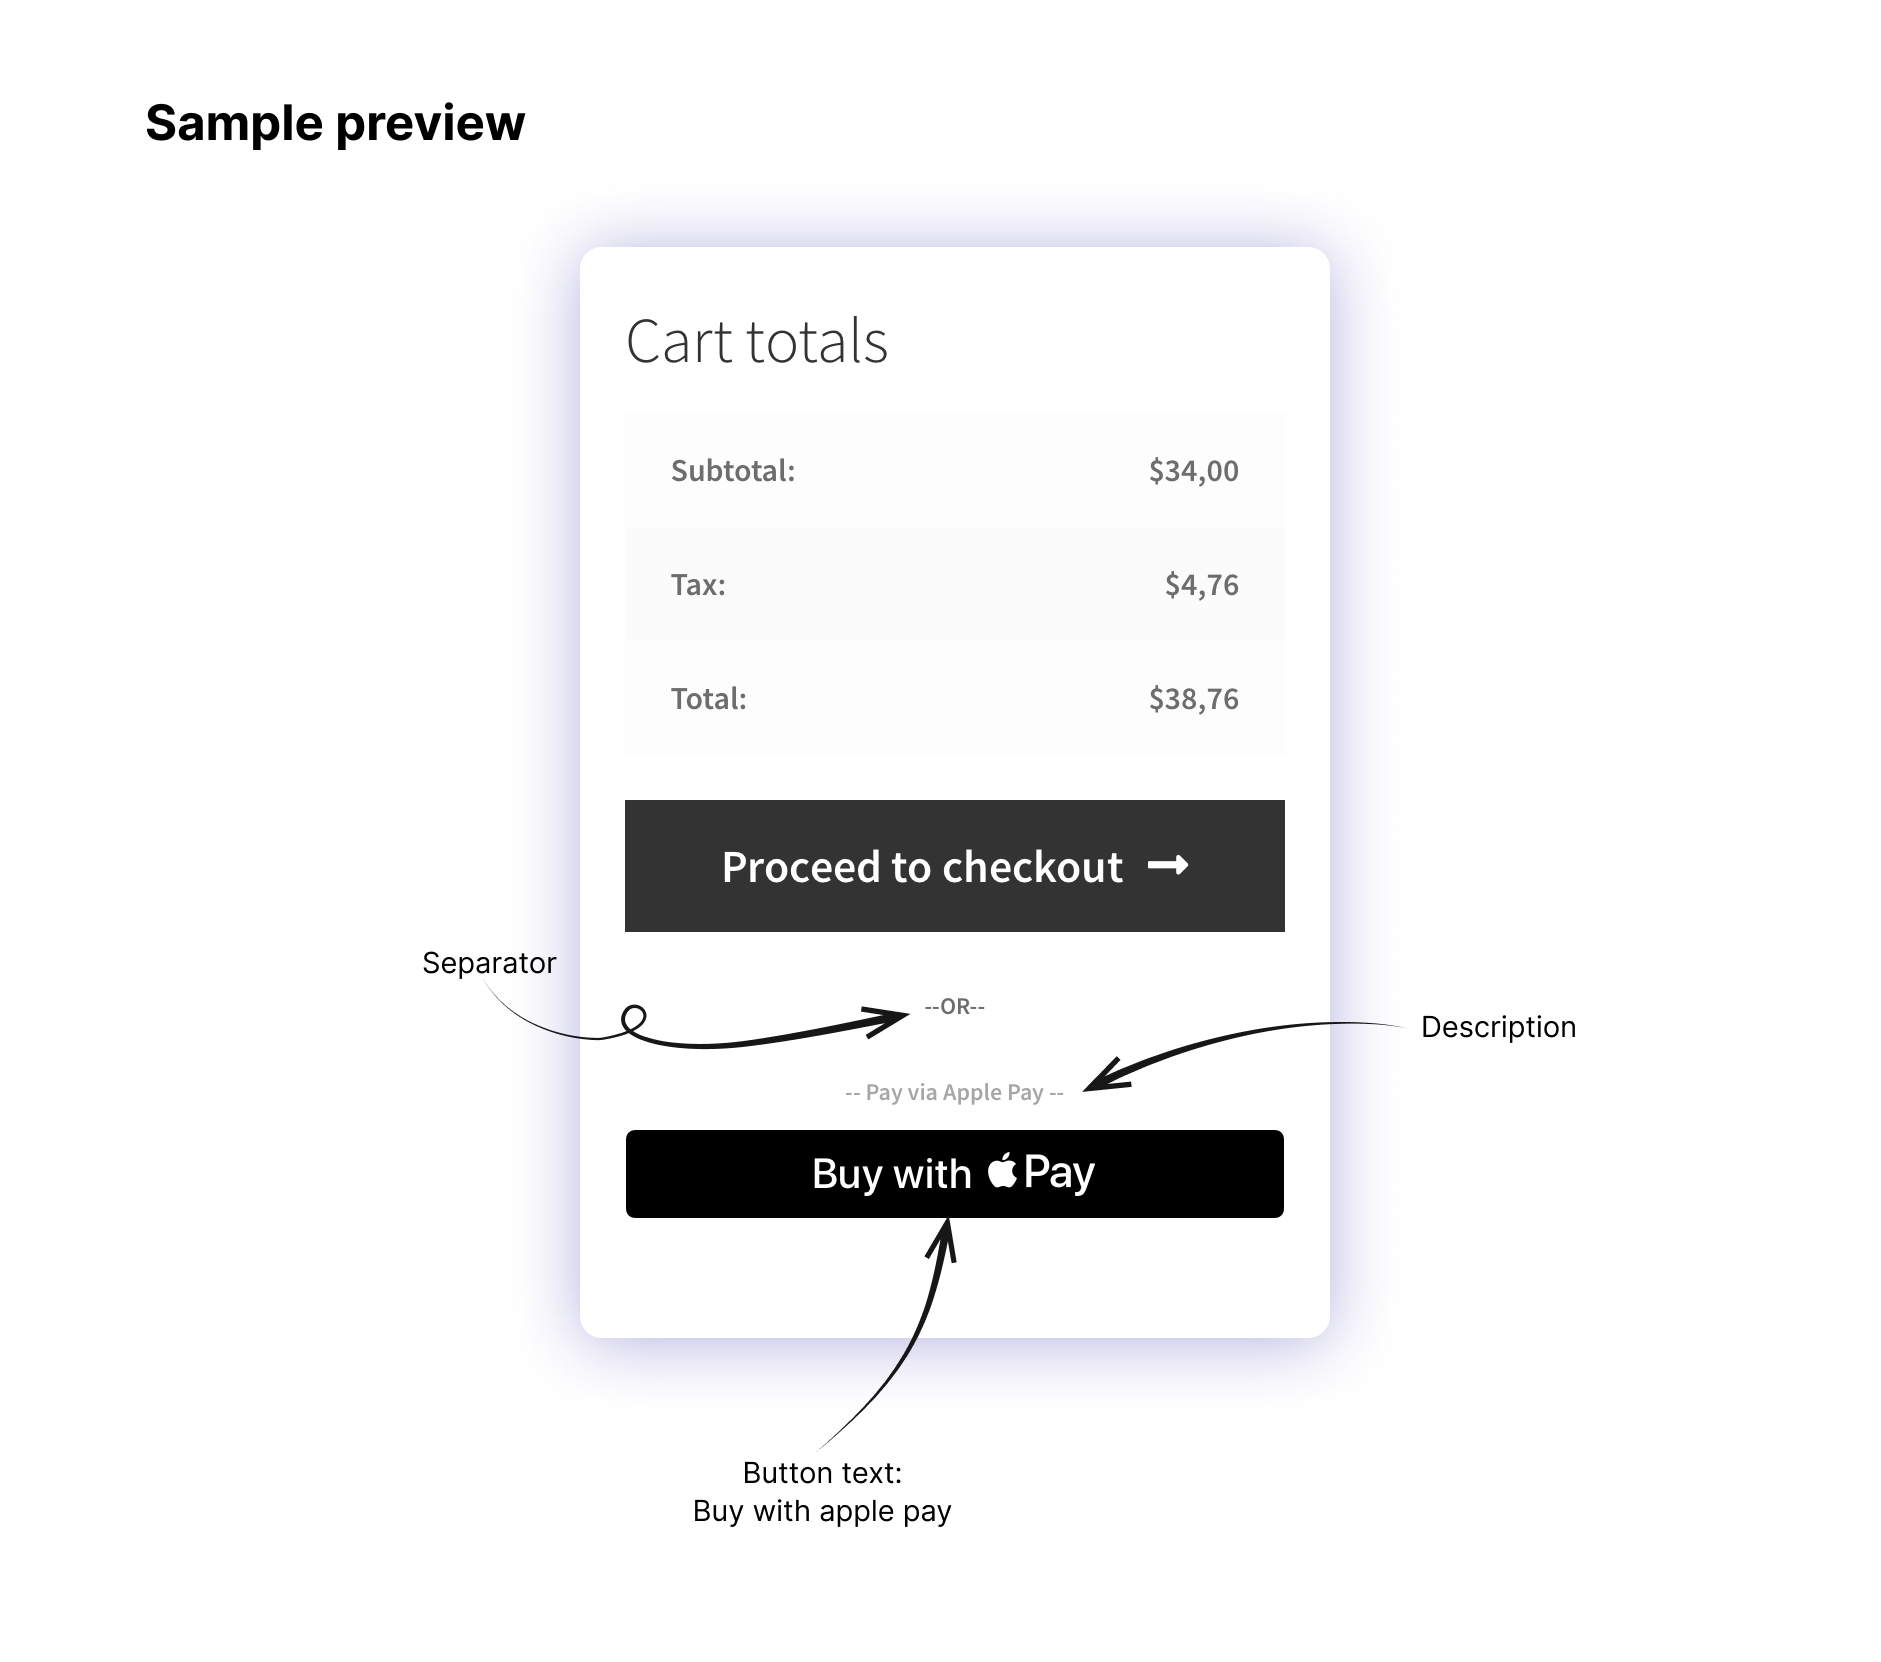
- Apple Pay: Enable to accept payment via Apple pay.
- Show on pages: Apple pay button will be shown on selected pages.
- Separator: Separator will be displayed between the Apple pay button and the order button at the checkout.
- Description: Description will be displayed between the Apple pay button and the separator at the checkout.

- Button settings:
- Position: You can choose to place the Apple Pay button Above or Below the order button.
- Color: Choose the button color from the standard white or black for it to appear accordingly at the checkout.
- Text: You can choose a suitable Apple Pay button text from the following options:
- Apple Pay
- Buy with Apple Pay
- Set up Apple Pay
- Language: You can set any custom language for the Apple Pay button. You should enter the 2-letter code of the desired language. Refer to this table for language codes.
Payment Request Button
- Go to plugin settings or from the WordPress dashboard, go to WebToffee Stripe > General Settings.
- Head on to the Payment Request button tab.
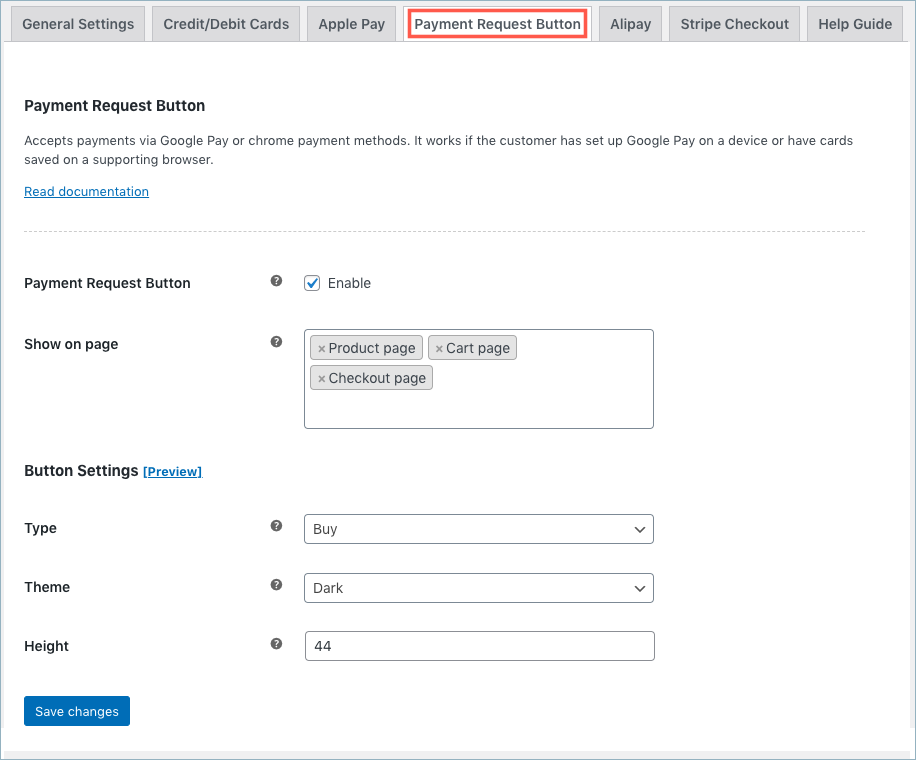
- Payment Request Buttons: If enabled, users will be able to pay using Chrome Payment Request if supported by the browser.
- Show on pages: You can show the payment request button on the cart, checkout, or on the product page.
- Button Settings:
- Type: Select the button type you would like to have as either Buy, Pay, or Donate.
- Theme: Choose the button theme as either dark, light, or light outline.
- Height: Enter the required height in pixels.
Finally, click Save changes to save/update the plugin settings.
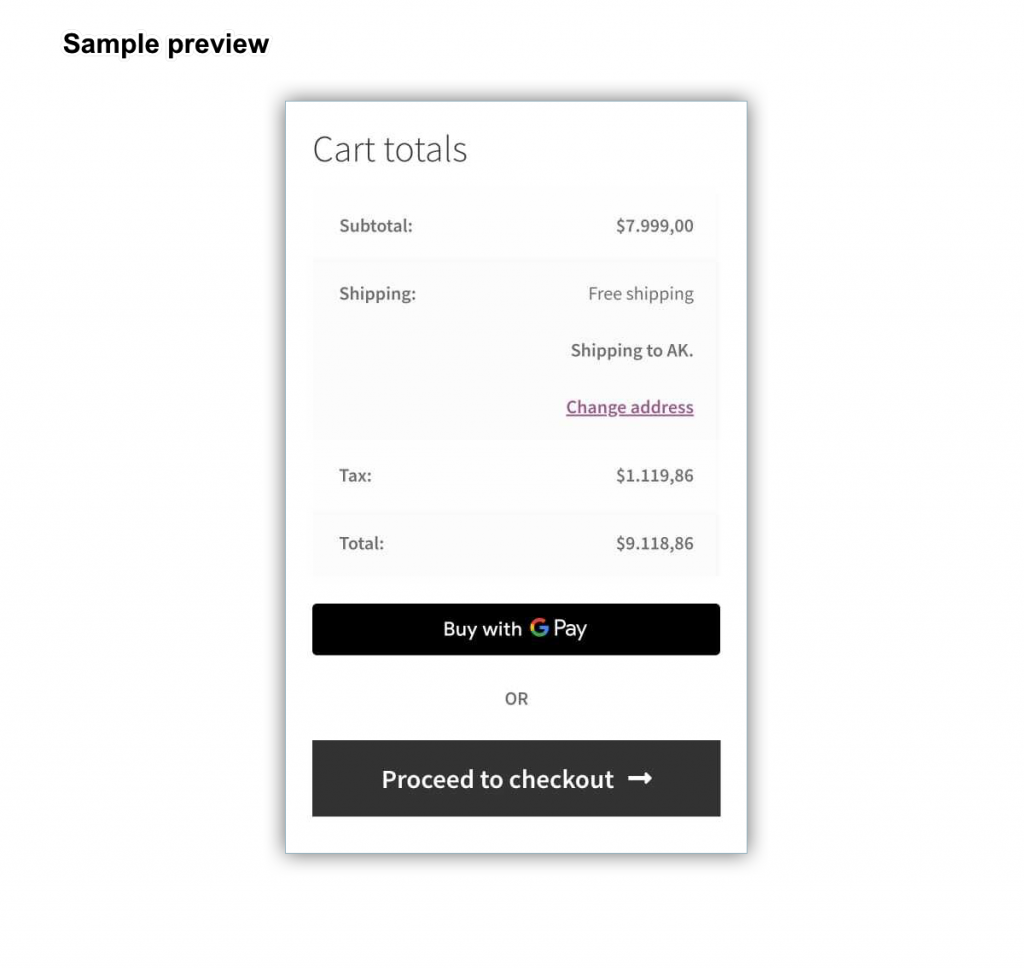
Google pay button on the cart page will appear in the following manner:
Stripe Checkout
- Go to plugin settings or from the WordPress dashboard, go to WebToffee Stripe > General Settings.
- Head on to the Stripe checkout tab.
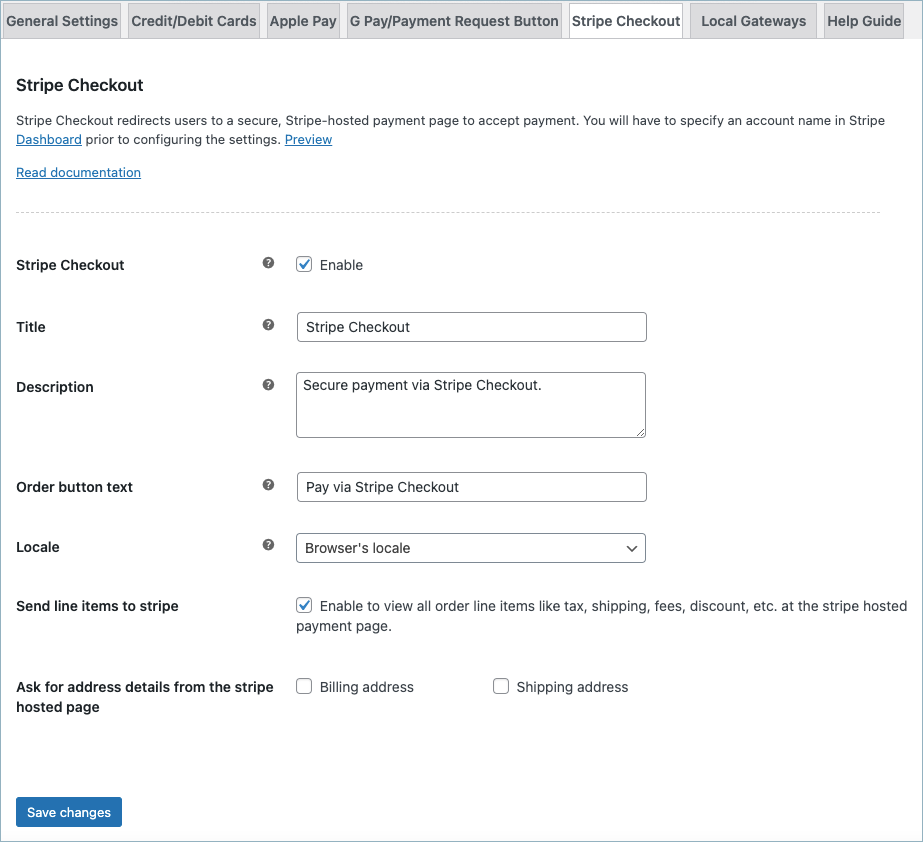
- Stripe Checkout: Enable to accept Stripe checkout payments.
- Title: Enter a custom title for stripe checkout payment. This title will be visible on the checkout page.
- Description: Enter a custom description for stripe checkout payment. This description will be visible on the checkout page.
- Order Button Text: Enter a custom text for the stripe checkout button.
- Locale: Choose a language code from the dropdown.
- Send line items to stripe: Enable to view all order line items like tax, shipping, fees, discount, etc. at the stripe hosted payment page.
- Ask for address details from the stripe hosted page: Enable to receive Billing and shipping address at the stripe hosted payment page.
Finally, click Save changes to save/update the plugin settings.
Pay via Stripe Checkout
Stripe checkout workflow is as shown below:
Local Payment Gateways
Alipay
- Go to plugin settings or from the WordPress dashboard, go to WebToffee Stripe > General Settings.
- Head on to the Local Gateways > Alipay tab.
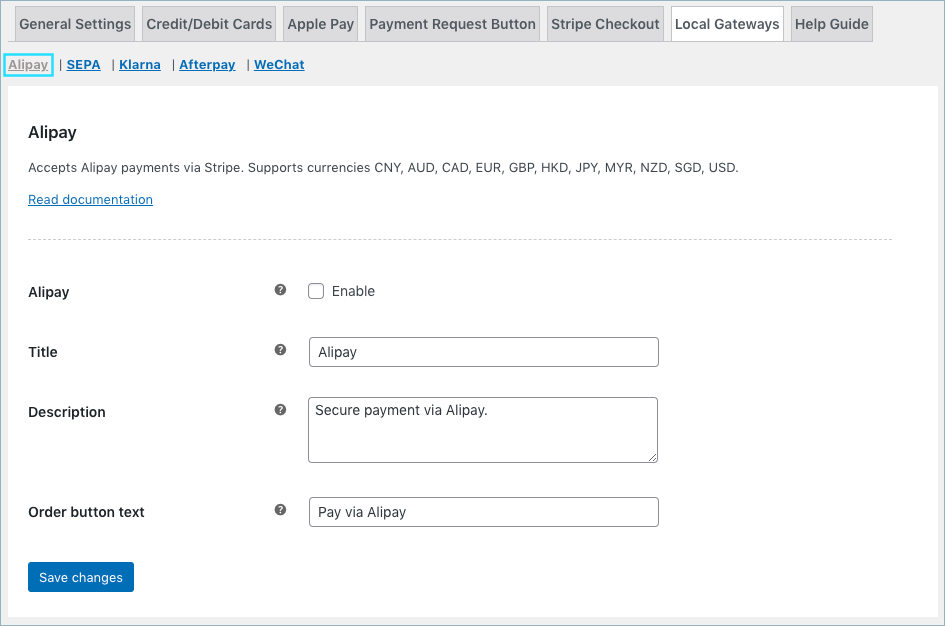
- Alipay: Enable to accept Alipay payments through Stripe.
- Title: Input title for the payment gateway displayed at the checkout.
- Description: Input texts for the payment gateway displayed at the checkout.
- Order Button Text: Input a text that will appear on the order button to place order at the checkout.
Finally, click on Save changes to update the settings.
Alipay checkout using Stripe
When you have configured all the above settings, move to the checkout page to pay via Alipay.
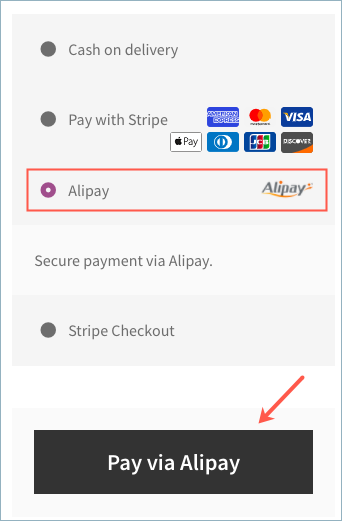
Finally, let’s see the steps involved in customer-facing web-flow:
- Select Alipay at checkout.
- Redirects to Alipay. Input the credentials in the respective fields.
- Get notified that payment is complete.
- Lastly, redirected back to the business’s site for payment confirmation.
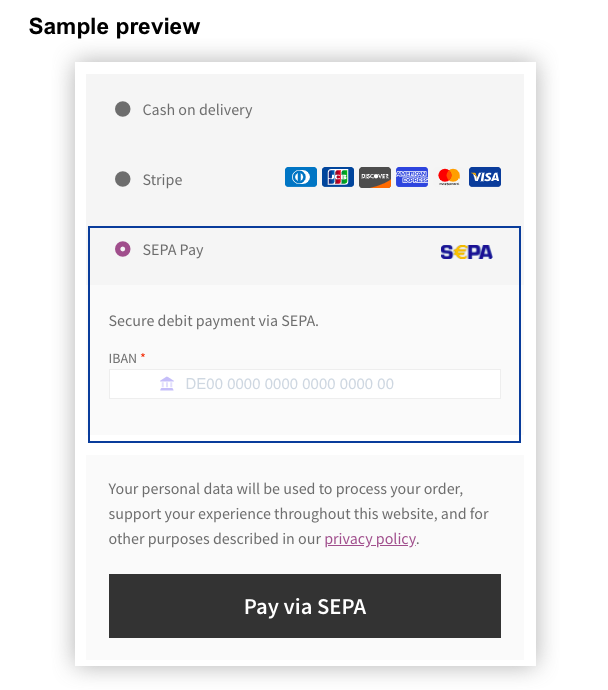
SEPA Pay
- Firstly, go to plugin settings or from the WordPress dashboard, go to WebToffee Stripe > General Settings.
- Head on to the Local Gateways > SEPA Payment tab.
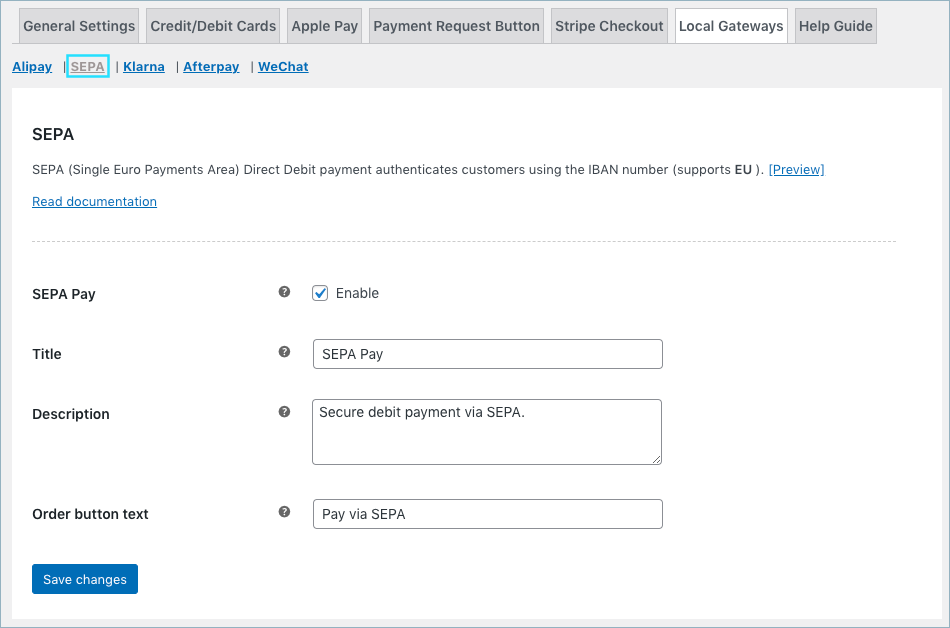
- SEPA Pay: Enable to accept SEPA payments.
- Title: Enter a custom title for SEPA payment. This title will be visible on the checkout page.
- Description: Enter a custom description for SEPA payment. This description will be visible on the checkout page.
- Order Button Text: Enter a custom text for the SEPA payment button.
Finally, click on the Save changes button to update the plugin settings.
Pay via SEPA
To sum up, the SEPA payment workflow will be as shown below:
- Customer selects SEPA Direct Debit at checkout
- The customer provides full name, IBAN, and authorizes mandate.
- The customer gets the notification that the payment is complete.
Klarna settings
- Firstly, go to plugin settings or from the WordPress dashboard, go to WebToffee Stripe > General Settings.
- Head on to the Local Gateways > Klarna tab.

- Klarna: Enable to accept Klarna payments.
- Title: Enter a custom title for Klarna payment. This title will be visible on the checkout page.
- Description: Enter a custom description for Klarna payment. This description will be visible on the checkout page.
- Order Button Text: Enter a custom text for the Klarna payment button.
Klarna at the checkout
A sample preview of Klarna at the checkout:

Pay via Klarna
To sum up, the Klarna payment workflow will be as shown below:
- At the checkout, redirects customer to the Klarna Hosted Payment Page.
- The customer can choose any among the payment options: Pay now, Pay later, Financing, and Installments.
- The payment options will differ based on the customer’s country/location. Refer to test Klarna pay.
- Klarna authenticates the payment either via Date of birth or One-time password.
- Customer returns to the business site by successfully placing an order.
Afterpay
- Firstly, go to plugin settings or from the WordPress dashboard, go to WebToffee Stripe > General Settings.
- Head on to the Local Gateways > Afterpay tab.
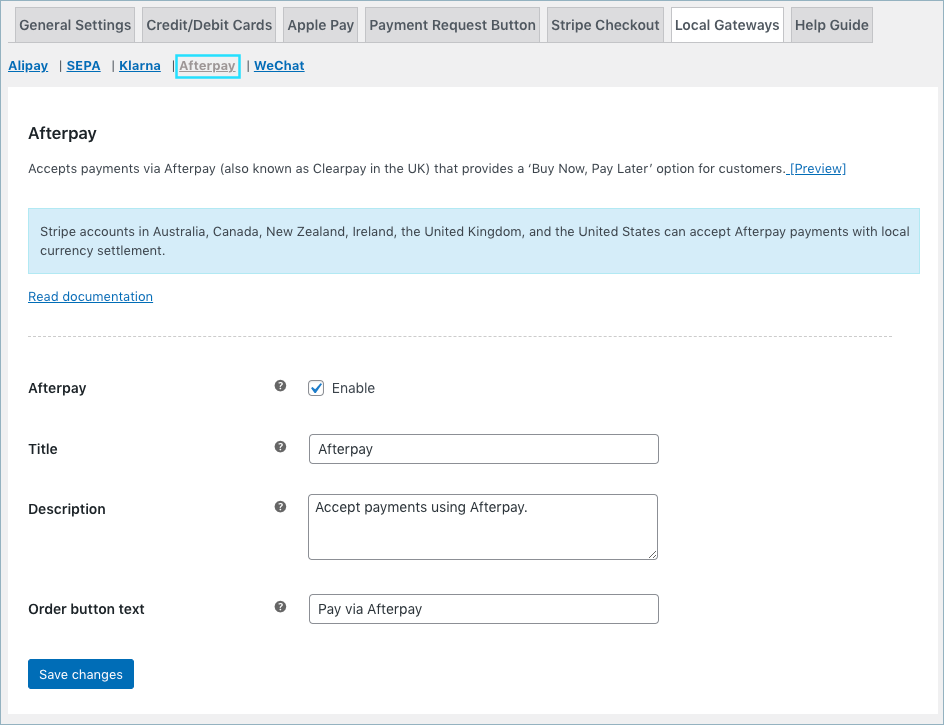
- Afterpay: Enable to accept Afterpay payments.
- Title: Enter a custom title for Afterpay payment. This title will be visible on the checkout page.
- Description: Enter a custom description for Afterpay payment. This description will be visible on the checkout page.
- Order Button Text: Enter a custom text for the Afterpay payment button.
Finally, click on the Save changes button to update the plugin settings.
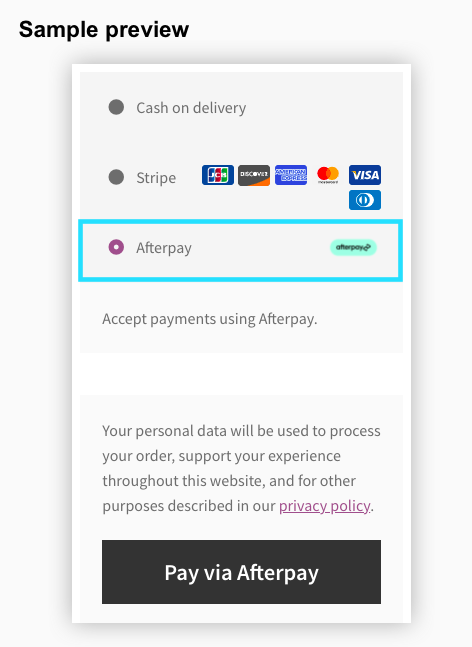
Pay via Afterpay
To sum up, the Afterpay payment workflow will be as shown below:
- Customer selects Afterpay at the checkout
- Redirects customers to the Afterpay site, where they agree to the terms of an installment plan.
- Prompts the customer to accept the terms. Sebsequently, guarantees and transfers the funds to your Stripe account.
- The customer pays the first installment and repays the rest of the amount to the Afterpay directly over time.
WeChat pay
- Firstly, go to plugin settings or from the WordPress dashboard, go to WebToffee Stripe > General Settings.
- Head on to the Local Gateways > WeChat tab.
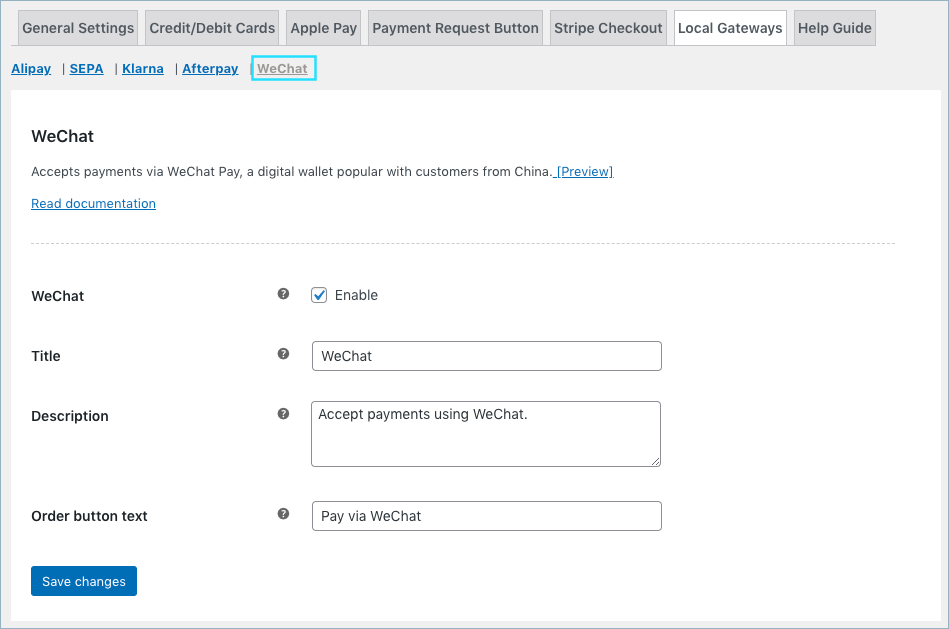
- WeChat: Enable to accept WeChat payments.
- Title: Enter a custom title for WeChat payment. This title will be visible on the checkout page.
- Description: Enter a custom description for WeChat payment. This description will be visible on the checkout page.
- Order Button Text: Enter a custom text for the WeChat payment button.
Finally, click on the Save changes button to update the plugin settings.
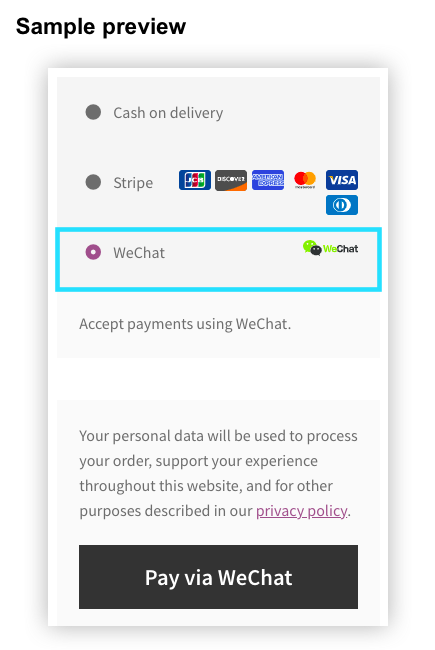
Pay via WeChat
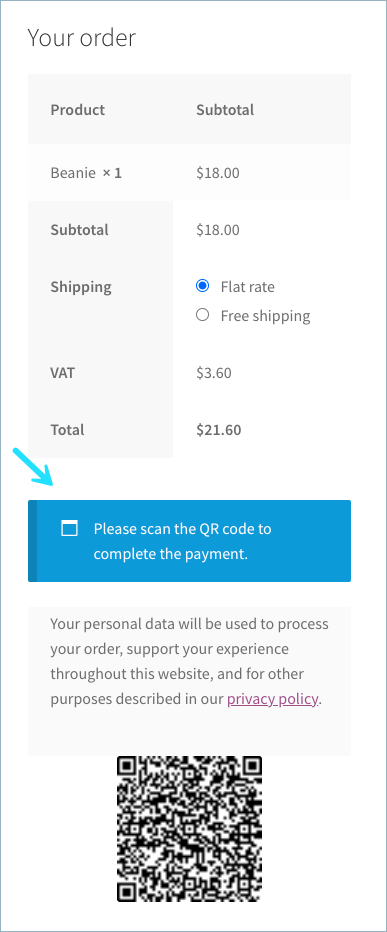
To sum up, the WeChat payment workflow will be as shown below:
- Customer selects WeChat at the checkout
2. The buyer scans the QR code to complete the payment.
3. WeChat app authenticates the payment.
4. Then, the plugin prompts the buyer to confirm the completion of the QR code scan.
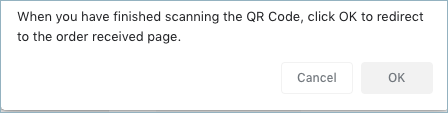
5. Redirects buyer to the order received page by successfully completing the order.
Sofort
- Firstly, go to plugin settings or from the WordPress dashboard, go to WebToffee Stripe > General Settings.
- Head on to the Local Gateways > Sofort tab.

- Sofort: Enable to accept Sofort payments.
- Title: Enter a custom title for Sofort payment. This title will be visible on the checkout page.
- Description: Enter a custom description for Sofort payment. This description will be visible on the checkout page.
- Customize language :Enable to view the bank site in the required language.
- Preferred language: Select the required language for the bank site.
- Order Button Text: Enter a custom text for the Sofort payment button.
Finally, click on the Save changes button to update the plugin settings.
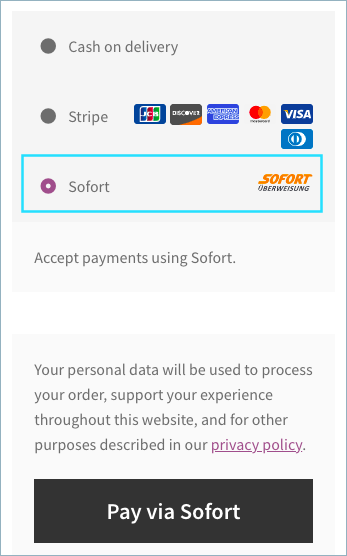
Pay via Sofort
To sum up, the Sofort payment workflow will be as shown below:
- Customer selects Sofort at the checkout
2. The buyer enters name and country. Redirects buyers to the bank site.
3. From the bank site, the buyer can choose the country and bank. Then, authenticates the transaction.
4. Payment becomes successful and order is placed.
iDEAL Pay
- Firstly, go to plugin settings or from the WordPress dashboard, go to WebToffee Stripe > General Settings.
- Head on to the Local Gateways > iDEAL tab.
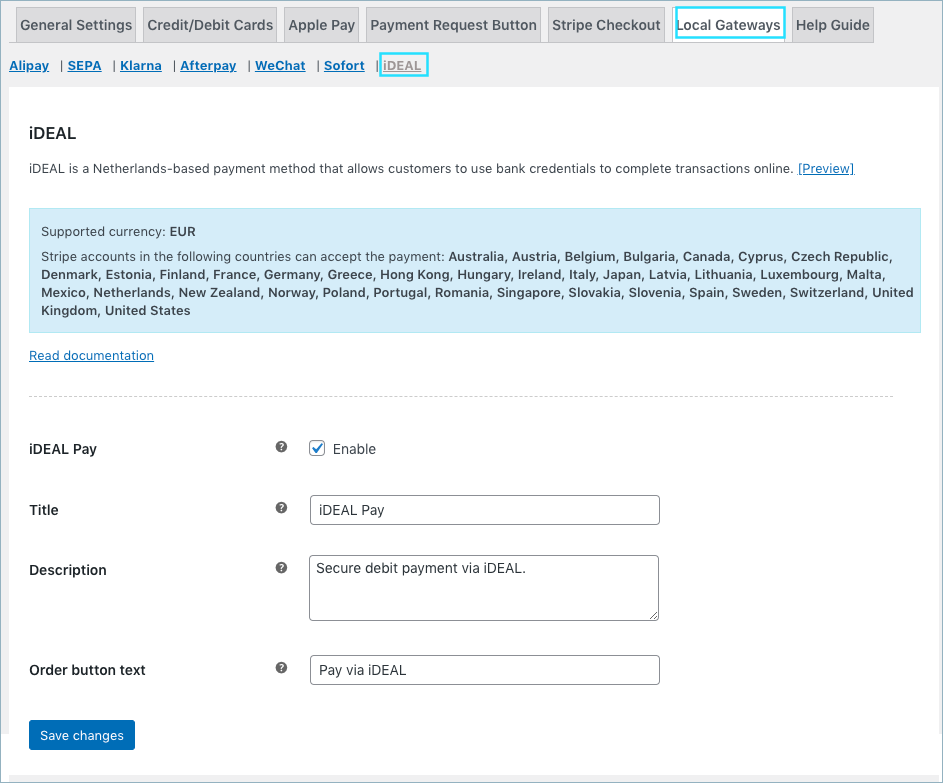
- iDEAL: Enable to accept iDEAL payments.
- Title: Enter a custom title for iDEAL payment. This title will be visible on the checkout page.
- Description: Enter a custom description for iDEAL payment. This description will be visible on the checkout page.
- Order Button Text: Enter a custom text for the iDEAL payment button.
Finally, click on the Save changes button to update the plugin settings.
Pay via iDEAL
To sum up, the iDEAL payment workflow will be as shown below:
- Customer selects iDEAL at the checkout
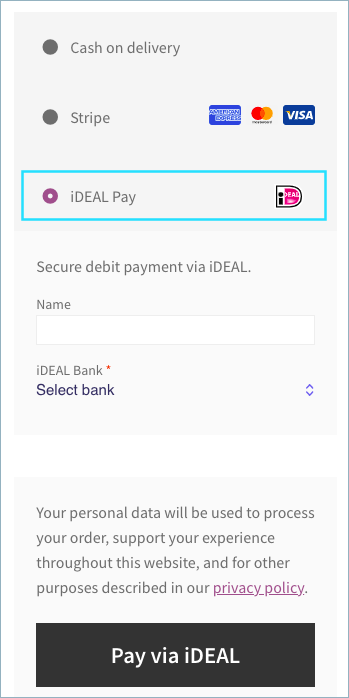
2. The buyer enters the name and selects the bank.
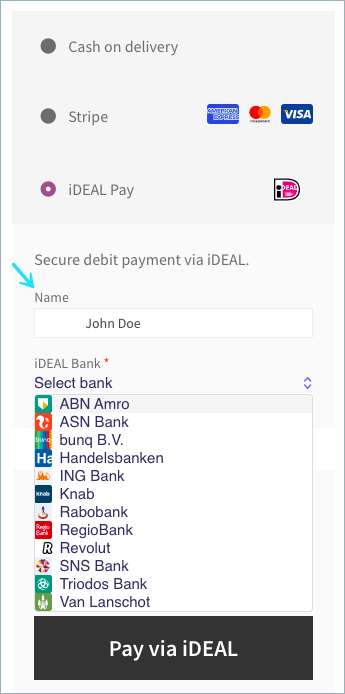
3. iDEAL authenticates the payment.
4. Then, the plugin prompts the buyer to confirm the completion of the transaction.
5. Redirects buyer to the order received page by successfully completing the order.
Bancontact Pay
- Firstly, go to plugin settings or from the WordPress dashboard, go to WebToffee Stripe > General Settings.
- Head on to the Local Gateways > Bancontact tab.
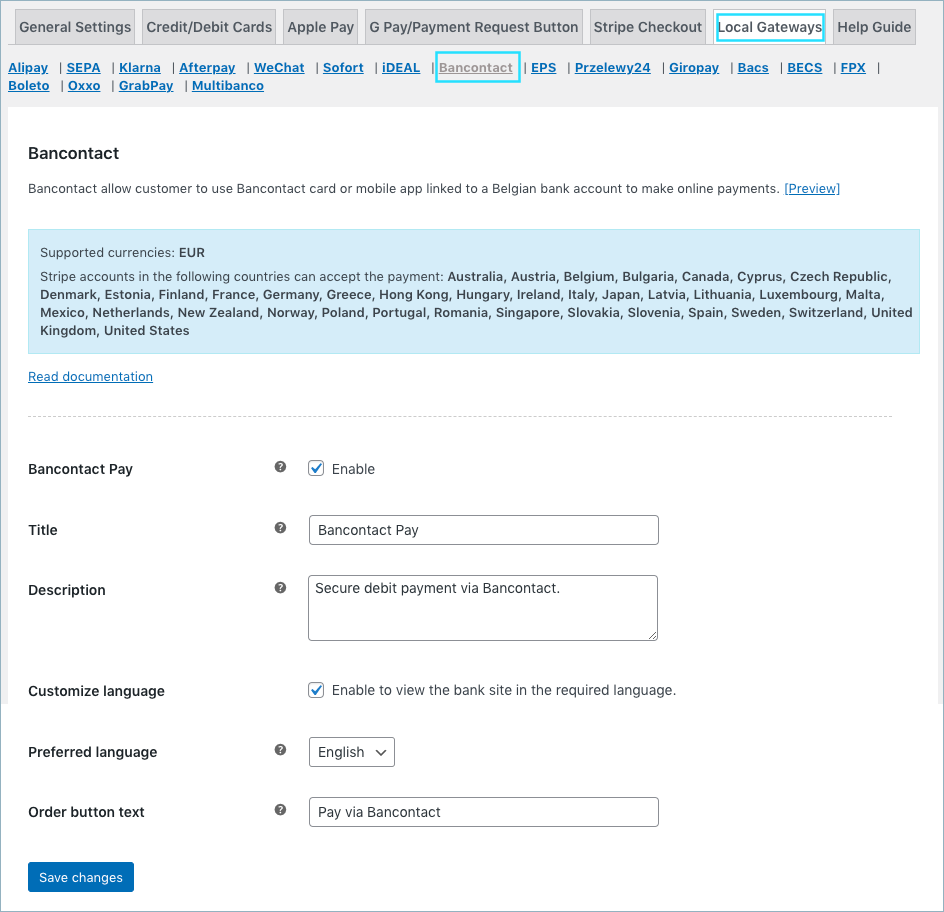
- Bancontact: Enable to accept Bancontact payments.
- Title: Enter a custom title for Bancontact payment. This title will be visible on the checkout page.
- Description: Enter a custom description for Bancontact payment. This description will be visible on the checkout page.
- Customize language: Enable to view the bank site in the required language.
- Preferred language: Choose the required language from the drop down.
- Order Button Text: Enter a custom text for the Bancontact payment button.
Finally, click on the Save changes button to update the plugin settings.
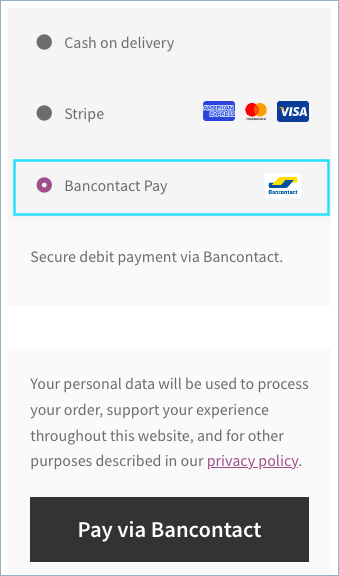
Pay via Bancontact
- Customer selects Bancontact at checkout
- Redirects customer to the Bancontact and enters credentials
- The customer is notified that payment is complete
- Customer returns back to business’s site for payment confirmation (Optional)
- Customer selects Bancontact at checkout
- Redirects customer to the Bancontact and scans QR code
- Customer enters Pincode
- Customer is notified that payment is complete
- Customer returns back to business’s site for payment confirmation (Optional)
EPS Pay
- Firstly, go to plugin settings or from the WordPress dashboard, go to WebToffee Stripe > General Settings.
- Head on to the Local Gateways > EPS tab.
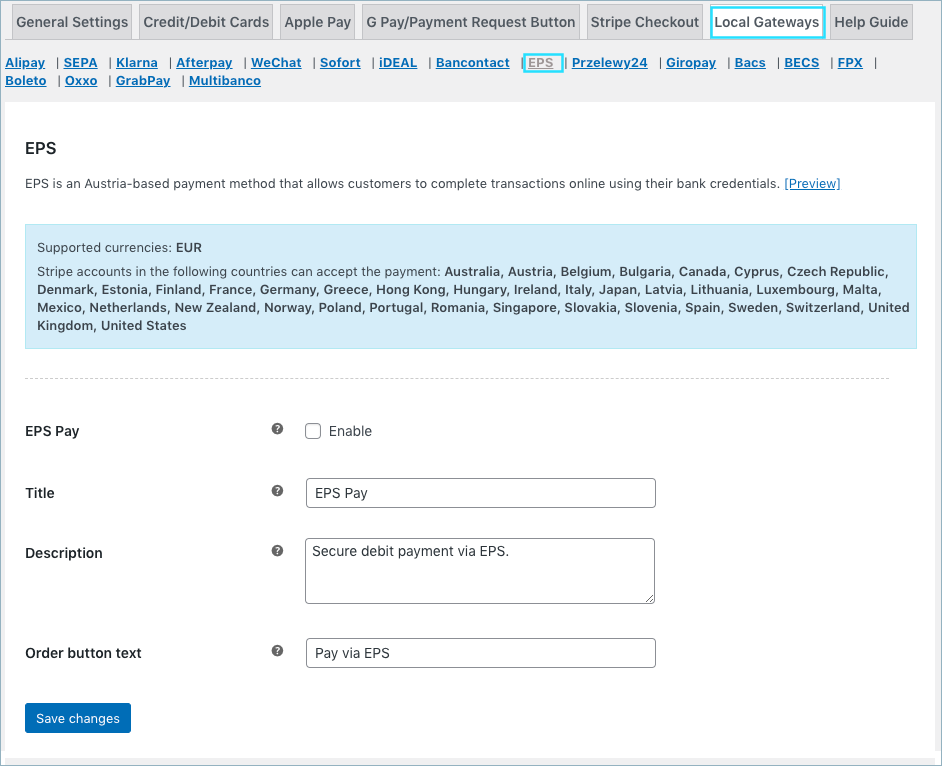
- EPS: Enable to accept EPS payments.
- Title: Enter a custom title for EPS payment. This title will be visible on the checkout page.
- Description: Enter a custom description for EPS payment. This description will be visible on the checkout page.
- Order Button Text: Enter a custom text for the EPS payment button.
Finally, click on the Save changes button to update the plugin settings.
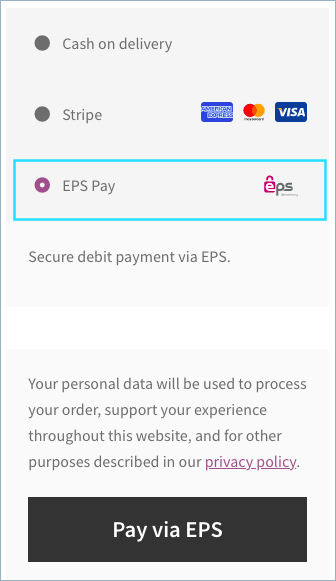
Pay via EPS
- Customer selects EPS at checkout
- Customer is redirected to EPS and chooses bank
- Customer enters account credentials
- Customer completes authorization process (with scanner or SMS)
- Customer is notified that payment is complete
- Customer returns back to business’s site for payment confirmation
Przelewy24 Pay
- Firstly, go to plugin settings or from the WordPress dashboard, go to WebToffee Stripe > General Settings.
- Head on to the Local Gateways > Przelewy24 tab.
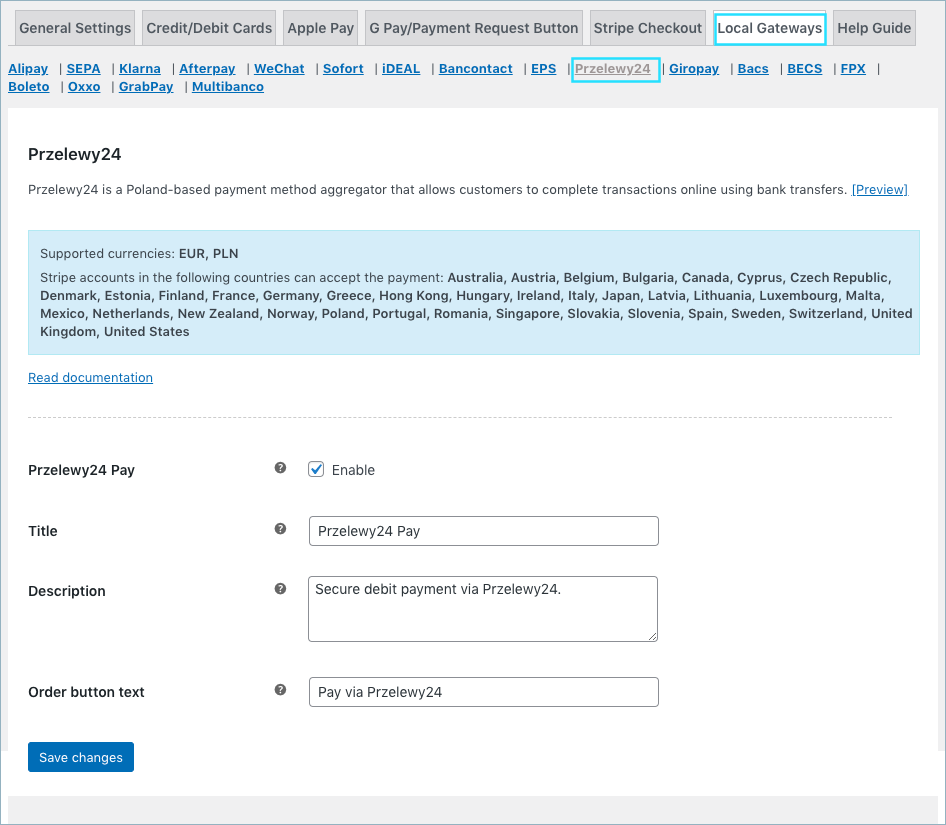
- Przelewy24: Enable to accept Przelewy24 payments.
- Title: Enter a custom title for Przelewy24 payment. This title will be visible on the checkout page.
- Description: Enter a custom description for Przelewy24 payment. This description will be visible on the checkout page.
- Order Button Text: Enter a custom text for the Przelewy24 payment button.
Finally, click on the Save changes button to update the plugin settings.
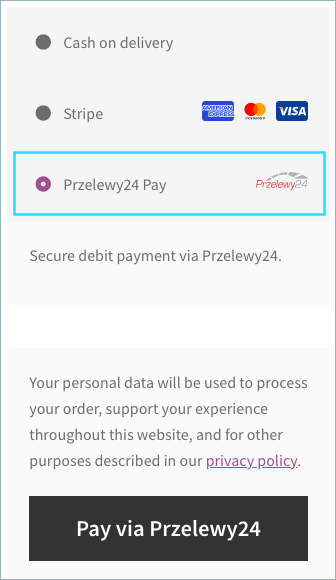
Pay via Przelewy24
- Customer selects Przelewy24 at checkout
- Customer is redirected to Przelewy24 and chooses bank
- Customer enters account credentials
- Customer completes authorization process
- Customer is notified that payment is complete
- Customer returns back to business’s site for payment confirmation
Help Guide
Provides direct links to resources like documentation and support.


Comments (28)
frank
January 30, 2024
how to change the main image of stripe (instead of only showing the cards) i would like to have my own image
Arjun
February 2, 2024
Hi frank,
Thank you for reaching out. We understand your requirement, but as of now the plugin doesn’t provide the mentioned functionality.
Henry
November 25, 2023
I’m using this plugin and I want to tokenize card information in our system and. Do we have solution for this?
Arjun
November 27, 2023
Hi Henry,
Thank you for reaching out. When a customer opts to save their card information on your store, our plugin will tokenize the card details during the storage process. Otherwise, no data is retained.
Khaled Jabbari
May 20, 2023
How to edit the WebToffee Stripe Checkout Stripe page
Hema
May 22, 2023
Hello Khaled,
Thanks for reaching out. You can customize the Stripe checkout page from their Stripe dashboard. In addition to that there is an appearance section to upload logo, change color.
Saud
August 4, 2022
Hi
I added webtoffee to my site and added set up Klarna payments as well.
I had multiple Mastercard / debit card payments at my checkout.
One from woo commerce payments and one from the stripe.
I was interested in keeping only one and switched off woo commerce payments.
The problem was sorted on my checkout but then I realized it had actually messed up my woo commerce cart page, and without the woo commerce cart page, the customer would not be able to modify the cart any more so I have basically disabled it the plugin until I get the solution.
Kindly recommend a possible solution.
Thanks.
Without having a cart page the customer would not be able to
Mark
August 29, 2022
Hi Saud,
Apologies for the inconvenience caused. The plugin is designed to work flawlessly with WooCommerce cart and checkout and hence, it has been tested thoroughly for any conflicts. This sounds like a conflict with your site theme or something specific to your website. We can surely take a look into it.
Please submit a ticket here with your site details.
Steven
June 7, 2022
hi, previous woocommerce and stripe FPX integration was fine. When i click on the FPX the list of bank will display, but today the list of bank is unaccessible at FPX. Any particular solution for such issue?
Shesna
June 8, 2022
Hi Steven,
Thanks for reaching out. Since this is a site-specific issue, we’d suggest you submit a ticket here for direct assistance from the technical team.
Dennis
March 17, 2022
May I know how to force the Alipay payment to HKD? It always redirect to RMB by default
Alan
March 23, 2022
Hi,
The plugin uses the currency that is set up on your site. If you are required to make payment using HKD then please make sure that you choose this currency in the site settings.
amir
January 3, 2022
dear
i have installed the plugin and integrated according to my requirments but on the front side i am unable to put the credit cart number, expiry date and card code all of these three input boxes are read only http://gator3077.temp.domains/~alamogsd/1stchoiceflags/NEWSITE/checkout/ can you help me please
regards
amir
Alan
January 3, 2022
Hi,
Can you please try switching the active theme on your site and check if the issue persists or not. If it’s resolved then please reach us via support and share your active theme zip file so that we can check.
Abdalhady Joharji
December 14, 2021
Hi dears,
How i can change the payment button text?
Thanks
Alan
December 22, 2021
Hi,
Please reach us via support and let us know which text you are required to change.
alex
September 15, 2021
I installed and activated the plugin. But it does not show up on my wocommerce checkout page. Stripe, paypal etc shows up just not klarna. also is there any documentation for the plugin? and how can I set the plugin in testmode? Found a video from 2018 on youtube that showed the same plugin, just with many more options.
Mark
September 21, 2021
Hi,
Please reach us via support so that we can check the issue with Klarna. You can also go through the below documentation to know more about setting up the plugin.
How to set up Klarna
How to set up stripe payment gateway
Ashwin Shahapurkar
August 4, 2021
Hi, Does it support BACS Direct Debit? If not, will you be adding it anytime sooner?
Mark
August 5, 2021
Hi Ashwin,
Sorry to let you down but it currently does not support this payment method.
Sanathan
July 27, 2021
Where can I get the webhook link for any website from the plugin and how to add a signing secret key in the plugin which we get in Stripe account post adding URL.
Mark
July 29, 2021
Hi Sanathan,
Our plugin supports webhooks only for SEPA payment currently. If you are not using that, the plugin does not support webhooks.
Subho
June 2, 2021
How to connect with API? I’m not getting the option. How will I receive the payment?
Mark
June 5, 2021
Hi Subho,
The above article clearly details on how to get the API keys and add them in the plugin. Please read the article thoroughly.
Victor Saul
May 14, 2021
Hello. Are BOTH the “Credit/Debit Cards” AND the “Stripe Checkout” suppose to be enabled together? Or is it one or the other? Please advise. Thank you!
Mark
May 18, 2021
Hi Victor,
You can choose to enable any one or both. Credit/Debit Cards options allows checkout directly from site using card details. Stripe checkout is hosted in stripe and users will be redirected to the corresponding page to finish checkout.
Christine
March 13, 2024
Are both methods equally as secure?
Sanjai Valsan
April 2, 2024
Hi Christine,
Thanks for reaching out!
Both payment gateways are protected by Stripe, ensuring equal security standards.