
This article provides a step-by-step guide on how to set up Stripe payment gateway in WooCommerce. It covers the process of creating a Stripe account, configuring payment settings in WooCommerce, and testing the payment process. We will be using the Stripe payment gateway plugin for setting up Stripe in WooCommerce.
Having a secure, and flexible payment system is essential for the success of any eCommerce business. If you have chosen Stripe as the payment processing system for your WooCommerce store you are almost halfway there.
What comes next is integrating Stripe with your WooCommerce store so that your customers can make payments in your store using their favorite payment method.
Let’s begin by answering why you should choose the Stripe Payment gateway in WooCommerce.
Using the Stripe payment gateway plugin for your WooCommerce store you can achieve the following and much more.
- Directly accept credit and debit card payments.
- Accept payments with Apple Pay.
- Accept payments with Alipay.
- Accept payments with Google pay and payment request buttons.
- Accept SEPA
- Accept Klarna
- Accept Afterpay and WeChat pay
- On-site checkout for better user experience.
- Simple payment structure and low transaction fees.
You may follow the below steps to integrate Stripe with your WooCommerce store quickly and easily.
Before going any further, do you have a Stripe business account? Well, it’s required for following the rest of the guide.
If you don’t have one already, you may create one by visiting the Stripe website. It’s completely free to create an account with Stripe, so no need to hesitate.
If you are done with creating the account let’s see what’s the next step you need to take to integrate Stripe with your WooCommerces store.
- Get Stripe API keys
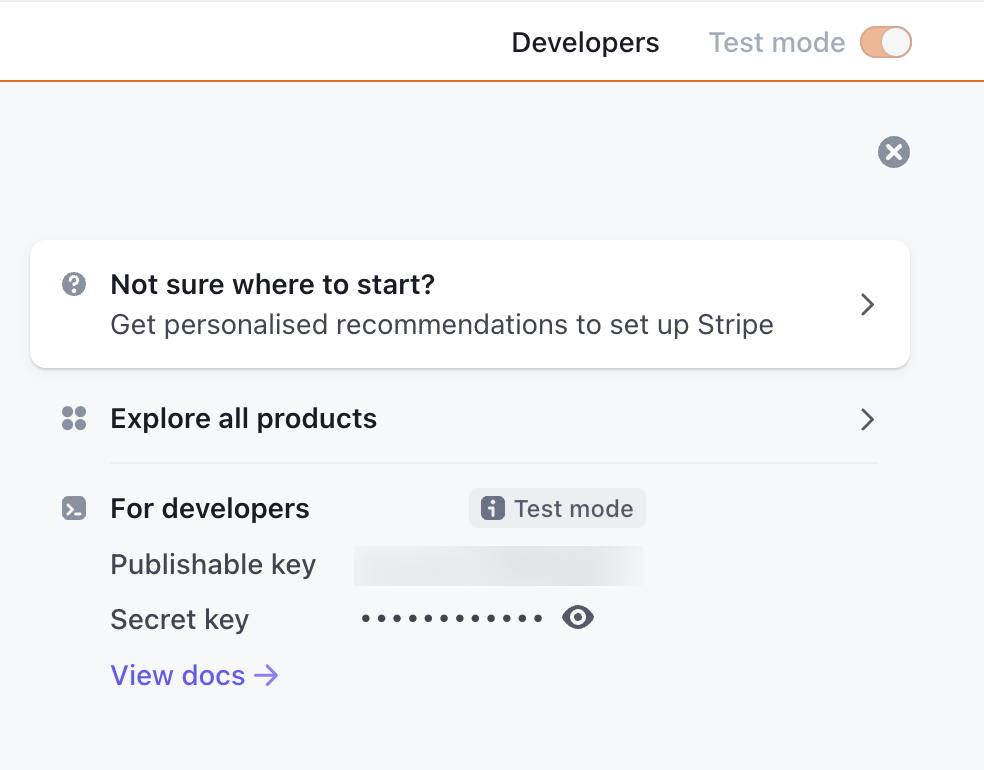
Once you have created your account you will get access to Stripe API keys (Test publishable and Test secret keys) -which are a mix of numbers and alphabets- from your Stripe dashboard.

You can copy and save both the Publishable Key and the Secret Key for later use. - Install the WooCommerce Stripe plugin
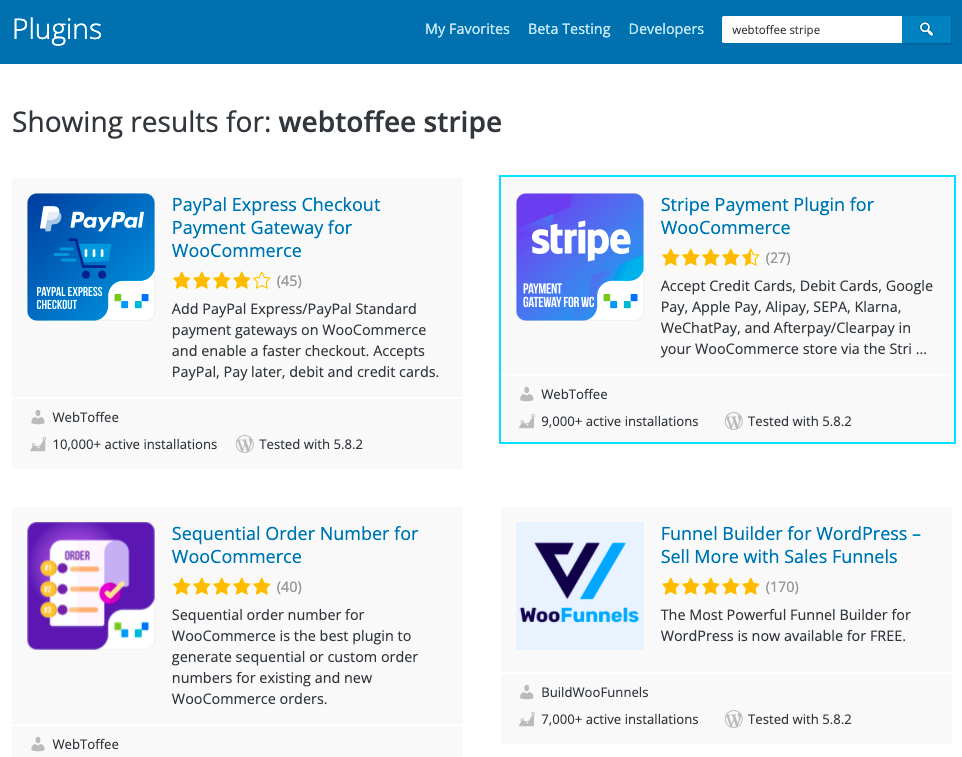
The Stripe payment gateway for WooCommerce is a free plugin that you can download and install by navigating to Plugins > Add new.

Install and Activate the plugin and go to its settings for further configuration. - Configure the plugin settings
Now, go to the WebToffee Stripe menu and select General Settings. Here, choose a transaction mode and enter the API keys you obtained earlier.

Click on Save changes to save the settings. - Enable credit/debit cards via Stripe
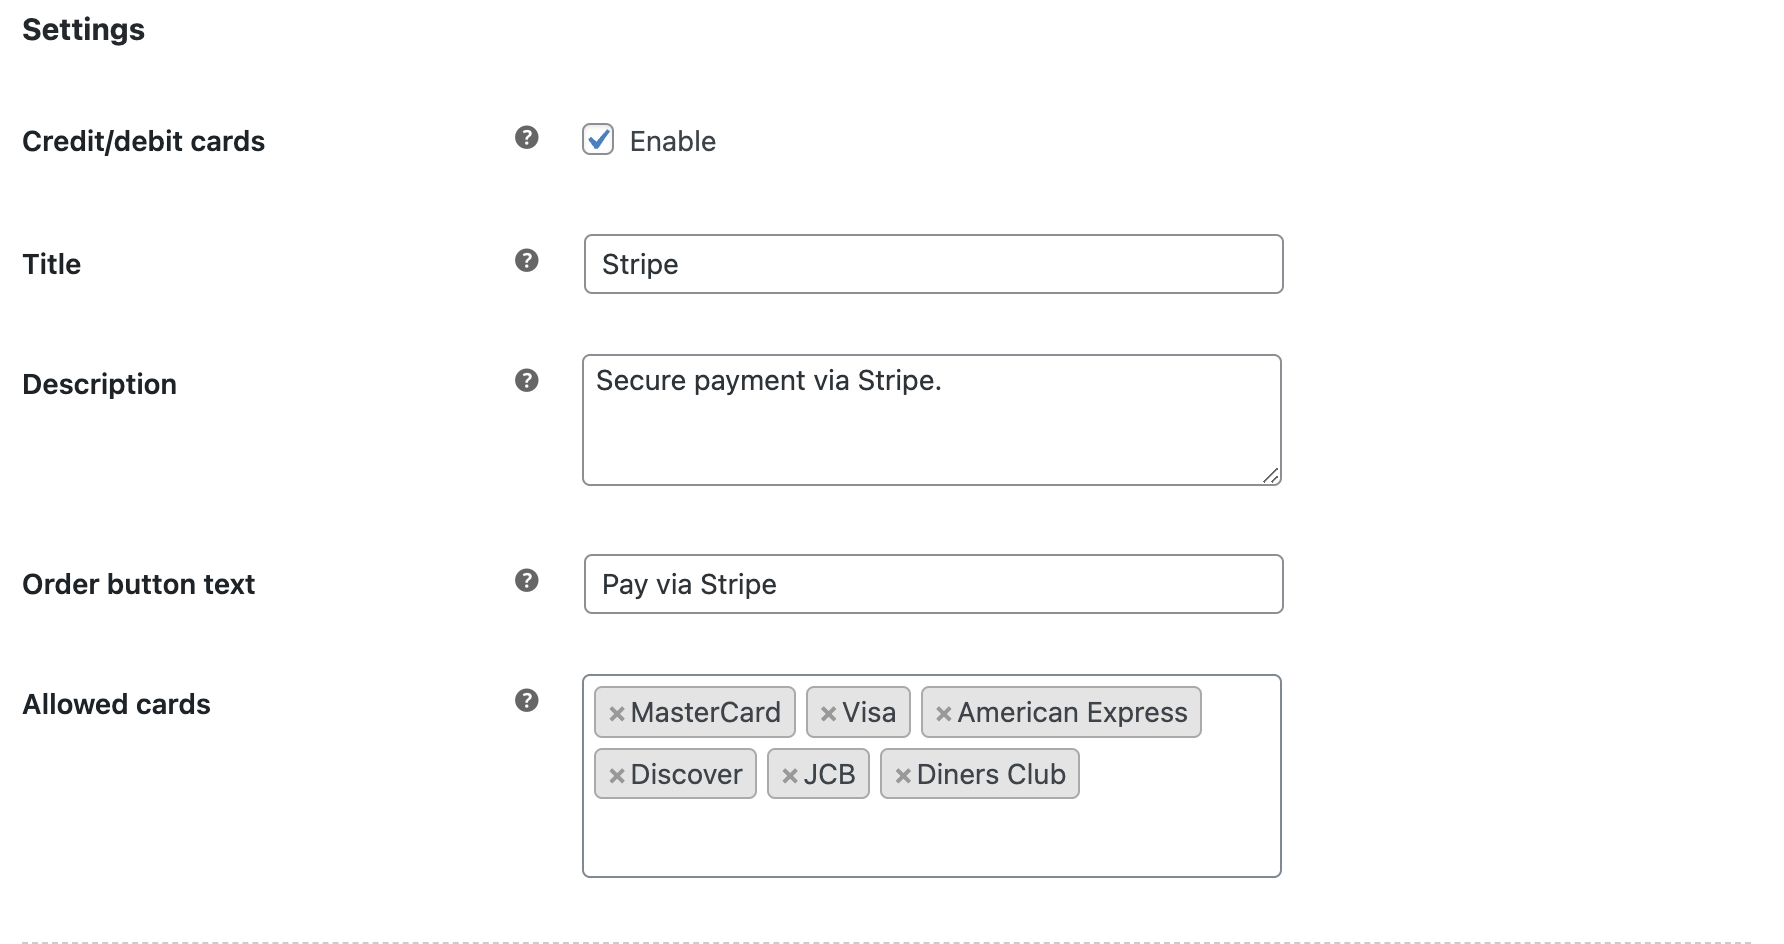
Credit and Debit cards are one of the popular payment methods used by customers across the world. Thus it’s important to provide these payment methods to your customers. To accept credit and debit cards within your store go to Credit/Debit Cards from the WebToffee Stripe menu.
• Enable the Credit and Debit cards checkbox.
• This Stripe plugin supports all popular cards including Mastercard, Visa, American Express, Discover, JCB, and Diners Club. You can allow all of these or choose the ones you prefer.
•There are many other options to customize the title, description, and button section for the checkout page, options to enable your customers to save their card details for future use, etc.
Once the settings are enabled you can click Save changes.
Similarly, you can add 20+ payment methods to your WooCommerce store using Stripe. You can set up Stripe checkout, add Payment buttons for Google Pay, and Apple Pay and enable other local payment methods such as Alipay, SEPA, Klarna Payments, WeChat Pay, Afterpay, etc. - Make a test transaction
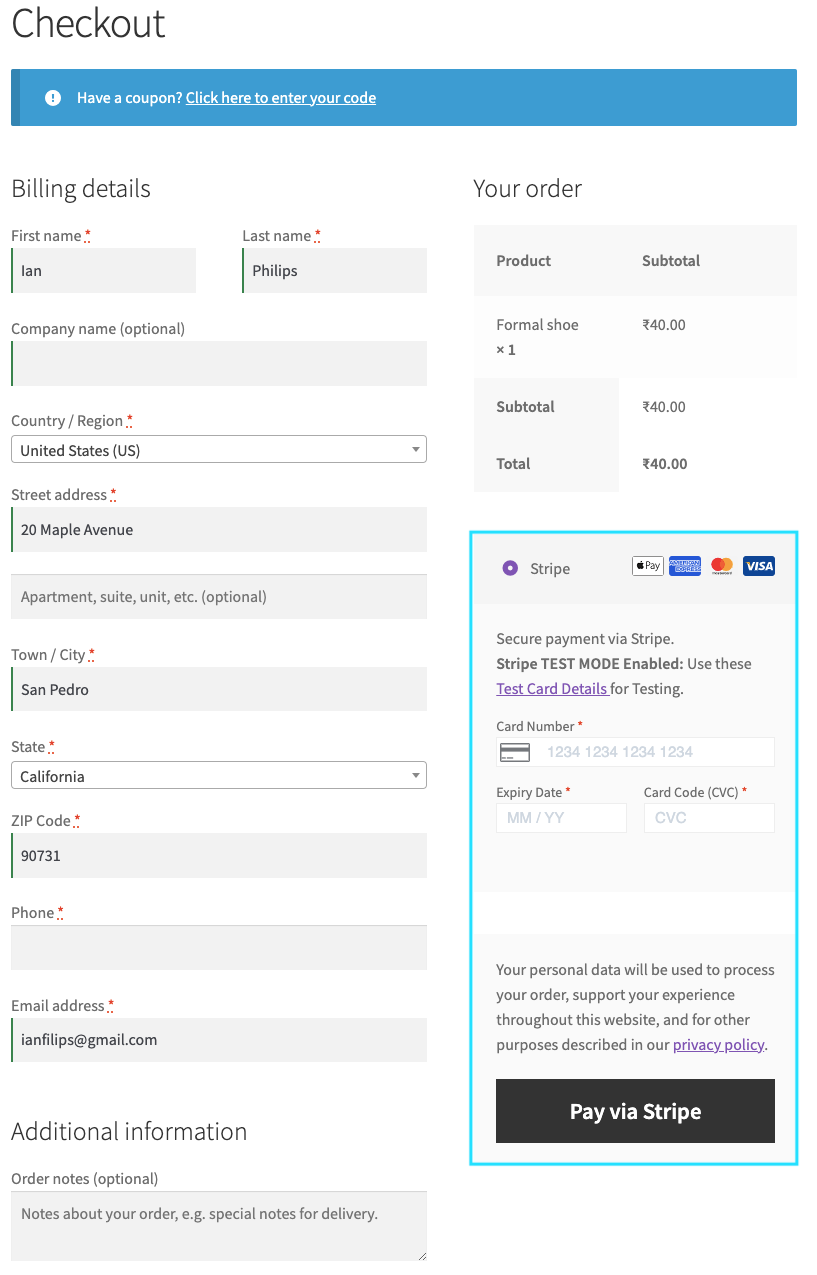
Now let’s check if the configurations are working properly by placing an order in your store.
On checkout, you can see the option to make payments with card details.
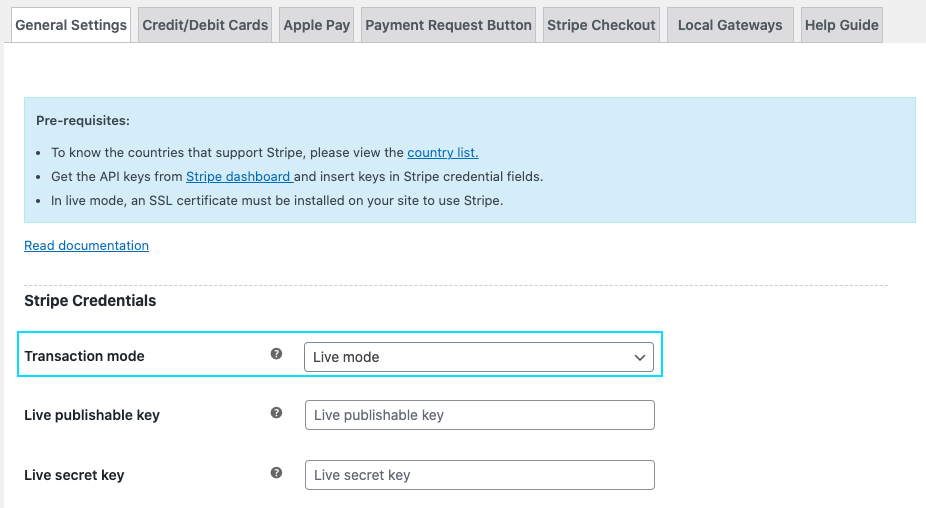
- Enable Live mode
Since we have enabled test mode for Stripe, you will not be able to make any actual transactions. For enabling actual transactions you will have to switch to live mode within the plugin settings as shown below.

You can choose Live mode from the drop-down and along with that paste the live publishable key and secret key copied from your Stripe account dashboard.
Click on Save changes to save the changes. Now your store is all ready to accept payments from your customers.

Similar Plugins to Integrate your WooCommerce Store with Stripe
You can check out the below list of plugins as well to add Stripe to your WooCommerce store. These are entirely free and some of them have their paid versions as well.
WooCommerce Stripe Payment Gateway
This official WooCommerce Stripe plugin offers support for card providers including Visa, MasterCard, American Express, Discover, JCB, and Diners Club. Local payment methods such as Alipay, SEPA, Sofort, iDeal, and Giropay can also be easily integrated into your store with the plugin. Plus you can accept payments via Apple Pay, Google Pay, and Microsoft Pay for mobile and desktop.
Payment Plugins for Stripe WooCommerce
Payment plugins is an official partner of Stripe and lets you accept payments via Credit Cards, Google Pay, ApplePay, Afterpay, ACH, Klarna, iDEAL, etc. This free plugin also supports WooCommerce subscriptions thus enabling customers to payments for Subscription products as well.
Accept Stripe Payments
This Stripe Payments plugin allows you to accept credit card payments via the Stripe payment gateway on your WordPress site easily. It supports Alipay and comes with a quick installation and setup.
Conclusion
Ensuring the best possible payment experience is one of the top priorities of any eCommerce store. Integrating Stripe is one of the best ways to make sure of it. The WooCommerce Stripe Payment Gateway plugin we mentioned in this article also has a premium version with advanced features like support for recurring payments.
Hope you will be able to easily integrate Stripe with your WooCommerce store once you go through the article.
What are your thoughts on this article? Let us know in the comments.