When you are merging multiple sites and want to automatically shift all users to a new site, the quickest way to accomplish this is by using a plugin to export and import the user data. The WordPress User & WooCommerce Customers Import Export Plugin is one of the best plugins to accomplish this task. To import WordPress users / WooCommerce customers:
- Select the post type as Users/Customers.
- Select an import method.
- Map the import columns.
- Use advanced options/ batch import and scheduling.
Import Users
To import WordPress users / WooCommerce customers, click on WebToffee Import/Export(Pro) > Import
Step 1: Select post type
As a first step, you need to choose the post type as Users/Customers.
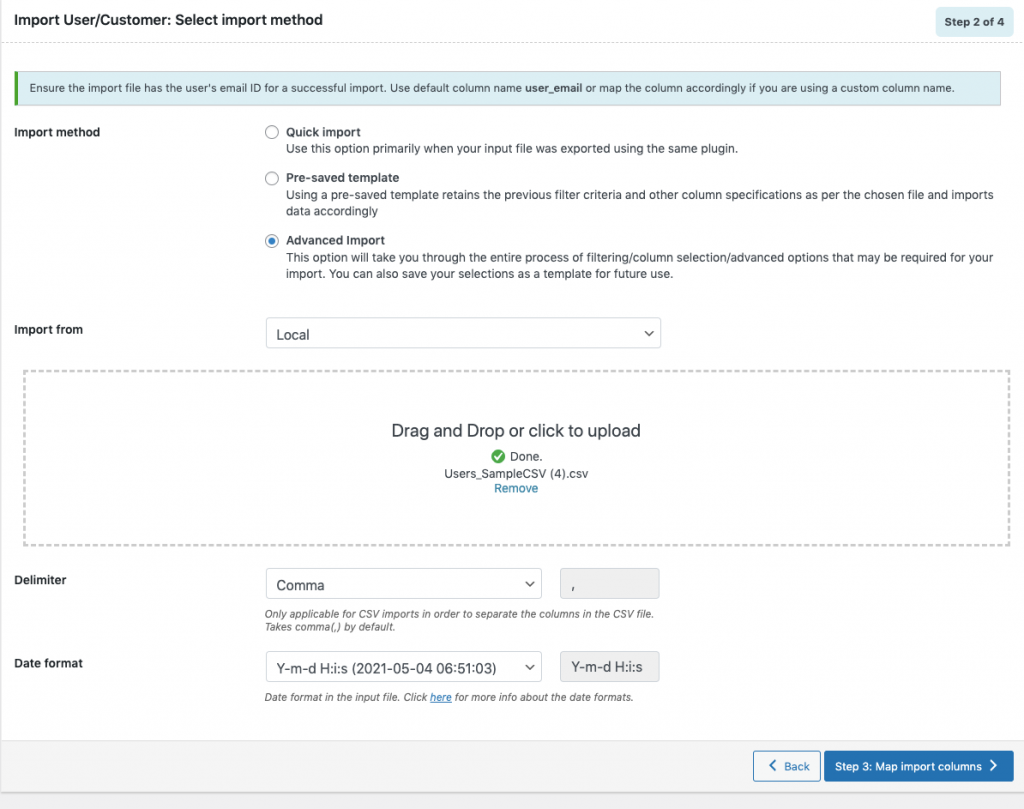
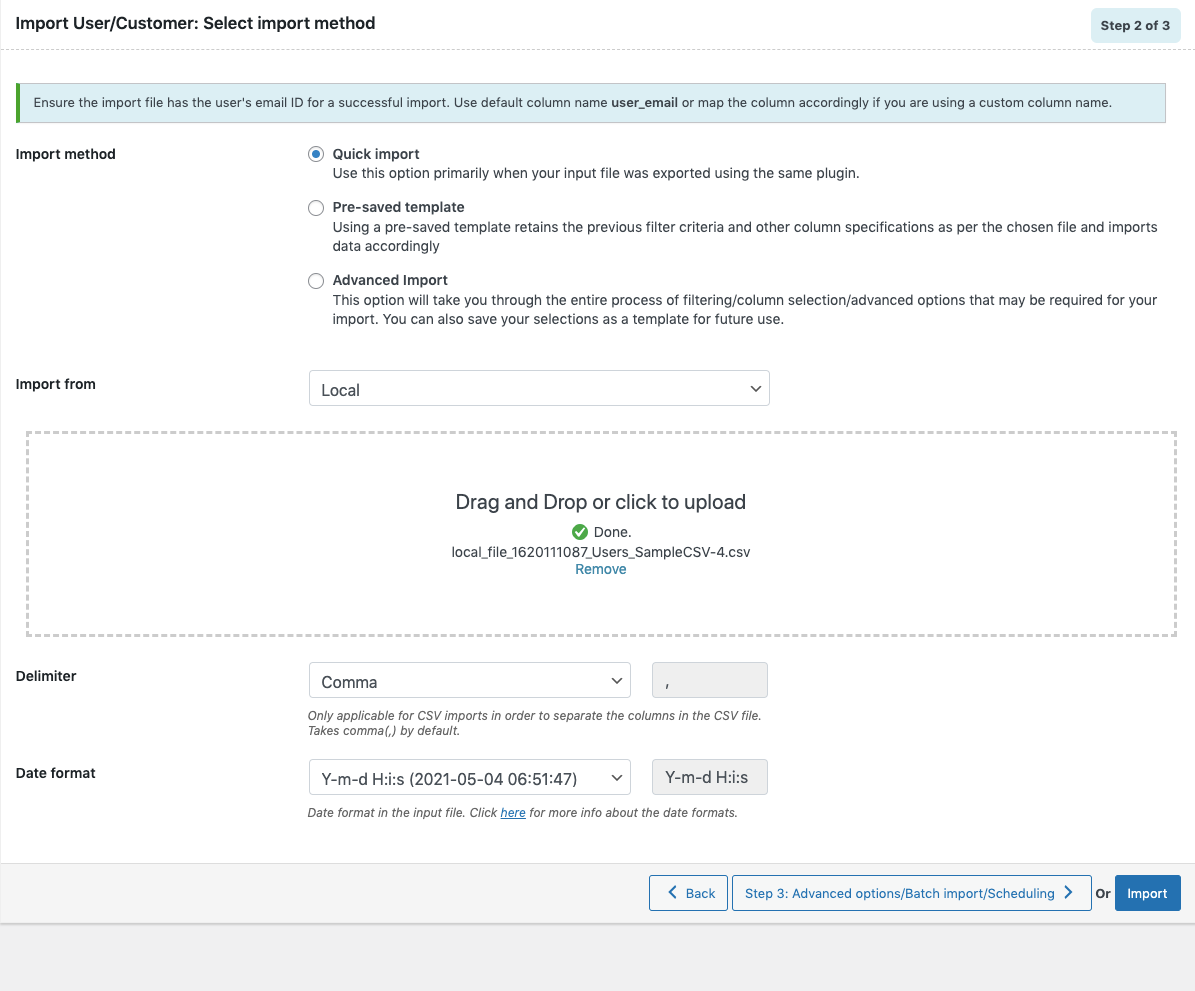
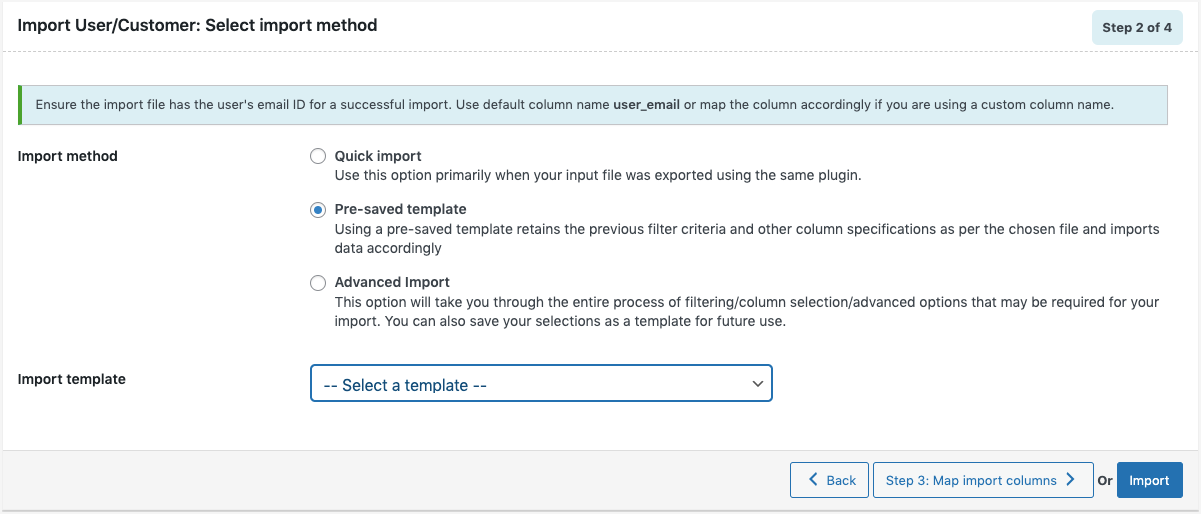
Step 2: Select the import method
Choose from the below options to continue with your import:
- Quick import
- Based on a pre-saved template
- Advanced import
Let us have a look at each of these import methods:
Quick Import
- imports the basic/standard fields of the respective post type.
- primarily used when your input file was exported using the same plugin
- One can import file from:
- Local
- URL
- FTP
- Click the Import button to complete the action or proceed to Step3 for advanced options.
- Navigate to Step 4 to know more about Advanced options/ Batch import/ Scheduling.
From pre-saved template
- This method retains the previous filter criteria and other column specifications as per the chosen file and imports data accordingly.
- By selecting this option, one can choose a previously saved template from the Import template drop-down.
- Click the Import button to complete the action or proceed to Step3 to map columns.
- Navigate to Step 3 to know more about mapping import columns.
Advanced Import
- This option will take you through a detailed process of filtering/column selection/advanced options that may be required for your import.
Step 3: Map import columns
- Here, one can map the import columns under the following 3 fields:
- Default fields: The column names appearing in this section can be edited if required. The preferred names and choices that were last saved can be viewed on choosing a pre-saved template.
- Meta(custom fields)
- Hidden meta
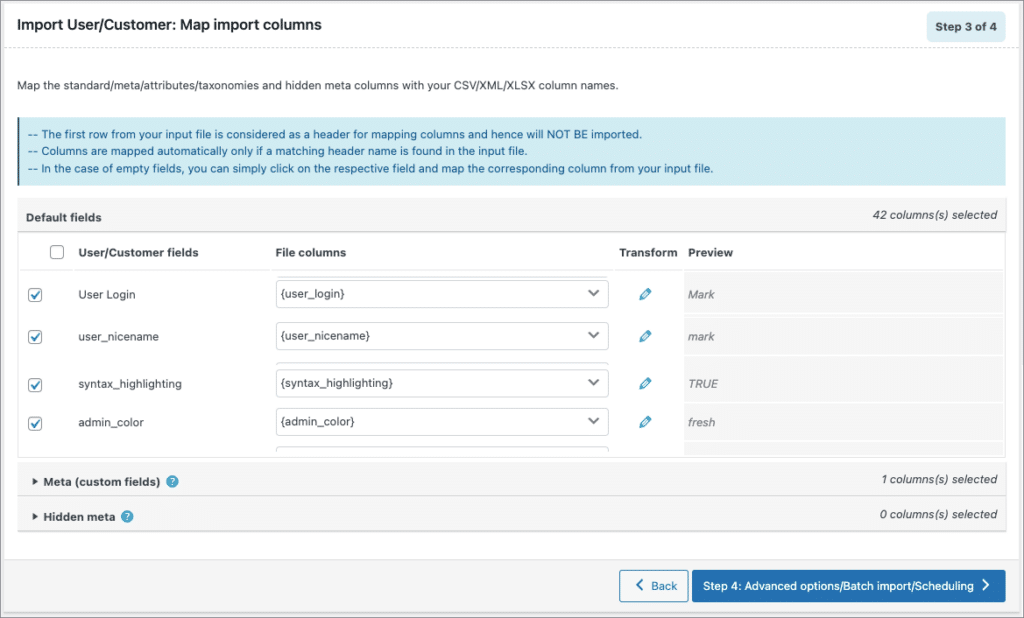
- Click on Step 4 to proceed.
Evaluate field
This field is used to append a value/expression to an existing item while importing. It basically selects/maps any column from the input file and compute the values with expressions and creates output.
- Expression: Any of the operators +*/-()&@ or string constants can be used along with the attributes to manipulate the respective value.
- Input: Select the column from the dropdown which has to be modified.
- Output: Sample value will be created based on the first record from input file.
Step 4: Advanced Options/Batch Import/Scheduling
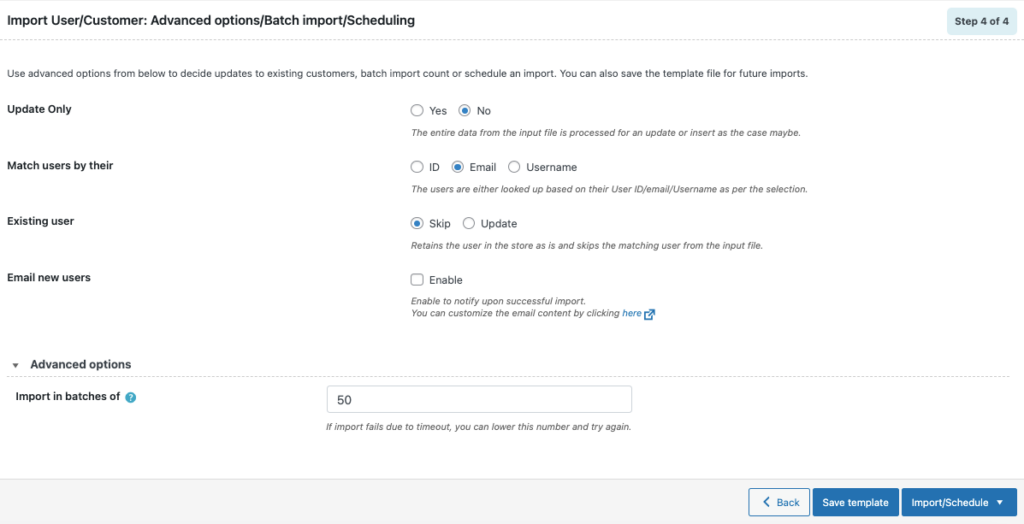
On reaching Step 4, the following window will appear, from where one can:
- Update Only: On selecting “Yes”, the store is updated with the data from the input file only for matching/existing records from the file. On selecting “No”, the entire data from the input file is processed for an update or insert as the case maybe.
- Match users by their: ID, Email, Username
- If the user exists in the store: One can either Skip or Update the entry.
- Email new users: One can Email all the new users upon successful import.
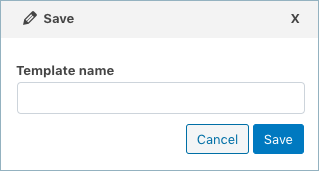
- Save the template file for future (if needed).
- Click on Import/Schedule to finish.
You can either import the users directly into your store or schedule the import.
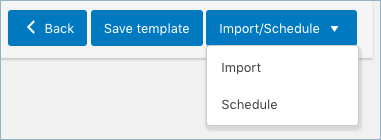
To schedule the import:
- Hit the Schedule option, and you will be taken to the cron schedule window as shown below:
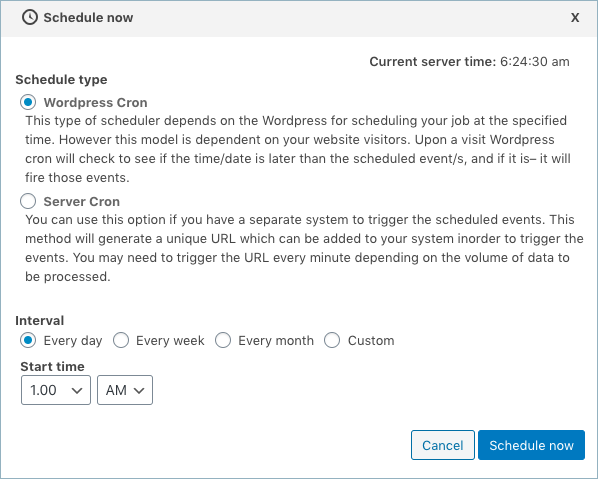
The plugin supports two different schedule types:
- WordPress Cron: Upon a visit, WordPress Cron will check to see if the time/date is later than the scheduled event/s, and if it is– it will fire those events.
- schedules your job at the specified time.
- is dependent on your website visitors.
- Server Cron: You may need to trigger the URL every minute depending on the volume of data to be processed.You can use this option :
- to generate a unique URL that can be added to your system in order to trigger the events.
- if you have a separate system to trigger the scheduled events.
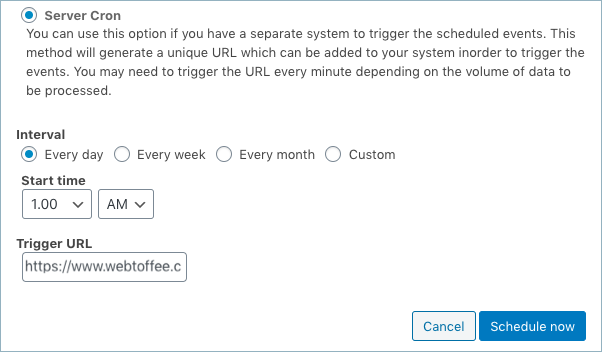
Also, the import/export can be scheduled on a daily, weekly, monthly, custom basis. One can also configure the time at which the import has to be scheduled.
To directly import:
- Hit on the Import option
Once the import is completed, a pop-up will be displayed showing import status which contains the number of successful imports and failed imports (if any).
To know more : WordPress Users & WooCommerce Customers Import Export Plugin.

Cedric VIDAL
March 29, 2024
Hello,
When exporting then importing from one WooCommerce shop to another, will the customer retain their previous passwords? Or will it generate a new one?
Thanks
Hema
April 2, 2024
Hello Cedric Vidal,
Thanks for reaching out. Yes, The password will be retained during the export/import process.
Dion
June 5, 2023
Could you indicate which fields are mandatory at the least for a successful import?
Vineetha
June 7, 2023
Hi Dion,
Thanks for reaching out! For successful import of users, the only mandatory column is user_email.
Cathy
February 1, 2023
How can I tell what pre-saved template my scheduled import is using? And how do I clean up old pre-saved templates?
Alan
February 21, 2023
Hi Cathy,
Thanks for reaching out to us.
You can choose the desired pre-saved template before creating the schedule in Step 2.
In order to delete the existing templates you may please go to the general settings of the plugin and delete it from there.
pierre
September 21, 2022
Hello,
I tried to import users from a .csv file (UTF-8 encoding, fields separated by commas) but the same error appears every time “skipped: cannot insert user without email.”. But the column user_email exists and is completed.
Can you help me with that ?
Alan
September 23, 2022
Hi,
Can you please reach out to us via support and share the CSV file you used to import so that we can check it?
Kurt Meyer
February 10, 2022
It seems that when I import a user with a zip code that has a leading zero (01370 for example) the leading zero is lost. Is there a way to keep the leading zero so it displays correctly on the checkout and account details pages? Thanks for any advice.
Alan
February 17, 2022
Hi,
The issue you are facing is that the leading zeroes in the zip code column are excluded when you saved the file. In the spreadsheet applications, the leading zeroes will be automatically removed when the file is saved. ie. the data “000113” will be saved as “113” in the CSV file. We can assure you that the issue is not caused due to the plugin instead it is because of how the data is saved by the spreadsheet application.
Justus Erima
March 22, 2021
Im trying to import about 2000 subscribers, it goes through successfully but when I open the excel document, it is empty,even though it shows me users import successful
Alan
March 31, 2021
Hi,
As per our understanding you are having issue with importing users on your site. Please reach us via support and share your import log.
ami
March 17, 2021
it imports customers into users section. how can I import into woo customers section?
Alan
March 17, 2021
Hi,
The reason why the imported users do not show up under Woocommerce > Customers is because any one user to appear in this section
(DB view wp_customer_lookup) has to have at least 1 placed order. And freshly imported users have 0 orders.
So once an imported user places his/her first order, this view will be populated and the the users will show up under
Woocommerce > Customers
Markus
March 11, 2021
Hello
I did some test with the customer importer.
I like to import my existing web shop customer from an other system into WP / Woocommerce.
The importer worked fine so far and I saw my customer in WP / Users.
QUESTION:
As “roles” it makes from the improt directly “subscriber”. Should this not be “customer” and if so how can I manage this, with the import to have this set correctly?
Thank you very much for your kind support!
Alan
March 16, 2021
Hi,
To import users with the role “customer” please create a column in your file with header “roles” and then specify the data “customer” in those columns so that they will be imported as customers.
Sven Adam
March 7, 2021
What date format is expected for UNIX timestamp dates in XML import file?
Alan
March 8, 2021
Hi,
Please use the date format YYYY-MM-DD(2020-02-17) in the import XML file to import dates.