Share:


Table of Contents
- Shopify allows merchants to customize the checkout experience, including branding elements like logos, colors, and layout, depending on their plan.
- Basic plans can access the checkout and accounts editor for standard changes, while Shopify Plus offers advanced customization options through the Checkout Branding API and supported apps.
- Merchants can choose between one-page and three-page checkout layouts, allowing them to tailor the experience based on their product complexity and customer needs.
- Customization options include modifying customer information fields, adding useful app blocks, and enhancing shipping and payment clarity to streamline the checkout process.
- It's important to maintain a simple and consistent design that aligns with the overall store branding while ensuring essential information is easily accessible to customers.
- Regular testing of the checkout flow is necessary to ensure functionality across devices and scenarios, as well as to verify that any customizations enhance rather than complicate the purchasing experience.
Your Shopify checkout is one of the most important parts of your store. By the time a customer reaches it, they have already browsed your products, chosen what they want, and decided they are interested enough to buy.
The last thing you want is for the checkout experience to feel disconnected from your store, confusing, or difficult to complete.
Fortunately, Shopify gives store owners several ways to customize the checkout experience. The options available to you depend heavily on your Shopify plan, though. Some changes can be made directly from Shopify’s checkout editor, while others require Shopify Plus, apps, or custom development.
In this guide, we’ll look at how Shopify checkout page customization works, what you can change on different plans, and how to customize your checkout without making it unnecessarily complicated.
The Shopify checkout page is where customers provide the information required to complete their purchase.
Depending on your store setup, this typically includes their contact information, shipping address, delivery method, payment information, discounts, and final order details.
It is different from your cart page.
The cart lets shoppers review the products they intend to buy before proceeding. Checkout handles the information and payment required to actually place the order.
Shopify also treats the thank-you page, order status page, and newer customer account pages as part of the broader checkout and accounts experience. These surfaces can now be managed from Shopify’s checkout and accounts editor.
Yes. Shopify lets merchants customize both the appearance and, to varying degrees, the checkout functionality.
However, how much you can customize depends on your Shopify plan.
Stores on the Basic plan or higher can use Shopify’s checkout and accounts editor. This lets you make standard changes such as adding your logo, adjusting colors and fonts, changing the checkout layout, and using eligible apps on supported post-purchase pages.
Shopify Plus stores get additional options. These include eligible app customizations on the information, shipping, and payment stages of checkout, along with access to the Checkout Branding API for more advanced visual customization.
Here’s the general difference:
| Customization | Basic, Grow & Advanced | Shopify Plus |
|---|---|---|
| Checkout and accounts editor | Yes | Yes |
| Logo, fonts, and colors | Yes | Yes |
| One-page or three-page checkout | Yes | Yes |
| Customer contact and address fields | Yes | Yes |
| Eligible apps on thank-you and order status pages | Yes | Yes |
| Public apps using supported Shopify Functions | Yes | Yes |
| App UI blocks on information, shipping, and payment steps | No | Yes |
| Checkout Branding API | No | Yes |
| Custom apps using Shopify Functions | No | Yes |
Most merchants can make useful checkout changes without Shopify Plus, but deeper checkout customization still requires Plus.
Shopify now handles most checkout customization through the checkout and accounts editor, which is separate from the normal theme editor.
You can access it from:
Shopify Admin → Settings → Checkout → Configurations → Edit
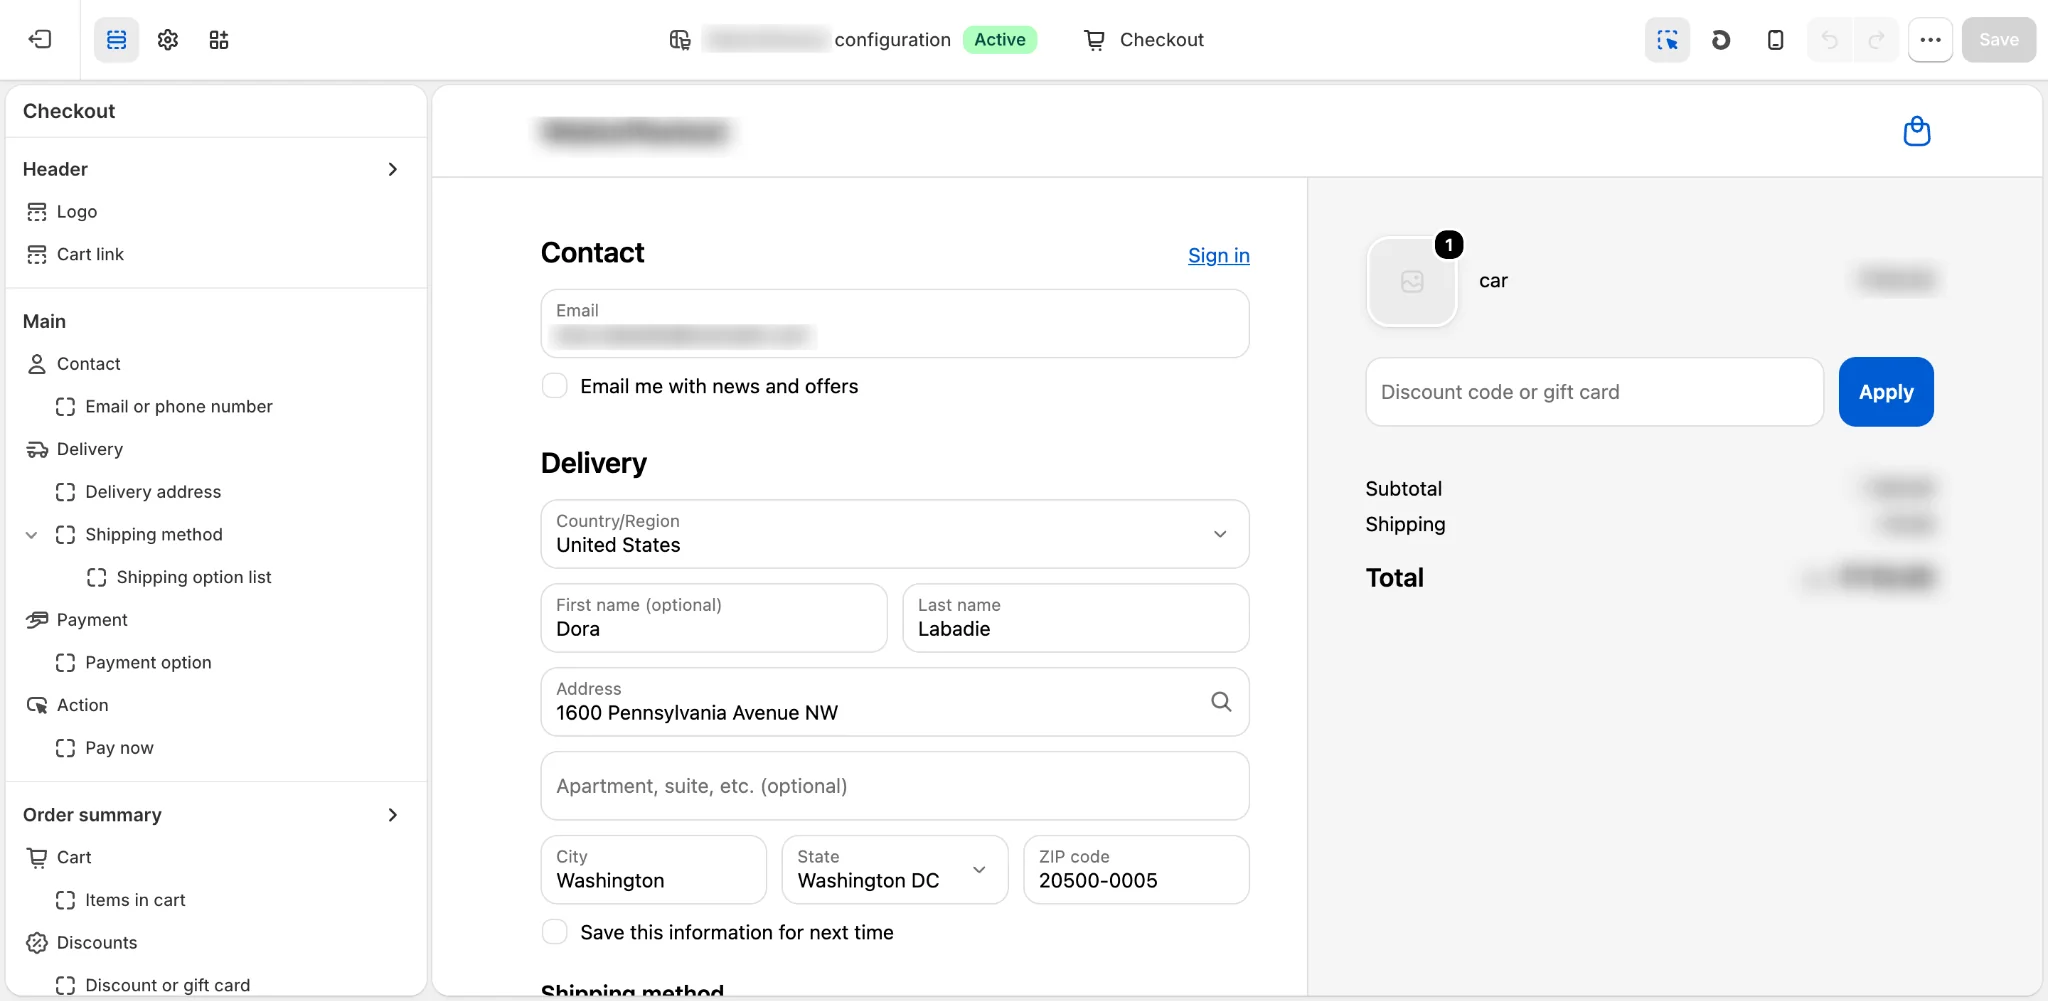
You’ll now see a preview of your checkout alongside several customization options.
The editor has three main sections:
- Sections: Manage supported page content and blocks.
- Settings: Change checkout branding, colors, typography, and layout.
- Apps: Add compatible apps and extensions to supported checkout pages.
You can also use the page selector at the top to switch between checkout, thank-you, order status, and customer account pages.
Before making significant changes, duplicate your existing checkout configuration to create a backup draft. This allows you to experiment without immediately changing your live checkout.
Now let’s look at what you can customize.
1. Add Your Logo and Match Checkout to Your Brand
One of the simplest checkout improvements is making sure it visually belongs to the rest of your store.
A customer shouldn’t move from a carefully branded product page into a checkout that suddenly looks unfamiliar.
From the checkout and accounts editor, you can add your logo and customize elements such as fonts, colors, backgrounds, buttons, links, form fields, and error-message colors.
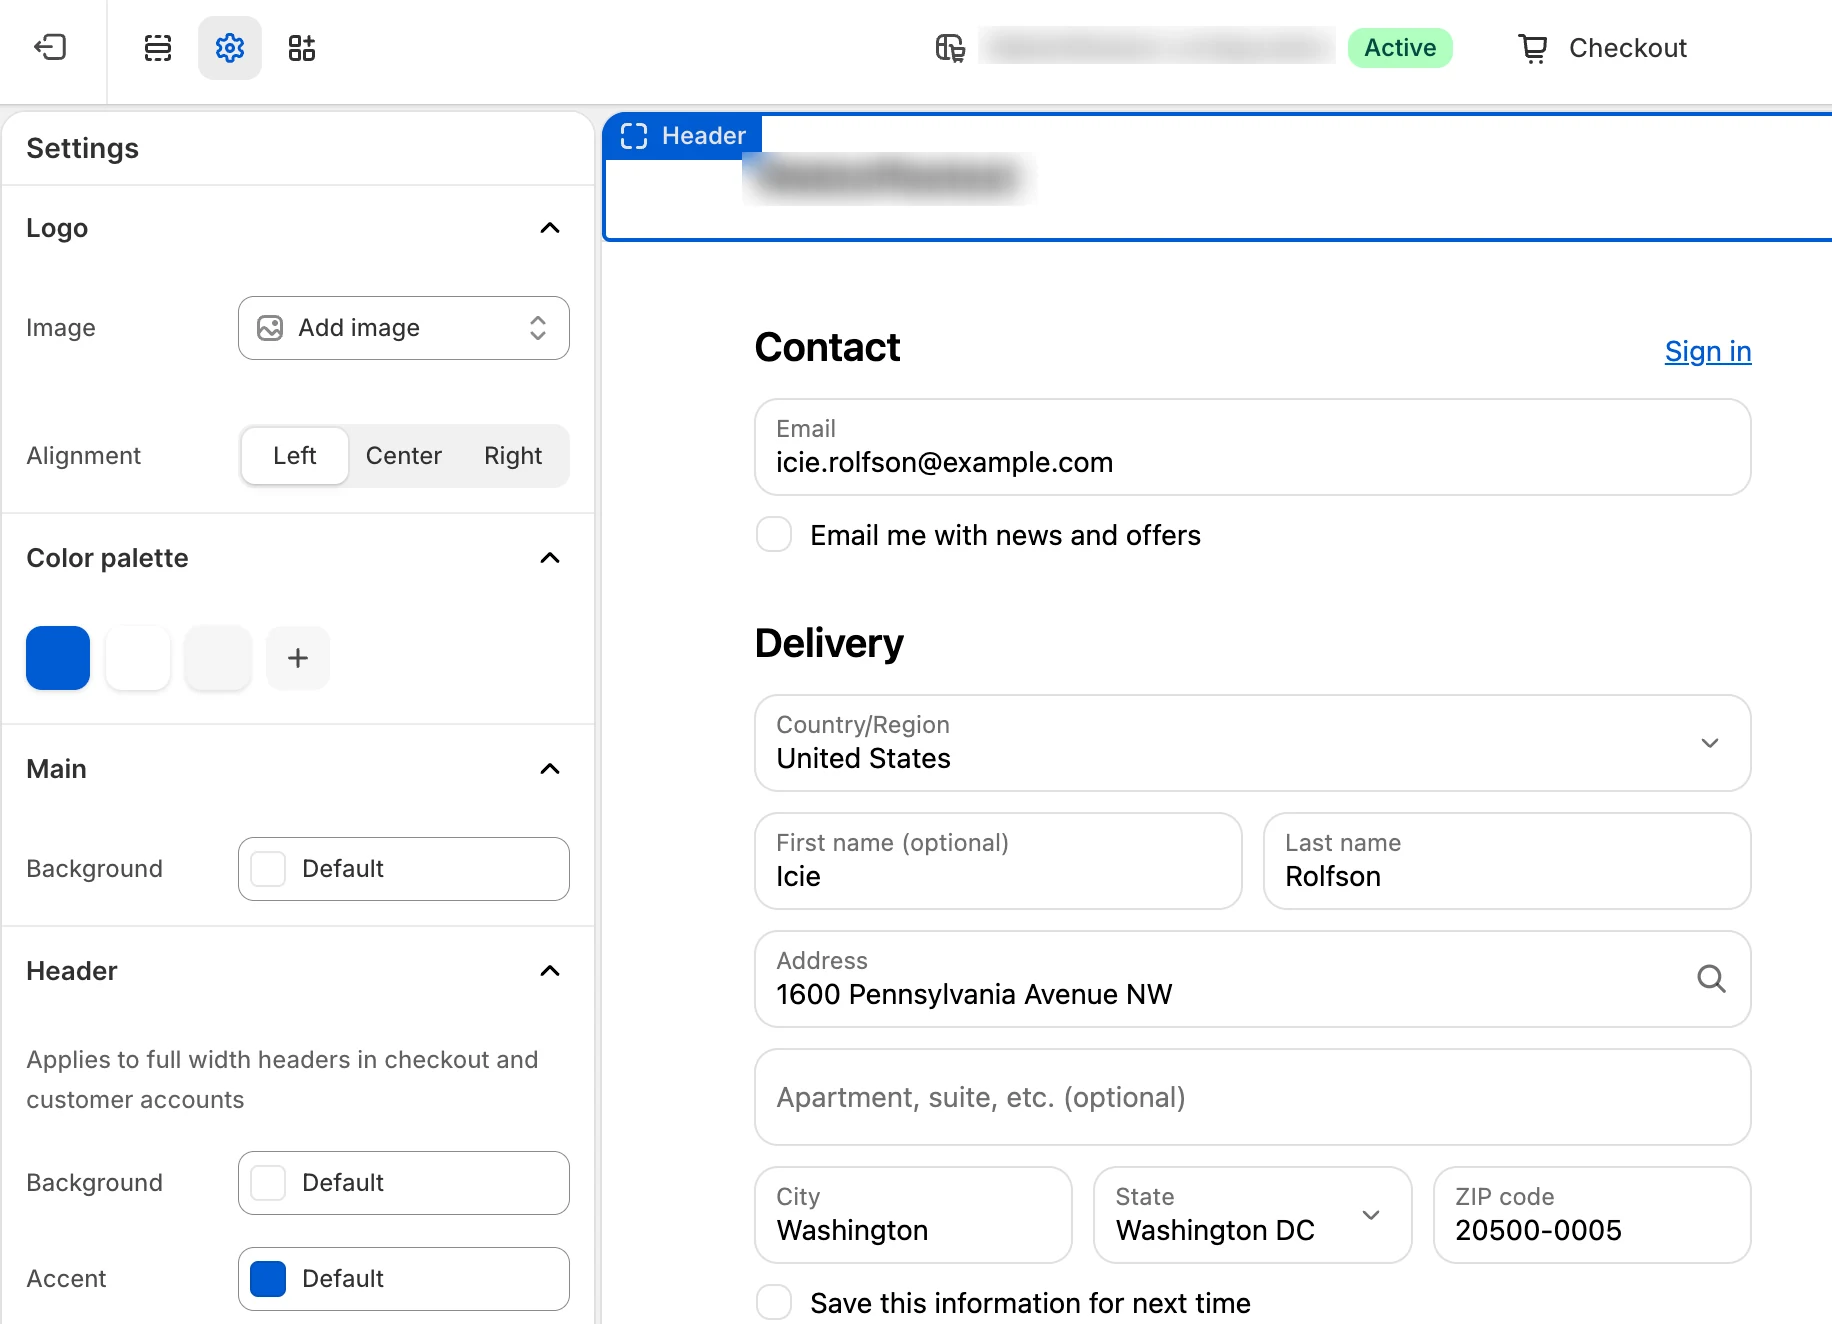
You do not need to recreate your entire storefront design inside checkout. In fact, keeping checkout relatively simple is usually better. Focus on recognizable elements such as your logo, primary brand colors, and readable typography.
For example, if your storefront uses a distinctive dark theme, you don’t need to carry every decorative element into checkout. A consistent logo, typeface, color palette, and button style may be enough to maintain brand recognition.
Also pay attention to contrast. Checkout is primarily a functional page, so labels, totals, errors, and buttons should remain easy to read.
Note: Since February 5, 2026, Shopify no longer lets merchants add new background images to the checkout header. Stores that already have one can retain or remove it, but once removed, a new header background image can’t be added again.
2. Choose Between One-Page and Three-Page Checkout
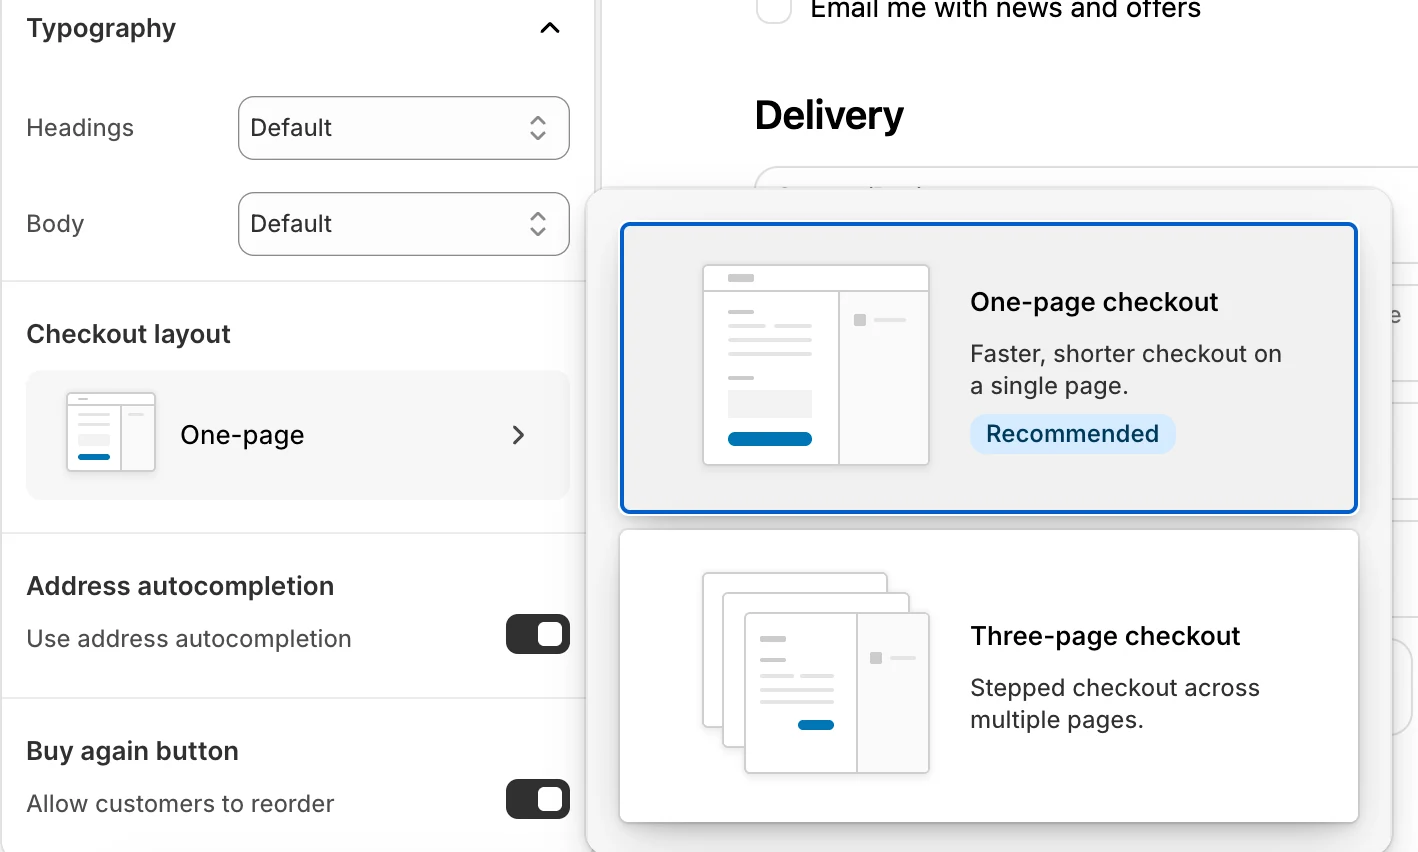
Shopify lets you choose between a one-page checkout and a three-page checkout.
One-page checkout places contact information, delivery details, and payment information together on a single page. Three-page checkout separates the process into stages such as information, shipping, and payment.
Shopify uses one-page checkout by default, but you can change the layout from the checkout and accounts editor under the Checkout layout setting.
Which Layout Should You Choose?
There isn’t one layout that is automatically right for every store.
A one-page checkout can feel quicker because customers can see everything in one place. This works well when the buying process is straightforward, and there isn’t much information to enter.
A three-page layout can make a more complicated checkout feel easier to digest because customers complete one stage at a time.
The better approach is to think about your customers and what they need to provide.
If you’re selling straightforward physical products with familiar shipping and payment options, the default one-page checkout may work perfectly well. If customers regularly need to choose between several delivery methods or your buying process requires more information, you may want to test whether a three-stage layout feels clearer.
3. Customize the Information Customers See and Enter
Checkout forms should collect the information your store genuinely needs without making customers work harder than necessary.
Some information is essential. For example, a physical order usually requires an address so the product can be delivered. Other information depends on the business.
A phone number might be useful when a delivery carrier needs to contact customers. Certain B2B stores may require additional business information. A gift-order business might need a message from the customer.
Start with Shopify’s native checkout settings and avoid adding extra fields simply because they’re available. Every field adds another decision or action before payment.
Use Apps for Advanced Checkout Requirements
For more advanced requirements, checkout apps can add elements such as custom fields, gift messages, delivery instructions, or validation rules.
This is also where plan limitations become important. Apps that modify the core information, shipping, and payment stages of checkout are available to Shopify Plus stores, while standard plans have more limited checkout-page app placement.
If you’re on a standard plan, check where an app can actually display before choosing it specifically for checkout customization.
4. Add Useful Blocks and Apps to Checkout
Shopify’s newer checkout system allows apps to add blocks to supported checkout and account surfaces.
A block is essentially a piece of app functionality that can appear at a specific point in the customer journey.
Depending on the app and your Shopify plan, blocks can be used for things such as loyalty information, custom messages, delivery details, upsells, gift options, surveys, or additional customer information.
After installing a compatible app, you can manage supported blocks through the checkout and accounts editor. Shopify lets you position and configure the block without editing the underlying checkout code.
Add Only What Helps Customers
The important word here is useful. It can be tempting to add several checkout apps once you realize they’re available.
But checkout isn’t a homepage. Customers have already made the main buying decision.
For example:
- A free-returns message can reduce uncertainty.
- A delivery estimate can answer an important question.
- A gift-message field can provide a useful option.
- An upsell can be appropriate when it is genuinely relevant to the order.
Add something only when it helps customers complete their order or supports a clear business requirement.
5. Customize Shipping and Delivery Information
Shipping is often one of the last areas of uncertainty before a customer completes an online purchase. They want to know how much delivery costs, which options are available, and when their order is likely to arrive.
Shopify already manages your available shipping rates through your delivery settings. Your checkout customization should make those choices as easy to understand as possible.
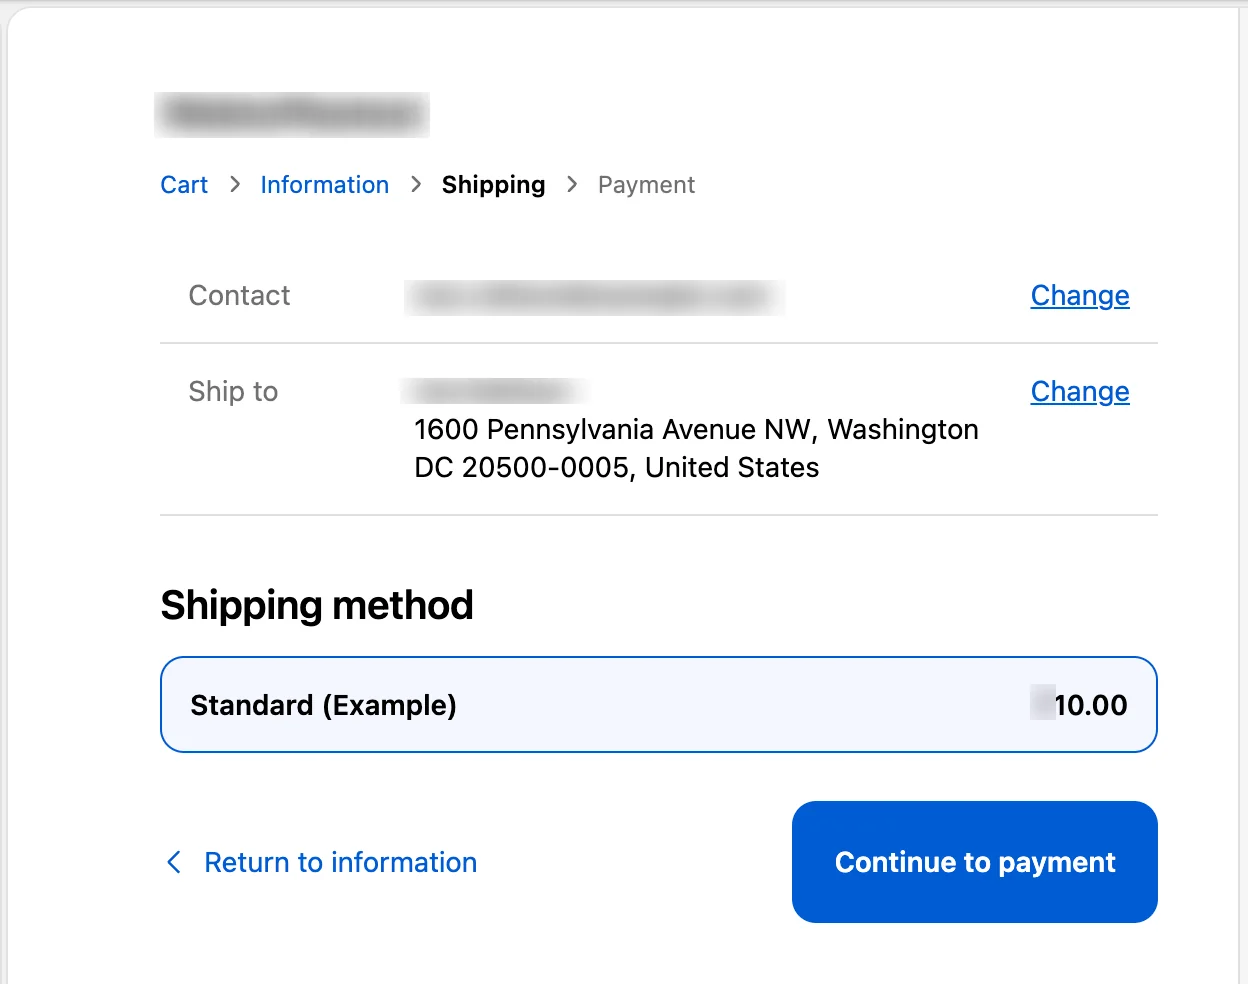
Use clear shipping names instead of internal terminology customers may not recognize.
For example, Express Shipping – 1 to 2 Business Days usually tells the customer more than a carrier service code alone.
If you operate locally, you might also offer pickup or local delivery where appropriate.
Use Advanced Shipping Customization When Needed
For stores with more complex shipping requirements, Shopify Plus provides additional options through apps and Shopify Functions. For example, businesses with complex shipping requirements can use supported solutions to control how delivery options are presented based on the cart or customer.
For most stores, however, clarity is more important than advanced customization. Customers should understand what each delivery option means, how much it costs, and when they can expect their order before they reach the payment stage.
6. Customize the Payment Experience
Payment is another area where simplicity matters.
Customers should be able to quickly identify a payment method they trust and use regularly.
Shopify supports its standard checkout along with accelerated and wallet-based payment experiences depending on your payment setup. This can include options such as Shop Pay, PayPal, Apple Pay, or other locally relevant payment methods.
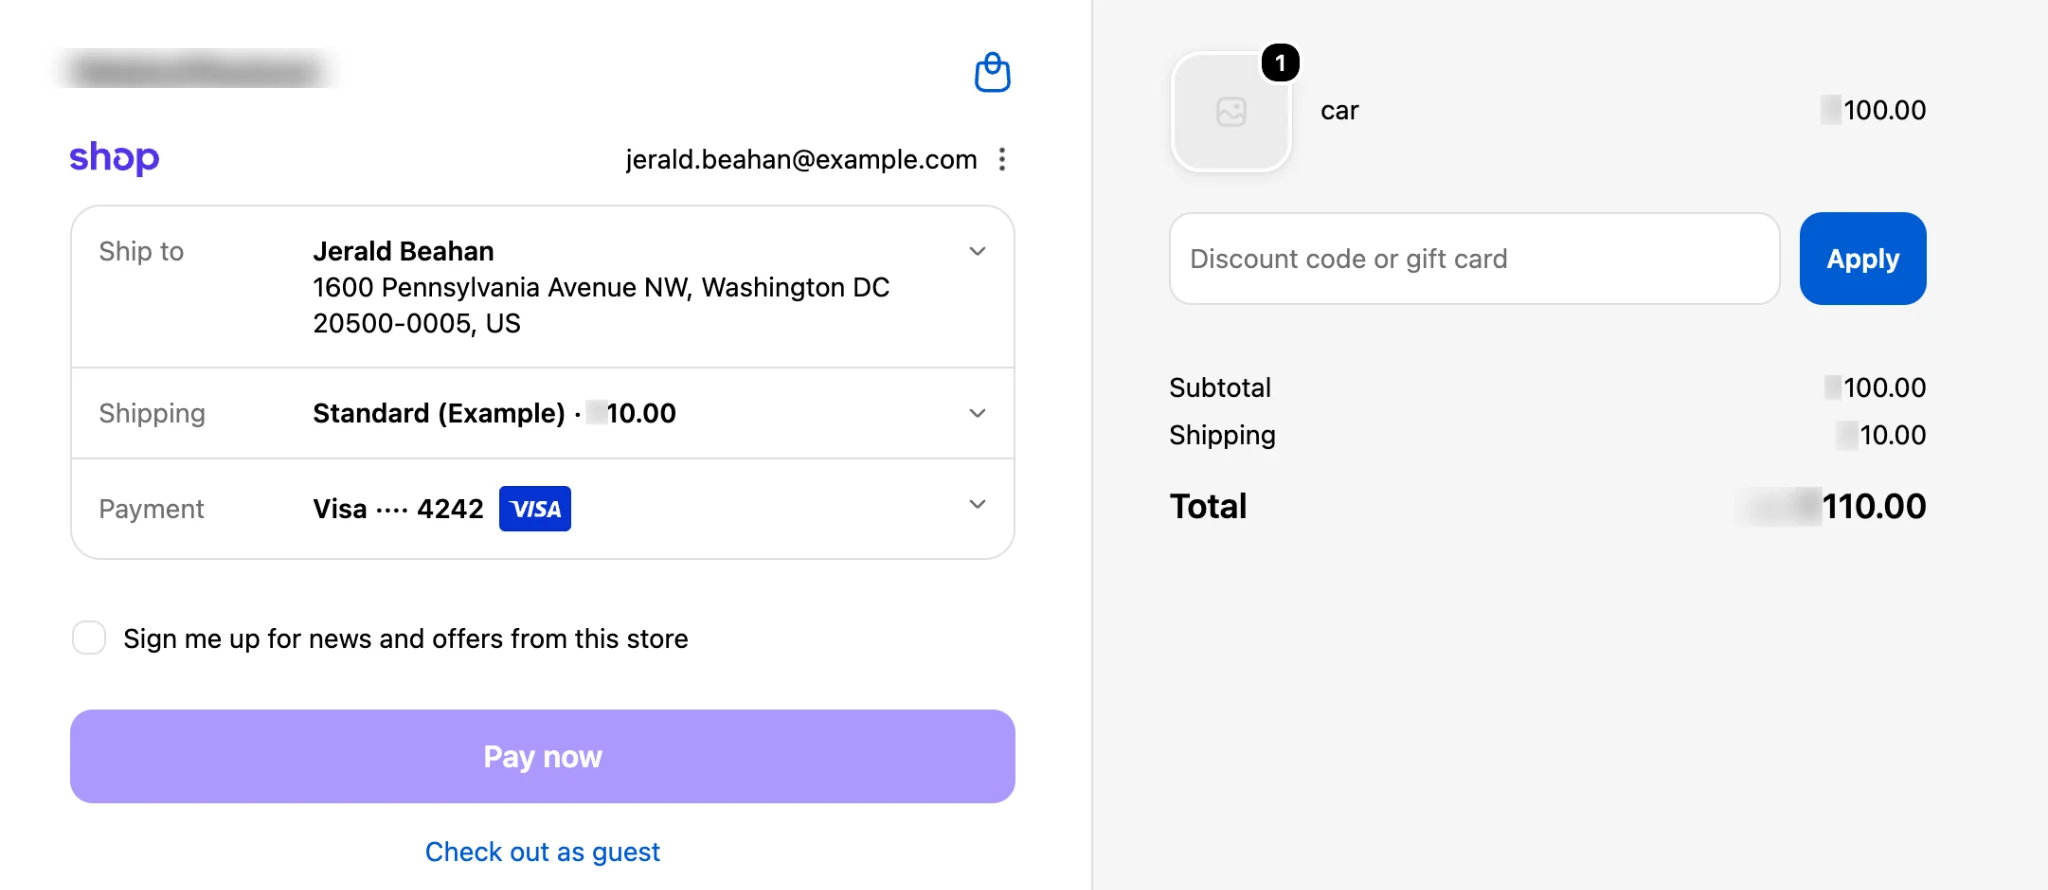
Customization here isn’t about displaying every payment method you can find. It’s about giving your target customers appropriate choices without overwhelming them.
A store selling primarily in one country may have very different requirements from an international store operating across several markets.
Test Your Payment Flow Regularly
Shopify Plus merchants can go further by using supported apps and functions to customize payment-related logic, such as conditionally controlling available payment methods. Standard Shopify plans have less direct control over the payment stage itself.
Whatever your setup, test payment flows regularly. A beautifully customized checkout doesn’t help if a wallet button fails, a payment method isn’t available for a key market, or an app prevents customers from completing their order.
7. Customize the Thank-You and Order Status Pages
Checkout customization doesn’t have to end when the customer clicks the final payment button.
Shopify’s checkout and accounts editor also covers the thank-you page and order status page. These pages are useful because the customer has already completed the purchase. You can provide helpful post-purchase information without adding friction before payment.
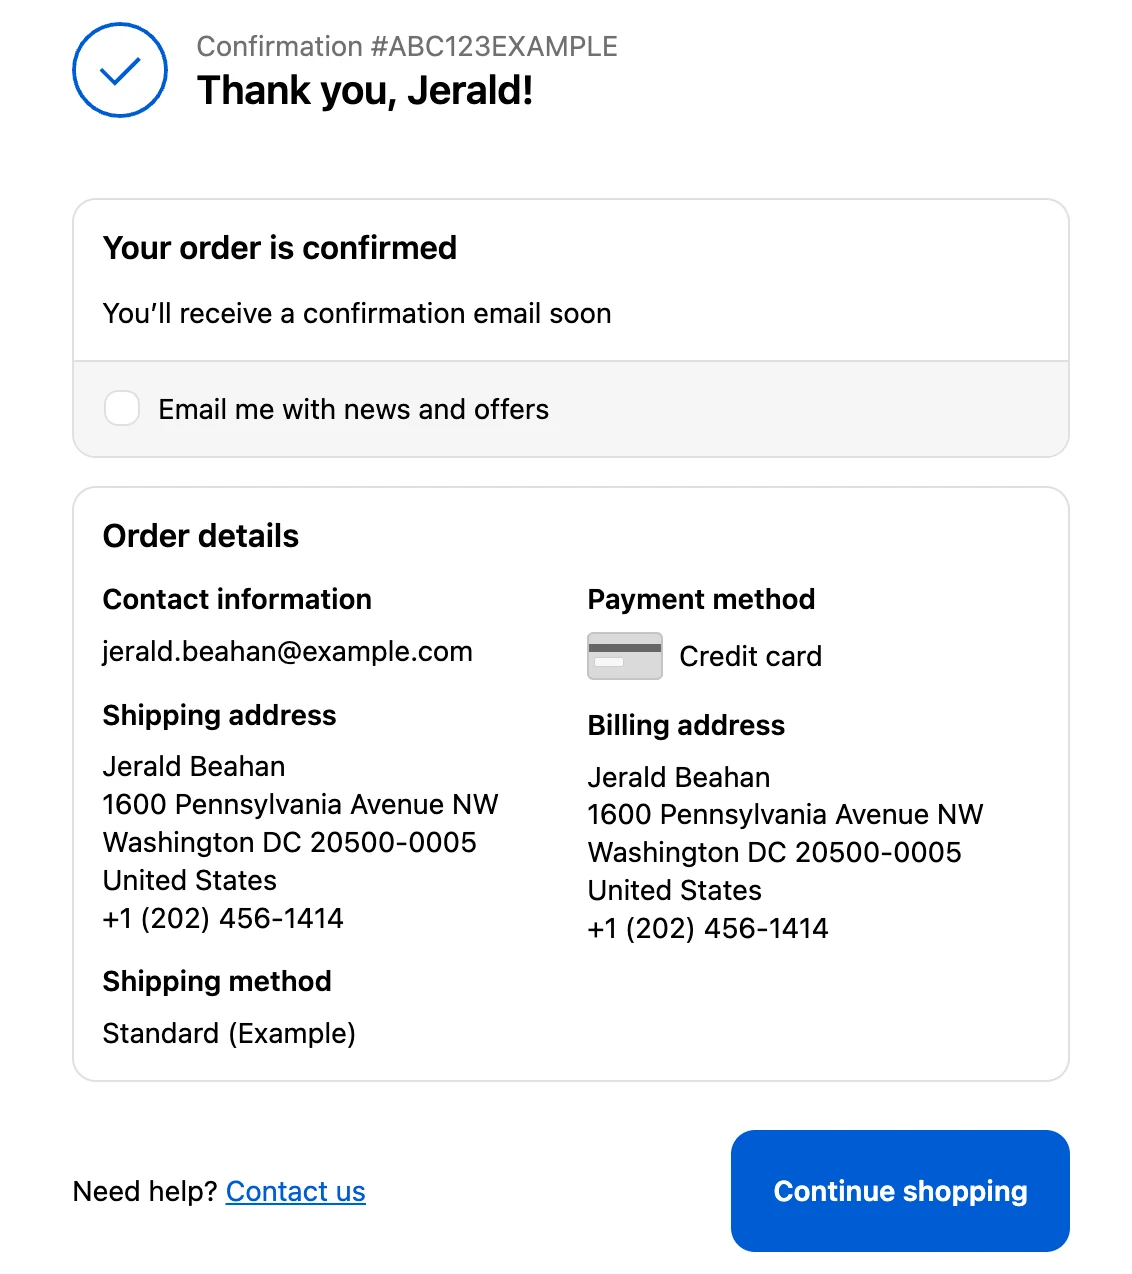
For example, you could use supported apps or blocks to provide delivery information, recommend relevant products, promote a loyalty program, collect a post-purchase survey, or make customer support information easier to find.
This is also an important distinction for stores that aren’t on Shopify Plus.
Eligible apps can customize the thank-you and order status pages on Basic and higher plans, even though apps that modify the core information, shipping, and payment stages are restricted to Shopify Plus.
So if your goal is to add recommendations or another marketing element, consider whether it really needs to appear before payment. Moving it to the post-purchase experience can often keep the main checkout cleaner.
Customizing Shopify Checkout Using a Checkout Editor App
Shopify’s built-in checkout editor handles basic changes such as logos, colors, fonts, and layouts. But what if you want to add custom messages, collect additional customer information, or control which shipping and payment methods appear?
That’s where a checkout customization app can help.
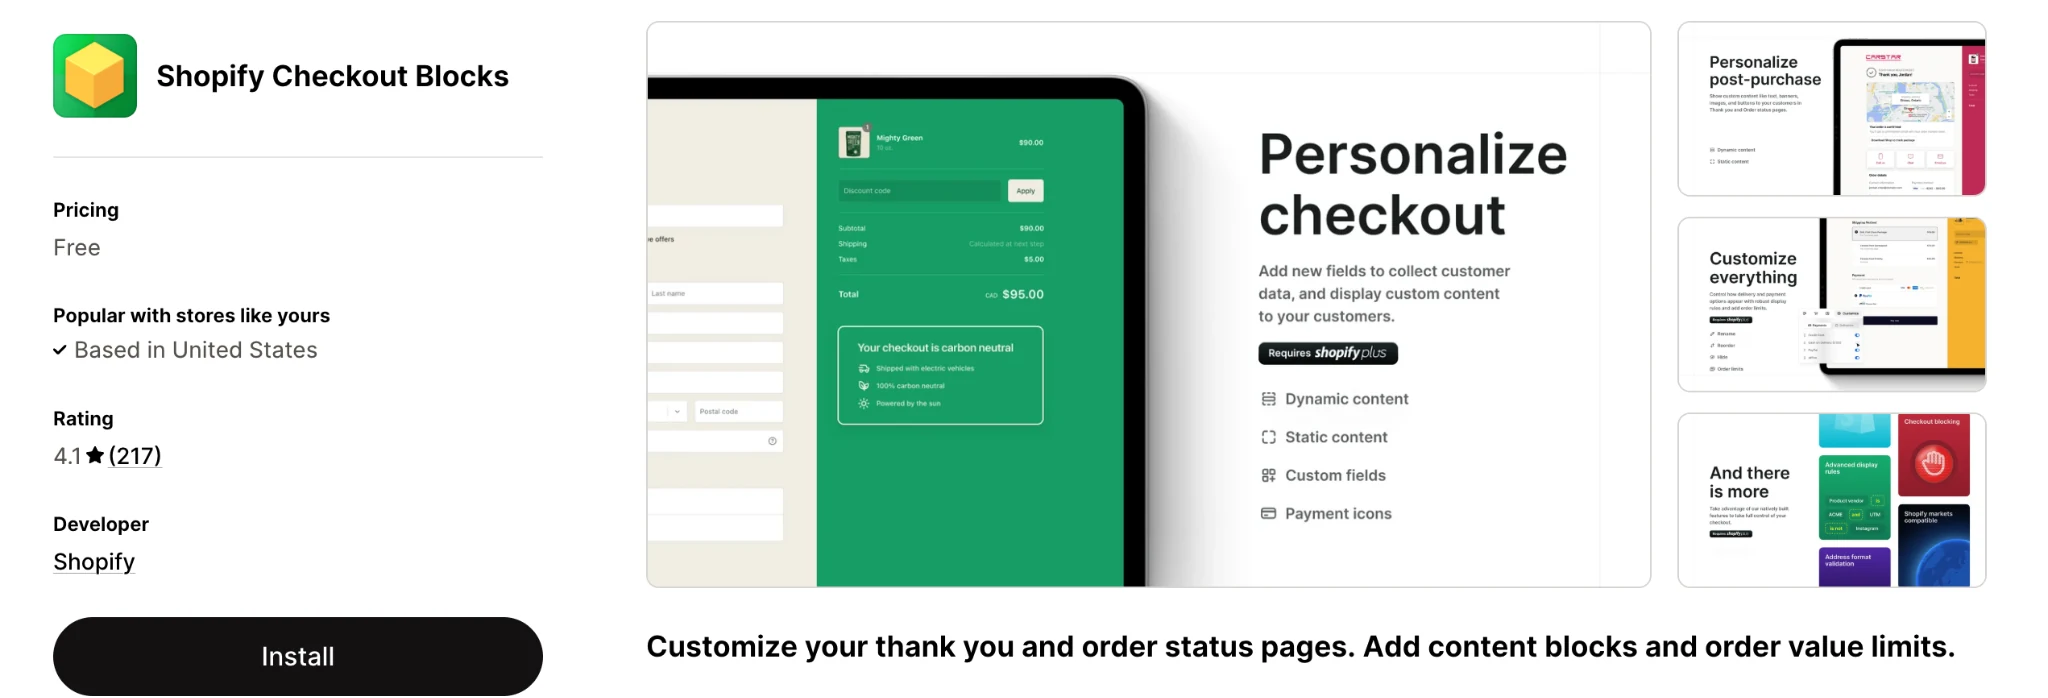
One option is Shopify Checkout Blocks. This free app, developed by Shopify, lets merchants add content blocks and configure supported checkout functionality without writing code.
What Can You Customize With Shopify Checkout Blocks?
The available customizations depend on your Shopify plan. Here’s what you can do with the app.
Here’s what you can do with the app:
- Add custom messages: Display banners, shipping information, promotional messages, and customer instructions. Standard plans support content blocks on thank-you and order status pages, while Shopify Plus also supports them during checkout.
- Add custom fields: Collect gift messages, delivery instructions, or additional customer information using text fields, dropdowns, and checkboxes. Available on Shopify Plus.
- Customize payment and shipping methods: Hide, rename, or reorder payment and delivery options based on specific conditions. Available through Checkout Blocks on Shopify Plus.
- Set checkout rules: Apply order limits, address validation, and other conditions to control checkout behavior. Available on Shopify Plus.
- Customize order information: Display product-specific messages or additional details within the checkout order summary. Available on Shopify Plus.
Here’s a quick comparison of what the app supports.
| Customization | Standard Shopify plans | Shopify Plus |
|---|---|---|
| Static content on thank-you and order status pages | Yes | Yes |
| Dynamic content on thank-you and order status pages | Yes | Yes |
| Content blocks during checkout | No | Yes |
| Custom fields and agreement checkboxes | No | Yes |
| Payment method customization through Checkout Blocks | No | Yes |
| Delivery method customization through Checkout Blocks | No | Yes |
| Product-specific checkout messages | No | Yes |
| Order limits, address restrictions, and advanced discount rules | No | Yes |
You can also use other checkout customization apps for specific needs like:
Payfy
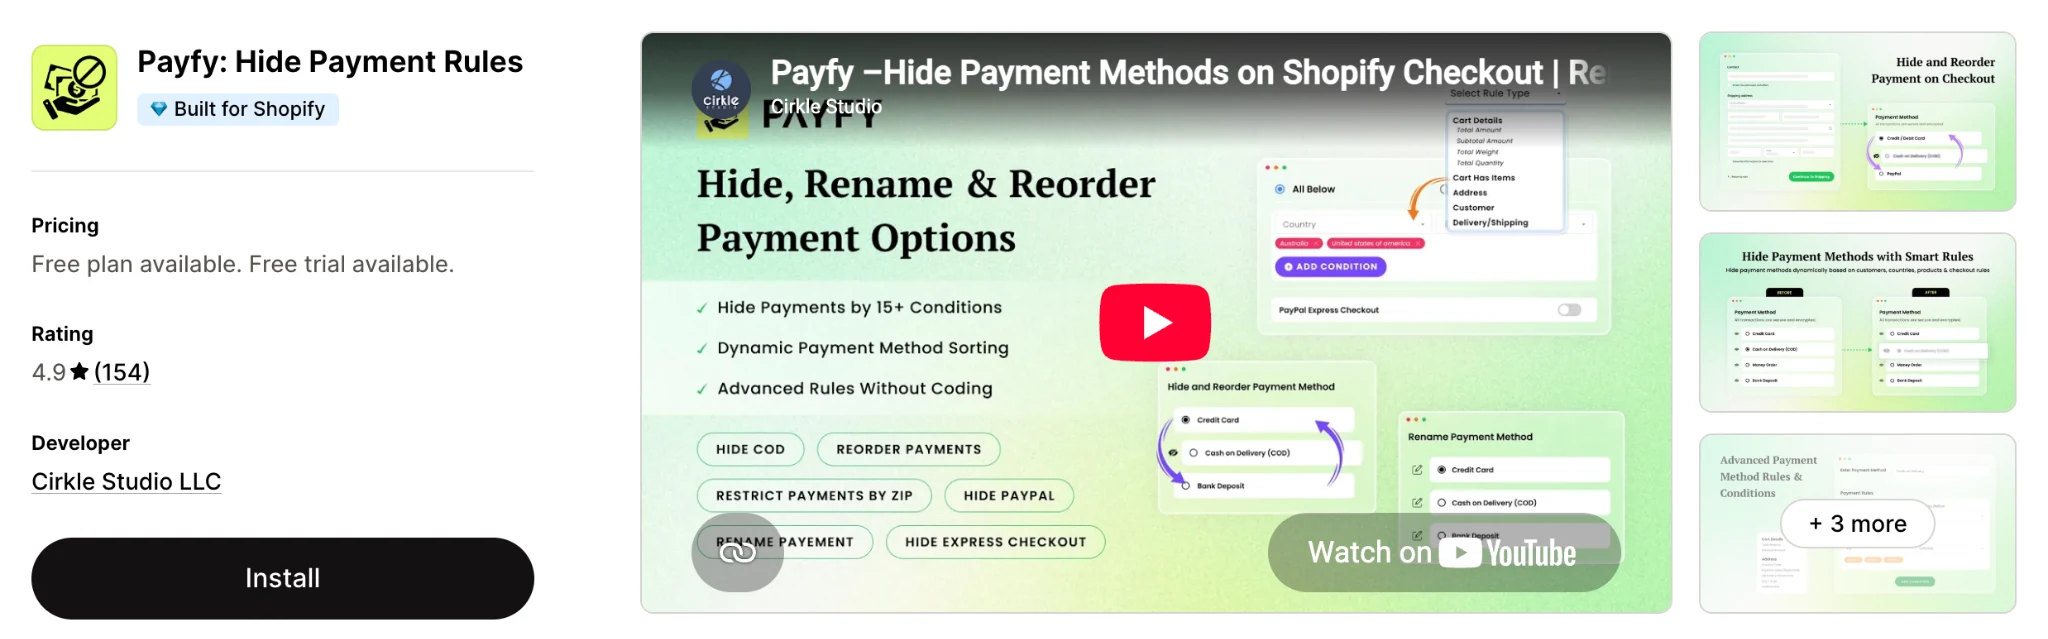
Payfy helps you control which payment methods customers see during checkout. It lets you hide, rename, or reorder payment methods based on conditions such as cart value, customer location, or products purchased. It uses Shopify Functions and can support eligible customizations on standard Shopify plans without requiring Plus.
ReConvert
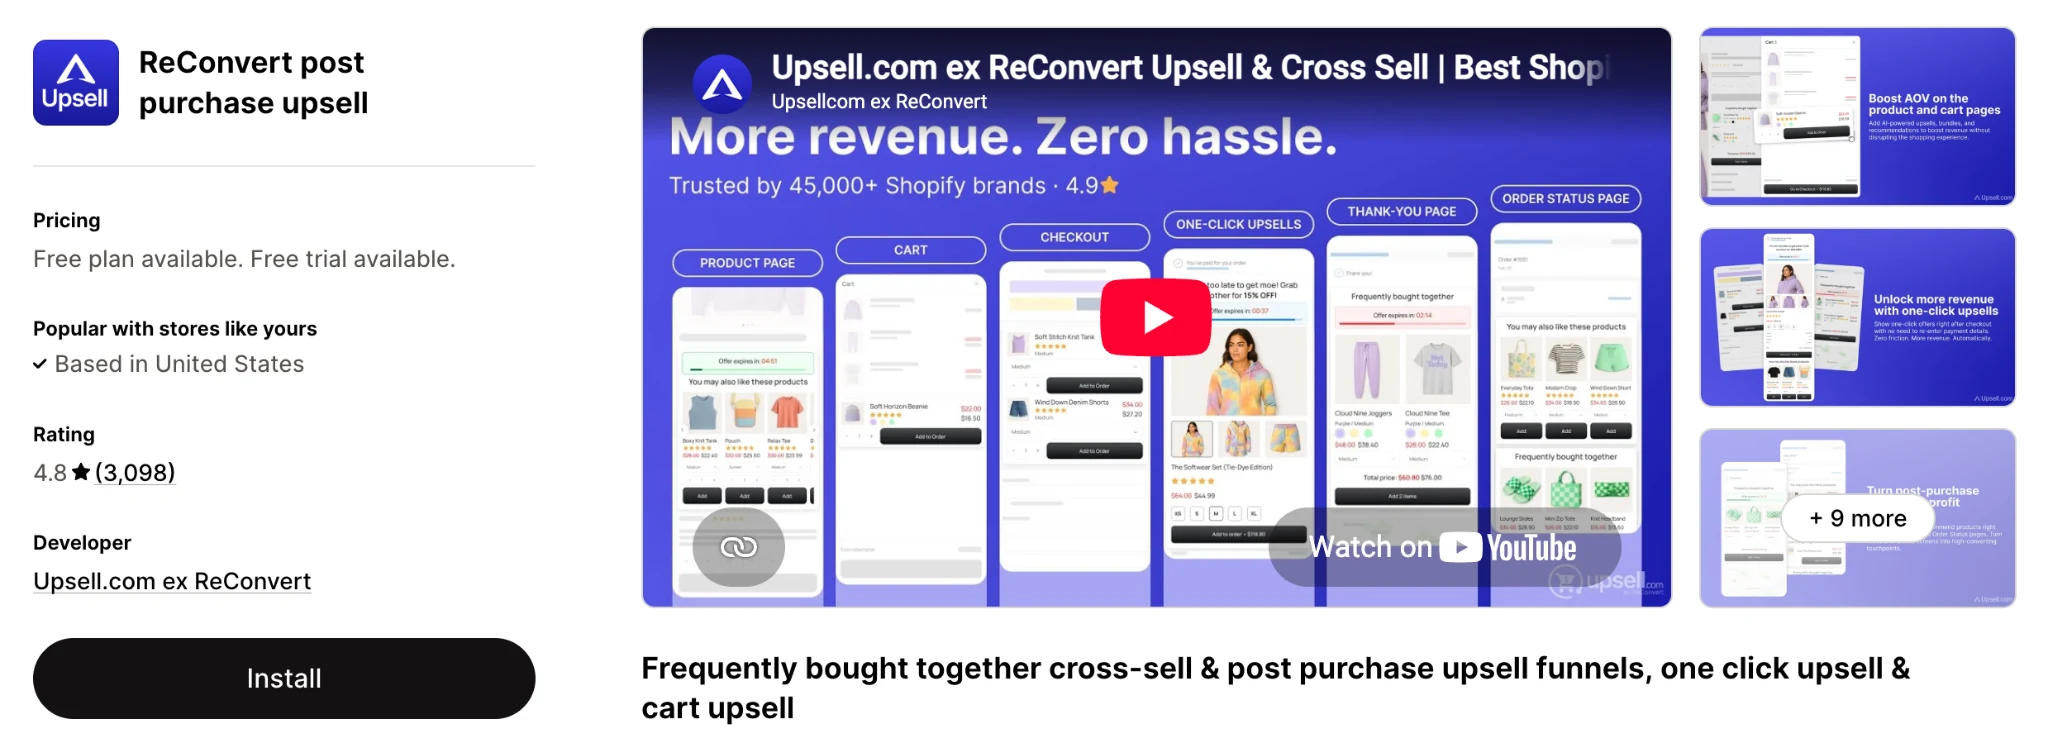
If you want to promote additional products after a customer completes a purchase, ReConvert lets you create post-purchase upsell offers, display product recommendations, and customize thank-you page offers. It can help encourage repeat purchases and increase average order value without interrupting the main checkout process. Its checkout-stage upsells, however, require Shopify Plus.
For most stores, it’s best to start with Shopify’s built-in checkout editor for branding and layout changes, then use apps like Checkout Blocks, Payfy, or ReConvert when you need additional functionality.
Shopify Checkout Customization Best Practices
Being able to customize something doesn’t necessarily mean you should. The best checkout customizations make purchasing clearer and easier, rather than making the checkout more elaborate.
1. Keep Branding Consistent
Your checkout should feel connected to the rest of your storefront, but it doesn’t need to reproduce the entire shopping experience.
Keep recognizable elements such as your logo, colors, and typography, but leave out unnecessary navigation, promotional sections, videos, and visual effects.
2. Make Important Information Easy to Find
Customers should never have to search for essential checkout information.
Make sure delivery options, order totals, discounts, payment methods, and error messages are clearly visible and easy to understand.
3. Optimize for Mobile
Check how your checkout looks and works on smaller screens. A layout that looks clean on a large desktop display can become crowded or difficult to use on a phone.
Pay particular attention to:
- Form fields
- Buttons
- Payment options
- Error messages
- Order summaries
4. Use Promotions Sparingly
Think twice before adding promotional content to checkout.
An upsell that closely complements the customer’s order may be useful. Several offers that require customers to stop and make additional decisions can distract them from completing the purchase.
The goal is to help customers finish their order, not give them another reason to reconsider it.
5. Test the Real Checkout
Always test your actual storefront after making checkout changes.
Shopify’s editor preview uses a simulated checkout environment, and some actions, such as completing a payment, can’t be performed there. Shopify recommends testing the storefront experience separately.
Test the checkout using the devices, shipping addresses, discount codes, payment methods, and customer scenarios that are relevant to your store. A checkout that looks correct in the editor isn’t necessarily a checkout that works correctly for every customer.
Frequently Asked Questions
Yes. Stores on the Basic plan or higher can use Shopify’s checkout and accounts editor to make standard customizations, including changes to logos, fonts, colors, and checkout layout. Eligible apps can also customize supported surfaces such as the thank-you and order status pages. Advanced customizations to the information, shipping, and payment stages require Shopify Plus.
From your Shopify admin, go to Settings → Checkout. Under Configurations, edit the checkout configuration you want to customize. This opens the checkout and accounts editor, where you can change branding, layout, and supported app blocks.
Yes. Shopify lets you switch between one-page and three-page checkout from the checkout and accounts editor. One-page checkout is the default.
Yes, although where an app can appear depends on your plan and the app. Eligible apps can customize thank-you and order status pages on Basic plans and higher. Apps that customize the information, shipping, or payment stages are generally available only to Shopify Plus stores.
Yes. Shopify’s checkout and accounts editor lets you customize the thank-you and order status pages, and eligible apps can add additional functionality to these pages on Basic plans and higher.
Shopify replaced the legacy checkout.liquid approach with Checkout Extensibility. The old checkout.liquid customization method was sunset on August 28, 2025. Modern checkout customization now uses Shopify’s editor, apps, extensions, Functions, and supported branding tools.
Not for most basic changes. Store owners can change branding, layout, and supported app blocks using Shopify’s no-code checkout and accounts editor. A developer may be useful for advanced Shopify Plus requirements involving custom apps, Checkout UI extensions, the Checkout Branding API, or custom Shopify Functions.
Conclusion
Shopify gives you plenty of ways to customize checkout, but the options available depend on your plan. Basic, Grow, and Advanced stores can use the checkout and accounts editor to create a branded, clear purchasing experience, while Shopify Plus offers more advanced customization through apps, Shopify Functions, and additional checkout controls.
The goal isn’t to customize every element simply because you can. Focus on changes that make checkout clearer, easier, and more consistent. Keep distractions to a minimum, test the real checkout on different devices and scenarios, and add advanced functionality only when it solves a genuine customer or business need.
A checkout that feels simple, familiar, and easy to complete is usually more valuable than one packed with custom features.


Subcribe to our newsletter