


WebToffee’s AI Content Generator for WooCommerce lets you generate product images, descriptions, brands, and tags using AI and manage your store through a built-in chatbot or any MCP-compatible AI agent (Claude Desktop, Cursor, Claude Code, and others).
Supported AI providers:
| Provider | Text | Image Generation |
|---|---|---|
| OpenAI | ✓ | ✓ |
| Google Gemini | ✓ | ✓ |
| Anthropic (Claude) | ✓ | ✗ Not supported |
Step 1: Install and Activate
- Upload the plugin folder to /wp-content/plugins/, or install directly from the WordPress plugin directory.
- Go to Plugins → Installed Plugins and click Activate.
- Navigate to WooCommerce → AI Content Generator to begin setup.
Step 2: Connect an AI Provider
You need at least one configured AI provider before any features will work. There are two ways to do this.
Option A : WordPress AI Connectors (Recommended)
Available on WordPress 7.0+.
- Go to Settings → AI.
- Enter your API key for OpenAI, Google Gemini, or Anthropic (Claude).
- The plugin detects any active provider automatically and displays only the models available from your connectors.
Option B : Custom OpenAI API Key
- Go to platform.openai.com/api-keys and create a secret key.
- In the plugin settings, enable Use Custom API Key and paste your key.
- Only OpenAI models are available through this path.
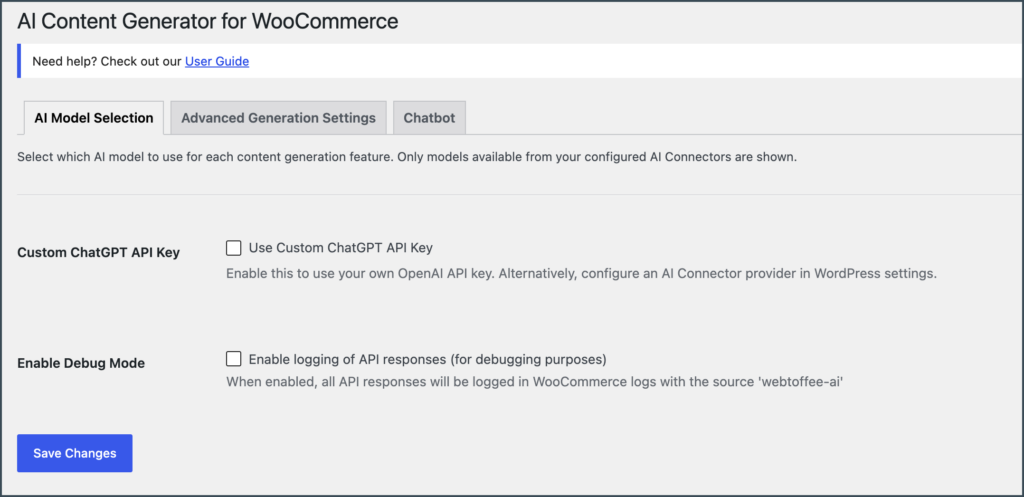
Step 3: Select AI Models
- Go to WooCommerce → AI Content Generator → AI Models.
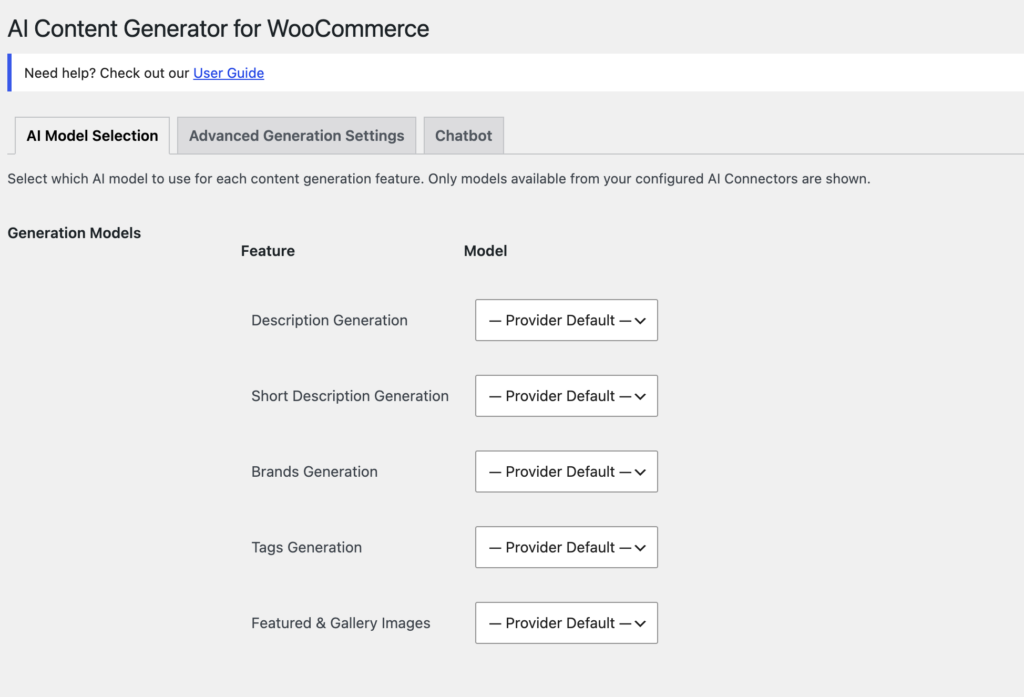
- Assign a model for each feature independently:
- Product description
- Short description
- Brands
- Tags
- Image generation
- Chatbot
Only models from your active providers are listed. If no models appear, return to Step 2 and confirm a provider is configured.
Step 4: Generate Product Content
Open any product in the WooCommerce editor. Generation controls appear alongside the relevant fields.
Description & Short Description
- Click Generate next to the description editor.
- Select a writing tone:
- Formal & Professional
- Casual & Friendly
- Persuasive & Sales-focused
- Technical & Detailed
- Luxury & Premium
- Creative & Engaging
- Preview the generated content before applying. Regenerate as many times as needed.
Brands & Tags
- Generated automatically from the product name and existing attributes.
- Results appear as clickable chips — select the ones you want and apply them in bulk.
Featured Image
- In the product sidebar, click Generate Featured Image.
- Multiple image options are generated.
- Click Use as Featured on the image you want.
Gallery Images
- Click Generate Gallery Images.
- Select images using the checkboxes.
- Click to add the selected images to the product gallery in one step.
Tip: Fill in the product title, category, and at least a few attributes before generating. The AI uses this information to produce more relevant and accurate content.
Step 5: Configure the AI Badge (Optional)
When AI-generated content is applied to a product, you can display a badge on the product page to indicate it was AI-assisted.
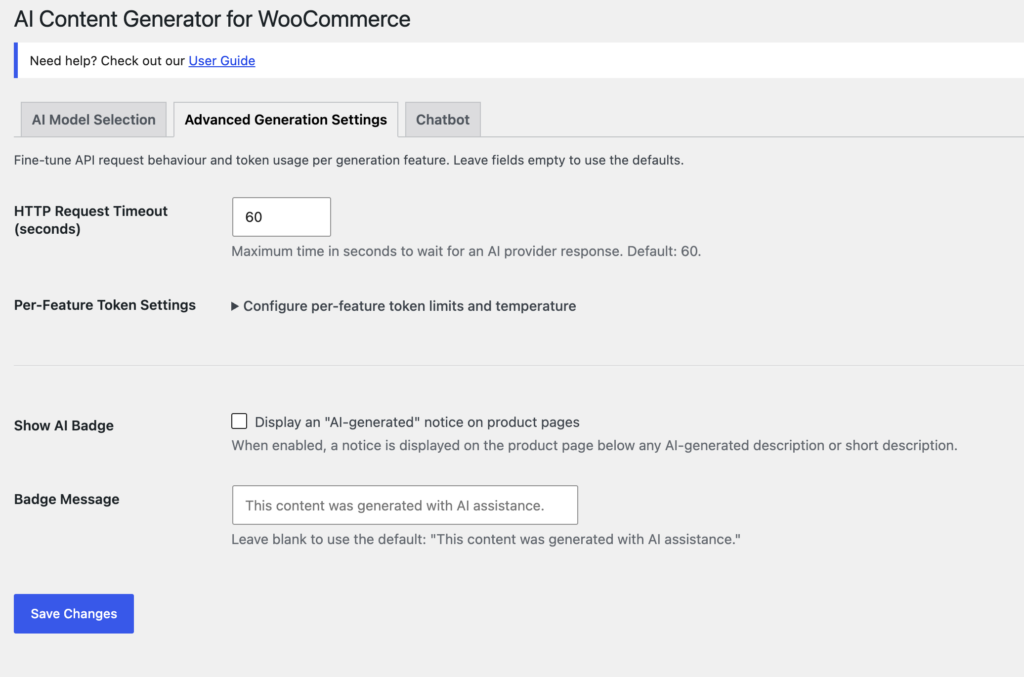
- Go to WooCommerce → AI Content Generator → AI Badge.
- Customize the badge label text.
- After generating and applying content to a product, use the Mark as AI-generated option on that product to show the badge.
Step 6: Set Up the Store Chatbot (Optional)
The plugin includes a floating AI chatbot for both your storefront and your WooCommerce admin area.
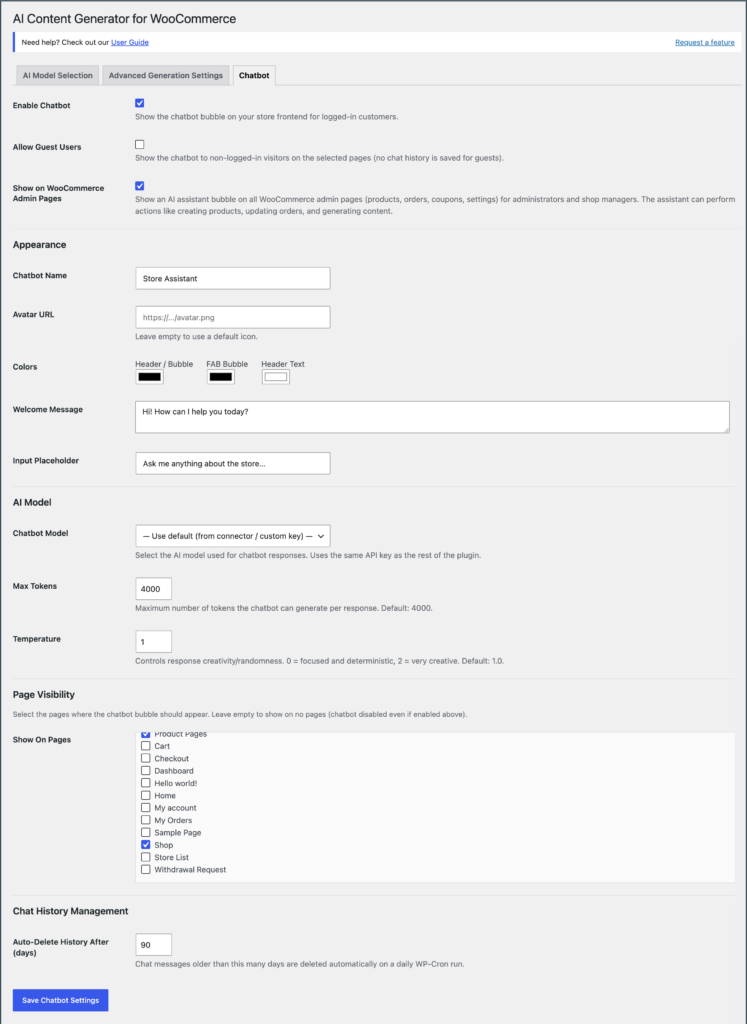
Go to WooCommerce → AI Content Generator → Chatbot to configure:
| Setting | Description |
|---|---|
| Customer chatbot | Enable/disable for storefront visitors. Requires login by default; enable guest access if needed. |
| Admin chatbot | Enable/disable for shop managers and administrators in wp-admin. |
| Chatbot name | Display name shown in the chat bubble. |
| Avatar image URL | Custom avatar for the chatbot. |
| Color scheme | Visual styling for the chat widget. |
| Welcome message | Opening message shown to users. |
| Input placeholder | Placeholder text in the chat input field. |
| AI model | Model used for chat responses. |
| Chat history retention | Number of days to retain conversation history. |
The below images shows the Chatbot settings page:
Admin Chatbot Capabilities
The admin chatbot can perform store management actions directly from the chat interface:
- Create products and generate content
- Manage coupons
- Update order statuses
- Bulk-import product data via CSV (requires the Product Import Export for WooCommerce plugin)
- Download invoices, packing slips, delivery notes, and shipping labels (requires the Print Invoices, Packing Slips, Delivery Notes & Shipping Labels plugin)
BOGO Coupon Management (requires WebToffee Smart Coupon)
When the WebToffee Smart Coupon plugin is active, the admin chatbot gains additional BOGO (Buy One Get One) management capabilities: create, duplicate, trash, restore, permanently delete, and toggle BOGO deals active or inactive.
Connect an MCP-Compatible AI Agent (Optional)
On WordPress 6.9+, the plugin registers its tools with the WordPress Abilities API, making them available to any MCP-compatible agent — Claude Desktop, Cursor, Claude Code, and others.
Prerequisites
- WordPress 6.9 or higher.
- The MCP Adapter plugin installed and active. If you see a notice in wp-admin, install it from the WordPress plugin directory or run:
Your MCP Server Endpoint
https://your-site.com/wp-json/mcp/mcp-adapter-default-server/The server requires the user to be logged in. Use an Application Password for agent access: go to Users → Your Profile → Application Passwords, enter a name (e.g., Claude Desktop), and click Add New Application Password.
Connecting Claude Desktop
- Open Claude Desktop and go to Settings → Developer → Edit Config.
- Add the following to claude_desktop_config.json:
- Replace yoursite.example, {admin_user}, and {application-password} with your actual values.
Connecting Cursor or Claude Code
Add the server to your .cursor/mcp.json or Claude Code’s MCP config using the same URL and credentials.
Available MCP Tools
Core Tools
| Tool | Description |
|---|---|
| generate-product-description | Generate and save a full description for an existing product |
| generate-product-short-description | Generate and save a short description for an existing product |
| generate-product-image | Generate an AI image and set it as the product’s featured image |
| generate-product-brands | Generate and apply brand suggestions for a product |
| generate-product-tags | Generate and apply SEO tags for a product |
| mark-product-ai-generated | Mark or unmark a product’s content as AI-generated |
| search-product-id | Find WooCommerce product IDs by name (use before tools requiring a product ID) |
| create-product-draft | Create a new product as a draft for review |
| create-product-published | Create and immediately publish a new product |
| publish-product-draft | Publish an existing draft product by ID |
| update-product | Update any fields on an existing product (title, price, stock, description, etc.) |
| delete-product | Move a product to trash or permanently delete it |
| create-shop-coupon | Create a WooCommerce coupon (percent or fixed, cart or per-product scope) |
| update-order-status | Change an o |
Smart Coupon Tools (requires WebToffee Smart Coupon)
| Tool | Description |
|---|---|
| create-bogo | Create a new BOGO deal |
| list-bogos | List all BOGO deals with their current status |
| toggle-bogo | Enable or disable a BOGO deal by ID |
| trash-bogo | Move a BOGO deal to the trash |
| restore-bogo | Restore a trashed BOGO deal |
| delete-bogo | Permanently delete a BOGO deal |
| duplicate-bogo | Create a copy of an existing BOGO deal |
Note: Smart Coupon tools are registered on the MCP server unconditionally but will return an error if the WebToffee Smart Coupon plugin is not active.
