


Share:


Table of Contents
Transactional emails are one of the most overlooked marketing assets in a WooCommerce store. Every order confirmation, processing notice, completed order email, and refund update lands directly in your customer’s inbox. Unlike promotional campaigns, these emails have exceptionally high open rates because customers are actively expecting them.
Yet in most stores, WooCommerce emails remain untouched, with plain templates, default colors, generic messaging, and no brand personality.
When you customize WooCommerce emails properly, you do more than change a logo or tweak colors. You reinforce your brand identity, improve customer experience, and reduce support queries, all within emails that are already being sent automatically.
In this guide, we’ll walk you through exactly how to customize WooCommerce emails step by step.
Key Takeaways:
- Customizing WooCommerce emails is important to maintain brand consistency and showcase professionalism.
- The eCommerce Marketing Automation plugin by WebToffee lets you fully customize your WooCommerce emails with pre-built templates and layouts.
- Use pre-built templates to easily customize WooCommerce emails and make them look appealing to your brand.
WooCommerce, by default, offers a number of order email templates out-of-box. However, they follow a standard and somewhat bland template that might not go well with your brand image.
The following are some of the emails that are available by default on your WooCommerce website.
- New order: This email notifies the store admin when a customer places a new order.
- Canceled order: The store admin receives this email when an order gets canceled.
- Failed order: This email alerts the store admin when an order fails to go through.
- Order on hold: When an order’s status is changed to “On-Hold,” the customer receives an email.
- Processing order: After the payment is completed, the customer receives an email with the order details.
- Completed order: When the order is shipped, the customer gets an email with the order details.
- Refunded order: This email informs the customer that their order has been refunded.
- Customer invoice/order details: The customer receives an email containing the order details and payment links.
- Customer note: If the store owner adds a note to the order, the customer gets an email with the note.
- Reset password: When customers request a password reset, they receive an email to reset their password.
- New account: This email is sent to the customer after creating a new account on the website.

Note: You may see other email templates on this list if you have installed additional plugins for email marketing or WooCommerce quotes.
Why You Should Customize WooCommerce Emails?
WooCommerce transactional emails are more than just order confirmations—they’re a direct communication channel between your brand and your customers. Since these emails have some of the highest open rates, they provide an excellent opportunity to build customer relationships, strengthen brand identity, and even drive additional sales. But if you’re still using the default WooCommerce email templates, you might be missing out on these benefits.
Here’s why you should customize WooCommerce emails:
1. Reinforce Your Brand Identity
Your emails should reflect your brand’s personality, just like your website and social media pages. The default WooCommerce emails are functional but lack any real branding elements. By customizing them, you can add your logo, brand colors, fonts, and messaging style to create a consistent brand experience.
2. Improve Customer Engagement
Generic-looking emails are easy to ignore, but a well-designed email with a professional look can capture attention and boost engagement. A personalized, branded email makes customers more likely to read through the content, click on links, and take action.
3. Enhance Trust and Credibility
Customers expect businesses to maintain a professional and polished appearance. If your order emails look outdated or poorly formatted, it could create doubts about your business’s credibility. Customizing your emails ensures they look polished and professional, reinforcing trust in your store.
4. Encourage Repeat Purchases
Transactional emails are a great place to promote additional products, offer discount codes, or share loyalty rewards. For example, you can include a special discount code in the order confirmation email, encouraging customers to come back and shop again.
5. Reduce Customer Confusion
A well-structured and easy-to-read email can provide clear order details, shipping updates, and return policies, reducing the number of customer support inquiries. By adding custom messages, FAQs, or helpful links, you can make your emails more informative and customer-friendly.
6. Stand Out from Competitors
Most WooCommerce stores stick to the default email templates. Customizing your emails with unique layouts and personalized content helps your business stand out in your customers’ inboxes. A memorable email experience can leave a lasting impression and encourage long-term loyalty.
7. Optimize for Mobile Users
Many customers check their emails on their mobile devices. The default WooCommerce emails might not always display well on smaller screens. Customizing your emails ensures they are mobile-friendly, making it easier for customers to read order details and take action directly from their phones.
By customizing your WooCommerce emails, you’re not just improving their appearance—you’re making them work for your business. Whether it’s reinforcing your brand, building customer relationships, or boosting conversions, a well-crafted email can do wonders for your store.
So, why settle for bland and boring emails when you can create stunning, high-converting ones?
The default email settings in WordPress offer you some basic edit functionalities for your WooCommerce emails. You can edit the email texts for each email and change the color of the email templates globally.
Follow the below steps to customize WooCommerce emails with the default settings:
Step 1: Navigate to WooCommerce Email Settings
Go to WooCommerce > Settings > Emails from your WordPress backend.
All the default WooCommerce emails will be listed there; you can click on the Manage button corresponding to the email you want to edit.

Step 2: Edit WooCommerce Email Content
Here you have the option to add a subject, email heading, content, etc. Edit them based on your needs.

Click on Save Changes to save the changes.
Step 3: Edit the Sender Details
Now, go back to the Email settings page and scroll down to the Email sender options section.
You can change the entry in the “From” name field to edit the sender’s name in outgoing emails.
Change the entry in the “From” address field to change the sender’s email address.

Step 4: Edit the Email Template Style
Provide the URL of an image that you want to add to the header in the Header image field. You will first have to upload the image in the Media gallery to get the URL.
You can even alter the Footer text if you need to. The placeholders {site_title} and {site_url} can be added to the footer to include your site title and URL, respectively.
You can also change the Base color, Background color, Body background color, and Body text color of the template from this section.

Once completed, Click on Save changes to reflect the changes on your WooCommerce order emails.
As you can see, the default customization options are severely limited in WooCommerce, which is why you need a dedicated plugin to help you customize your WooCommerce emails. One such plugin is the WebToffee WooCommerce eCommerce Automation plugin from WebToffee. This free email customizer plugin enables you to customize WooCommerce emails completely.
In addition to design customization, you can also strengthen your email strategy with Cart Abandonment Recovery, which automatically sends branded recovery emails to customers who leave without completing their purchase, helping you turn transactional emails into revenue-generating touchpoints.
The WebToffee eCommerce Marketing Automation is a complete marketing suite for WooCommerce store owners. It lets you customize your WooCommerce emails and create automated marketing mail campaigns, dynamic popups, and cart recovery campaigns.
Building an email that is consistent with your store’s identity avoids all confusion and strengthens the brand image.
Before we begin, make sure that you have installed the WebToffee Marketing Automation plugin.
Step 1: Choose an Email Template
After installing the WebToffee WooCommerce Marketing Automation plugin, go to WebToffee Marketing and select Email editor.
- Under the Email type dropdown menu, choose an email type.
- Then, go to Prebuilt Templates and choose an email template.

Step 2: Edit the WooCommerce Email Text
Select the Email text option to edit the content of the email.

Step 3: Customize the Email Container
In this step, you can edit the email container. You can change the background color, padding, container width, border radius, shadow, border color, and container border width.

Step 4: Edit the Header of the Email
In this step, you can customize the header section of your email, including its layout, logo, and heading text.

Under Header style, you can enable or disable the header using the Header visibility toggle. You can change the background color of the header to match your brand and adjust the text alignment to left, center, or right. You can also modify the padding for both the top and bottom, as well as the left and right sides, to control the spacing within the header.

In the Header image section, you can remove the existing logo or upload a new one using the Change image option. You can set the alignment of the logo and choose its placement, such as displaying it inside or outside the header container. Additionally, you can adjust the maximum width and height of the logo, set a background color for the image area, and customize the padding around the logo for better spacing.

Under Heading and subtitle, you can control the appearance of the heading text by adjusting the font size and selecting the font family. You can modify the font weight, change the text color, and choose the preferred font style, such as normal or italic. You can also add a text shadow effect to enhance the visual presentation of the heading.
Step 5: Edit the Footer of the Email
In this step, you can configure the footer section of your email, including its appearance, content, and social media links.

Under Footer style, you can enable or disable the footer using the Footer visibility toggle. You can change the background color to align with your brand design and adjust the top/bottom and left/right padding to control spacing within the footer.
You can also set the text alignment, choose the font size, select the font family, adjust the font weight, and modify the text color to ensure the footer text matches your overall email design.

In the Footer content section, you can update the footer text. This is typically used to display copyright information, company details, disclaimers, or any additional message you want to include at the bottom of your email.

Under Social links, you can choose where the social icons should appear, such as above the footer text. You can add new social media icons by selecting the social icon type, entering a title, and providing the corresponding link.
You can further customize the appearance of the social links by changing the icon color, title color, title font size, font family, and font weight. Additionally, you can adjust the icon alignment and control the top, bottom, and left padding to fine-tune spacing within the footer.
Step 6: Customize the WooCommerce Email Content
In this step, you can control the appearance and structure of the main email body, including the content container, typography, order details, address sections, and action buttons.

- Under Content container, you can change the background color of the main email body and adjust the left, right, top, and bottom padding to control spacing inside the content area. This helps you create a clean layout with proper white space around the email content.
- In the Text style section, you can adjust the font size and select the font family for the email content. You can also change the text color and link color to ensure readability and maintain brand consistency throughout the email.
- Inside the Order items settings, you can enable or disable the item table visibility. You can choose whether to display product images, show or hide the product SKU, and define the product image size. Additionally, you can change the background color of the item table, adjust the padding, and set the border width to refine the table’s appearance.
- Under Order addresses, you can control the visibility of the billing and shipping address sections. You can customize the address box background color and text color, adjust the left/right and top/bottom padding, and set the text alignment to ensure the address details are clearly structured and easy to read.
- In the Button styles section, you can customize the appearance of action buttons. You can change the button text color, adjust the font size, select the font family, and modify the font weight. You can also set the button alignment, choose a background color, and adjust the top and bottom padding to create visually appealing and consistent call-to-action buttons within your email template.
Step 7: Test and Publish the Changes
- After making necessary changes, click on Test email to send the test email.
- If you want to apply the changes to all WooCommerce emails, check the Apply changes to all email type checkbox.

- Click on Publish to save the changes.
WooCommerce Email Customizer Plugin – An Overview
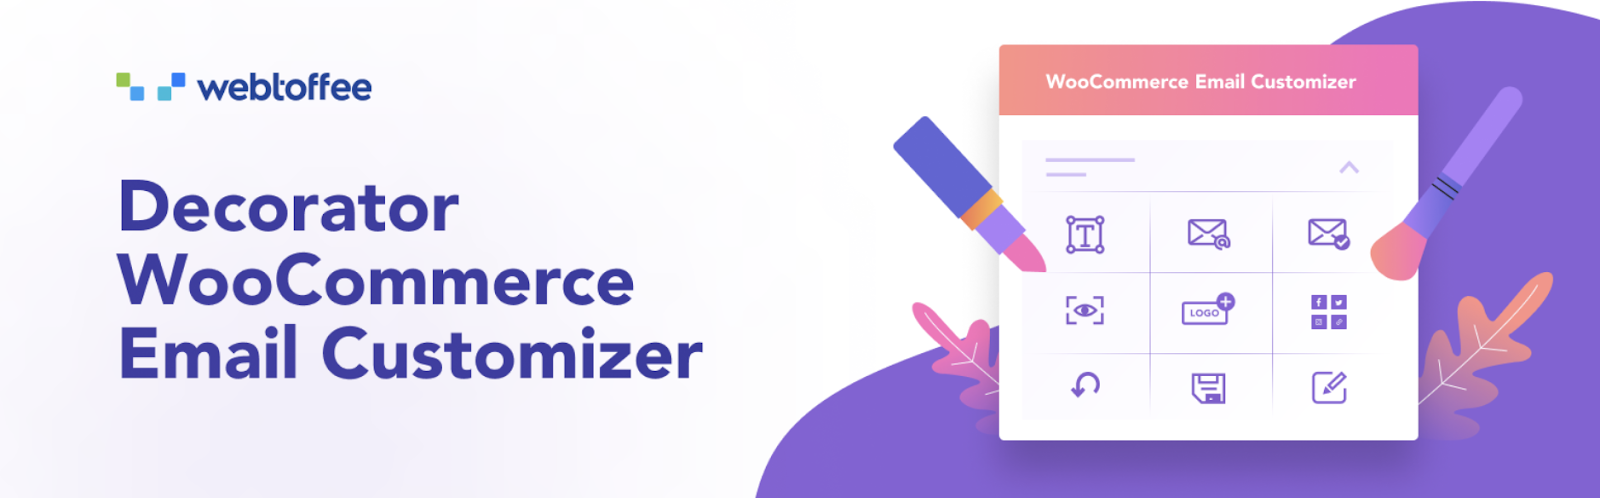
The WooCommerce Email Customizer plugin from WebToffee is a useful tool designed to address the limited default customization options available in WooCommerce emails. This free plugin allows you to fully customize the appearance and content of your WooCommerce order emails.
With this plugin, you have the flexibility to modify various aspects of the email templates. You can change the text, adjust container styles, and make other visual and content-related customizations. This plugin supports customization for all default WooCommerce email templates.
The plugin offers branding options for WooCommerce emails, allowing you to add brand images, taglines, and other branding elements. Additionally, you can access a wide range of email style elements to adjust the email style to your liking. The plugin also provides templates that people can customize or use right out of the box.
Other than the customization features, this plugin offers several automation features such as automated follow-up emails, abandoned cart recovery emails, post-purchase thank-you emails, and personalized promotional campaigns. With its advanced workflow builder, you can set up triggers and conditions to send the right emails at the right time, improving customer engagement and retention.
The WebToffee Marketing App is more than just an email customizer—it’s a complete marketing automation solution for WooCommerce stores. It helps businesses streamline email communication, boost sales, and enhance customer relationships through automated, data-driven email campaigns.
To customize the default WooCommerce email template, go to WooCommerce > Settings > Emails. However, this only allows for basic customizations such as adjusting colors, adding a header image, and editing the footer text. If you need advanced customization options for WooCommerce emails, get the ECommerce Marketing Automation plugin by WebToffee.
Transactional emails, aka order emails, are emails sent to the merchant (you) and/or to the customers once the customer has completed a transaction in your store. These emails are extremely significant because customers anticipate them and therefore have a very high open and click-through rate.
These emails serve as a way to stay in touch and communicate important information. It’s important for these emails to have a professional and consistent look that matches your brand’s personality. This helps to maintain trust and improve the overall customer experience.
Customizing your WooCommerce emails gives you the chance to include useful information in the emails. For example, you can mention related products or share coupon codes with your customers. This can encourage them to make additional purchases and increase their engagement with your store.
Yes, with the WooCommerce Email customizer plugin, we mentioned in this article, you can add your company logo to your WooCommerce emails.
Start Customizing Your WooCommerce Emails Today
WooCommerce transactional emails are not just system notifications. They are high-visibility touchpoints that shape how customers perceive your brand after every purchase. Leaving them in their default state means missing an opportunity to build trust, improve clarity, and reinforce your store’s identity.
With the default WooCommerce settings, you can make basic adjustments like editing text, updating sender details, and changing colors. But if you want full design flexibility, better branding control, and advanced customization options, a dedicated solution like the WebToffee Marketing Automation plugin gives you complete control over every element, from the container and header to order tables, addresses, and buttons.
A well-designed transactional email feels intentional, professional, and aligned with your brand. It reduces confusion, strengthens customer confidence, and turns routine order updates into meaningful brand interactions.
Take a few minutes to customize your WooCommerce emails properly. It’s a small improvement that delivers long-term impact on customer experience and brand consistency.

Got any query? Please leave a comment or reach out to our support
Got any query? Please leave a comment or reach out to our support

Subcribe to our newsletter


Comments (16)
carritos abandonados Tiendanube
February 28, 2026
Personalmente, creo que personalizar los correos de WooCommerce es fundamental para mejorar la experiencia del cliente. He notado que incluir un diseño más acorde con la marca no solo aumenta la satisfacción, sino que también puede reducir los carritos abandonados. Si alguien ha probado herramientas específicas para este propósito, me encantaría conocer sus experiencias. ¡Gracias por el artículo!
Sanjai Valsan
March 4, 2026
Hi Carritos,
Thanks for sharing your thoughts!
If you’re looking for a tool to customize your emails, our plugin mentioned in the article allows you to easily customize WooCommerce emails with your own branding, layouts, and content. Feel free to give it a try, and we’d love to hear your experience with it!
Rafael Rojas
July 11, 2025
Buenas tardes:
Cuando mando los e-mail de prueba, no sale la dirección de entrega, solo la de envío.
Saben por qué sucede eso.
Sanjai Valsan
July 17, 2025
Hi Rafael,
Thanks for reaching out,
We’ve tested the plugin thoroughly, and in our environment, the shipping (delivery) address is displayed correctly in the test emails as expected. If you’re not seeing the delivery address on your site, it could be due to a site-specific configuration. To investigate and resolve this, we recommend reaching out to our support team.
Rafael Rojas
July 10, 2025
Lo instalé pero tiene un problema, no sale la columna de envío con todos los datos necesarios, solo sale la de Facturación. Pueden revisarlo y decirme si tendrá alguna solución.
Gracias
Sanjai Valsan
July 17, 2025
Hi Rafael,
Thank you for reaching out,
We’ve thoroughly tested the plugin and verified that the shipping address is correctly displayed in the email under normal conditions. If the shipping column isn’t appearing on your site, it’s likely due to one of the following reasons:
1. The order may not include shipping details, for instance, if it involves virtual or downloadable products.
2. There could be a site-specific issue, such as a conflict with your theme or another plugin, that’s interfering with how the shipping information is rendered.
To help you resolve this, we recommend contacting our support team.
Annette
November 28, 2023
Hi webtoffee team,
your plugin looks great, thanks for your efforts!
Is there a way that I can also customize the additional email types that are being created by this plugin?
https://www.pluginhive.com/product/woocommerce-booking-and-appointments/
Sincere thanks in advance!
Best
Annette
Arjun
December 4, 2023
Hi Annette,
Thank you for reaching out to us. To ensure compatibility, we recommend testing our plugin alongside the one you mentioned. Kindly reach out to our support team for further assistance.
Chris
September 17, 2023
Hi,
I’m just testing your plugin for my store and it seems great, but when I adjust the container width it doesn’t center it?
In the CSS it looks like it’s the line “max-width: 600px” that’s doing this, can you tell me how I can adjust this please?
Otherwise it’s looking really good!
Thanks
Arjun
September 18, 2023
Hi Chris,
Thank you for reaching out to us, The ‘max-width: 600px’ property is specifically applied to the preview container and is managed by WordPress. However, we do have the ability to modify the container width for the email, and any adjustments made to this width will impact the final appearance of the email.
Rick
July 11, 2023
Hello,
I try to adjust the text in the field “Body invoice pending payment text” in the template “Customer invoice”. However, when you add the text, it doesn’t update it.
What can be wrong?
Arjun
July 13, 2023
Hi Rick,
Thank you for getting in touch with us. To adjust the text in the “Body invoice pending payment text” field in the “Customer invoice” template, ensure that you have selected an order with pending payment status.
Chris Nolte
April 14, 2023
Hello,
I have your plugin and I was interested in sending some emails to my admin from the customers email address in order to create a ticket from the customers email. Is this possible? I want this to happen each time a new order is created.
Hema
May 2, 2023
Hello Chris,
Thanks for reaching out.
The plugin actually enhances or customizes the available WooCommerce emails. The plugin doesn’t support creation of new email types (customer emails to admin). Hope this helps.
Peter
September 15, 2023
How can I customize the body texts with this? I’m using the Easy E-mail Customizer for WooCommerce plugin from wpoxium.com to adjust the texts. It’s a great plugin but it’s limited to texts only, not colors.
Arjun
September 20, 2023
Hi Peter,
Thank you for reaching out to us. If your inquiry is related to the Decorator – WooCommerce Email Customizer Plugin, yes, the plugin indeed allows you to customize the body text. Please refer to this article for more information.