
Share:


Table of Contents
Custom gift card designs in WooCommerce enhance the customer experience by allowing store owners to personalize gift cards, making them more appealing and aligned with brand identity. Utilizing the WebToffee WooCommerce Gift Cards plugin, businesses can easily upload unique designs, cater to various occasions, and provide customers with options that reflect their personal touch.
- Custom gift card designs help differentiate your store from competitors by adding a personal touch.
- The WebToffee WooCommerce Gift Cards plugin allows for easy uploading of custom templates and categorization.
- Store owners can enable options for customers to upload their own images for a more personalized gifting experience.
- Templates can be organized by seasons or occasions, making it easy to manage designs for different campaigns.
- High-resolution images in JPG or PNG formats ensure that designs remain sharp and professional.
- Gift card products can be customized to offer predefined amounts or allow customers to enter their own values.
Are you selling gift cards on your store? If so, here’s something most WooCommerce store owners overlook: their gift cards use plain, generic designs straight out of the box. A customer buys or receives a gift card, and it looks exactly like every other store’s: same layout, same stock graphic, zero personality.
Most gift card plugins hand you a basic template and call it a day, but gifting is supposed to feel personal, not like an afterthought bolted onto checkout. That’s the gap WebToffee WooCommerce Gift Cards fills. Instead of settling for a generic default, you can upload custom designs and match them to your brand, your seasonal campaigns, or whatever occasion the gift card is for.
In this article, we will show you how to upload custom gift card designs in WooCommerce using the WebToffee Gift Cards plugin.
Let’s get started.
Before we begin, make sure you have installed and activated the Pro version of the WebToffee WooCommerce Gift Cards plugin. Then follow the steps below:
Step 1: Enable Gift Card Products in WooCommerce
Before you can upload custom designs, you need to turn gift cards on as a product type.
Head to WooCommerce → Gift Cards → General Settings from your WordPress dashboard.
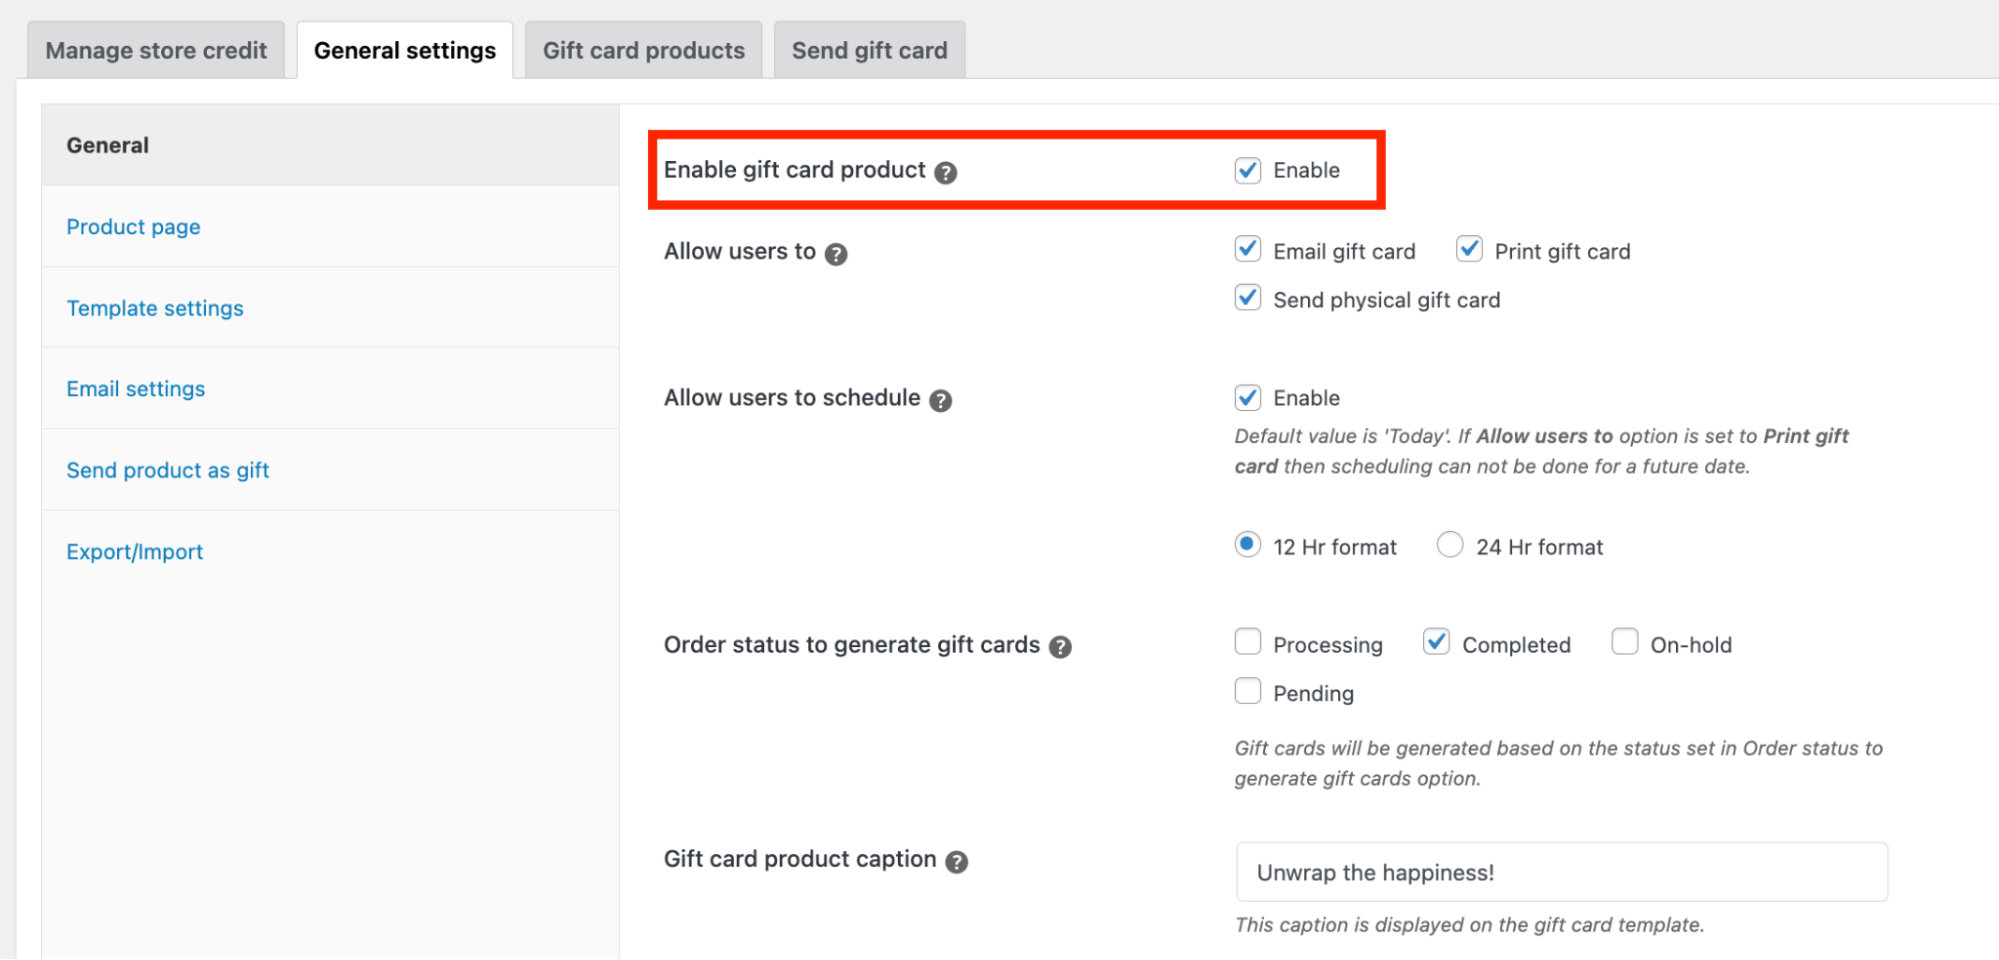
- Enable the gift card product checkbox
- Choose how customers can send gift cards: physical, email, or print
- Decide whether to allow scheduled delivery for gift cards
- Select the order status that triggers gift card generation
- Add a default caption for the gift card, if you want one
You can also configure additional gift card usage settings, such as gift card tax calculation, gift card expiry, and more.
Step 2: Add New Gift Card Template
Once gift cards are enabled, you can replace the default template with your own design.
- From General Settings, go to the Template Settings tab.
- Enable the checkbox that lets customers upload their own gift card image if you want to offer that option.
- Under Templates, click Add New Template.
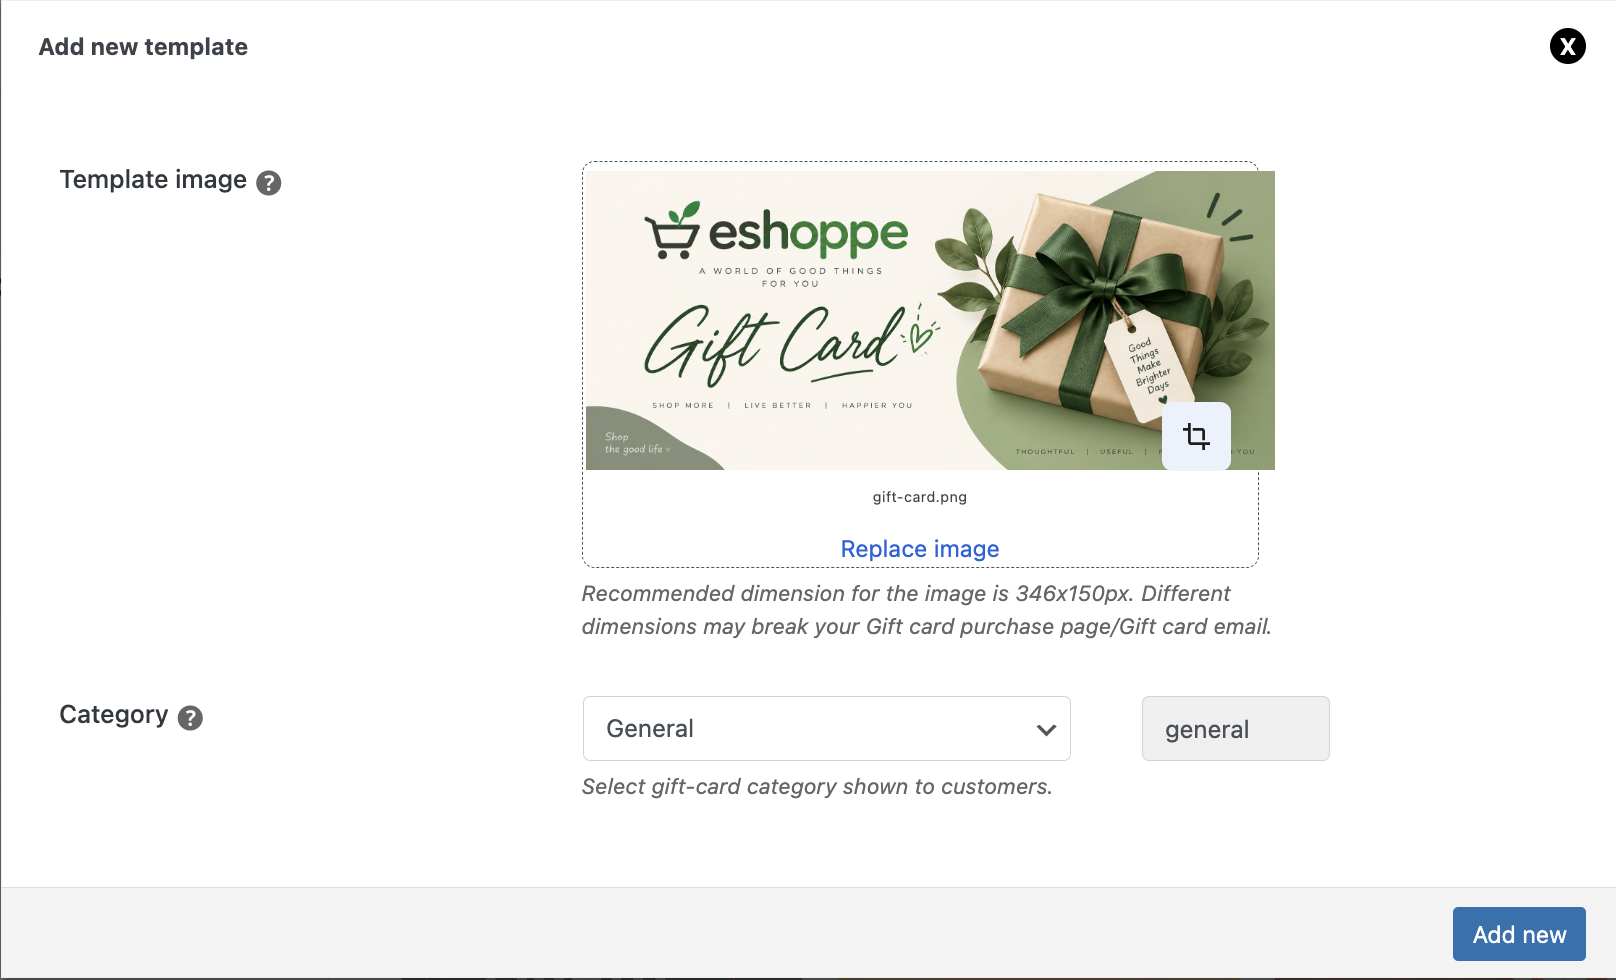
- Upload the gift card image you created and assign it to a category. To use a new category, click Add New Category instead of selecting an existing one.
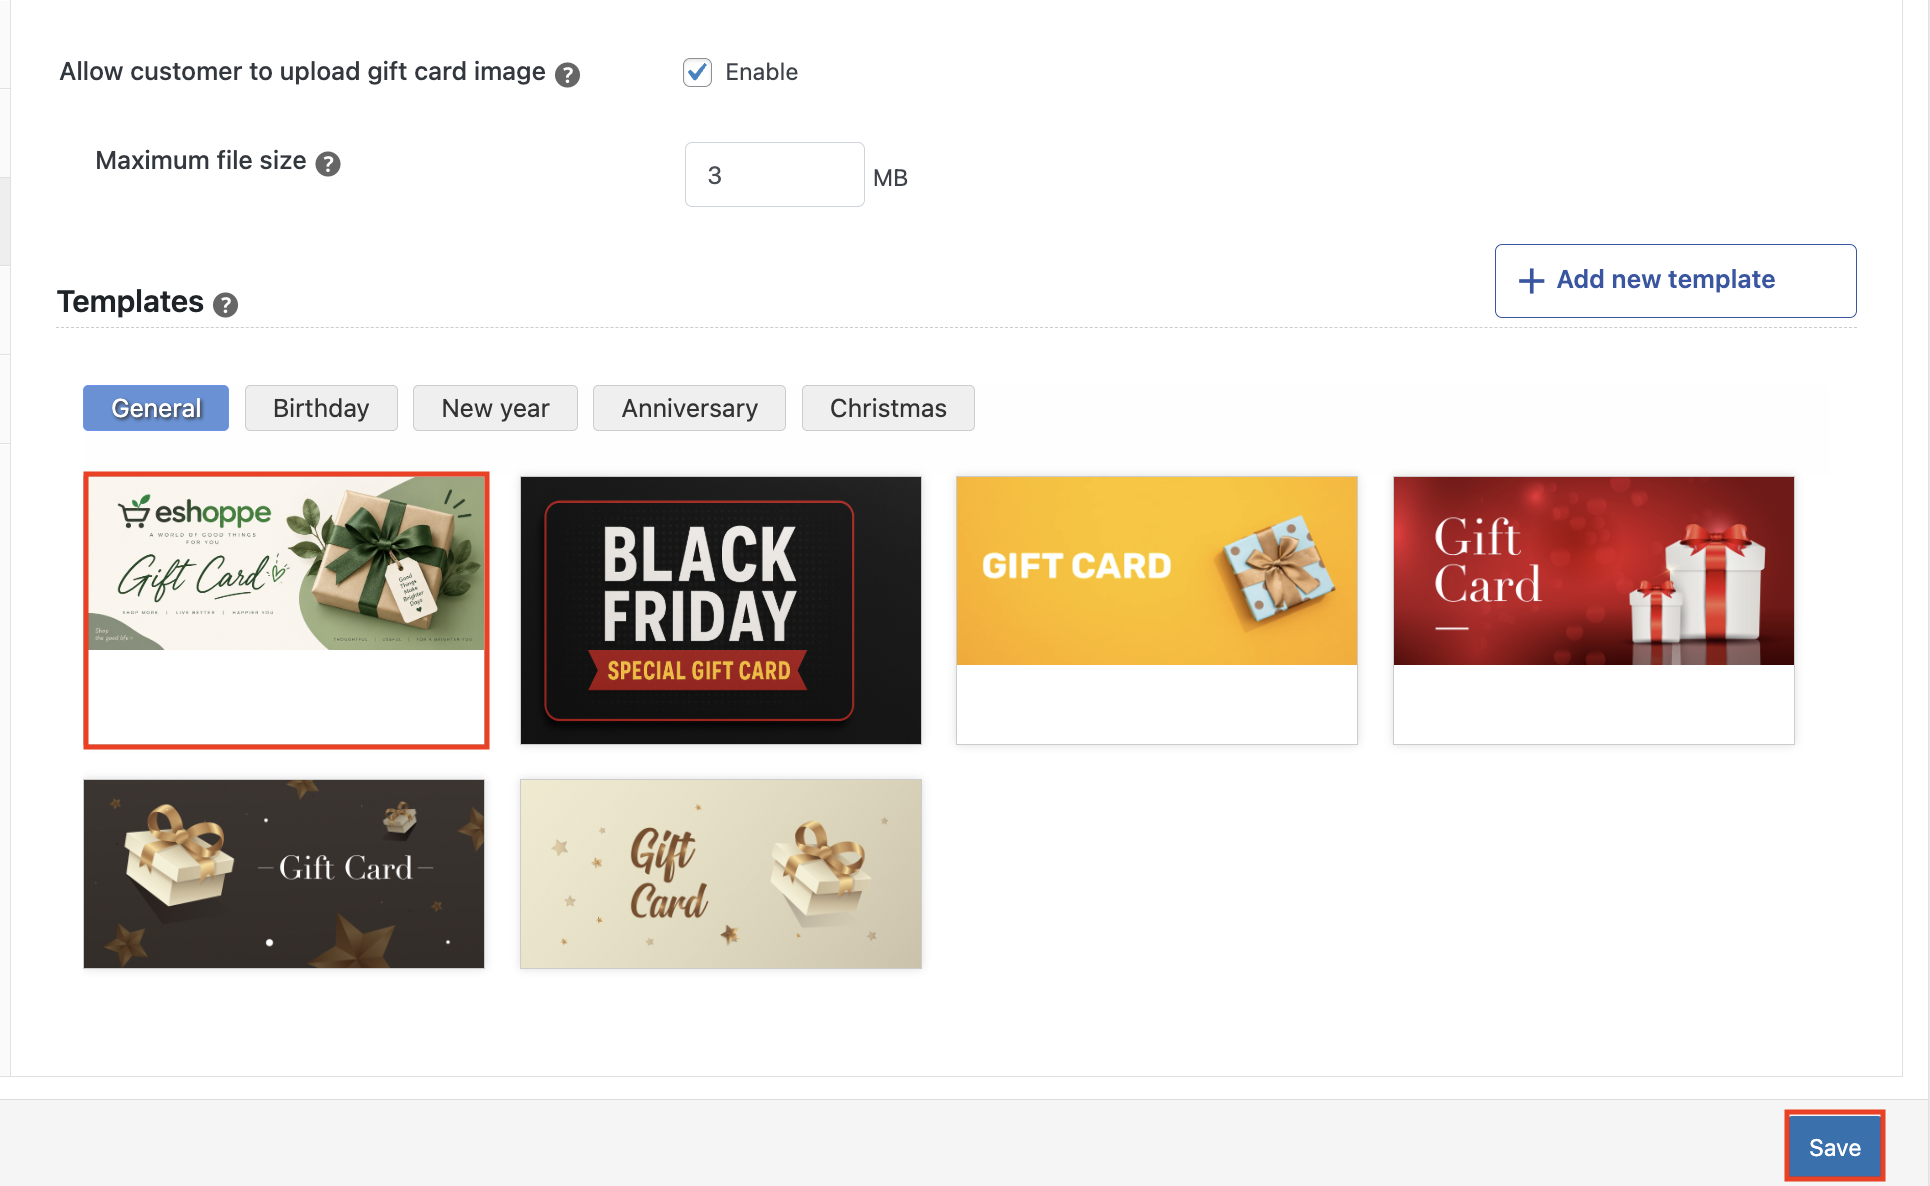
- Click Save to save the template.
Step 3: Add a New Gift Card Product to WooCommerce
With your template ready, the next step is creating the actual gift card product customers will buy.
- Go to the Gift Card Products tab.
- Click Add New to create a new gift card product.
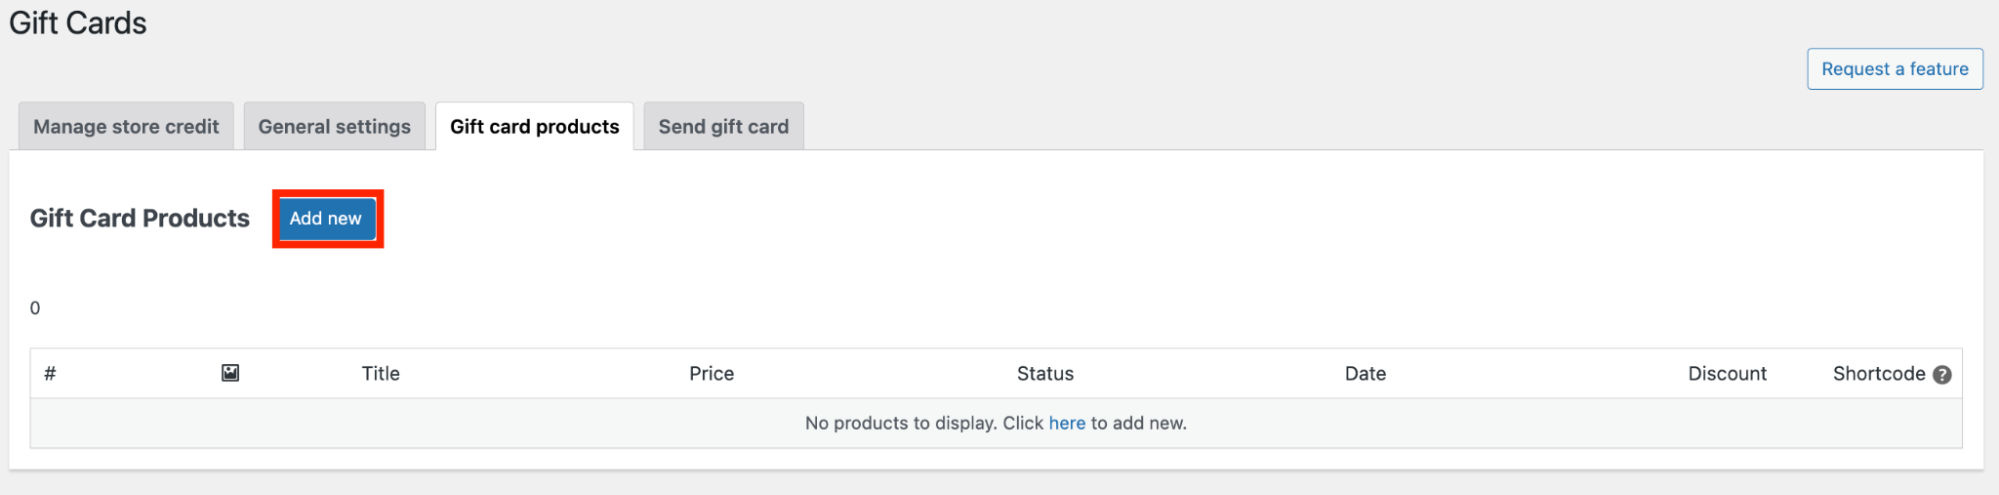
- Enter a product name and add a short description.
- Under Product Data, choose whether to offer predefined amounts or let customers enter a custom amount.
- Set the tax status and tax class based on how your store handles gift card taxation.
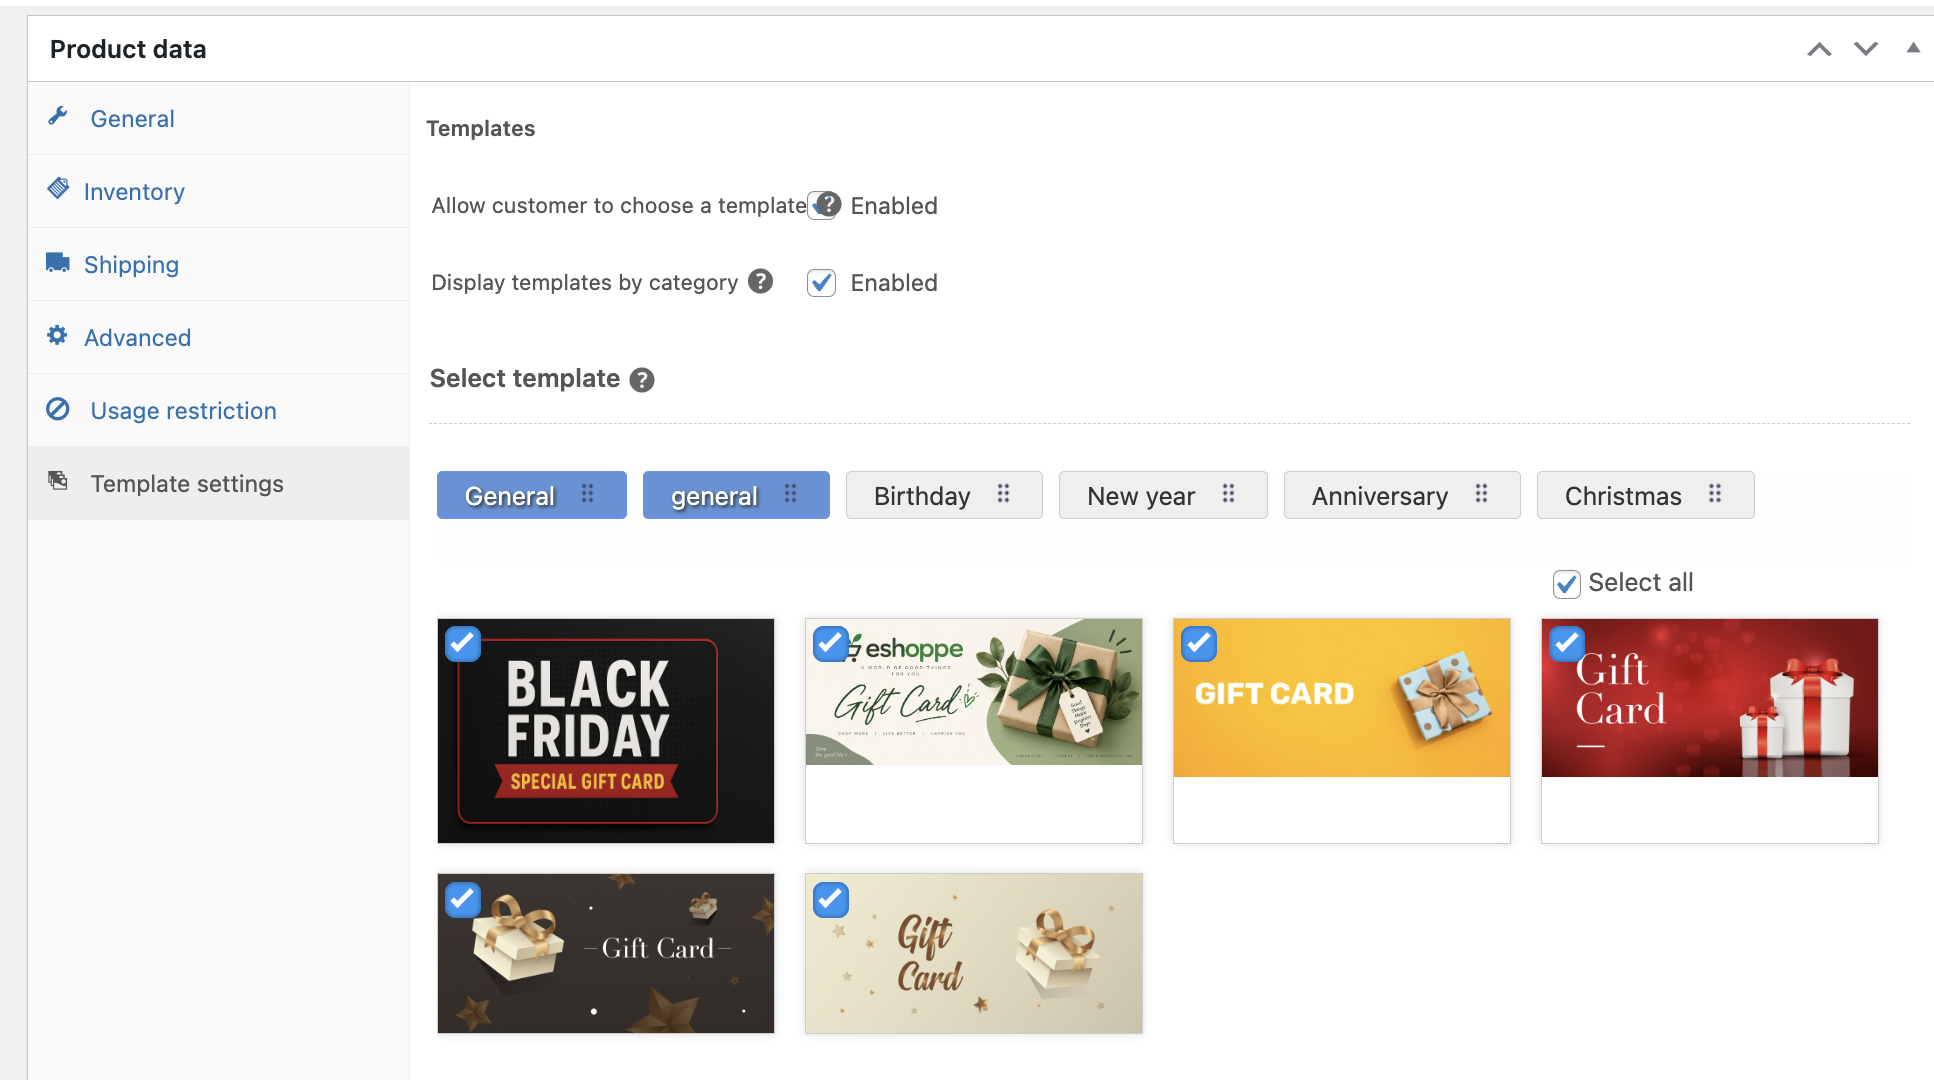
- Under Template Settings, select the template you uploaded in Step 2.
- Click Publish to make the gift card product live.
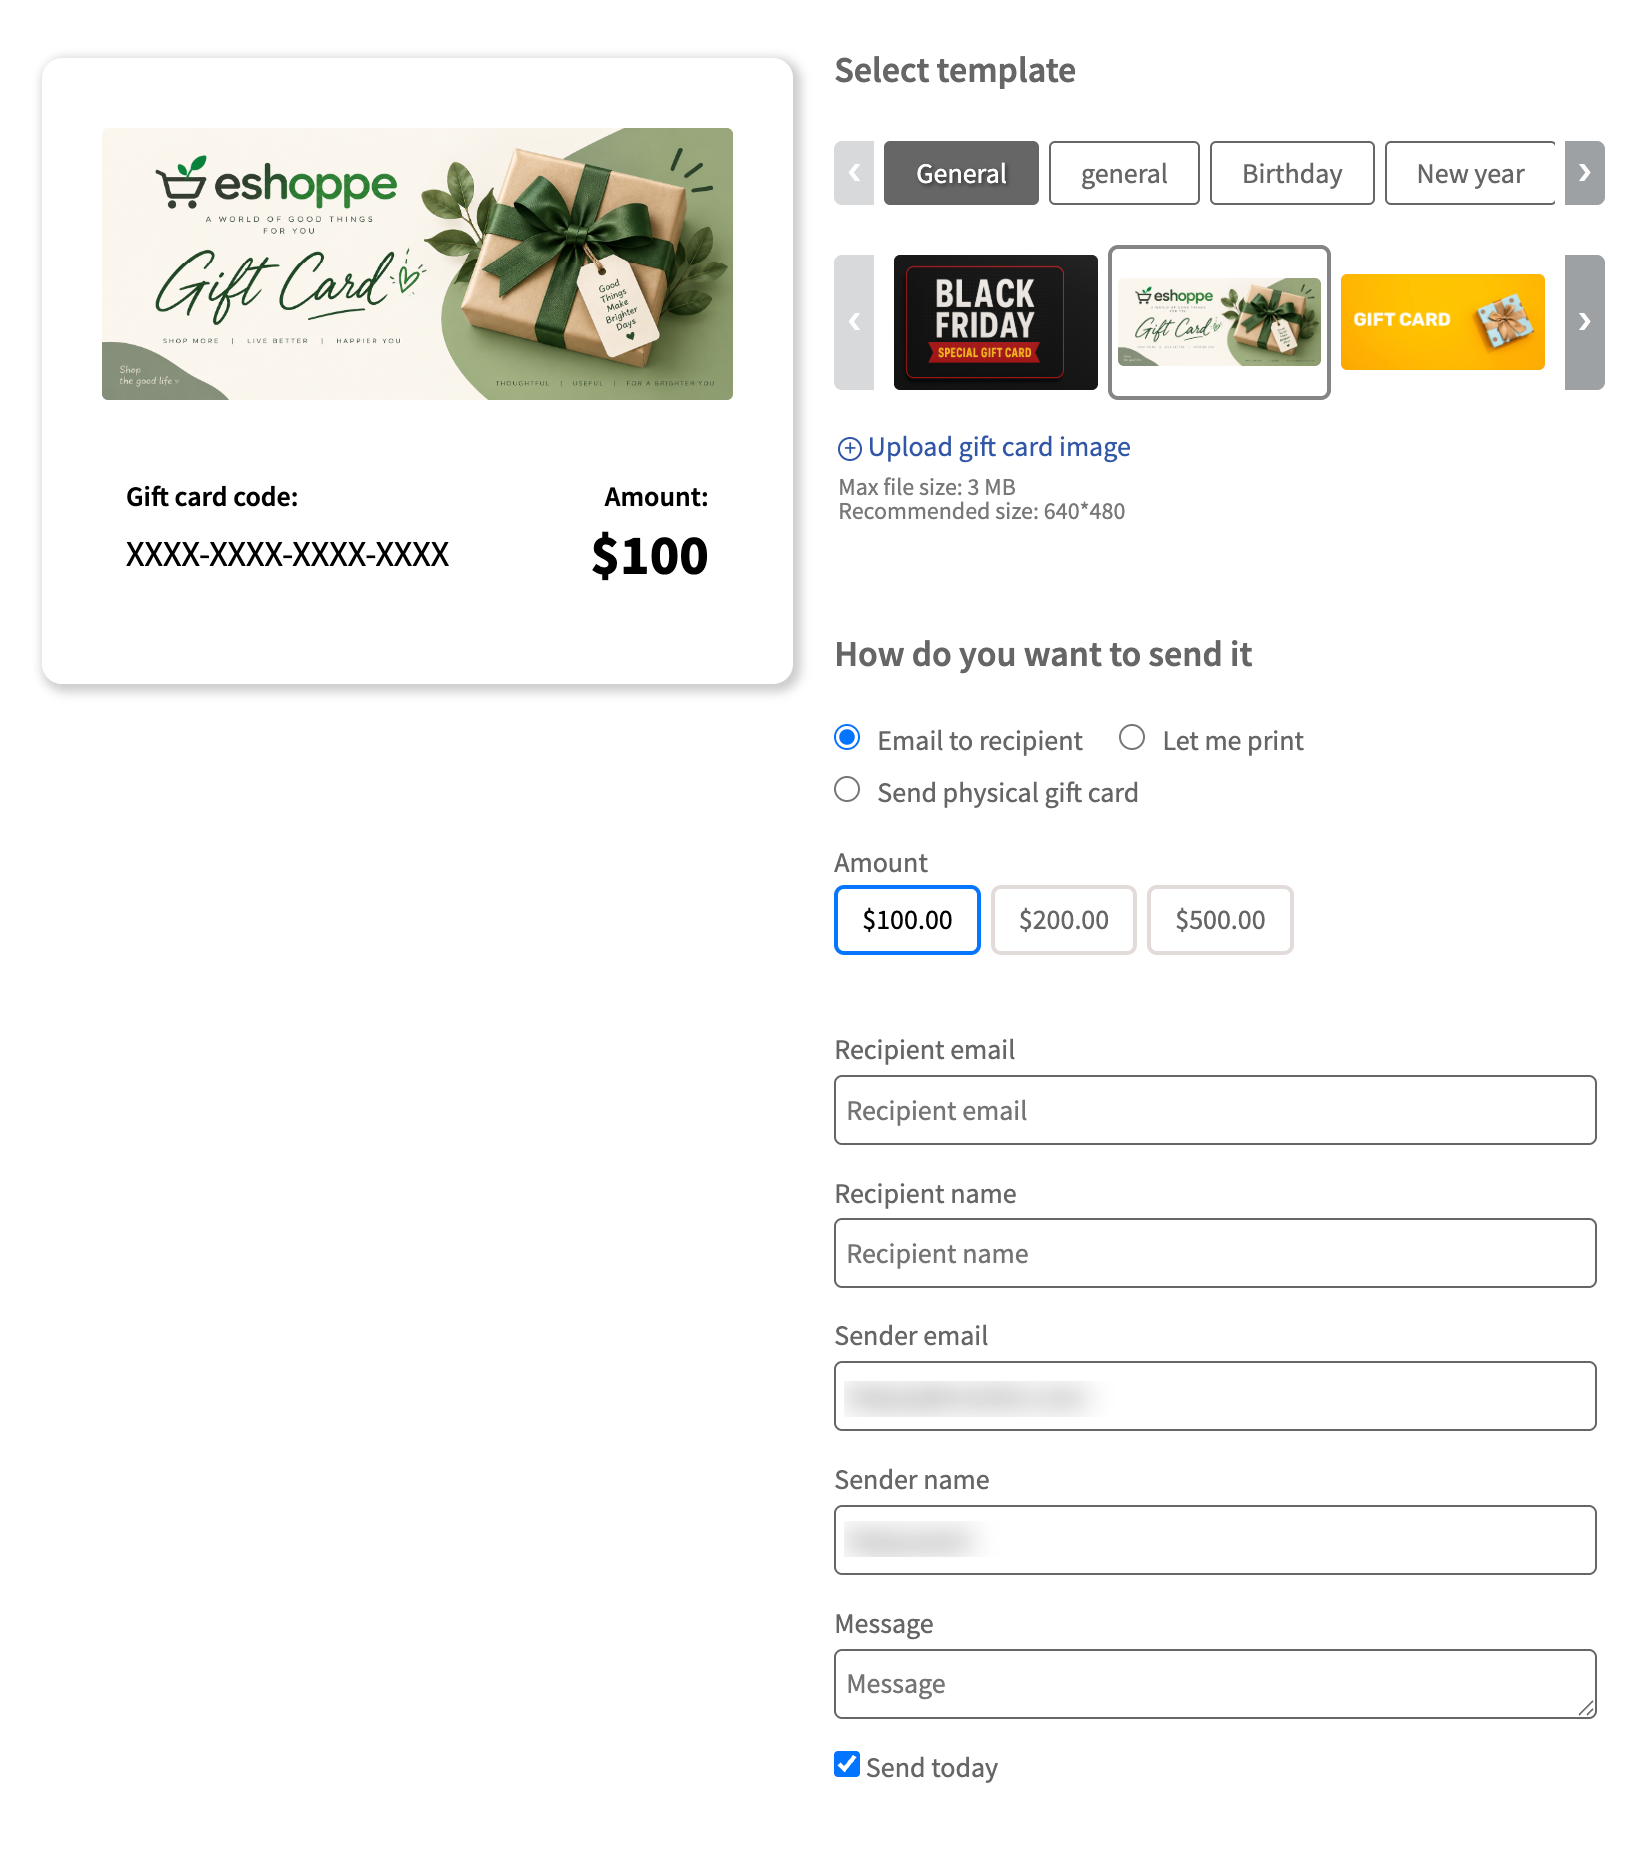
Once published, your new gift card product will appear in your store, ready for customers to purchase with the attached custom design.
What image formats and sizes work best for gift card templates?
Stick to JPG or PNG files, and keep the image close to the aspect ratio of a standard gift card (roughly 3:2 or 16:9, depending on your layout). A high-resolution image, at least 1200px wide, keeps the design sharp on both product pages and printed cards.
Can I upload multiple templates for one gift card product?
Yes. You can create as many templates as you want under Gift Cards → Template Settings, organize them into categories, and assign more than one to a single product so customers can pick a design at checkout.
Can customers upload their own gift card images?
Yes, if you enable that option in Template Settings. This lets customers attach a personal photo or image to the gift card they’re sending, useful for occasions like birthdays or anniversaries.
Can I organize templates by season or occasion?
Yes. Templates support categories, so you can group designs by season, holiday, or campaign (for example, “Holiday 2025” or “Birthday”) and assign the right category to each gift card product.
Also Read: How to Sell Gift Cards in WooCommerce?
Custom gift card designs are a simple way to make your WooCommerce gift cards feel more personal and consistent with your brand. Instead of relying on generic templates, you can create designs for different occasions, seasons, and campaigns.
With the WebToffee WooCommerce Gift Cards plugin, you can upload custom templates, organize them into categories, and assign them to individual gift card products. You can also let customers upload their own images for an even more personalized gifting experience.
We hope this guide helped you set up custom gift card designs in your WooCommerce store. Thanks for reading!


Subcribe to our newsletter