


Share:


Table of Contents
Creating a Withdrawal Terms and Conditions page in WooCommerce is essential for compliance with EU regulations, specifically the Consumer Rights Directive. This page informs customers of their legal right to cancel purchases and receive refunds, ensuring transparency and trust in the buying process.
- A Withdrawal Terms and Conditions page is legally required for WooCommerce stores selling to EU customers.
- Customers have a 14-day right to withdraw from their purchase without providing a reason.
- The EU Withdrawal Button plugin simplifies the creation and management of withdrawal policies, including a built-in page generator.
- The withdrawal process must clearly outline how customers can submit requests, the refund timeline, and any exceptions to the policy.
- Allowing partial withdrawals enhances customer satisfaction by enabling them to return individual items from their orders.
- Compliance with withdrawal regulations fosters customer trust and reduces potential legal issues for online retailers.
Running a WooCommerce store in the EU? Then you’re required to give customers a way to withdraw from their purchase, and that means adding a withdrawal button to your store.
But a button alone won’t cut it. This is a legal requirement, not a checkbox feature, and it comes with rules you need to follow. Alongside the withdrawal button, you also need a proper withdrawal terms and conditions page that discloses your store’s withdrawal policy clearly.
This is where our EU Withdrawal Button plugin comes in. It handles both sides of the requirement: a fully functional withdrawal flow for customers, and a built-in page generator to create your Withdrawal Terms and Conditions page in WooCommerce.
Let’s get started.
A withdrawal terms and conditions page is where you disclose your customers’ legal right to cancel a purchase and get their money back, without them needing to give a reason. If you sell to EU customers, this isn’t a nice-to-have. It’s required under the EU Consumer Rights Directive.
A proper withdrawal page covers a few core pieces:
- The right of withdrawal: the 14-day window customers get to change their mind, and when that window starts counting.
- How to exercise it: what counts as a valid withdrawal notice, whether that’s an email, a letter, or a withdrawal form.
- Effects of withdrawal: your refund timeline, what gets reimbursed, and who pays return shipping.
- Exceptions: product types the law excludes, like personalized goods, perishables, or digital content once download has started.
- Legal basis: the directive your policy is built on.
You could write this page manually, but keeping it accurate means tracking legal exceptions, updating dates, and matching your actual product catalog. That gets messy fast. The EU Withdrawal Button plugin’s built-in page generator handles this for you, pulling your store’s excluded products and categories directly into the policy text.
1. Install WebToffee EU Withdrawal Plugin
- From your WordPress dashboard, go to Plugins → Add New, then search for EU Withdrawal Button by WebToffee. Install and activate the free version to get started.
- The free version covers the basics, but features like the auto-generated Withdrawal Terms & Conditions page, partial withdrawals, and popup modal display need the premium version.
- Head to the WebToffee site, purchase EU Withdrawal Button Pro, then upload and activate it the same way you would any premium plugin: Plugins → Add New → Upload Plugin.
- Install and activate the premium plugin too.
2. Configure the Withdrawal Page
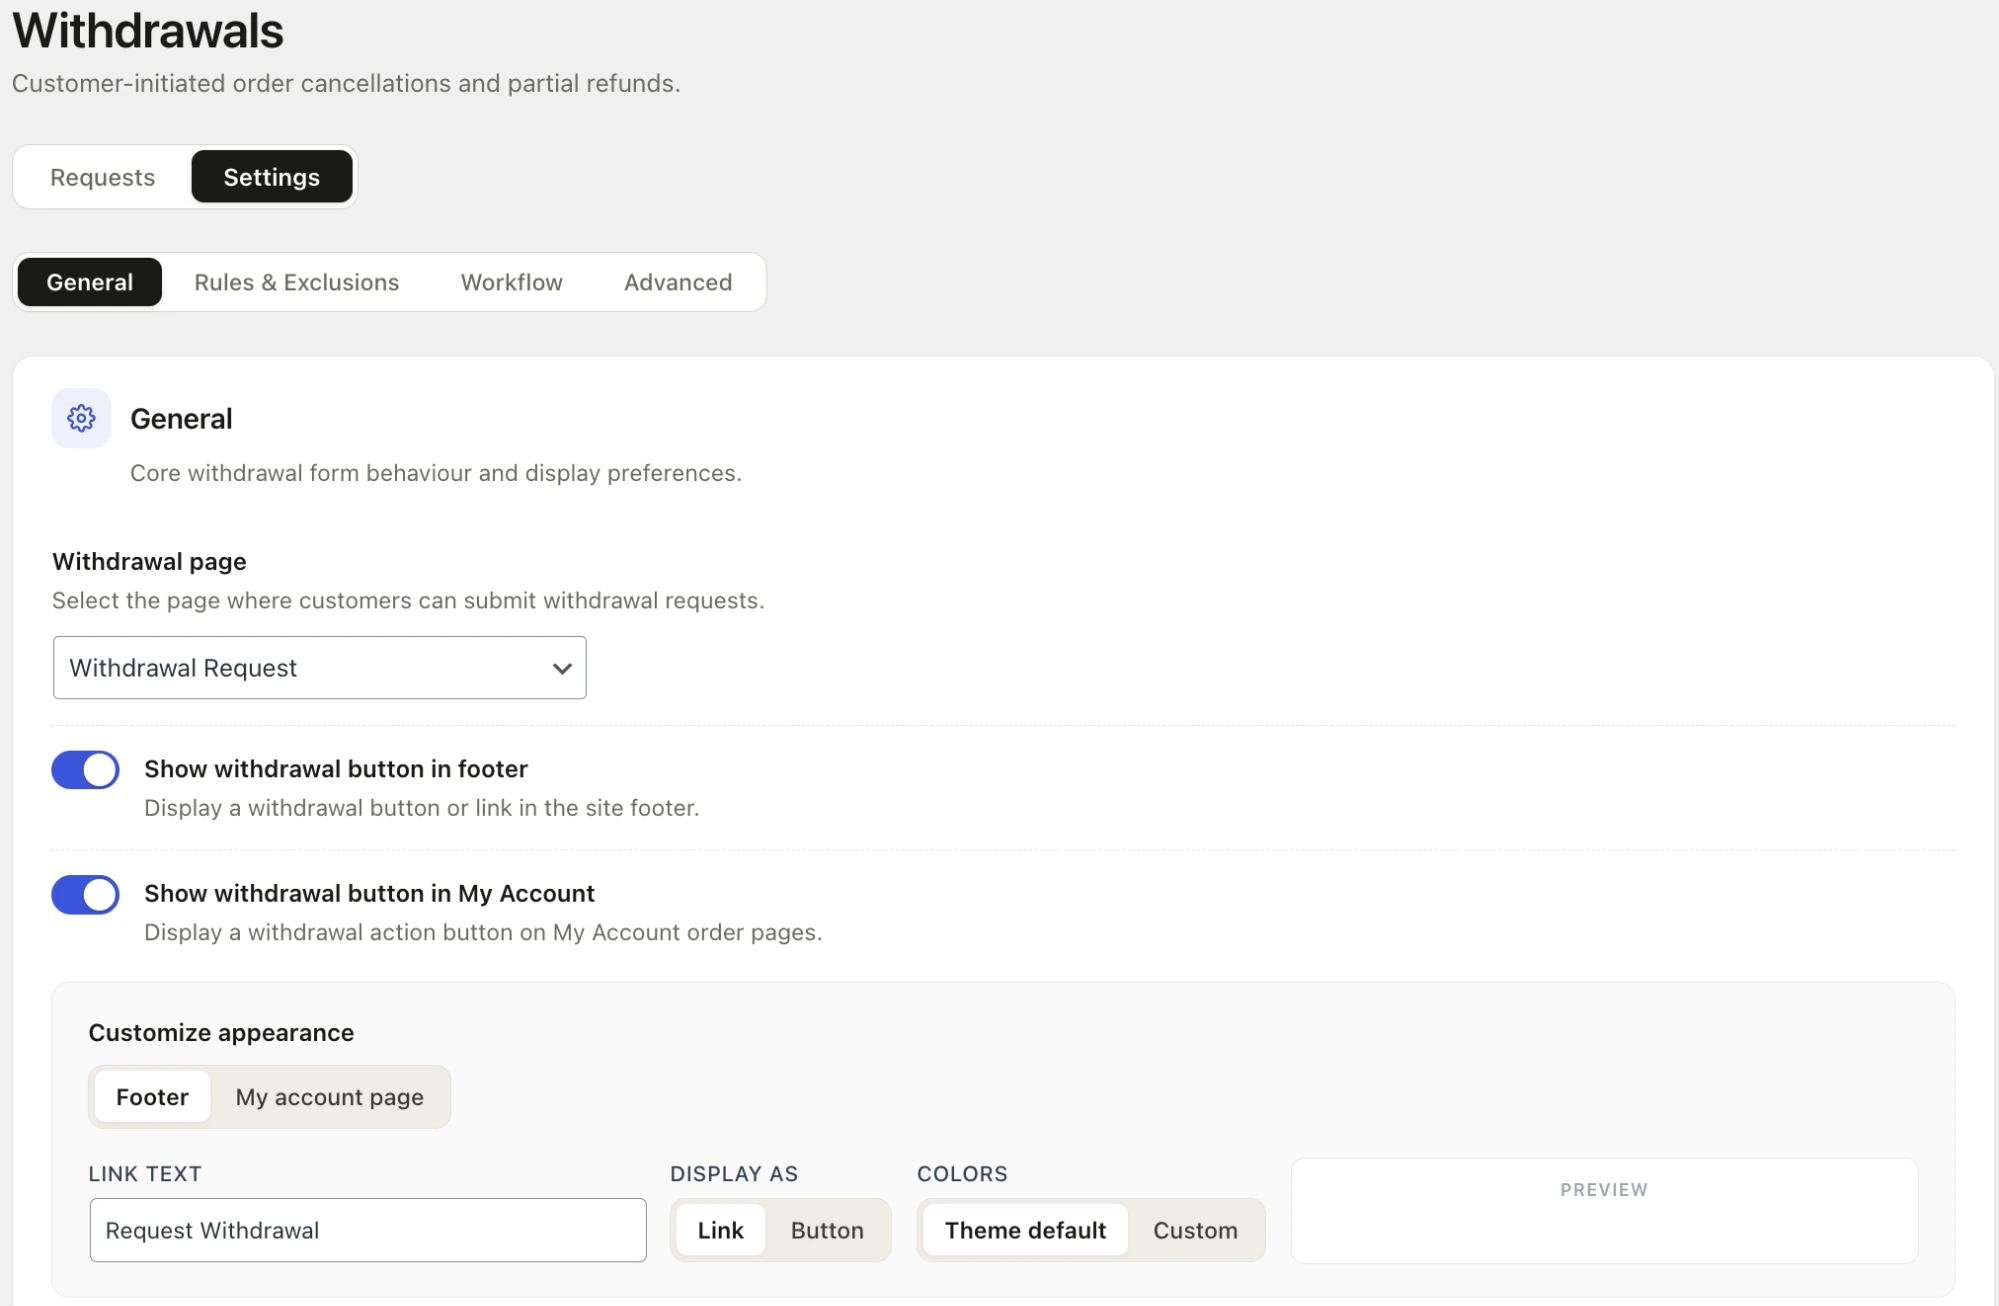
- After installing the plugin, go to Withdrawals → Settings → General. From the Withdrawal page dropdown, select the page where customers will submit their withdrawal requests.
- Turn on Show withdrawal button in footer and Show withdrawal button in My Account so customers can find the withdrawal option from both the site footer and their order history.
- Each toggle has a Customize appearance panel where you can set the link text and choose between a link or button display.
3. Set Display Scope for Withdrawals
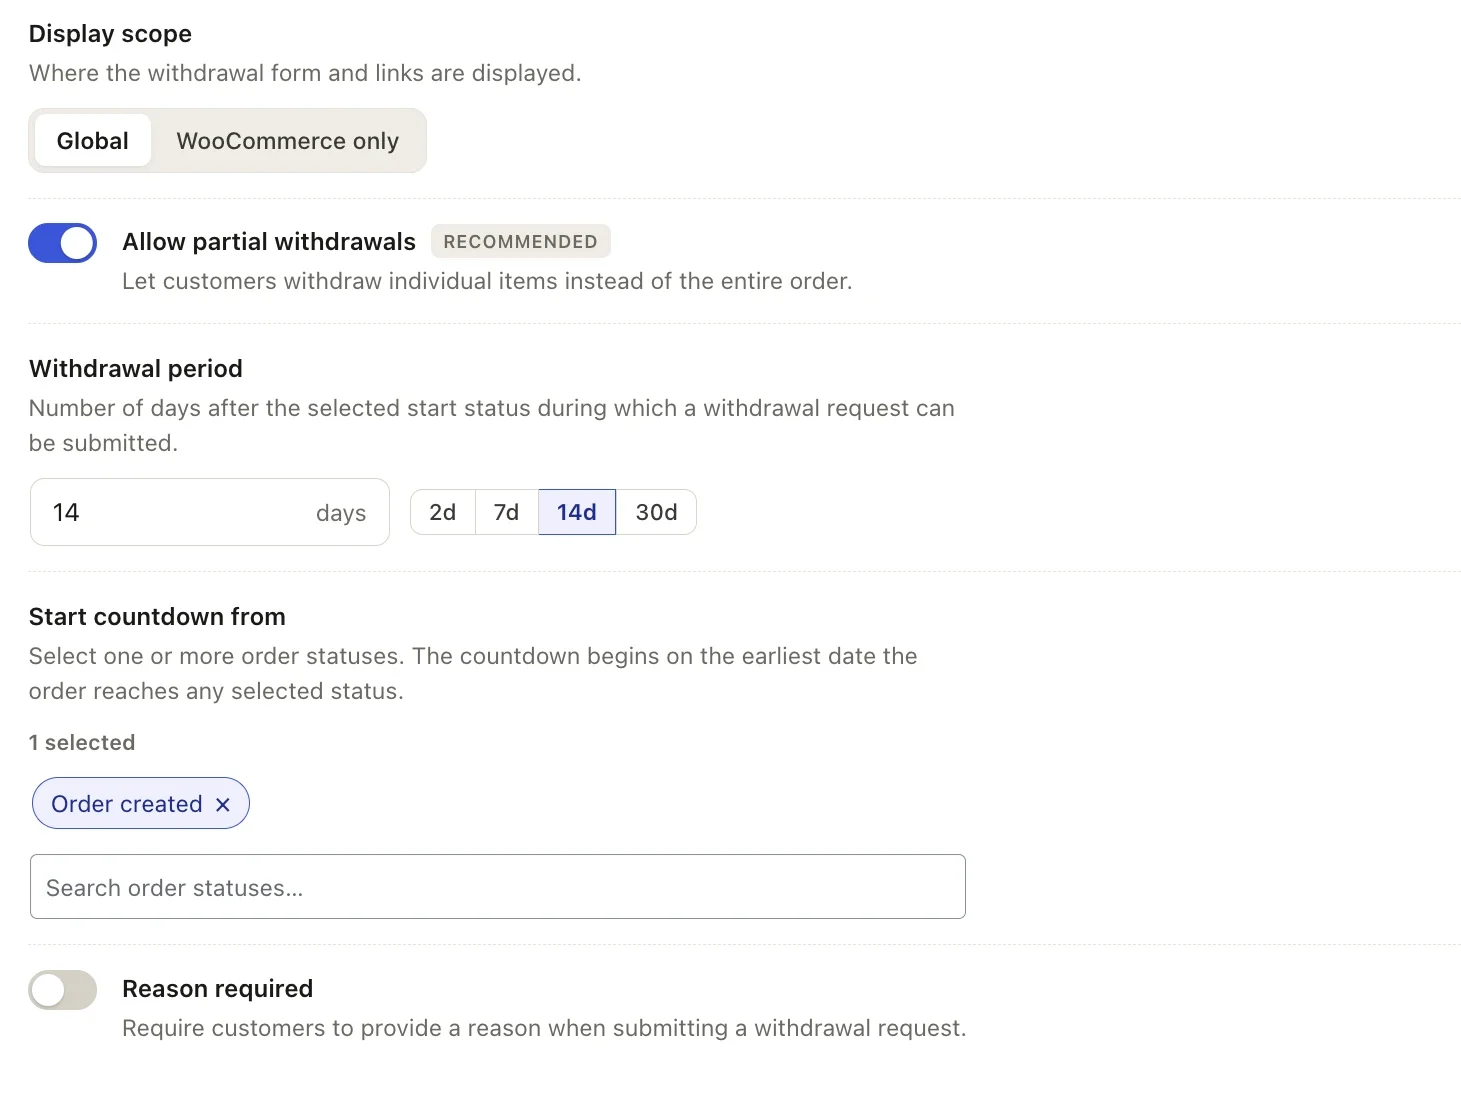
- Set the Display scope to Global if you want the withdrawal option available site-wide, or WooCommerce only to limit it to store pages.
- Turn on Allow partial withdrawals (recommended) so customers can withdraw individual items instead of being forced to cancel the entire order.
- Set your Withdrawal period. EU rules require 14 days, and the built-in preset sets this in one click. Next, use Start countdown from to choose what triggers the countdown.
4. Choose Withdrawal Form Display Mode
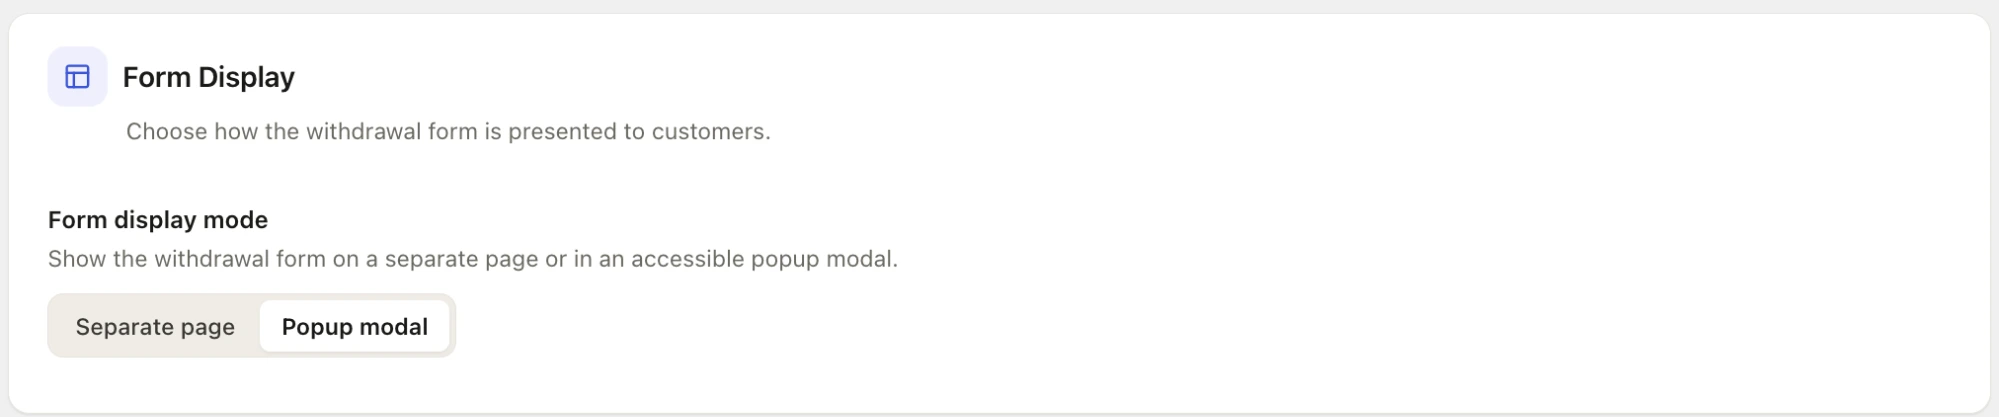
Under Form Display, decide how customers see the withdrawal form when they click through.
Choose Separate page if you want it on its own dedicated page, or Popup modal to show it as an accessible overlay without navigating away from the order.
5. Generate Your Withdrawal Terms & Conditions Page
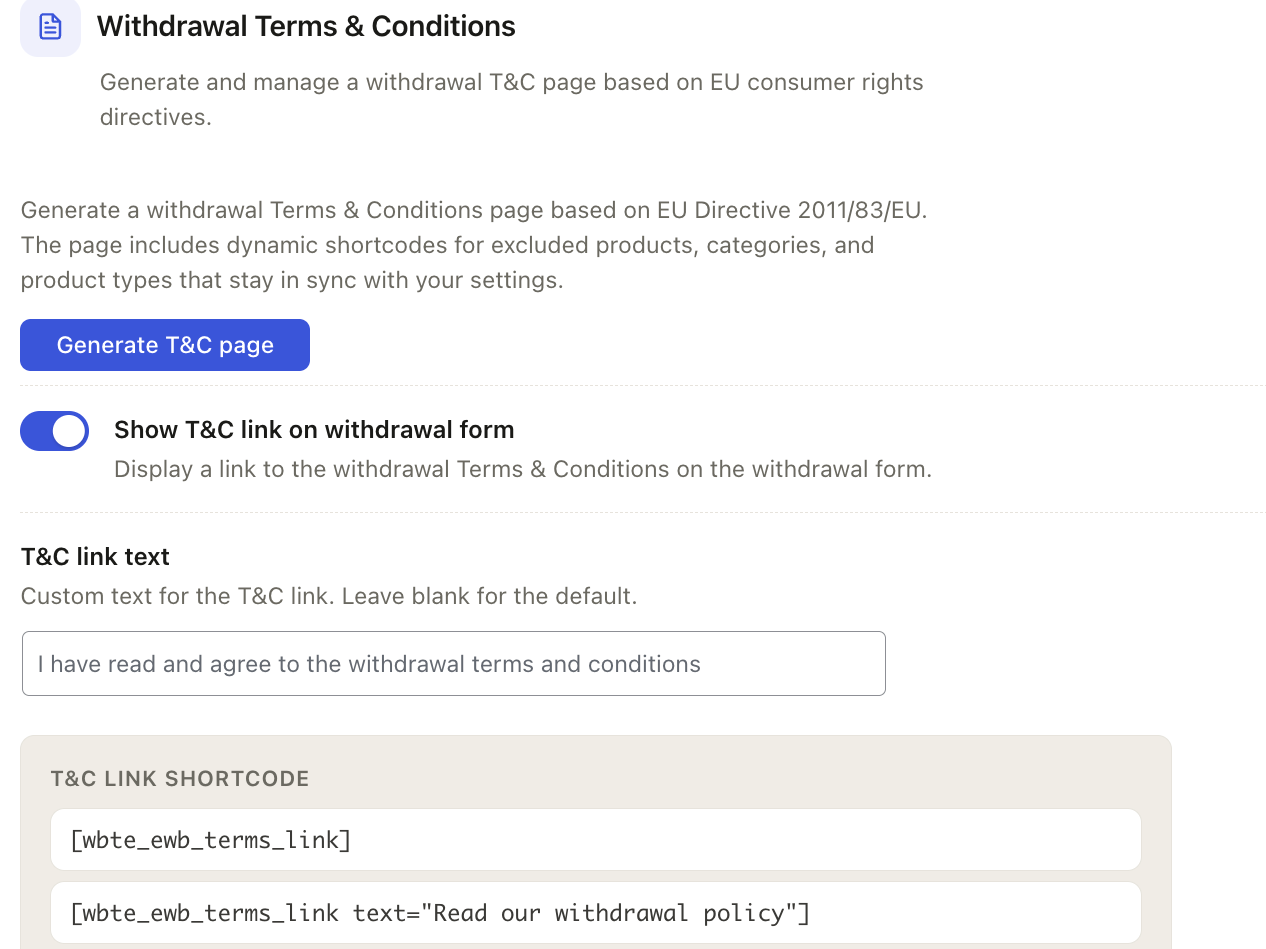
- Scroll to the Withdrawal Terms & Conditions section. Click Generate T&C page to create a page based on EU Directive 2011/83/EU.
- Turn on Show T&C link on withdrawal form so customers see a link to this page right where they submit their withdrawal request.
- Customize the T&C link text if you want something other than the default “I have read and agree to the withdrawal terms and conditions.” Leave it blank to use the default.
- Click Save settings to save your changes.
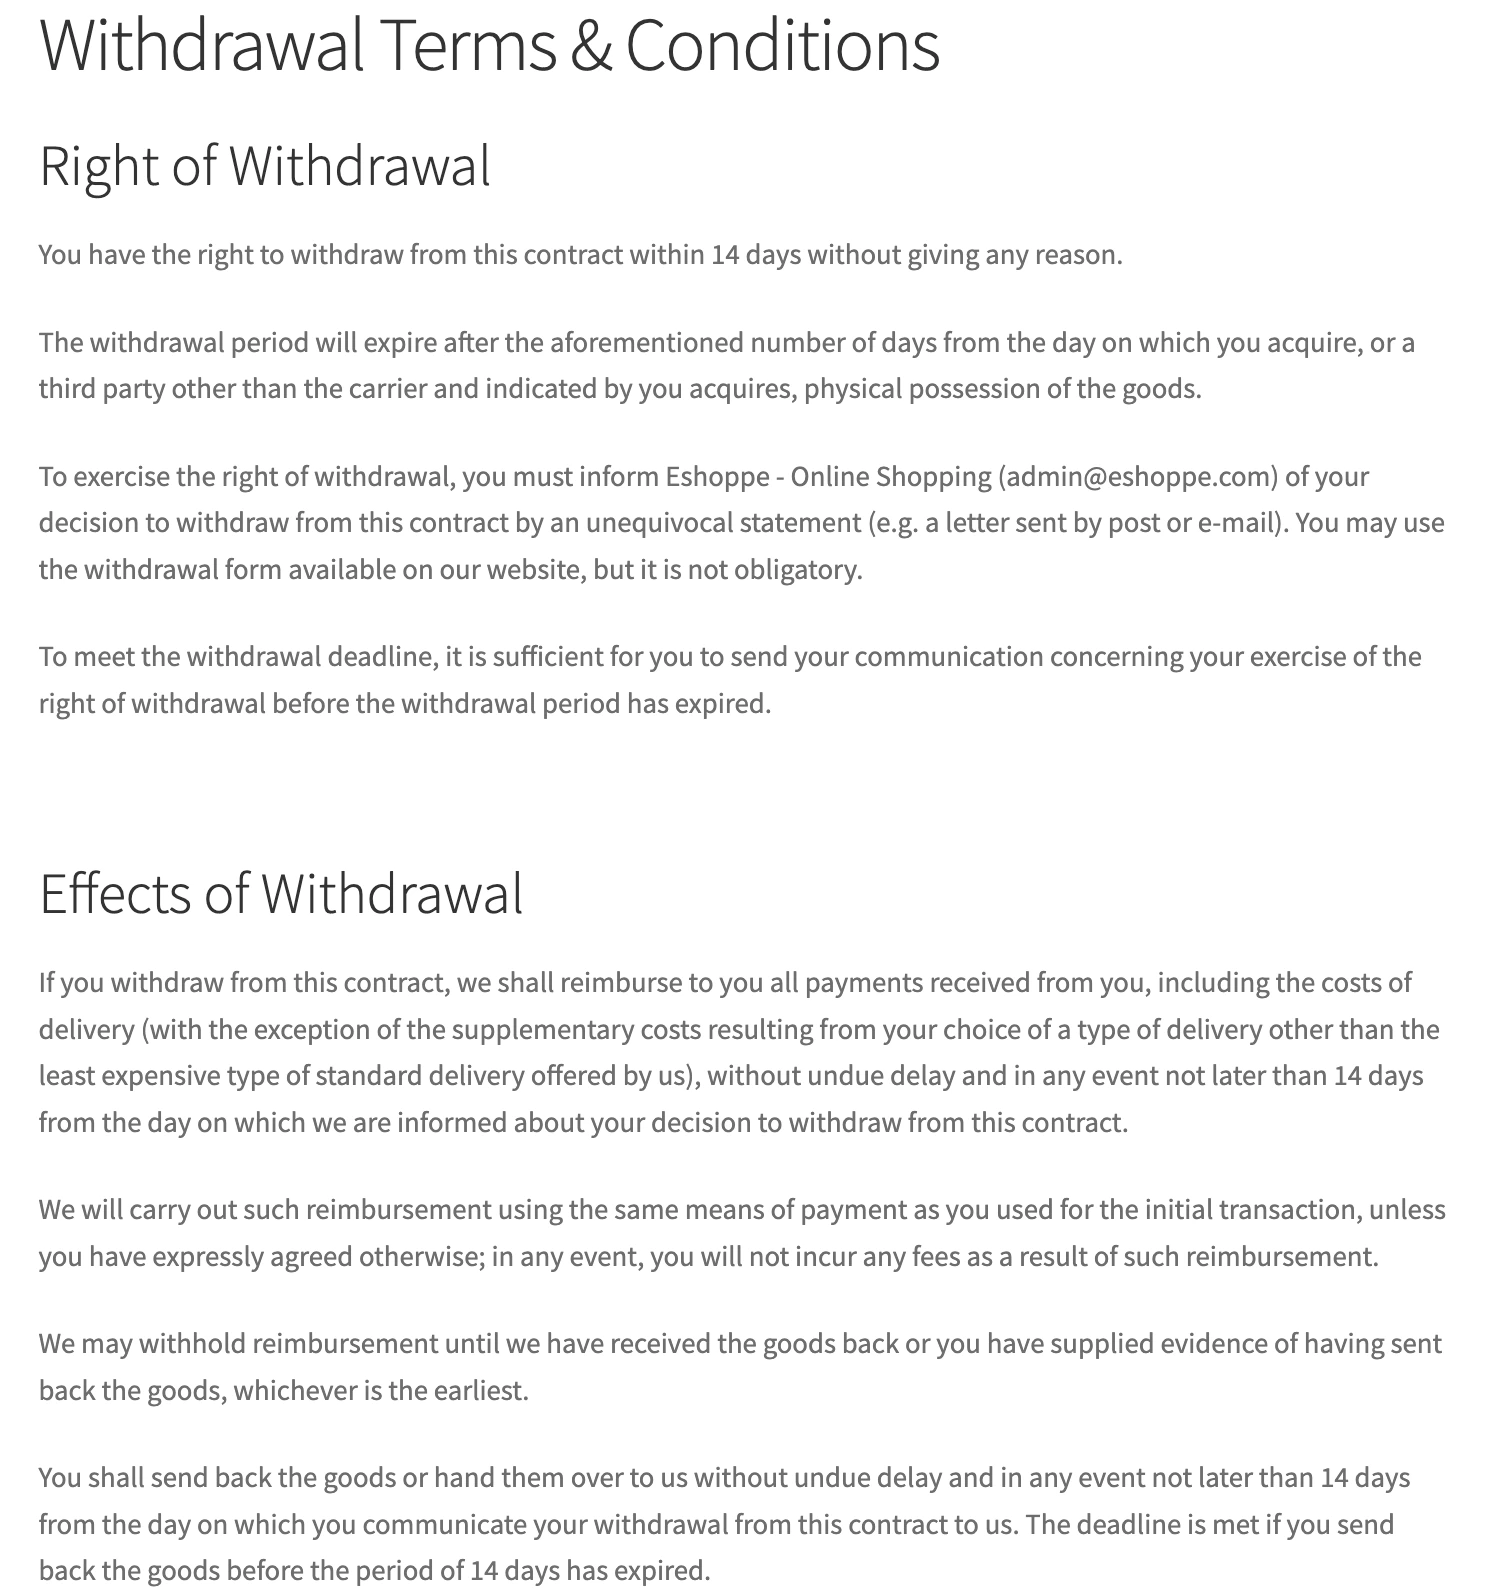
Here’s how the page appears on your website:
Do I legally need a withdrawal terms and conditions page for my WooCommerce store?
Yes, if you sell to customers in the EU. The Consumer Rights Directive gives EU customers a 14-day right to cancel most purchases, and you’re required to disclose that right clearly before they buy. A generic refund policy doesn’t satisfy this requirement on its own.
Does WooCommerce have a built-in withdrawal feature?
No. WooCommerce handles refunds and cancellations from the admin side, but it doesn’t include a customer-facing withdrawal flow or a way to generate a compliant terms page. That’s what a plugin like EU Withdrawal Button adds.
Does the right of withdrawal apply to digital products?
It depends on when the customer starts downloading or accessing the content. If a customer gives express consent to start immediately and acknowledges they’ll lose their withdrawal right, the exception applies. If you haven’t captured that consent, the standard 14-day window still applies.
Can customers withdraw part of an order instead of the whole thing?
Yes, if you enable partial withdrawals in your plugin settings. This lets customers cancel individual items rather than the entire order, which cuts down on unnecessary full-order cancellations when a customer only wants to return one item.
Creating a clear Withdrawal Terms and Conditions page is an important part of meeting EU withdrawal requirements for your WooCommerce store. It ensures customers understand their right to withdraw, the applicable timeframes, how to submit a request, and any exceptions that may apply.
Instead of creating and maintaining this page manually, the WebToffee EU Withdrawal Button plugin simplifies the process with a built-in T&C page generator. Along with a customer-facing withdrawal button, configurable withdrawal periods, partial withdrawals, and flexible form display options, it helps you manage the withdrawal process directly within WooCommerce.
Set up your withdrawal page, configure the appropriate settings, and make the terms easily accessible to customers so your store has a clear and streamlined withdrawal process.


Subcribe to our newsletter


