Share:


Table of Contents
Importing and exporting customer data in Shopify is essential for effective store management, enabling businesses to migrate customers, update records in bulk, and synchronize data with external platforms. Utilizing Shopify's built-in CSV import/export functionality streamlines these processes, while third-party apps like StoreRobo enhance capabilities by offering advanced features and flexibility.
- Shopify allows the import and export of customer data using CSV files, facilitating easy migration and updates.
- Common reasons for importing customers include migrating from other platforms, transferring between Shopify stores, and bulk editing customer information.
- The default import/export tool in Shopify has limitations, such as not transferring passwords or order history, making third-party apps beneficial for complex needs.
- StoreRobo Import Export App provides advanced features like multiple import methods, additional data field support, and scheduling options for import/export tasks.
- Users can customize their exports with advanced filters and export to external FTP servers using third-party tools, enhancing data management capabilities.
- Proper preparation of customer data in the required CSV format is crucial for successful import and export operations in Shopify.
Do you have a list of customer data that you want to import into your Shopify store? Or are you planning to move customers from one Shopify store to another?
Importing and exporting customer data is an important part of Shopify store management. Whether you are migrating from another platform, updating customer records in bulk, syncing customer data with a CRM, or creating a backup of your customer list, Shopify gives you a built-in option to import and export customers using CSV files.
In this guide, we will explain how to import and export Shopify customers using the default Shopify option. We will also cover the limitations of Shopify’s built-in customer import/export tool and show how a third-party app like StoreRobo Import Export App can help you manage customer data more efficiently.
Why Import Customers to Shopify?
There are several reasons why store owners may need to import customers into Shopify. Some of the most common use cases include:
1. Migrating from another ecommerce platform
If you are moving your online store from WooCommerce, Magento, BigCommerce, Wix, Squarespace, or another ecommerce platform to Shopify, you will likely want to bring your existing customer list with you.
Importing customers helps you retain important customer details such as names, email addresses, phone numbers, addresses, tags, notes, and marketing preferences.
However, customer migration does not mean everything can be transferred through Shopify’s default CSV import. Passwords, order history, and purchase history have separate limitations, which we will explain later in this article.
2. Transferring customers between Shopify stores
If you are creating a new Shopify store, moving from a development store to a live store, or managing multiple regional Shopify stores, you may need to export customers from one Shopify store and import them into another.
This is useful when you want to keep your customer list consistent across stores or move existing customers to a newly designed store.
3. Bulk editing customer data
Shopify lets you edit some customer fields directly from the admin. However, if you want to update a large number of customer records, editing them one by one can take a lot of time.
With a customer CSV file, you can bulk update customer details such as:
- First name
- Last name
- Email address
- Phone number
- Address details
- Tags
- Notes
- Tax exemption status
- Marketing preferences
After editing the CSV file, you can re-import it into Shopify and update the existing customer profiles.
4. Importing customer data from a CRM or marketing platform
Many businesses manage customer data in external tools such as CRMs, email marketing platforms, loyalty programs, or offline databases.
If you want to bring that customer data into Shopify, you can export the customer list from the external platform as a CSV file and format it according to Shopify’s customer CSV structure.
This helps you centralize your customer information in Shopify and use it for marketing, segmentation, and store management.
Follow the steps below to import customer data into Shopify using a CSV file.
Step 1: Prepare Your Customer CSV File
First, prepare your customer list in Shopify’s customer CSV format. You can either download Shopify’s customer CSV template or create your own CSV file with supported column headers.
Make sure the CSV file includes the required column headers and is saved in UTF-8 format.
Step 2: Log In to Shopify Admin
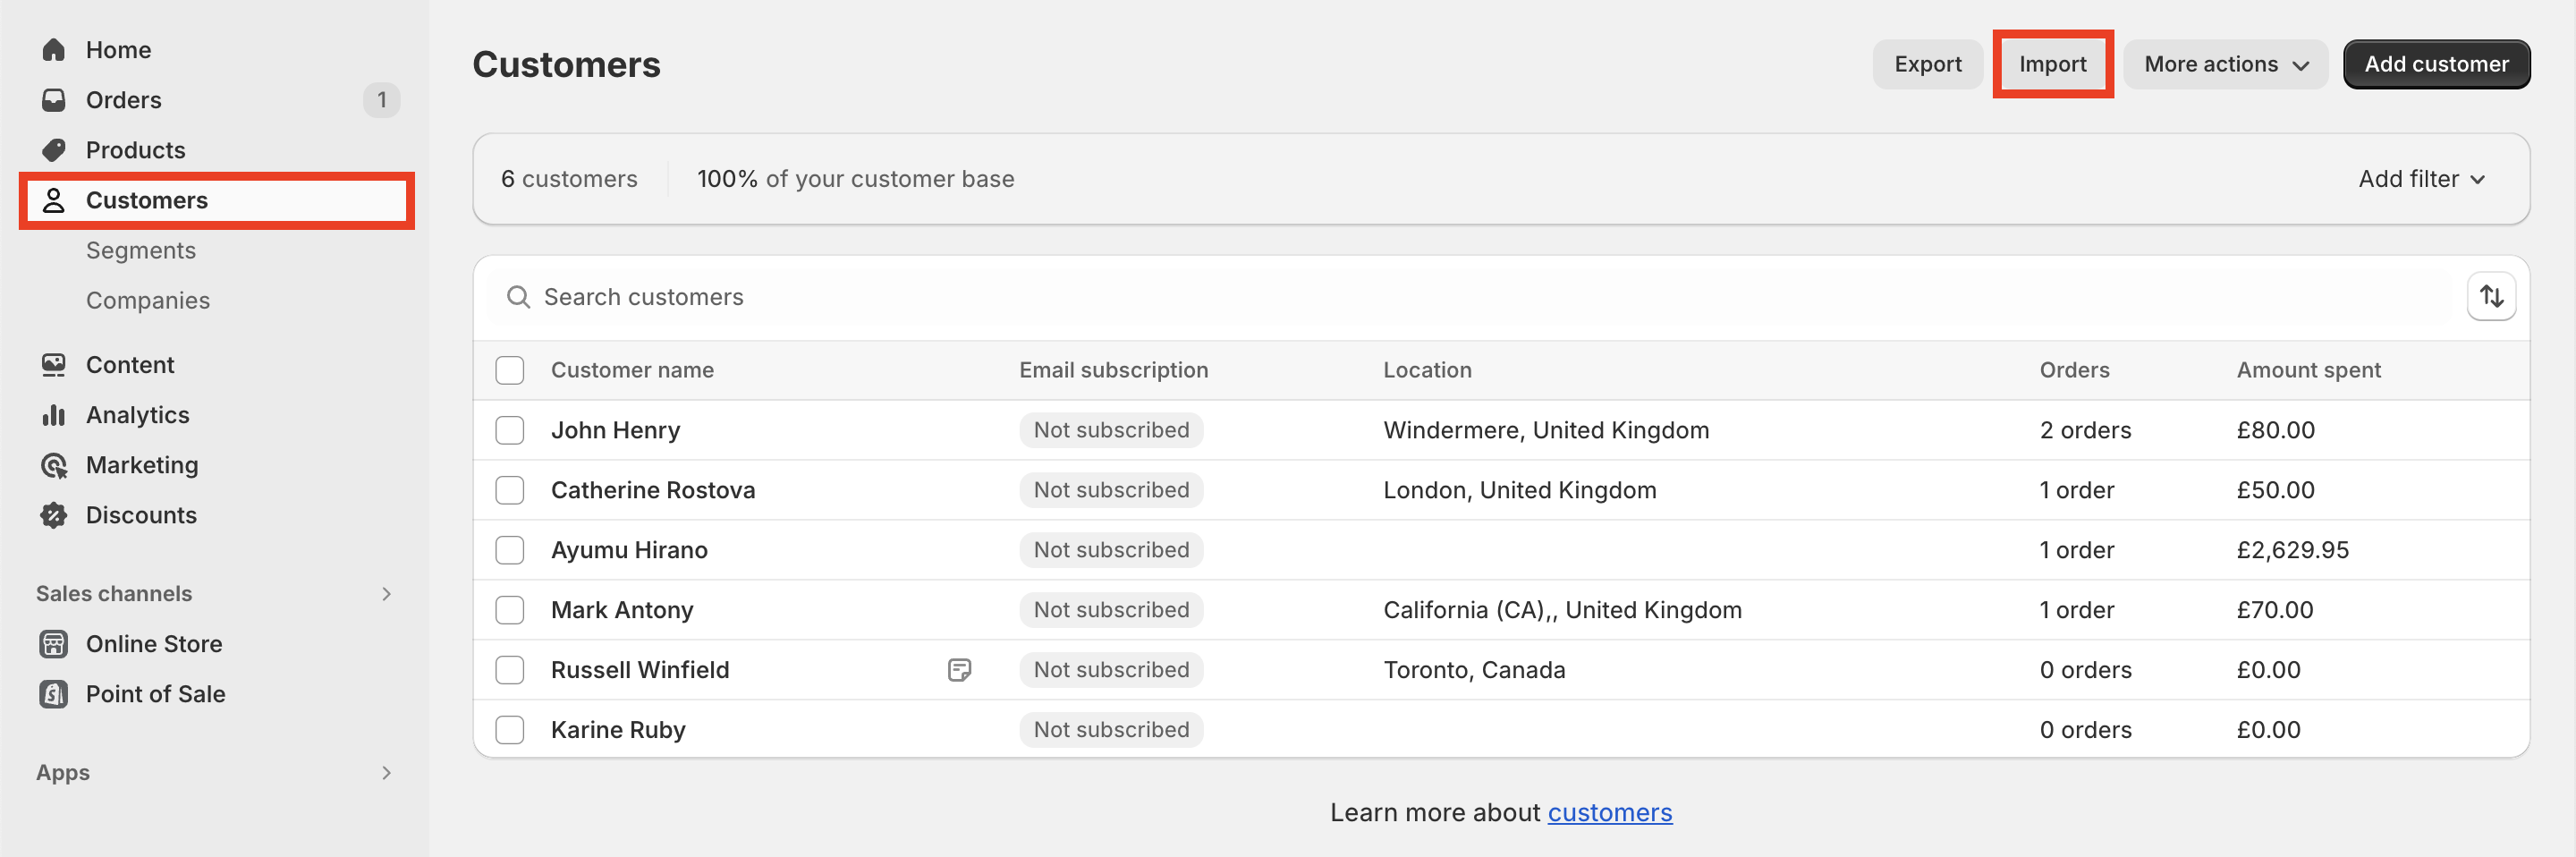
Log in to your Shopify admin account. From the left sidebar, go to Customers.
On the Customers page, click the Import button.
Step 3: Upload the Customer CSV File
Click Add files and upload your customer CSV file.
If you want to update existing customer profiles, enable the option to overwrite existing customers with the same email address or phone number.
You can also tag customers from the CSV and create a customer segment using those tags.

Step 4: Import Customers
Click Import customers.
Shopify will process the file and add the customer profiles to your store. If there are errors in the CSV file, Shopify will notify you so that you can correct the file and try again.

Export Shopify Customers to CSV
Exporting Shopify customers to CSV allows you to create backups, analyze customer data, update records in bulk, migrate customers to another store, or send customer data to a CRM or marketing platform.
Shopify’s default customer export tool lets you export all customers, selected customers, customers on the current page, or customers that match your filters.
How to Export Shopify Customers to a CSV File
Go to the Customers menu from the sidebar and click on Export.

- Choose whether you want to export all customers or customers on the current page.
- Select whether to include Customer tags and Customer metafields in the export file.
- Then, choose a file format for exporting the data.
- Click on Export customers.
If you export a small number of customers, the file may download directly to your browser. For larger exports, Shopify sends the CSV file to the store admin’s registered email address. You can download the file from the email and open it in a spreadsheet application such as Google Sheets, Microsoft Excel, or Numbers.
Also Read: Getting Started with Shopify Import Export
Filter Options Before Exporting Customers
Before exporting customers, you can narrow down your customer list using Shopify’s customer filters and segments.
Common export filter use cases include:
- Customers added during a specific date range
- Customers with specific tags
- Customers from a specific location
- Customers who accept email marketing
- Customers who accept SMS marketing
- Tax-exempt customers
- Customers matching a saved segment
- Selected customers from the customer list
This helps you export only the customers you need instead of downloading the entire customer database every time.
What Fields Are Included in the Shopify Customer Export CSV?
A Shopify customer export CSV can include standard customer profile fields such as:
- First name
- Last name
- Phone
- Email marketing preference
- SMS marketing preference
- Default address details
- Company
- City
- Province/state code
- Country code
- ZIP/postal code
- Address phone number
- Notes
- Tax exemption status
- Tags, if selected
- Supported customer metafields, if selected
- Total spent
- Total orders
The exact fields may vary depending on your store data and selected export options.
Limitations of Shopify Customer Export
Shopify’s default customer export is useful, but it has some limitations.
- Customer passwords are not exported.
- Customer purchase history is not exported as full order details in the customer CSV.
- Some advanced customer fields may require metafields or third-party apps.
- Large exports may be emailed instead of downloaded directly.
- Advanced scheduled exports and FTP exports are not available in the default tool.
- The exported CSV may need formatting before being imported into another platform.
If you need more control over customer exports, advanced filters, additional fields, scheduled export jobs, or FTP export options, you can use a third-party Shopify import/export app.
The default customer import/export option in Shopify is useful for basic CSV imports and exports. However, it may not be enough if you need advanced migration, automation, field mapping, or export filtering.
In such cases, you can use a third-party import/export app like StoreRobo Import Export App for Shopify.
StoreRobo is an advanced Shopify import/export app that helps store owners import and export products, collections, customers, and other store data more efficiently.
Below are some of the major benefits of using StoreRobo instead of relying only on Shopify’s default tool.
1. Multiple Methods for Importing Data
StoreRobo lets you import customer data from different file locations and sources.
You can import customer CSV files from:
- Local storage
- Public URL
- External FTP/SFTP server
- WooCommerce API
This is helpful when you are migrating from another platform or syncing customer data from an external system.
2. Customer Account Activation URL Support
When transferring customers to a new Shopify store, customer passwords cannot be migrated directly.
StoreRobo can help by generating activation URLs when exporting customers. After importing customers into the new store, you can share activation URLs with customers so they can activate their accounts and set new passwords.
This makes customer migration smoother and reduces confusion for returning customers.
3. Support for Multiple CSV Formats
Shopify’s default tool supports Shopify’s customer CSV format.
StoreRobo supports additional CSV formats, including Shopify CSV and WooCommerce CSV. This is useful when migrating customers from WooCommerce to Shopify because it reduces the amount of manual CSV formatting required.
4. Advanced Export Filters
StoreRobo provides advanced customer export filters that let you export only the customer data you need.
This is useful when exporting customers based on specific conditions, segments, tags, or store requirements.
5. Import and Export Additional Customer Fields
StoreRobo supports importing and exporting additional customer-related fields beyond basic customer profile data.
For example, you can export advanced marketing-related fields such as email marketing level and email marketing status.
6. Export Customer Data to FTP/SFTP
With StoreRobo, you can export customer data to an external FTP or SFTP server.
This is useful for businesses that need to send customer data to external systems such as CRMs, ERPs, marketing platforms, or backup servers.
7. Schedule Import and Export Jobs
StoreRobo allows you to schedule import and export jobs for a later time.
You can use scheduled jobs to automate recurring data transfers, reduce manual work, and keep customer data synced between systems.
Before we begin, make sure you have installed the StoreRobo Import Export App on your Shopify store. The app has different plans for different store sizes. With the free plan, you can import or export up to 10 customers only. If you have more number of customers, consider choosing any of the premium plans.
Check out the pricing information here.
Now, follow the steps below to import customers into Shopify using StoreRobo.
Step 1: Choose Input File Location
- From your Shopify admin account, go to the Home page of the StoreRobo App.
- Under the Import section, choose a file location for the input file.
- Let’s choose Local and upload a CSV file. Then, choose the data type as Customers.

- Click on the Upload button.
Step 2: Schedule or Import Customers to Shopify
In this step, you can choose whether to schedule the import job or import customers right away.
If you select the schedule option, the app will ask you to select the date and time for the scheduler. You can also select whether to repeat the import process at specific intervals.
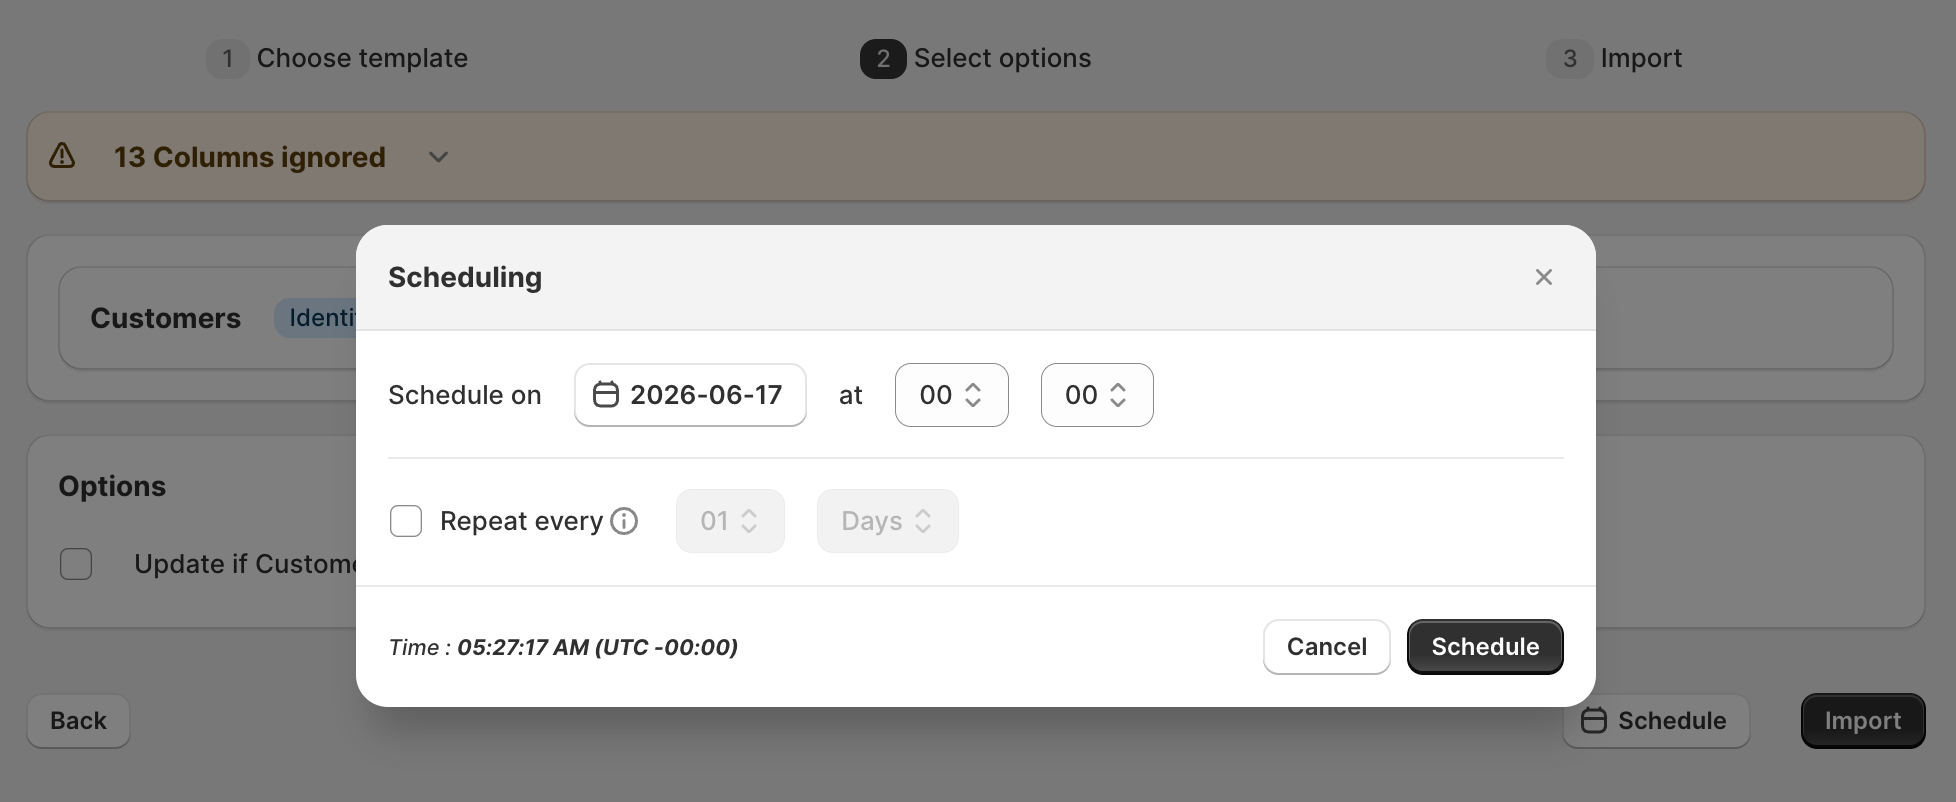
Once the import job is scheduled, the app will execute it at the designated time.
Now, let’s see how we can export customer data from Shopify with the StoreRobo app.
StoreRobo also lets you export Shopify customers with more flexibility than Shopify’s default export option.
Follow the below steps to export the Shopify customer list to a CSV file using the StoreRobo app.
Step 1: Choose an Export Template
- From the Home page of the StoreRobo app, go to the Export option and select Shopify CSV as the export template. Then click on Proceed to continue.

Step 2: Choose Customers as Data Type
Select Customers from the list of available data types.
StoreRobo supports additional customer fields, including advanced email marketing-related fields.

You can also select the specific data fields you want to export from your store.

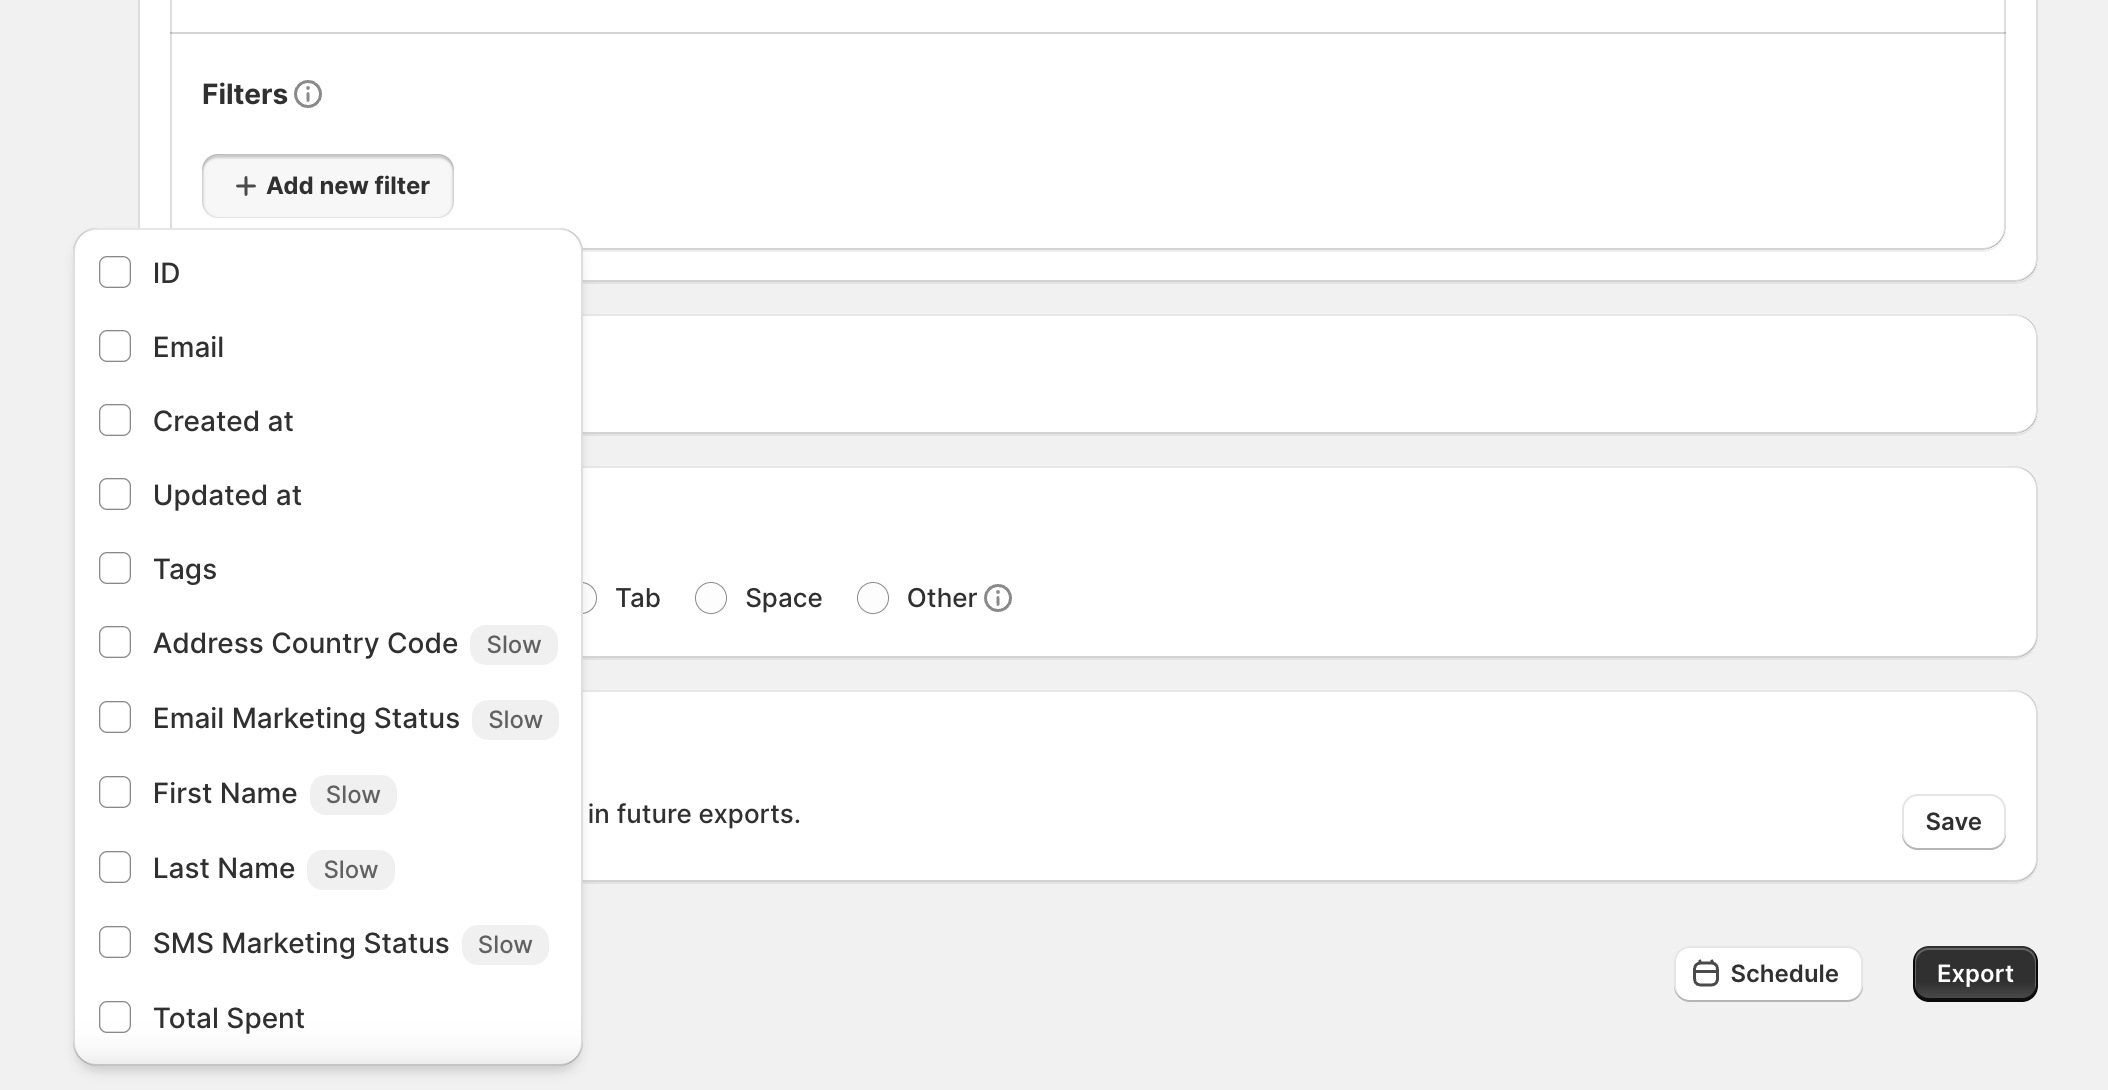
Step 3: Apply Export Filters
Then, you have the option to filter the data based on advanced filters. This helps you specifically export the data based on different filters.
Step 4: Export Now or Schedule the Export
After choosing the necessary filters, you can schedule the export job or export data right away.
Click Export to start the export job.
Once the export is complete, StoreRobo will display a log report. You can click Download File to download the exported customer CSV file.

You can also view the detailed log report of the Import/export job from the Log history page of the StoreRobo app.

To avoid errors and make customer data migration smoother, follow these best practices:
- Review the import/export log after every job.
- Always back up your customer data before making bulk changes.
- Use Shopify’s customer CSV template as a starting point.
- Save CSV files in UTF-8 format.
- Check for duplicate email addresses and phone numbers before import.
- Make sure required column headers are present.
- Use the correct values such as
yesornofor marketing and tax fields. - Do not expect customer passwords to migrate through CSV.
- Import order history separately if you are migrating from another platform.
- Test the import with a small sample file before importing the full customer list.
No. Shopify does not allow customer passwords to be imported using CSV. Since passwords are encrypted by the original platform, they cannot be migrated directly to Shopify.
After importing customers, you need to invite them to activate their accounts and create new passwords. If you are using a third-party app or custom workflow, you may be able to generate account activation URLs for eligible customers.
The Email column header is required in a Shopify customer CSV file, although the email value itself can be blank. Your CSV file should also follow Shopify’s supported customer CSV format and include valid column headers.
Common fields include First Name, Last Name, Email, Phone, Accepts Email Marketing, address fields, Tags, Note, and Tax Exempt.
To migrate customers from another platform to Shopify, export the customer list from your existing platform as a CSV file. Then, format the file according to Shopify’s customer CSV structure and import it from the Customers section in Shopify admin.
If you are migrating from WooCommerce or need advanced field mapping, FTP import, scheduled imports, or customer activation URLs, you can use a third-party app like StoreRobo.
Yes. You can filter or segment customers in Shopify before exporting them. Shopify lets you export all customers, selected customers, customers on the current page, or customers matching your filters.
You can also choose whether to include customer tags and supported customer metafields in the export file.
Importing and exporting customer lists in Shopify allows you to migrate your store customers from one store to another or import customers from your old store to a new store. The default customer import export option in Shopify will be enough for your basic data migration requirements.
However, if you are looking to transfer customers from one store to another, we recommend using a third-party app like StoreRobo. The support for additional data fields, advanced export filters, and the provision to generate activation URLs make the data transfer seamless for your Shopify website.
We hope this article has helped you learn how to import and export customers in Shopify using the default tool and the StoreRobo app.
If you have any queries, please feel free to ask them in the comments section.
We also recommend you read the below articles:


Subcribe to our newsletter