Dispatch labels are labels attached to individual orders that will give you information regarding the customer, consumer, and the products in the order. Configuring and printing dispatch labels in WooCommerce can be done with the help of an external plugin. This article will discuss this in detail.
An online purchase goes through multiple stages before it reaches your doorstep. Confirmation of order, dispatch, shipping, and delivery are some of the common stages. The WooCommerce dispatch label is one of the essential components you would need to smoothen the dispatch process.
By default, WooCommerce doesn’t support creating or printing dispatch labels. You can, however, set this up with the help of WebToffee’s free WooCommerce Shipping Labels, Dispatch Labels, and Delivery Notes plugin.
We will see how you can set up and print dispatch labels in WooCommerce for free with this plugin.
What is a dispatch label?
Dispatch labels are labels that you attach with an order to smoothen the order processing and order completion process.
In general, dispatching means that the sender has completed packing the order, and you can now proceed to invoicing, labeling, and printing shipping labels.
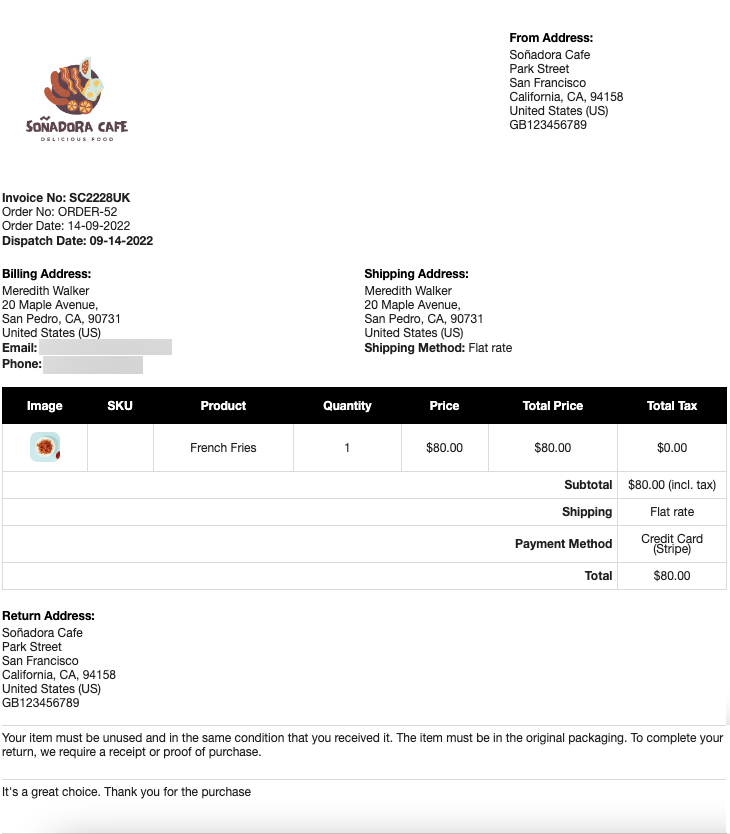
A WooCommerce dispatch label contains product details, payment method information, total cost amount, billing address, shipping address, and from address.
Return addresses can also be added to the WooCommerce dispatch labels to make it easy for costumes to return orders.
How to set up WooCommerce dispatch labels for free?
Dispatch labels in WooCommerce can be set up with the help of a free tool from WebToffee WooCommerce dispatch labels.
To do this,
Step 1: Plugin installation
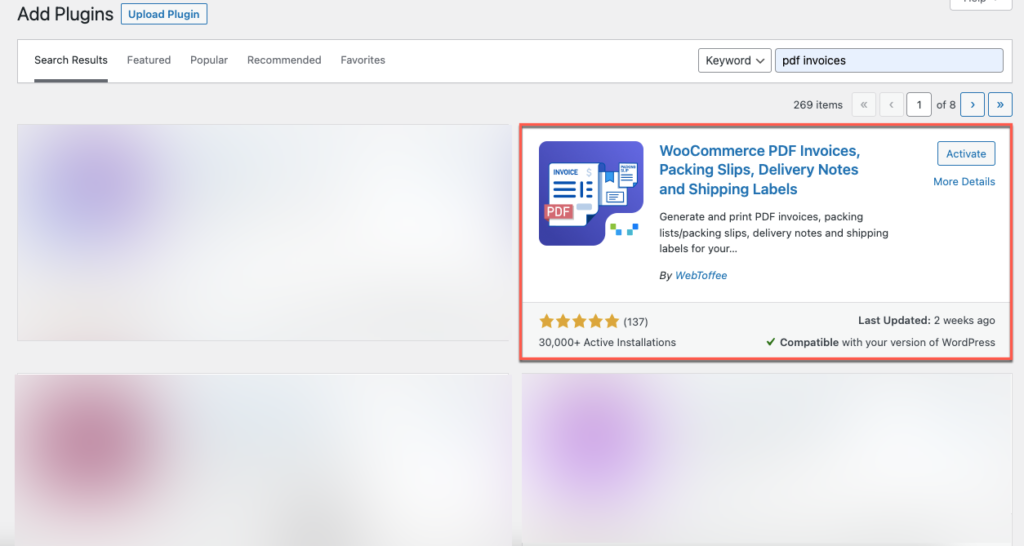
From the WordPress dashboard, go to Plugins > Add New.
In the search box, type the keyword ‘PDF invoices, packing slips, delivery notes, and shipping labels’. You will now be able to see the free WebToffee invoice plugin. Install and activate it on your store.
Step 2: Configure WooCommerce dispatch labels
From the dashboard, go to Invoice/Packing > Dispatch label.
Here you will have two options to
- Add customer note – to the dispatch label documents generated in the store.
- Add footer – to the WooCommerce dispatch label. You can customize this footer content from Invoice/Packing > General Settings > General > Footer.
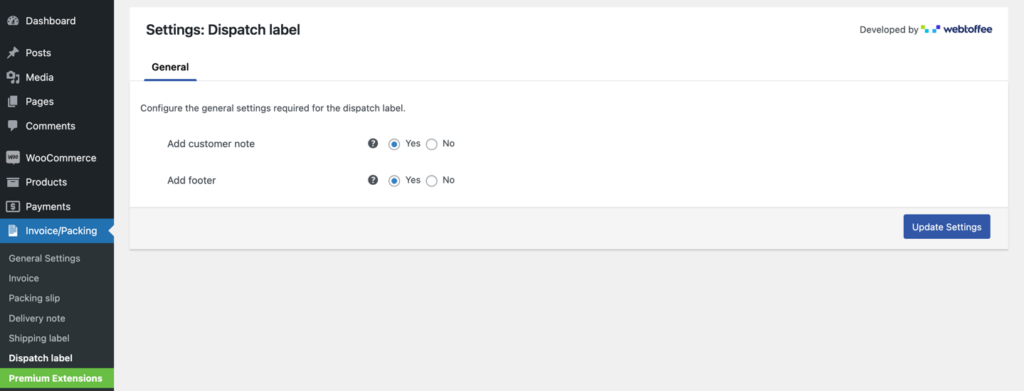
Update the settings.
That’s it, the dispatch labels will now follow the set configuration. Note that this plugin works out-of-the-box, this means that dispatch labels can be generated upon installing the plugin, and you are not required to configure them to activate it.
If you want customizations more than adding a customer note and footer, you may use the premium WooCommerce print dispatch label extension from WebToffee.
Advanced personalizations in dispatch labels
Install and activate the premium WooCommerce shipping labels and dispatch labels plugin along with the free WooCommerce dispatch label plugin to access the advanced personalizations for the document.
The available customizations include,
- Sort products by: Use this to sort products on the basis of their name or SKU.
- Show variation data below each product: Use this to add product variation data below the product in the product table.
- Order meta fields: If you want to add additional order-related information such as contact number or email, you can select it here. If you want to add an additional meta field that is not available here, use the Add/Edit order meta field button.
- Product meta fields: Similarly, use this field to include additional product fields.
- Product attributes: Use this option to add more product attributes to the dispatch labels.
- Show ‘Print Dispatch Label’ button for selected order statuses: Any emails corresponding to the order status selected here will now include a print option that you can use to print the dispatch label.
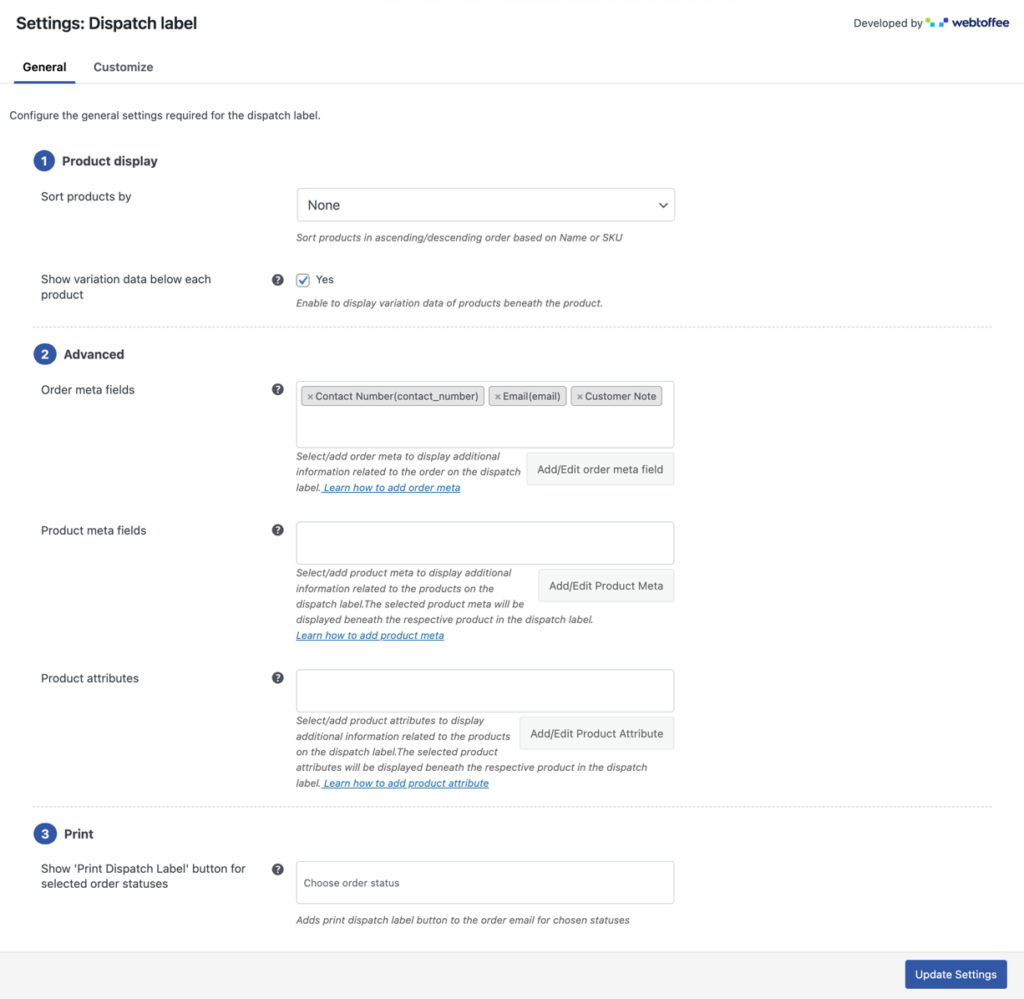
Once done, click on Update Settings to update the changes.
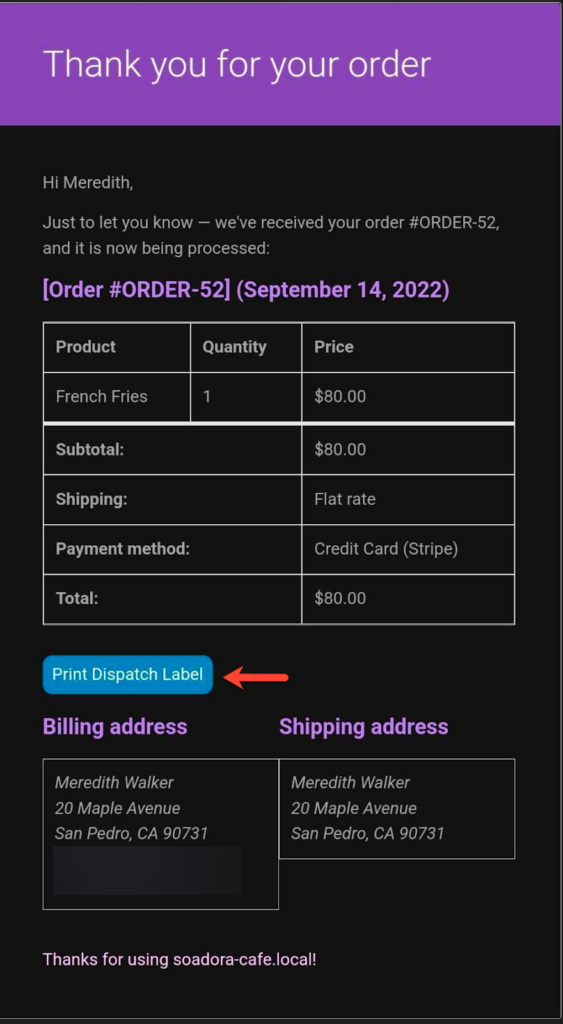
The print dispatch label option will look like this on the order status email.
How to change the template of the dispatch labels?
The premium version of the plugin also offers you the option to change the dispatch label template. To do this,
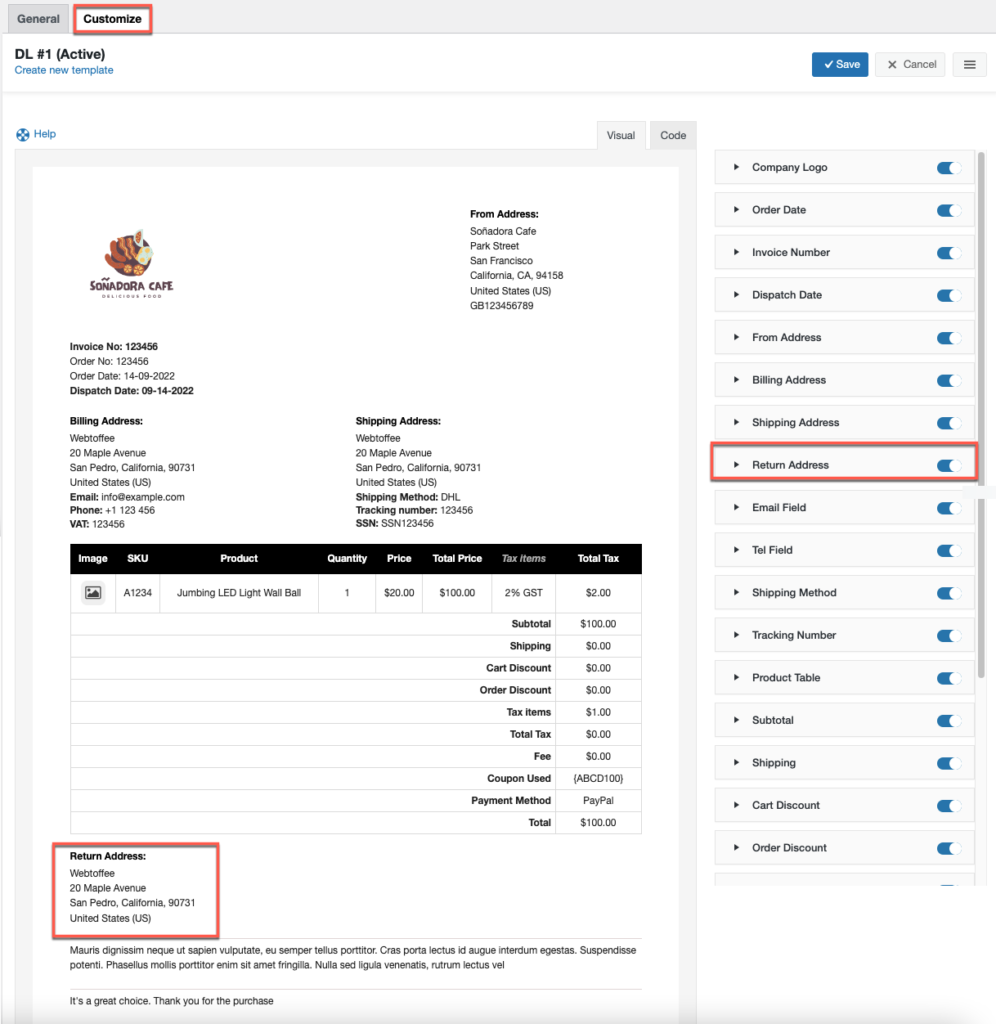
- Go to Invoice/Packing > Dispatch Label > Customize.
- Click on the link Create new template and choose the template that you seem fit.
- Either use the visual or code editor to make the changes to the selected template.
- All customizable elements will be available on the right side of the page. Toggle it on or off and make other adjustments as needed. Any changes made can be dynamically previewed from the visual editor preview screen.
- Click on Save and provide a template name to save it as a template.
- If the template doesn’t get activated by default, click on the menu icon and tap on Activate.
How to print dispatch labels?
Store admins can print dispatch labels either in bulk or individually for each order.
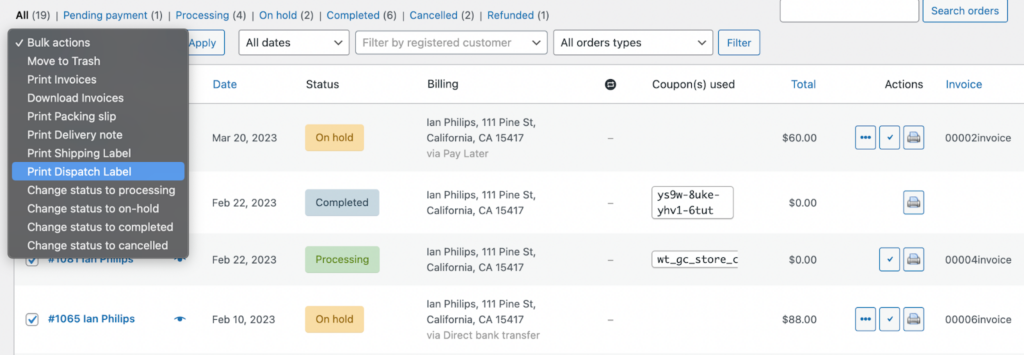
To print WooCommerce dispatch labels in bulk,
- Head on to WooCommerce > Orders and select all the orders whose dispatch labels are to be printed.
- Click on the Bulk actions drop-down and choose the option Print Dispatch Label.
- Tap on Apply and follow the on-screen instructions to complete the print action.
To print WooCommerce dispatch labels individually for each order,
- Go to WooCommerce > Orders and click on the required order.
- Go to the Invoice/Packing widget and click on the print icon corresponding to dispatch labels.
Sample dispatch label
This is a dispatch label of a sample store.
Wrapping Up
Though dispatch labels are often overlooked, incorporating such labels into your order fulfillment process would make the process more efficient. One of the key reasons for the hesitance towards making use of dispatch labels is the unavailability of a good tool to set it up.
However, a free tool like the WebToffee dispatch label plugin is the right solution in this case. Moreover, if you want to scale up to a tool that offers more customizations, the premium version of the WebToffee plugin is also available to you.
Hope you have understood how to set up dispatch labels in WooCommerce. Please leave a comment if you enjoyed this article. Your suggestions inspire us.
Stay tuned for more helpful tips.