This tutorial explains how to setup WordPress Comments Import & Export Plugin. Please refer to the product page to know more about the plugin features.
Overview
WordPress Comment Import Export plugin facilitates online store Admin to export or import WordPress article comments and WooDiscuz Discussions about the products by using a CSV file. Admin can also customize WordPress article comments and WooDiscuz Discussions of the product according to the need. The plugin is mainly used by store owners/Admin to make the transaction of WordPress article comments and WooDiscuz Discussions from one store to another.
You can import/export/merge (update existing WordPress article comments and WooDiscuz Discussions of the product ) hundreds, even thousands by using one file which saves your effort and time of manually adding WordPress article comments and WooDiscuz Discussions of the product.
For importing WordPress article comments and WooDiscuz Discussions of the products to your online store, you must create a CSV(Comma-Separated Values) file which contains information about mapping fields in the tabular form. You can create CSV file by using a spreadsheet program, such as Excel, or Google Spreadsheets. Save this file with extension .CSV. After entering all details about WordPress article comments and WooDiscuz Discussions of the products in a spreadsheet, you can import to your online store.
With this plugin, you can also export details of WordPress article comments or WooDiscuz Discussions of the product as a CSV file. While exporting, plugin facilitates you to apply filters by using the name of product, comment dates, and comment number limit.
It is recommended to take the backup of the existing comments in the CSV file by exporting the comments first and then import the comments according to the requirement.
It also supports Cron Job (WordPress Scheduled Task) to schedule Export into an FTP location in a specific time interval automatically.
Pre-requisites
- The user has to install WooDiscuz plugin to import/export WooDiscuz discussions.
- The CSV Import file must be in UTF-8 format. For more information about UTF-8 encoding, See How to save CSV / Excel File as UTF-8 Encoded?
Installation
After purchasing the plugin by Xadapter, plugin Zip file is available in MY ACCOUNT.
- Navigate to My Account -> API Downloads tab and download the plugin.
Note: If you have Basic/Free version already installed, please Deactivate and Delete the Basic Version before installing Premium Version to avoid any conflict. Your plugin settings will be retained intact. - Install the downloaded plugin zip into your WordPress / WooCommerce Site.
- You get Activation Key and Activation Email at My Account -> API Keys.
- Go to your site Admin and the Settings page of the plugin and activate it using email and key.
For detailed information about installing Xadapter Plugins, See How to Download, Install, Activate & Update WooCommerce Plugin?.
After installing the plugin, you can navigate to as given below:

Plugins > WordPress Comments Import/Export > Import Export.
If the WooComerce is not available in your store, then Navigate as shown below:
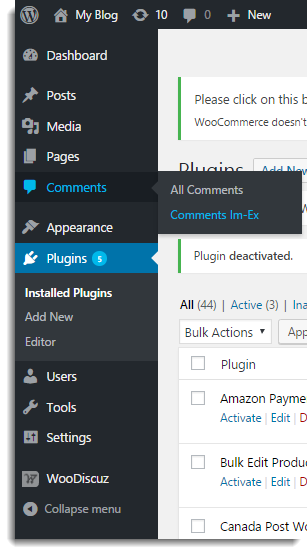
Navigate to Dashboard > Comments > Comments Im-Ex OR
Plugins > WordPress Comments Import/Export > Import Export.
WordPress Comments Import/Export tab
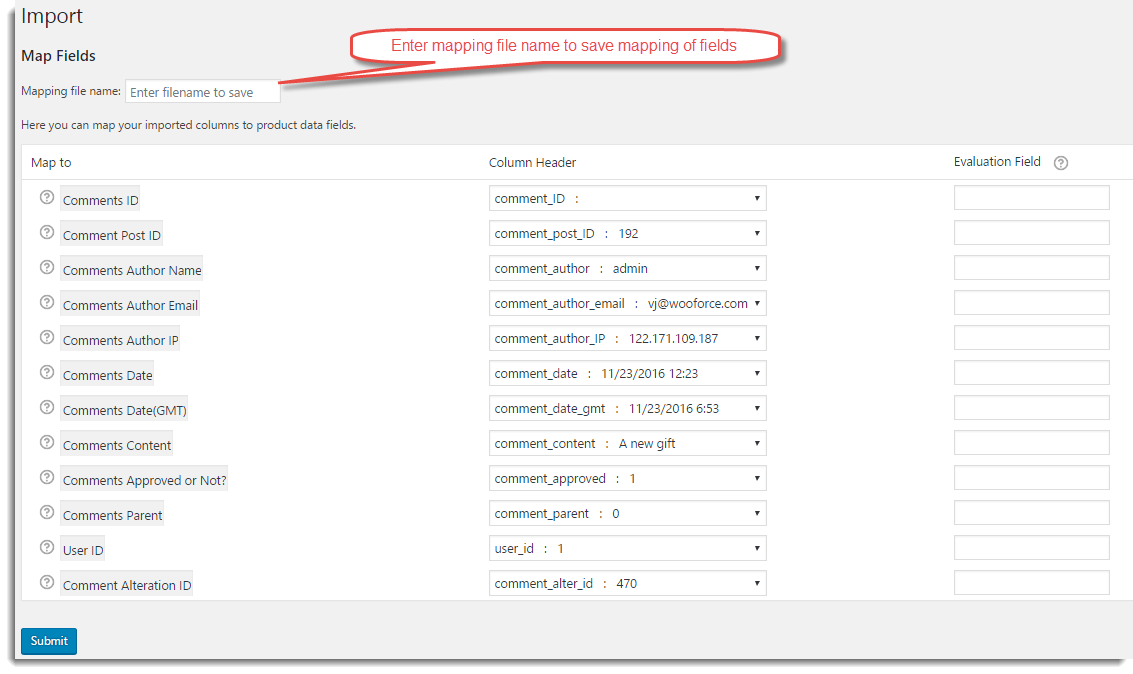
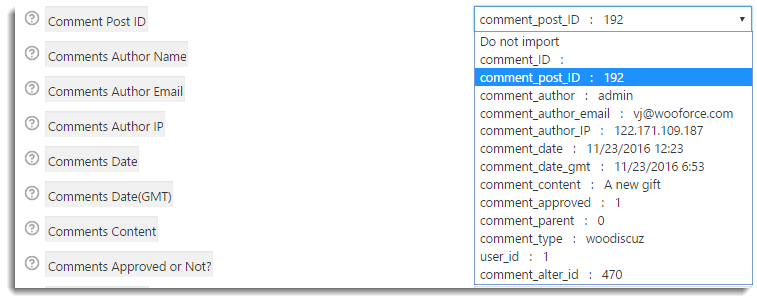
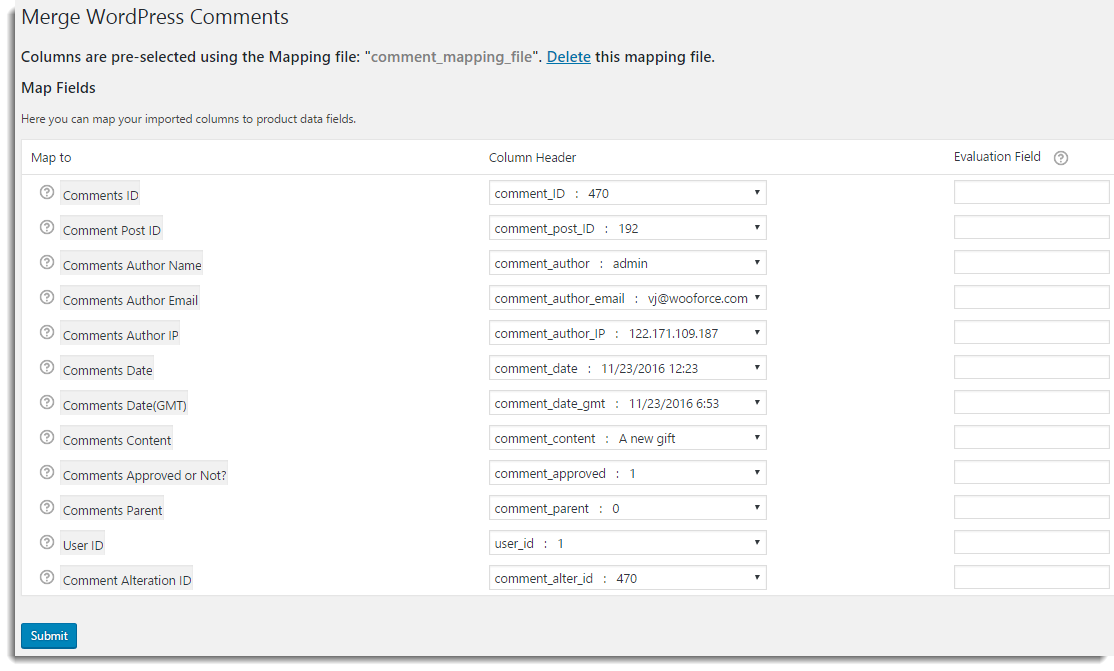
The plugin takes CSV file as input. It maps each field of CSV file to the field of the WordPress comment or product discussion that otherwise Admin need to input manually.
For example: Comments ID field gets mapped to the Comment ID of CSV file and the Comment Author Name field gets mapped to the comment_author of the comment. If you want the plugin to work correctly, you must map headers of all of the column correctly and you must ensure that all of the fields you enter must be in the correct format.
Note: If there is any mistake in your import file, your import may not work as expected.
To get started, you must have CSV file. You can create the one or you can export the WordPress comment or product discussions to get the format of CSV. Or you can download Comment Import Export Sample CSV.
You must enter the comment details in CSV file in structured format as given below:
- The first row must contain the column headers which are used for mapping the fields. The details about WooCommerce mapping field is given as below:
Column Heading Explanation Accepted value or format Comment ID Identification Number of the Comment Numerical Comment Post ID Identification number of the Product Numerical Comment Author Name Name of the Comment Author Text Comment Author Email Email ID of Comment Author Text e.g. test1@gmail.com
Comment Author IP Internet Protocol address of device of the comment Author e.g. 192.10.23.123 Comment Date Date on which the comment is posted MM/DD/YYYY H:i:s
e.g 9/6/2016 6:29:00Comment Date(GMT) Date on which the comment is posted with Greenwich Mean Time MM/DD/YYYY H:i e.g. 9/6/2016 6:29
Comment Content Content of comment Text Comment Approved Indicates whether the comment is approved by the authorized person. 1 means the comment is approved and 0 means the comment is not approved. Numerical Comment Parent The parent comment’s ID. And it will be 0 for parent comment. Child comments numerical value. Numerical Comment Type Type of the comment specifying whether it is WrodPress comment or WooDiscuz discussion. comment or wooDiscuz User ID The comment author’s ID if he is registered (0 otherwise) Numerical Comment Alter ID It is Comment ID and mandatory to import comments. Numerical
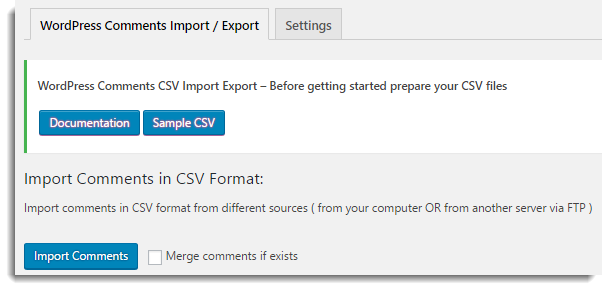
Import Comments
You can import WordPress comments or WooDiscuz Discussions of the product from CSV file or merge it with already existing by importing updated CSV file.
The Import Screen appears as shown below:
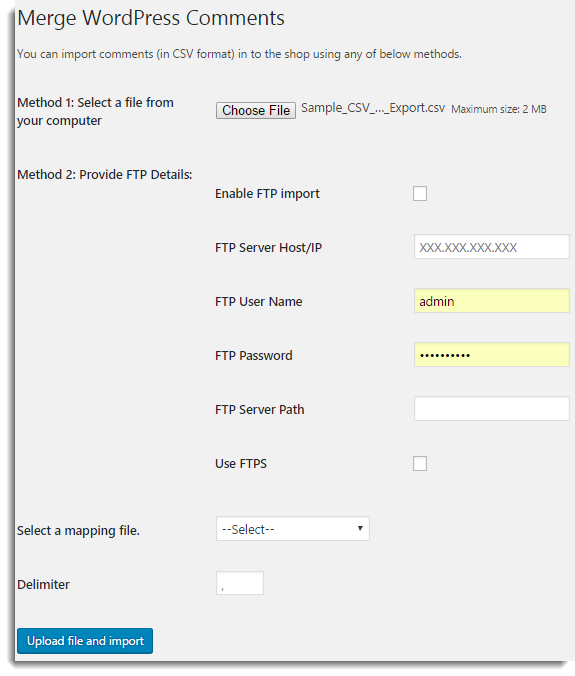
Click Import Comments, the window appears as shown below:
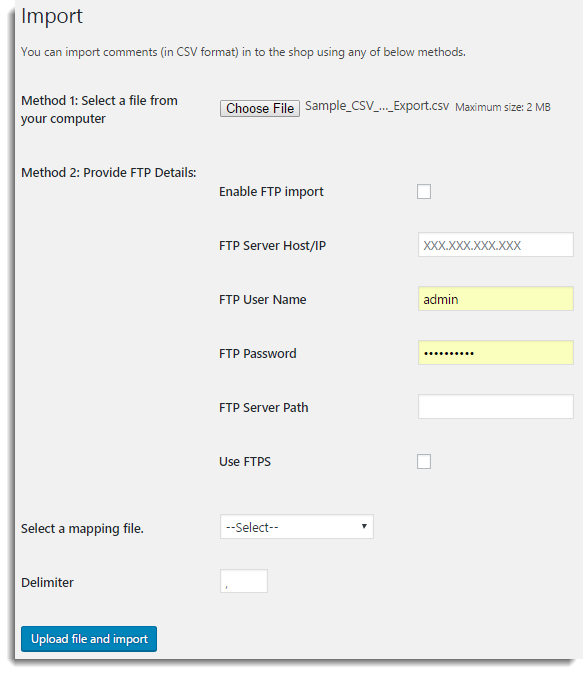
- Method 1: Select a file from your computer. Click Choose File to browse a required CSV file from your computer.
- Method 2: Provide FTP Details. If your CSV file is on server, then to import it, you need to do FTP settings as given below:
- Select the checkbox to enable FTP import/export.
- Enter FTP Server Host/IP.
- Enter FTP User Name.
- Enter FTP Password.
- Enter FTP Server Path.
- Select the checkbox to use FTPS.
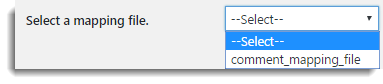
- You get the mapping file option(s) for auto-mapping only if you save the mapped fields with a user defined file name while Mapping the fields. Select the required mapping file from the Select a mapping file drop-down list as shown below:
Note: While mapping fields, do not import Comments ID as it does not exist before importing comment. But for merging WordPress comments or product discussions , you need to map Comment ID to appropriate field.
Note: Mapping is very helpful if you are importing CSV from some other e-Commerce like Magento.
Evaluation field
It is used to fix/update the required value for the particular field. The settings to modify the field are as given below:
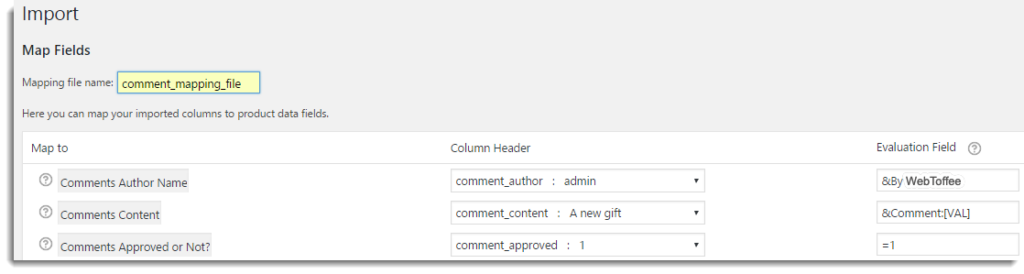
- Assign any required constant value to field.
For Example : Suppose, you want to assign 1 to comment_approved. Under Evaluation field, write =1 in Comments Approved or Not? row. - Append any field by required value.
For Example : Suppose, you want to append comment_author by By WebToffee. Under Evaluation field, write &By WebToffee in Comment Author Name row. - Prepend any field by required value.
For Example : Suppose, you want to prepend comment_content by Comment: . Under Evaluation field, write &Comment:[VAL] in Comment Content row.
Note : Hover the mouse on ? (Help), you can see the information about Evaluation field.
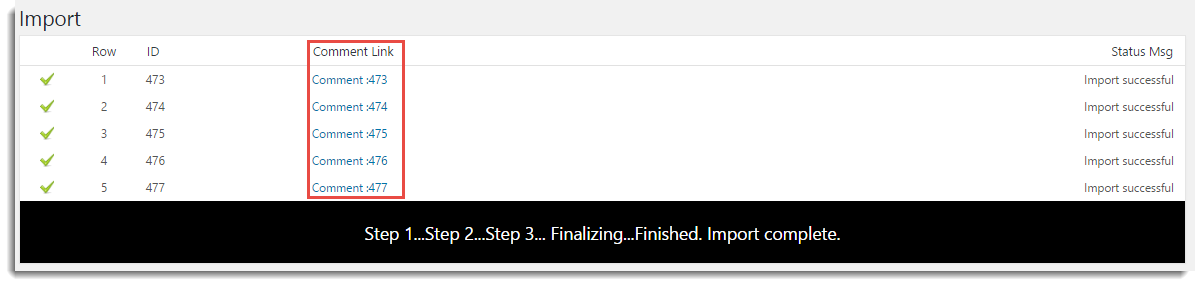
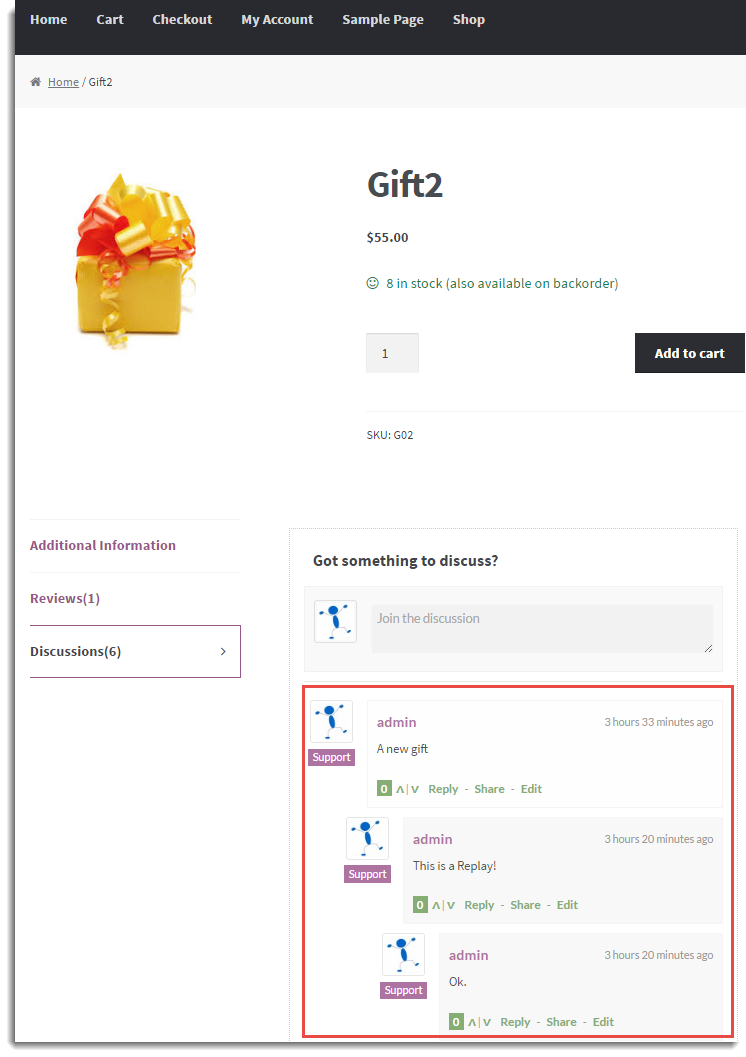
Imported product discussions are as shown below:
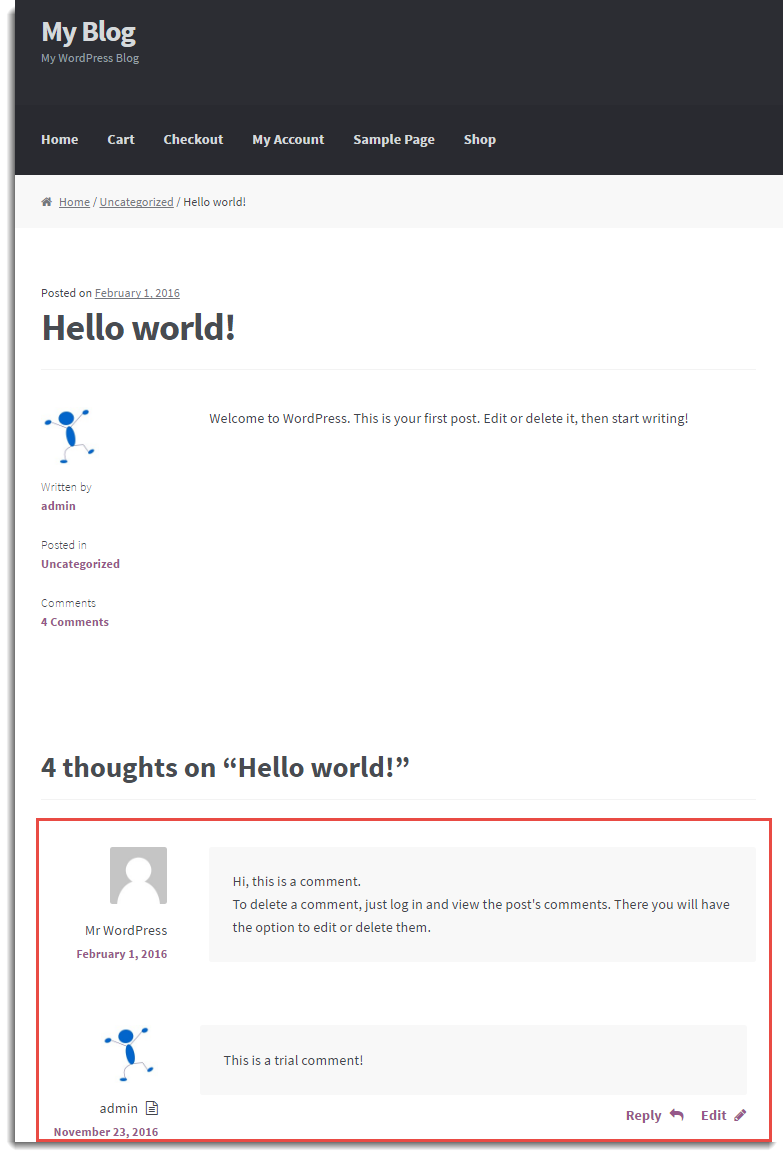
Imported WordPress comments are as shown below:
Merge WordPress comment / WooDiscuz Discussions
Suppose your existing WordPress comment / WooDiscuz Discussion of the product got modified. To reflect that modified WordPress comment / WooDiscuz Discussion of the product into your online store, you can update the current it by importing modified CSV file.
Steps to merge
- Select Merge comments if exists checkbox for modifying comments. It is shown as below:
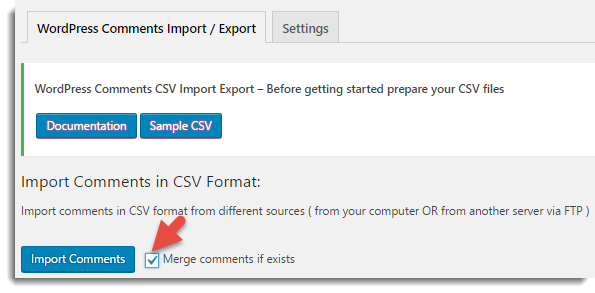
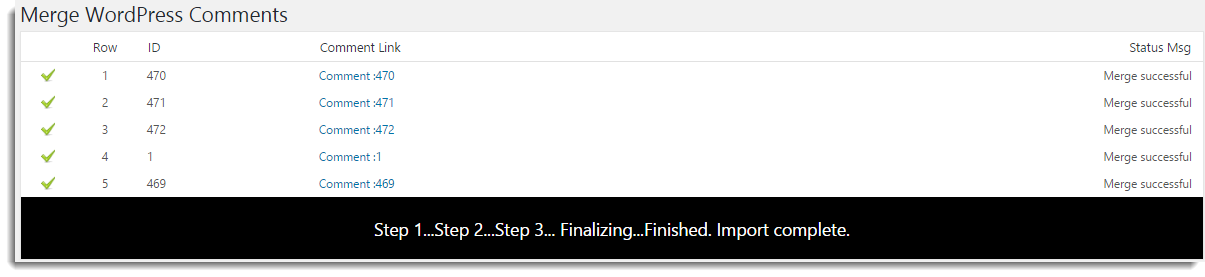
Note: If WordPress comments / WooDiscuz discussions do not exist, then the WordPress comment / WooDiscuz discussion is imported as new.
Export Wordpress comments / WooDiscuz discussions
If you export WordPress comments / WooDiscuz discussions using this plugin, you get the CSV file which contains the data about all the WordPress comments / WooDiscuz discussions of the WooCommerce online store.
The window is as shown below:
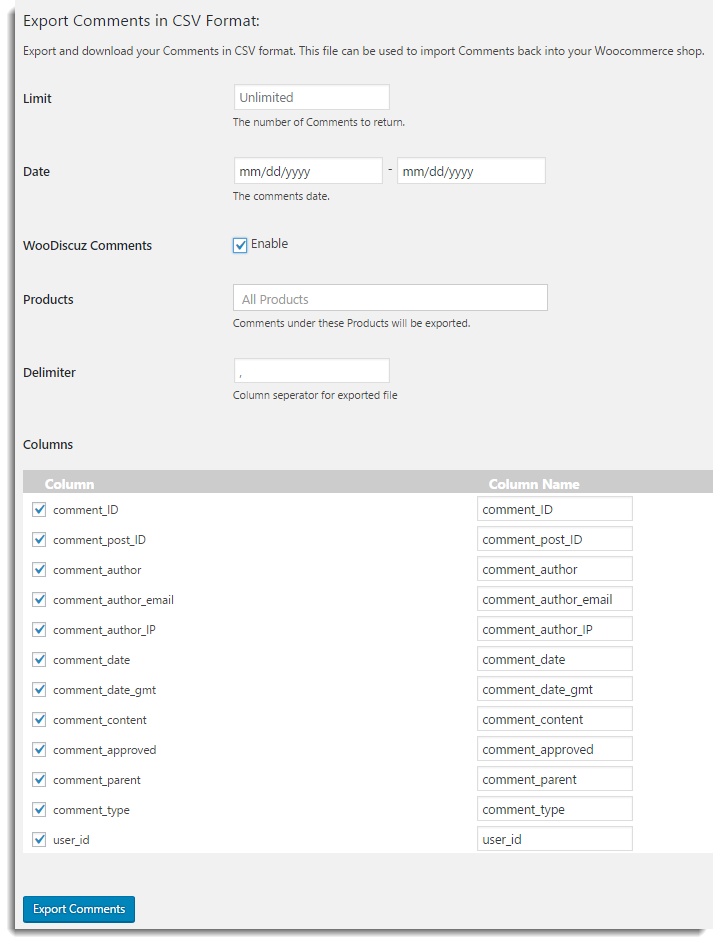
- Limit: Enter the number of comments that you wish to export.
- From Date: Select the date from which you want to export the WordPress comments / WooDiscuz discussions by clicking in this box.
To Date: Select the date till which you want to export the WordPress comments / WooDiscuz discussions by clicking in this box. - WooDiscuz Comments: Select the checkbox to enable the export of WooDiscuz Comments.
Note: Once you select this checkbox, you can export only WooDiscuz Comments. To export WordPress comments, de-select the checkbox. - Products: Select the required product(s) for which you want to export the WooDiscuz discussions.
- Delimiter: With this field, you can change the comma separated file to ‘|’ or ‘.” separated file according to your requirement.
- Columns: Select the checkbox for required columns if you want to export specific columns. With the Column Name field, you can modify the column header in CSV file. To do that, simply enter the required column name for the specific column.
- Click Export Comments, the CSV file gets auto-downloaded to your computer. The sample WordPress Comments CSV file is as shown below:

Note: You can download the Exported Sample CSV of WordPress Comments.
The sample of exported WooDiscuz discussions CSV file is as shown below:

Note: You can download the Exported Sample CSV of WooDiscuz Discussions.
Export WordPress comments / WooDiscuz discussions from Comments Page
You can directly download the specific detail of WordPress comment / WooDiscuz discussion from Comments Page . To do that, navigate to Dashboard > Comments. The Comments listing page appears as shown below:
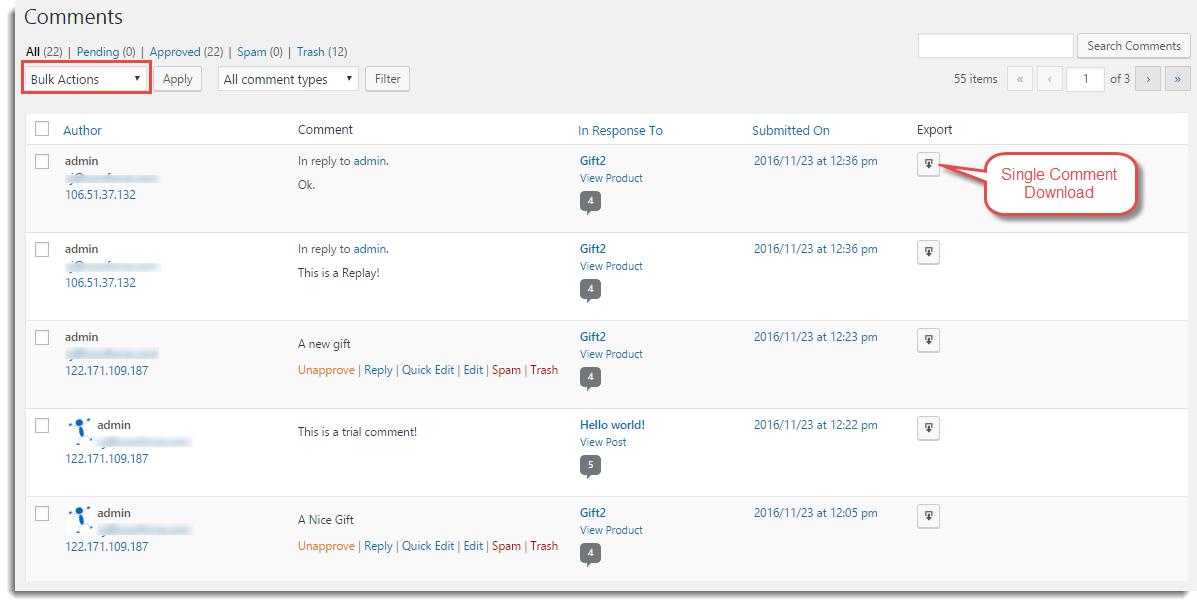
- Click Download to CSV button to export single comment details to CSV file under Export Column.
- To export details of multiple comments, select comments. From Bulk Action drop-down list, select Download as CSV and click Apply as shown below:
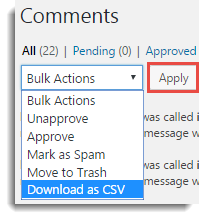
All the details about selected comments get auto-downloaded to CSV file.
Settings tab
Under settings of menu tab, you can set the FTP/auto-export settings for exporting the comments. The window appears as shown below:
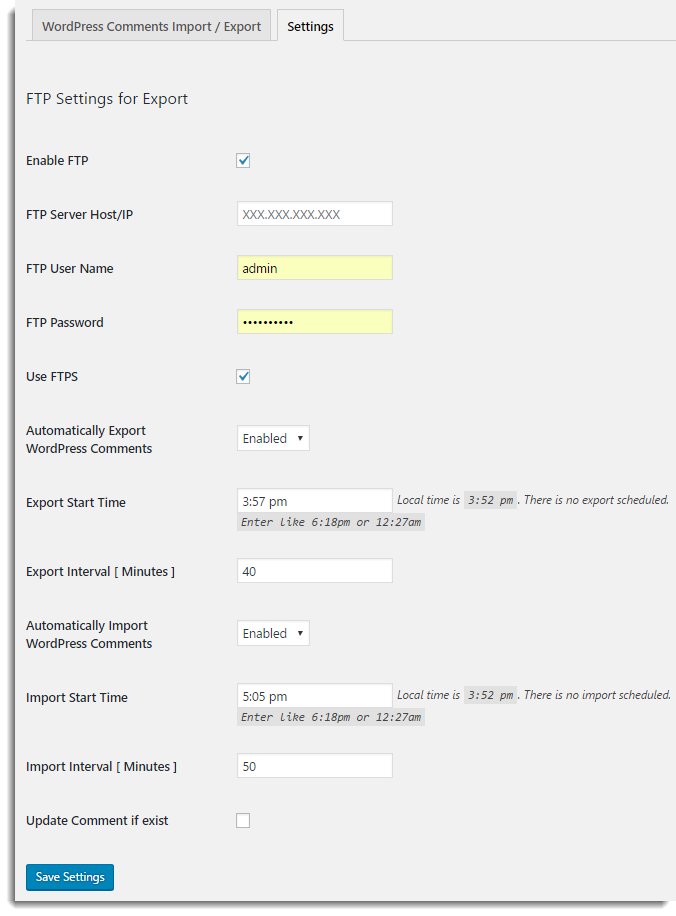
- Select the checkbox to enable FTP import/export.
- Enter FTP Server Host/IP.
- Enter FTP User Name.
- Enter FTP Password.
- Select Use FTPS checkbox to connect securely.
- For automating Import and Export of comment, you can use the Cron job feature.
How to automate the Export of WordPress Comments- Choose the Enabled option to Automatically Export WordPress Comments to FTP Server Host/IP.
- Enter the required Start time for Exporting the comments.
- Enter the time Interval in minutes for exporting the comments.
- Click Save Settings to save/update settings.
You can see the auto-exported CSV file of comments details on FTP server.
How to automate Import of the WordPress Comments
- Choose Enabled option to Automatically Import WordPress Comments from FTP Server Host/IP.
- Enter the required Start time for importing the comments.
- Enter the time Interval in minutes for importing the comments.
- Select Update Comment if exist checkbox to merge existing comments with the updated details. The Merging of the comment is possible only if the Comment ID already exists in your online store. Otherwise, the comment is imported as a new.
- Click Save Settings to save/update settings.
Check out our WordPress Comments Import & Export Plugin.


Comments (8)
xraju.com
June 29, 2020
I feel this is among the such a lot significant info for me.
And i’m satisfied reading your article. But should commentary on few normal issues, The website taste is
wonderful, the articles is truly excellent : D. Just right task, cheers
Kovin
October 27, 2019
Hello thanks for this amazing explanation but is there a way to export from someone else is comments like from amazon or alibaba like I want to take lots of comments from there to my woocommerce is that possible with these plugins please?
Alan
October 28, 2019
Hi,
Our plugin development is exclusively based on WordPress/Woocommerce platform. It does not support exporting comments from the Amazon or Alibaba. If you are somehow able to create a CSV file with those comments then it can be imported to the Woocommerce using the plugin.
Mahaie
April 15, 2019
Hello,
I’ve just import comments on my new website and the oldest one appears first. I’d like that the first comment that appears is the more recent… how can I change the order ?
Thank you in advance
Alan
April 16, 2019
Hi,
By default, the comments are imported based on the comment_date. The comment with the latest date will be displayed first. Please make sure that the date is provided in the format YYYY-MM-DD h:m:s. If the issue still persists please reach us via support.
Fari
December 28, 2018
Hi
I just used your plugin for exporting comments from my old website, after that i created my new website, but during importing process it just fails. How can import them to the new site? Can you please explain it.
Thanks
Mark
December 31, 2018
Hi,
Could you please mention what error you are receiving during import. Kindly make sure that the importing CSV is having default date format(YYYY-MM-DD). If you are having custom date format you may please specify it in the evaluation field of date while importing. Please reach us via support.
Edison
July 16, 2018
Hi, how can I make it work on multisites? it seems that on my root domain ex. domain.com, the plugin is working but on other created sites ex. domain.com/site-one, it doesn’t export/download the csv, it just redirecting to site-one main dashboard.