Every day, numerous orders can be placed on a WooCommerce store. Sometimes, due to a variety of factors, these orders need to be migrated from one store to another. The procedure of manually handling these exports will take a lot of time.
Most WooCommerce store owners will eventually need to export order information. These are some of the causes:
- Analysis and reporting
- Moving to a different server or platform
- Backups
- Order fulfillment
By default, WooCommerce has the function to import & export the orders, to leverage the function of updating the field values you’ll need to use a trusted and reliable order import export plugin to do these tasks.
By using the free version of the Order Import Export plugin, you have the function expression termed as Transform option, where you can add constant value, append, and prepend order field values to your order details.
Prerequisite:
Before importing your orders to another website, you need a CSV file exported by using the same plugin, to ease the importing process.
- A sample CSV file is required as a prerequisite before the order import
- WooCommerce Order import export plugin
- Install the plugin
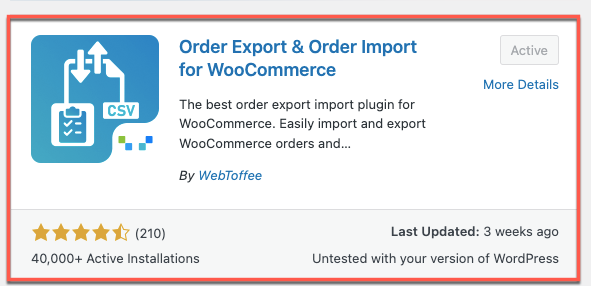
To apply the transform option during the order import process, you need to install the Order import export plugin by WebToffee. If you have already installed the plugin, skip to Step 2.
To download the plugin, from the WordPress dashboard, go to Plugins > Add New. Search for the Order Import Export Plugin. Then Install and Activate the plugin.
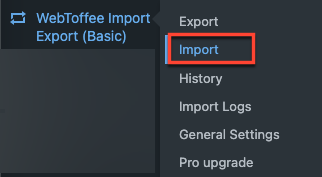
- Navigate to the Import Settings
Again, from the WordPress dashboard, go to WebToffee Import Export (basic) > Import.

- Select the post type to import
As a first step to import order data, select the post type you want to import as an Order from the drop-down list.

- Select the advanced import method
Select the import method as Advanced Import for the detailed filtration of the mapping columns, mapping selections, and other advanced options. Upload the CSV file of the Order list.

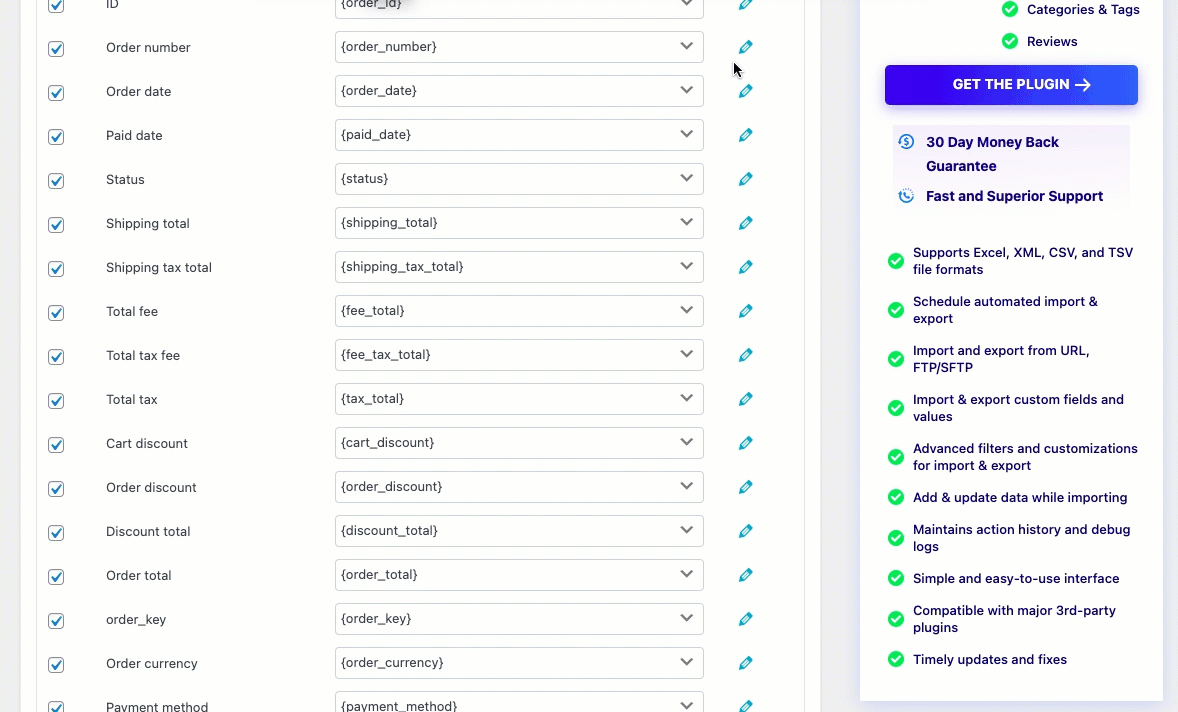
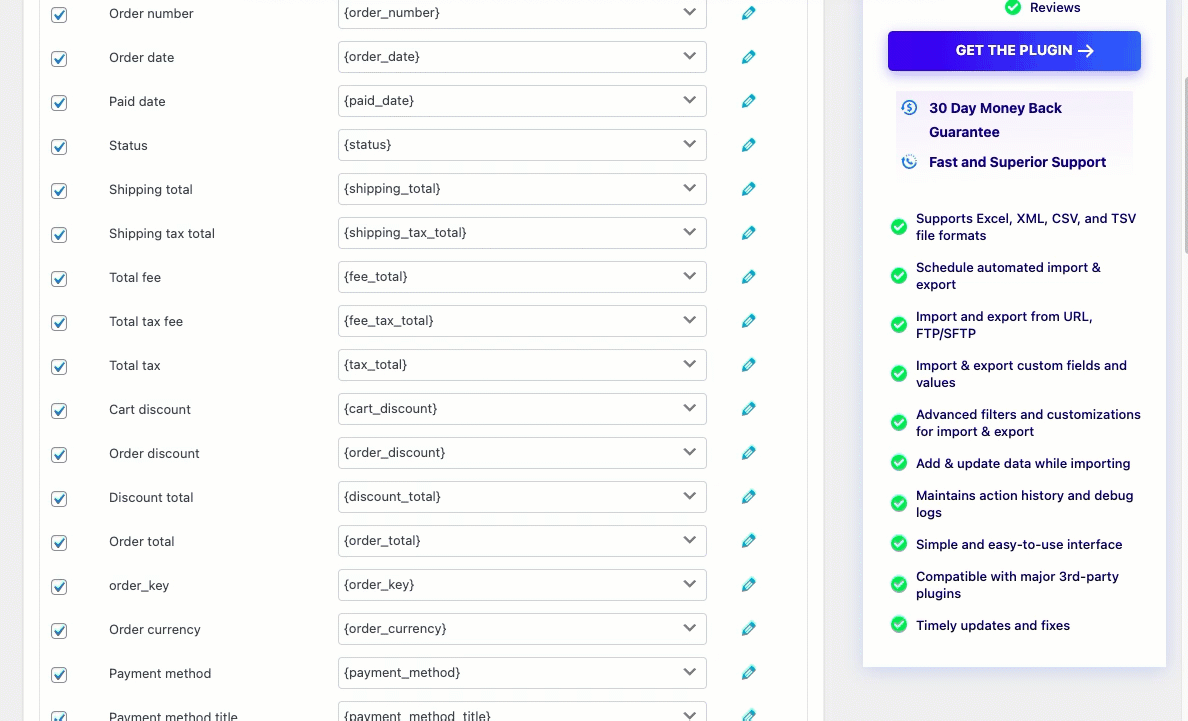
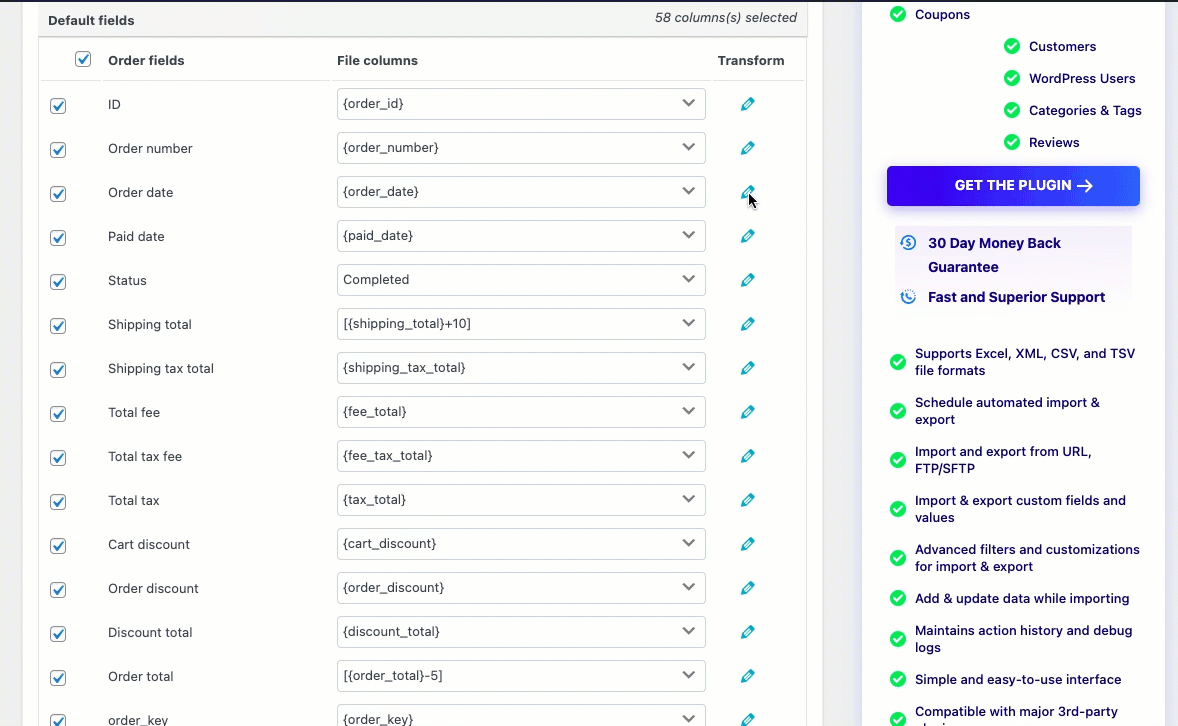
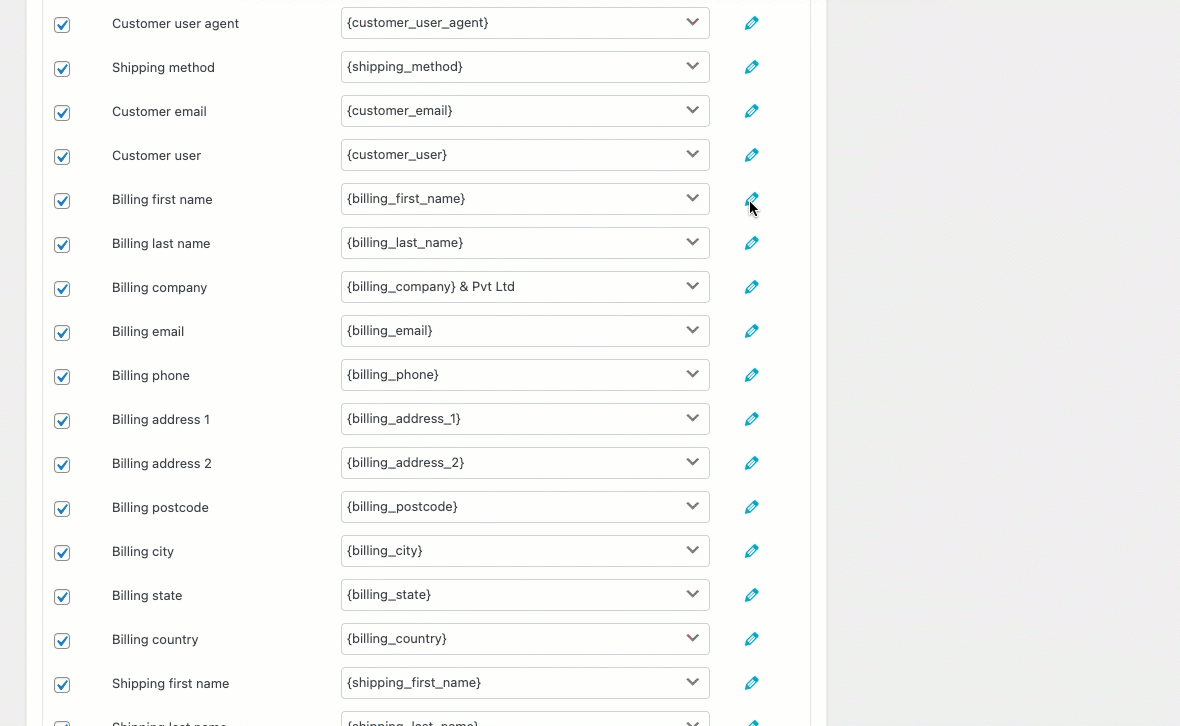
- Update the order field values
In this step, we’ll map the columns to import and use the transform option to change/edit any columns.
When a matching header name is discovered in the input file, columns are automatically mapped.
Here the mapped columns can be seen by a single scroll from the drop-down menu.
A pop-up will appear when you click the pencil-shaped icon, next to the file column, allowing you to enter a value for the product fields.
Expression: The field value can both be changed by using any of the operators +, *, /, -, (), &, @, or string constants.
Eg: [{order_total}+10]
Input file columns: From the dropdown, select the column that needs to be changed.
Output/ Preview: Based on the first record from the input file, a sample value will be generated.
Eg: Initially the order total is 90.00 and when adding 10 to the order total, the sample value for the order total is 100.00.


Use Cases of Updating the Order Field Values
Below are some options for changing the order field values using the Transform option, along with examples:
1. Assign a Constant Value to a Field
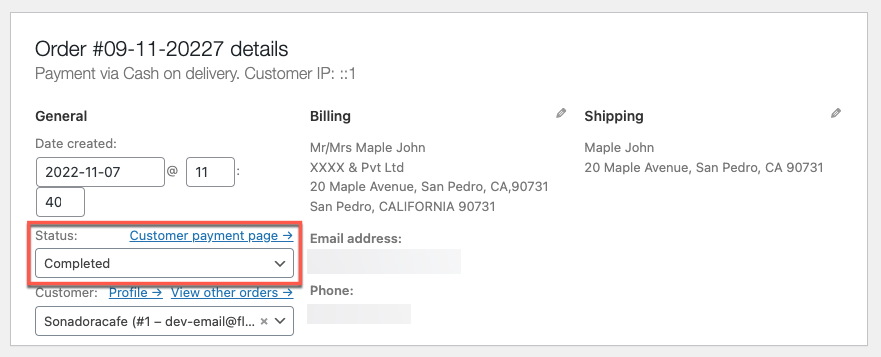
For Example: Let’s say you wish to change the Order Status to Completed. Write completed in the Order Status row under the transform option as shown below:
Applying a constant value as Completed to the status processing. Upon import, the status of the order will be changed to Completed.
The modified status gets imported as shown below:
2. Add Any Required Value to the Field
For Example: Let’s say you wish to increase the shipping total by 10. Write +10 in the Shipping Total row’s transform option as shown below:
Eg: [{shipping_total}+10]
If you haven’t assigned any shipping total before the exporting, you can add the value to your shipping total.
The modified value upon importing is shown below:
Added Value (10.00 + 10)
3. Reduce Any Required Value to the Field
For Example: Let’s say you wish to decrease the order total by 5. Write -5 in the Order Total row’s transform option as shown below:
Eg: [{order_total}-5]
The modified value upon importing is shown below:
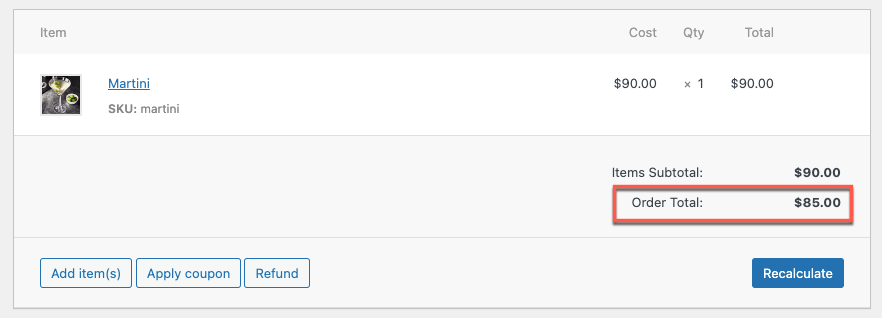
Reduce by Value(90.00-5)
4. Change the Format of a Date in WooCommerce
The format of the date must be in WooCommerce format in order to import it into your online store ( yyyy-mm-dd H:i:s e.g. 2016-07-13 4:24:25).
Therefore, your dates in a CSV file must be in this format, or you can use the transform option to convert your dates to WooCommerce format. Dates in a CSV file that are in PHP formats can be converted to WooCommerce formats. The following are a few formats:
- d/m/yy H:i
- m/d/yy H:i:s
- yy/m/d H:i:s
- yy/d/m H:i:s
Note: The transform option and CSV file must both use the same date format.
For Example:
Let’s say you wish to change an order date in the d/m/yy H:i format. As illustrated below, on the Order Date row, place @ d/m/yy H:i using the transform option:
The imported order date is adjusted as indicated below:
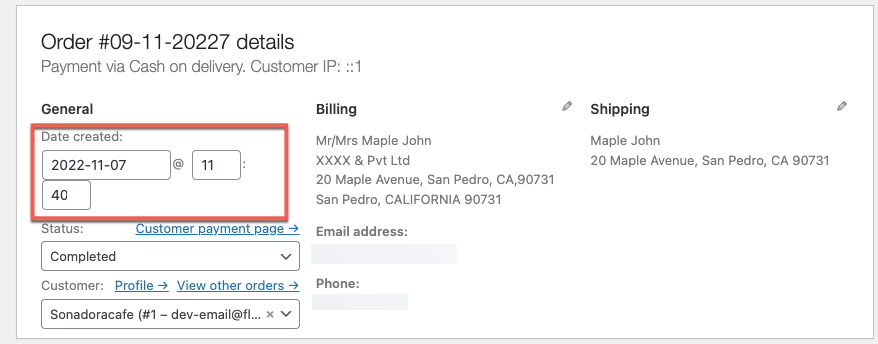
The updated date and time is 2022-11-07 at 11:40
5. Append Any Required Value to the Field
For Example:
Let’s say you wish to add a Billing Company by Pvt Ltd. In the billing company row, in the end, click on the pencil icon, type &Pvt Ltd as seen below:
The modified company data upon importing is adjusted as indicated below:
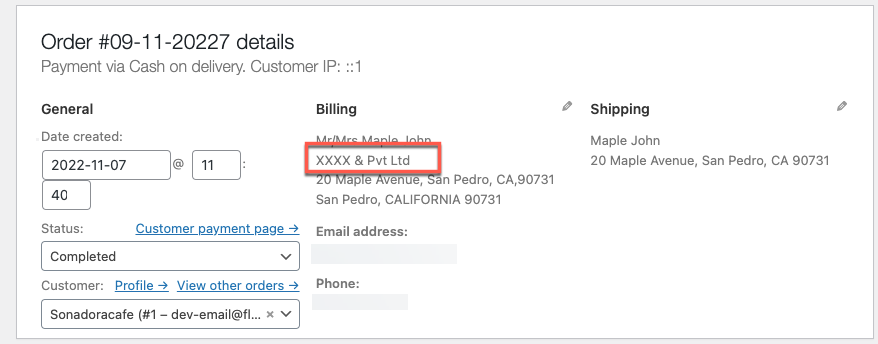
The appended value is XXXX &Pvt Ltd
6. Prepend any required value to the field
For Example:
Let’s say you want to add the salutation before your billing name: Write Mr/Mrs [your billing name] in the billing name row using the transform option as shown below:
The modified billing name upon importing is adjusted as indicated below:
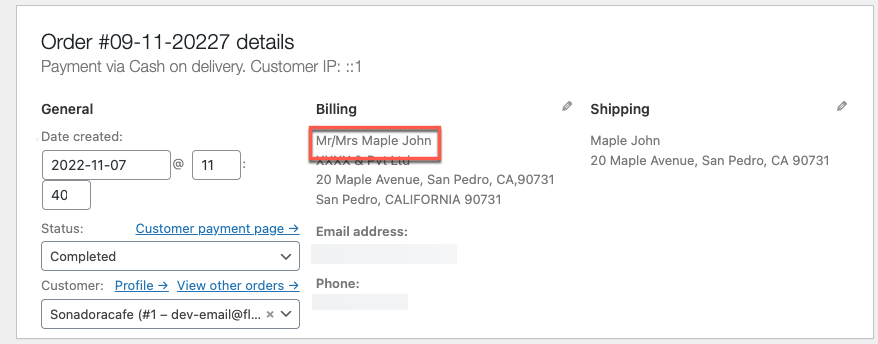
Appended Billing name will be Mr/Mrs. Maple John.
Wrap up
During the importing process, the transform option enables you to modify/change the file columns. When you need to update or correct any mapping data for bulk products, this tool is quite helpful. The Order Import Export plugin we mentioned in this article also has a premium version with advanced features.
Hope this article led you in the right direction. If you have any queries, please mention them below.
We encourage you to read the below article: