Address labels display accurate recipient or sender information on envelopes, packages, or parcels. They typically include the recipient’s/sender’s name, street address, city, state etc. Customizing an address label aims to set up a template, modify the address type, layout, and layout properties. WebToffee’s WooCommerce Address Labels plugin helps to customize an address label. To customize a WooCommerce Address label follow the given steps:
Step 1: Customize a template.
Step 2: Save and Activate the template for the address label.
Customizing a template
To customize a template for an address label by adding label parameters manually, follow the below steps:
- From the WordPress dashboard, navigate to Invoice/Packing > Address Label.
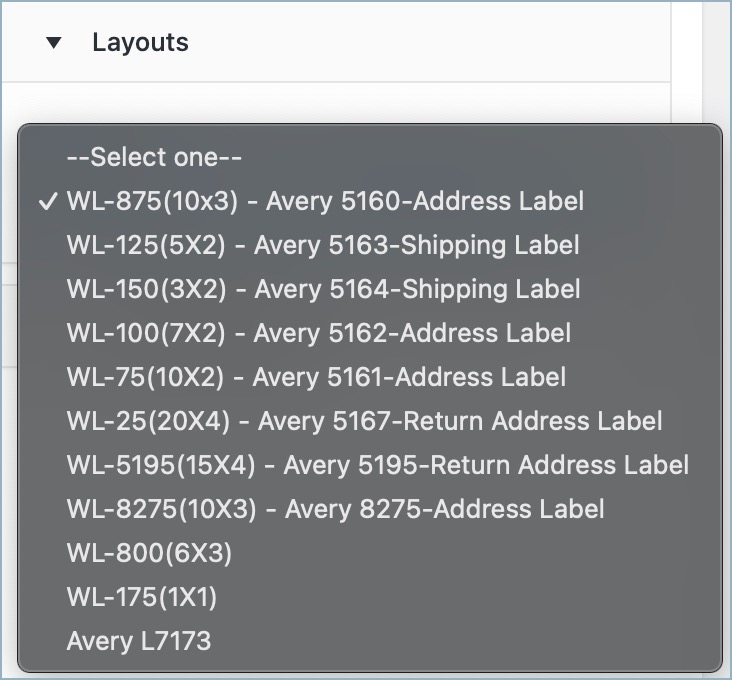
- To set up a new address label template either navigate to Create new template in the Customize tab or select a layout from the Layouts dropdown in the Customizer properties.
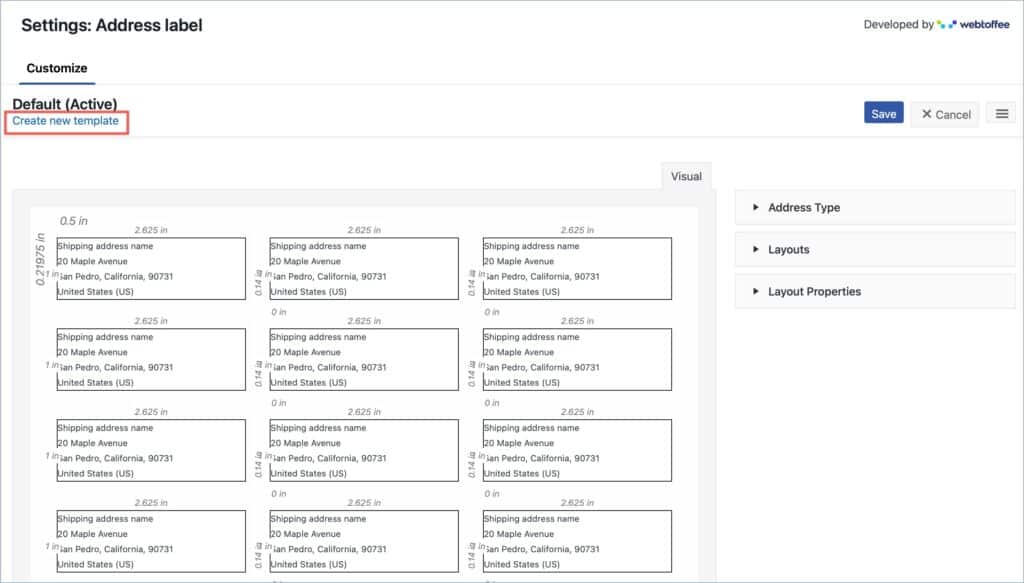
- In the absence of any pre-existing templates, the default layout for the address label will be WL-875 (10×3) – Avery 5160 – Address Label.
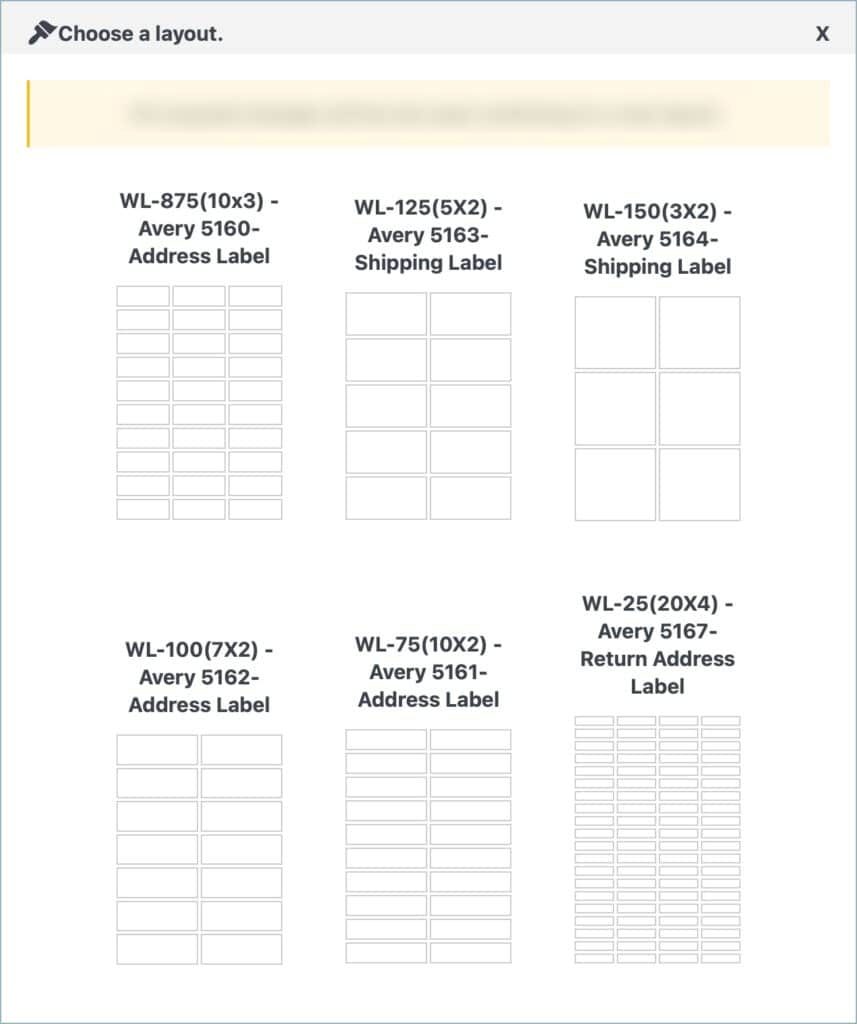
- On selecting ‘Create new template‘, a pop window will appear to choose a layout for the template. Choose a preferred layout for the template. (The template layout can be changed anytime from the Layouts dropdown in the customizer properties)
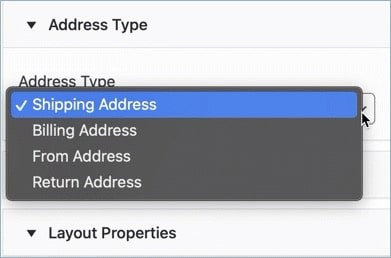
- From the Address Type dropdown present in the customizer properties, select the desired address type to display on the address label.
- Change the address label layout if required from the Layouts dropdown.
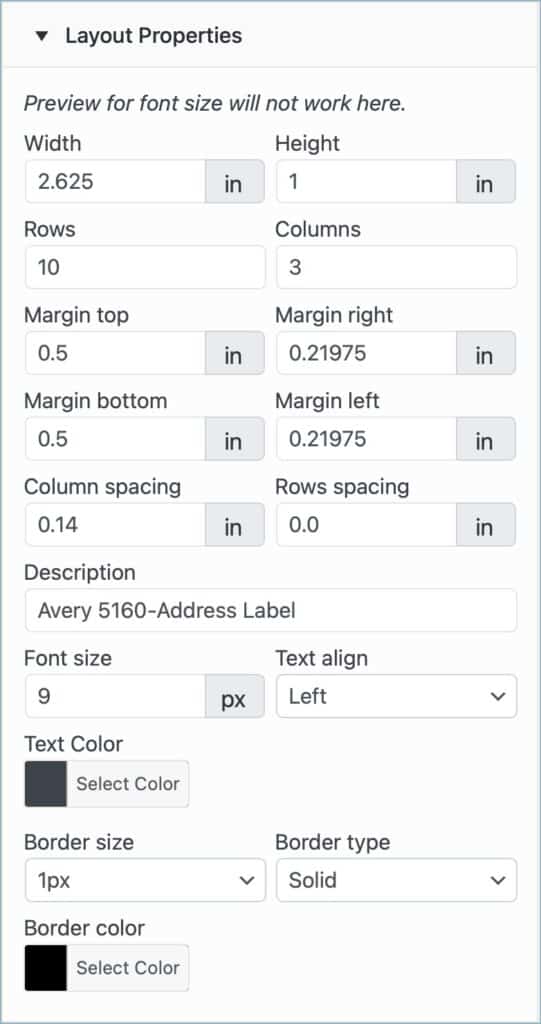
- In the Layout Properties, make necessary modifications to the layout such as width, height, rows, columns, etc. Changes made in the layout properties will reflect the template characteristics.
Saving the customized template for the address label
- Once the necessary changes are made, click on the Save button to save the template.

- A window will pop up to enter the template name.
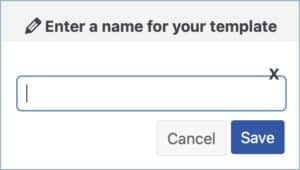
- Enter a suitable template name and click on Save.
- After saving, Activate the template to use it further for the address label.
Printing WooCommerce Address Labels
Store owners can print address labels for individual orders as well as for bulk orders.
Printing address labels for individual orders
Store owners can print address labels for single orders in two ways:
- From the order edit page.
- From the orders listing page.
Printing address label from the order edit page
Follow the below steps to achieve this:
- From the WordPress dashboard, navigate to WooCommerce > Orders.
- From the Orders listing page, click on the preferred order.
- From the Order edit page, click on the print icon present against the address label.
- The Print preview window will open up. Here make the necessary print settings and click on Print to print the shipping label.
Printing address label from orders listing page
Follow the below steps to achieve this:
- Navigate to WooCommerce > Orders.
- In the Orders listing page, head to the Printer icon present against the preferred order. Store owners can see the Printer icon under the Actions column.
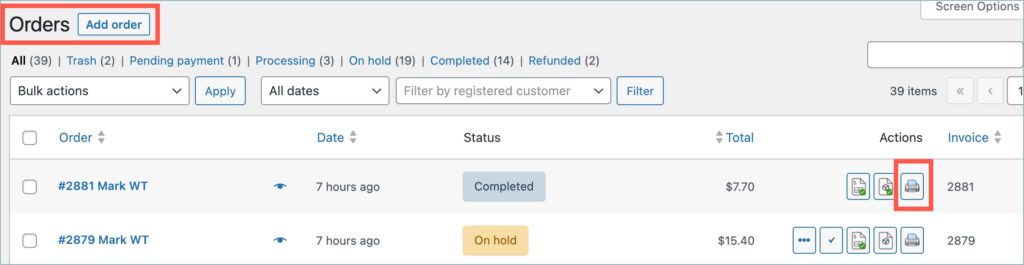
- Click on the Printer icon and select Address Label.
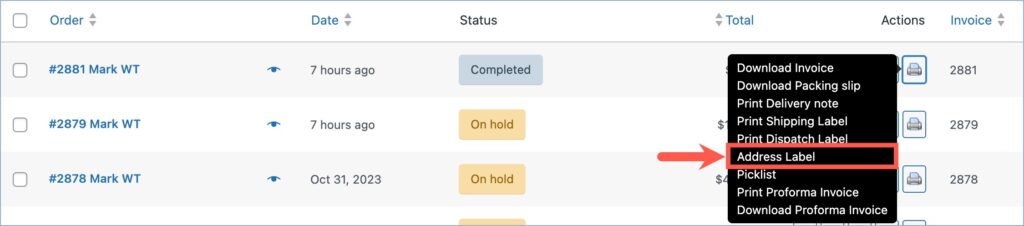
- The Print preview window will open up. Here make the necessary print settings and click on Print to print the shipping label.
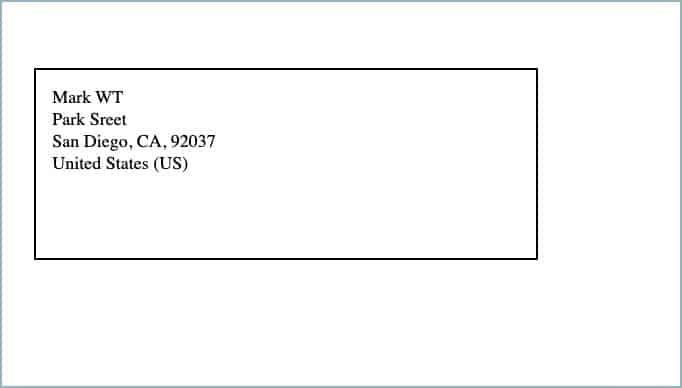
The address label for a single order will look like this:
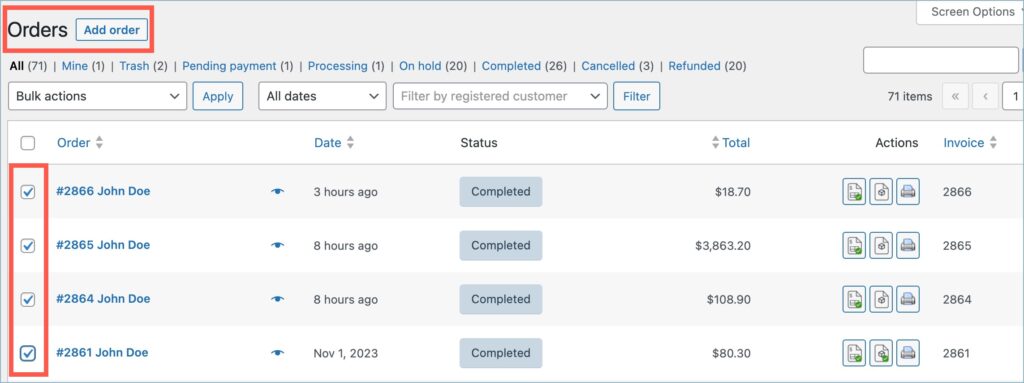
Bulk printing of address labels
Store owners can print address labels for multiple orders using the bulk print option. Follow the below steps to bulk print address labels:
- Navigate to WooCommerce > Orders.
- Under the Orders listing page, select the preferred orders by ticking the checkbox next to each order.
- From the Bulk actions dropdown, select Print Address Label.
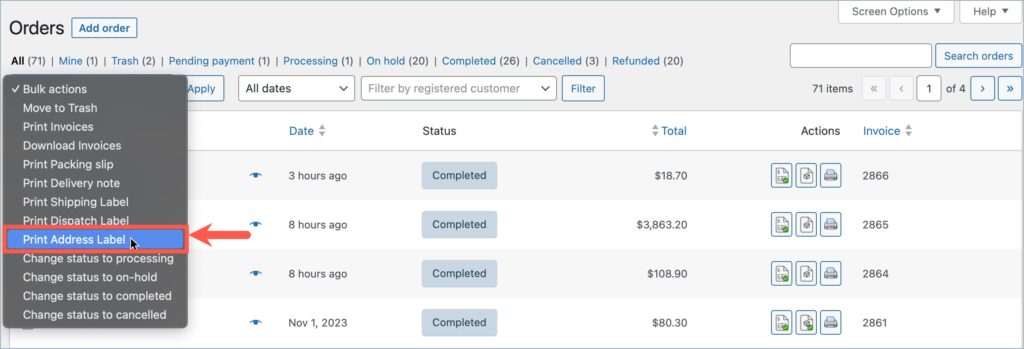
- Click on Apply.
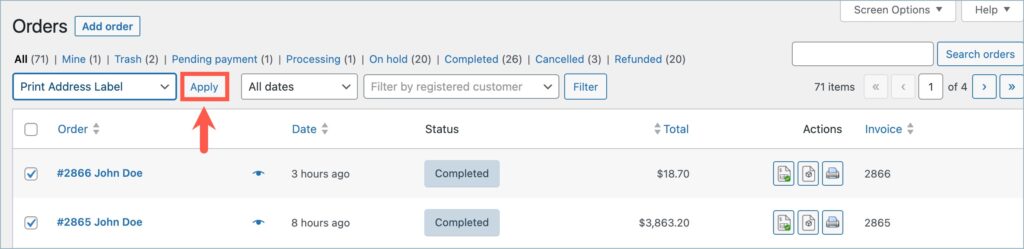
- The Print preview window will open up. Here make the necessary print settings and click on Print to print the shipping label.
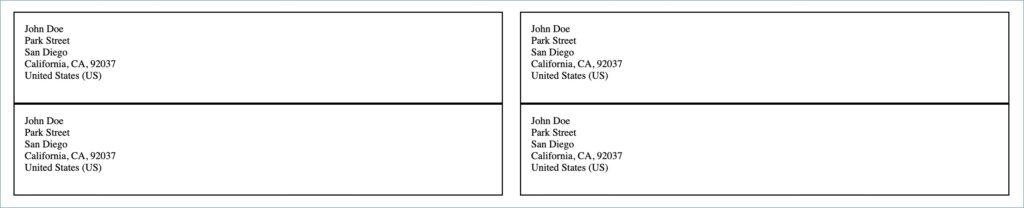
The below image shows WooCommerce address labels for four orders: