
Ever felt the need to migrate your WordPress users from one website to another? Manually adding users to your new website can be tiresome, not to mention boring too. What if you could migrate all your users quickly just by clicking some buttons, without actually spending any money? The Import Export WordPress Users and WooCommerce Customers plugin can do just that.
This is going to be a two-phase process. Firstly, we will export WordPress users from a source website to a CSV file. Then we will import WordPress users from the CSV to the destination website.
Before we begin make sure you have installed the free WordPress User import export plugin by WebToffee.
To install the plugin:
- Go to Plugins > Add New from your WordPress admin panel.
- Search for Import Export WordPress Users and WooCommerce Customers in the plugin directory.
- Install and Activate the plugin.
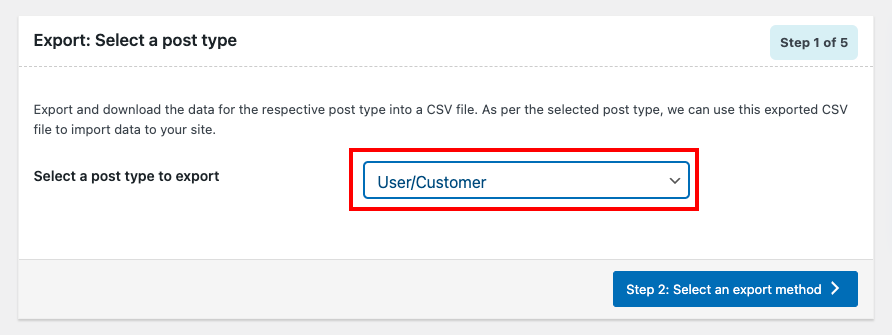
Go to WebToffee Import/Export(Basic) > Export.
Step 1: Select a Post Type
Here, you can select User/Customer as post type (for obvious reasons).
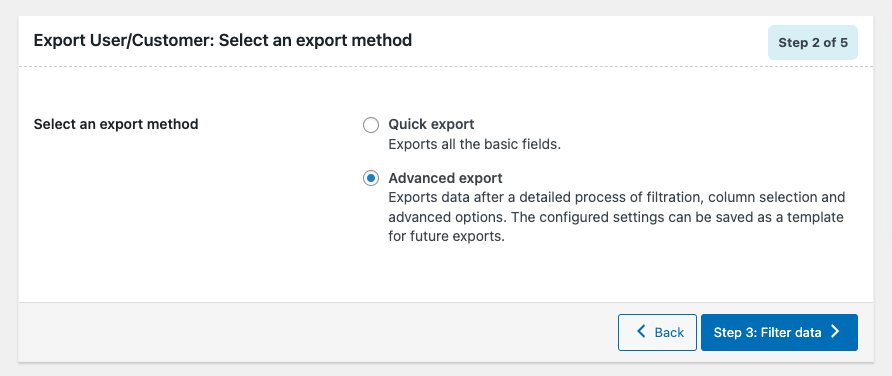
Step 2: Select an Export Method
Normally, you can see three options in this window. Since this is probably your first time, you might not see all of them.
- Quick export: Export data as per default specifications.
- Advanced export: Takes you through a detailed process of filtering, column selection, and advanced options that you can customize to obtain your required CSV file.
- Based on a pre-saved template: Export data according to your previously saved specifications.
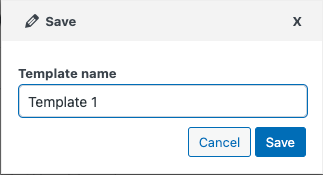
Note: This option will be visible only if you have saved a template in your previous exports. You can save a template if you go to Step 5 through the Advanced export. Once you save the template, you can select it from the Based on a pre-saved template option, so that you can obtain your custom-made CSV file without actually going through the configurations again.
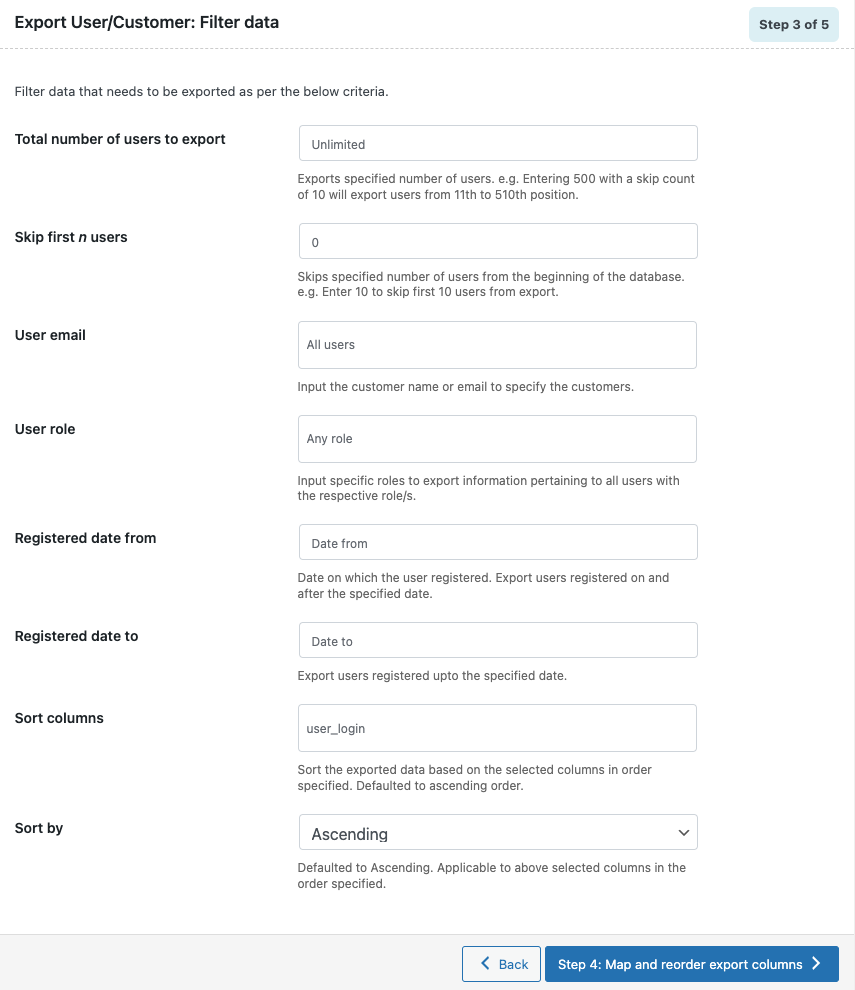
Step 3: Filter Data
Customizing your data will never be easier than this. Want to limit the number of users? Want to skip a couple of users you don’t want on your new site? Or are your requirements rather specific and explicit? No worries, we got you covered.
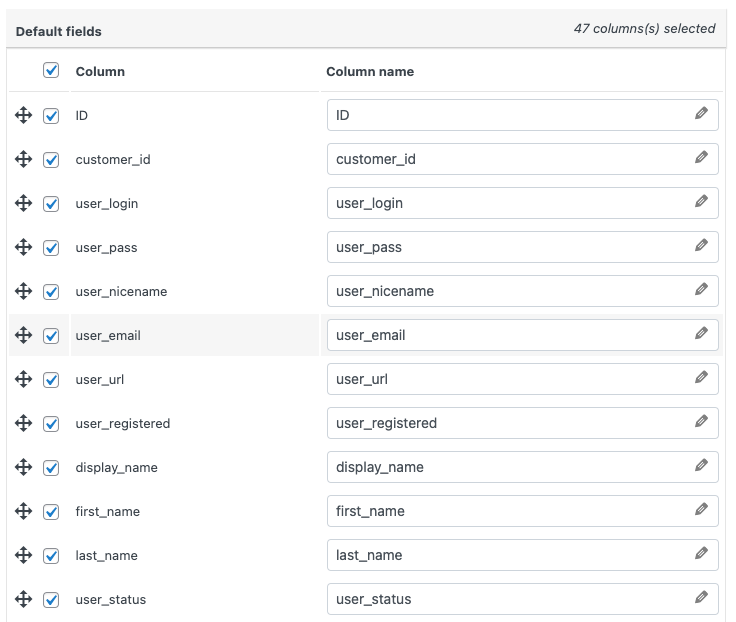
Step 4: Map and Reorder Export Columns
Here, you can see the plugin column name on the left and its corresponding CSV column name on the right. By default, both are the same. But you can customize the CSV column names by editing the right text field.
Beware that once you assign a different name to any CSV column name, you will have to manually map the same to its corresponding plugin column name during import. You also have the freedom to reorder the columns as you like.
Step 5: Advanced Options/Batch Export
Enable the Export guest users checkbox to include guest customers in the export file and choose the number of records to be processed in one batch.
Set the delimiter for differentiating the columns in the CSV file. (Comma will be set as default)
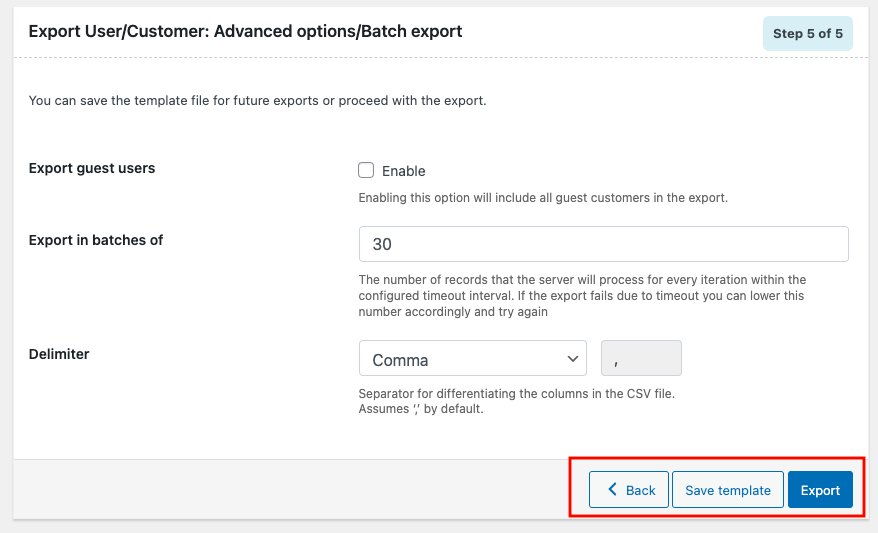
Click on Save Template to save the configurations you have made for future use (optional).
Click on Export to export users/customers to a CSV file.
A pop-up will appear saying Export file processing completed.
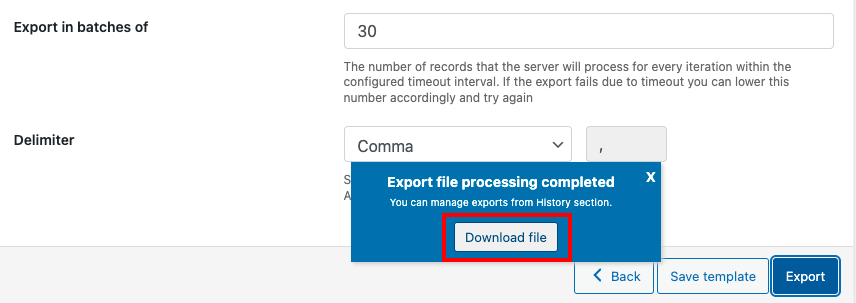
Click on the Download file to download the CSV file to your local storage.
Go to WebToffee Import/Export(Basic) > Import.
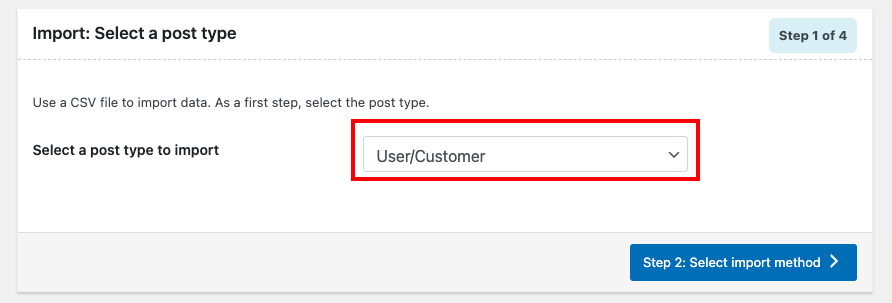
Step 1: Select a Post Type
Here you can select Users/Customers since that’s why you are here in the first place.
Step 2: Select an Import Method
The options are similar to the export method but there are additional fields too, which we will discuss.
Import Method
- Quick import: imports data as per the default specifications.
- Based on a pre-saved template: imports data according to your previously saved specifications.
- Advanced import: Takes you through a detailed process of filtering, column selection, and advanced options that you can customize to import data from your CSV file.
Choose File for Import
You can either drag and drop the CSV file you want to import or simply click anywhere on the dotted rectangle box to upload the file from your local storage.
Delimiter
Set the character used to separate columns in the export file.
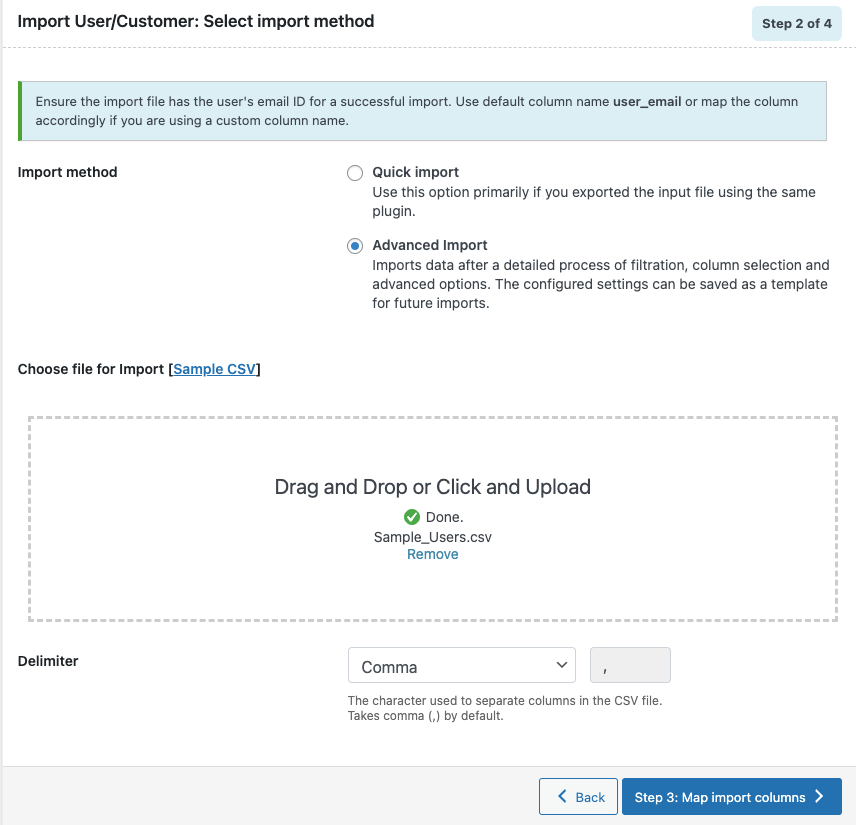
Proceed to Step 3.
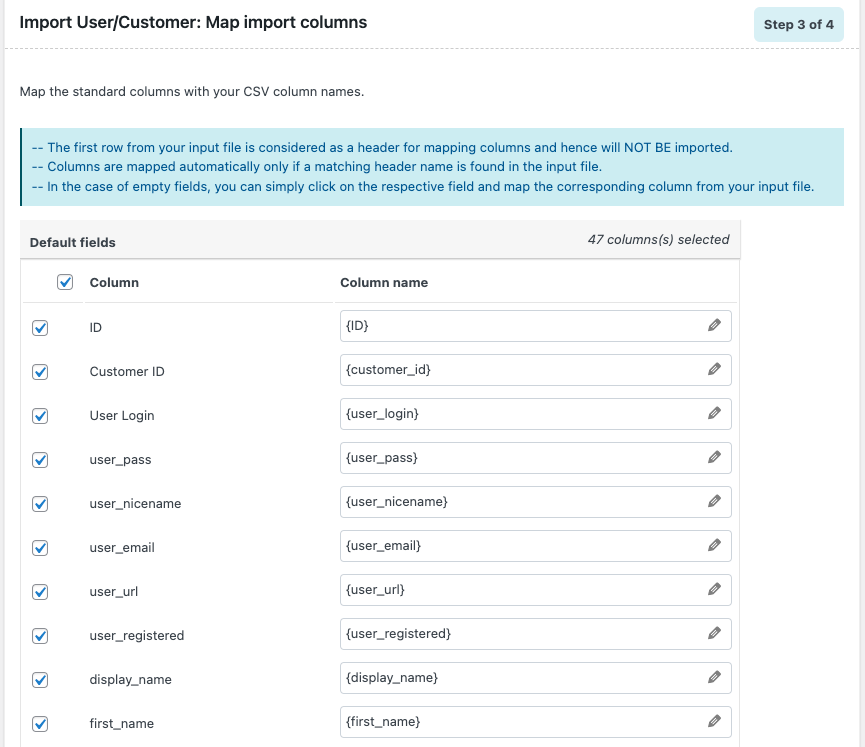
Step 3: Map Import Columns
If you provided the default names for the columns, the plugin identifies the required fields automatically. You can also manually set the column names as per the CSV file.
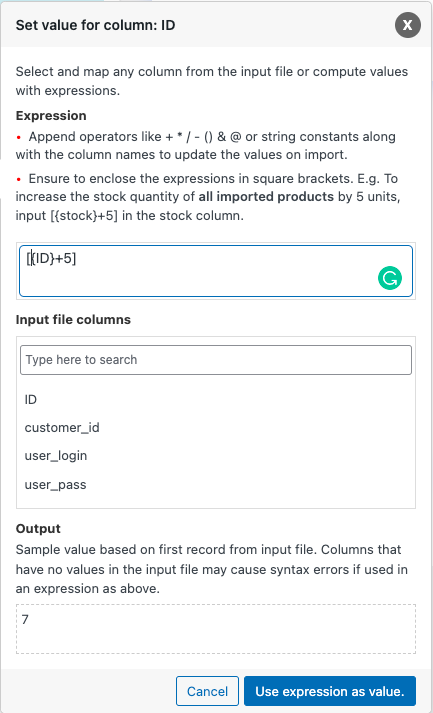
Evaluate field
Want to make some quick changes to your data without actually going through the CSV file? The simplest way is by using the Evaluate field. You can access it by clicking on the pen icon near the required column name. It basically takes the input data from the CSV, computes them using the given expression, and then creates output. The best part is that you can see the sample calculation in real-time. Leave no room for errors.
- Expression: Any of the operators +*/-()&@ or string constants can be used along with the attributes to obtain your desired result.
- Input: Select the column you want to modify from the dropdown window.
- Output: Sample output will be displayed here based on the first record from the input file.
Note: Columns that have no values in the input file may cause syntax errors if used in an expression.
Proceed to the next step.
Step 4: Advanced Options/Batch Import
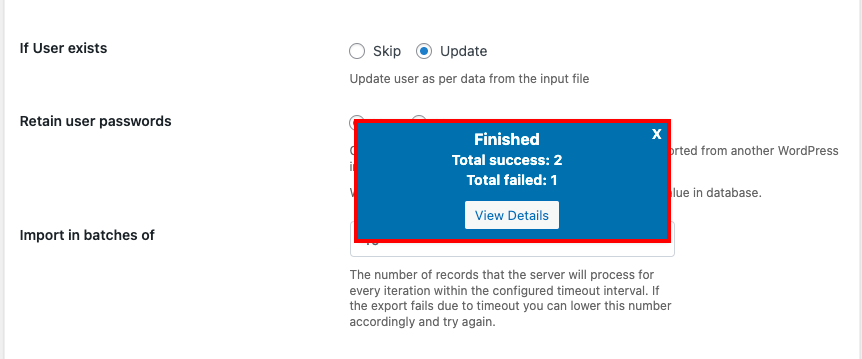
What do you want to do if the user already exists on the site? Do you want to skip that user import or update it using the data from the current CSV file? It’s up to you.
Retain user passwords: WordPress stores passwords in an encrypted format. If you want to Retain the password of an old user you will have to choose Yes. But if the user details in the CSV are manually added by you, then it will be plaintext format. So you should choose No in those cases.
You can also set the import in batches of option.
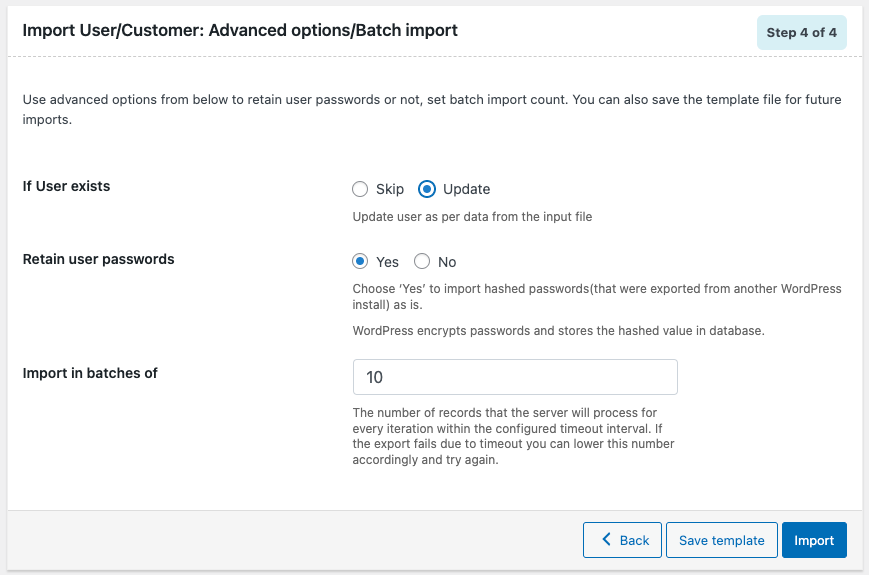
If you want to save the setup for the future, click on Save template or else click on Import to proceed.
After importing a pop-up will appear with a Finished message and the number of failed imports (if any).
Wrapping Up
This plugin lets you import and export WordPress users from CSV with a few clicks. If you are looking for some advanced features, you can try the premium version of this WordPress users import export plugin. It has some additional customization options, frequent updates, and support provided by a team of experts.
Do you find this article useful? Please share your feedback in the comments.
We also encourage you to read the below article: