This documentation guides you on the setup and usage of the free User/Customer Import Export Plugin for WordPress.
Pre-requisites for the Plugin
- Make sure mbstring is enabled on the server.
- Supports only CSV file formats.
- Download:Sample User CSV
- CSVs should be in UTF-8 format.
To begin with the plugin, install and activate.
Installation of the Plugin
You can install the plugin either from the WordPress plugin directory or as a zip downloaded from the WordPress.org website. You can learn more about the installation procedure by reading the article How to Install a Free Plugin from WordPress.
Getting Started with the Plugin
To get started with the plugin you can navigate to WebToffee Import Export (Basic) tab from your WordPress dashboard.
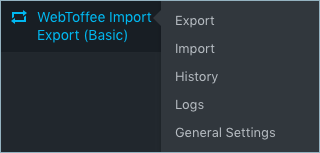
The plugin is divided into five different tabs – Export, Import, History, Logs, and General Settings,. Each of which is explained in the following subsections.
User/Customer Export
From this window, you can export or download users/customers from your WordPress website/WooCommerce store.
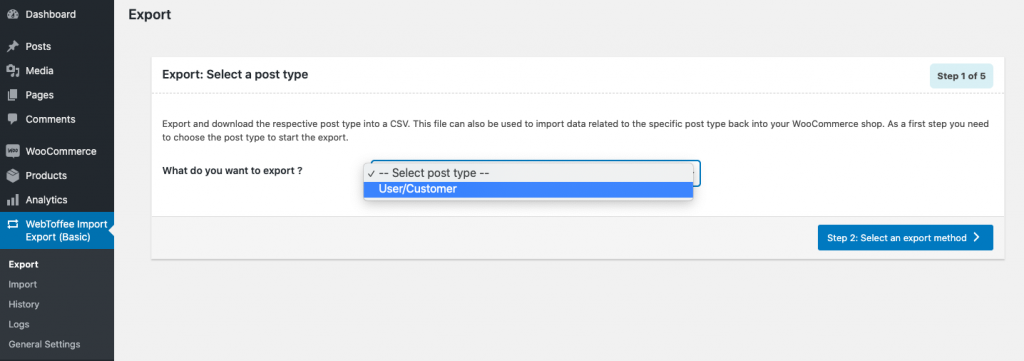
Choose user/Customer from the drop-down and click Select an Export Method.
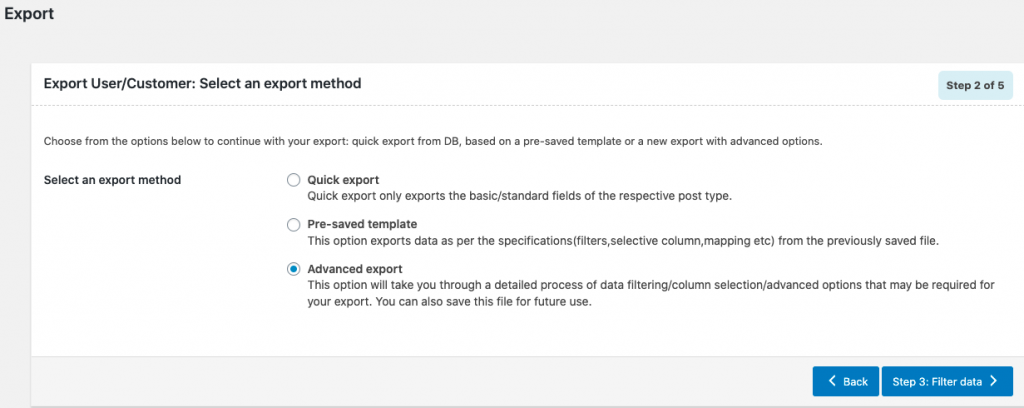
Here you have three options available for export. Quick export, Pre-saved template, and New export.
The below sections will explain how each of the export is done.
Quick Export
With the Quick Export option, you can only export the basic/standard fields of the respective post type. You do not get to selectively filter the columns with this option.
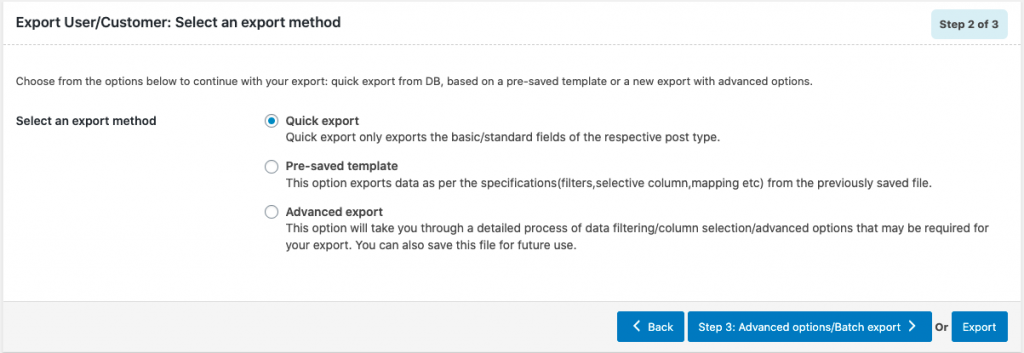
Now you can either click the Export button to start the Export or go to the Advanced options/Batch export window to enable batch export of users.
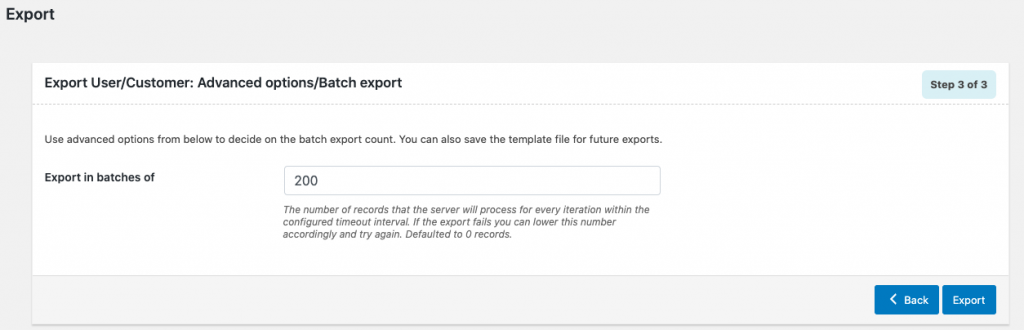
Export in batches of – Here you can give the number of records that the server will process for every iteration within the configured timeout interval. If the export fails you can lower this number accordingly and try again. Defaulted to 0 records.
Once you complete the configurations click the Export button.
Pre-saved Template
Using a pre-saved template retains the previous filter criteria and other column specifications as per the chosen file and export data accordingly. You can also edit this file in the process and export it accordingly or export straightaway.
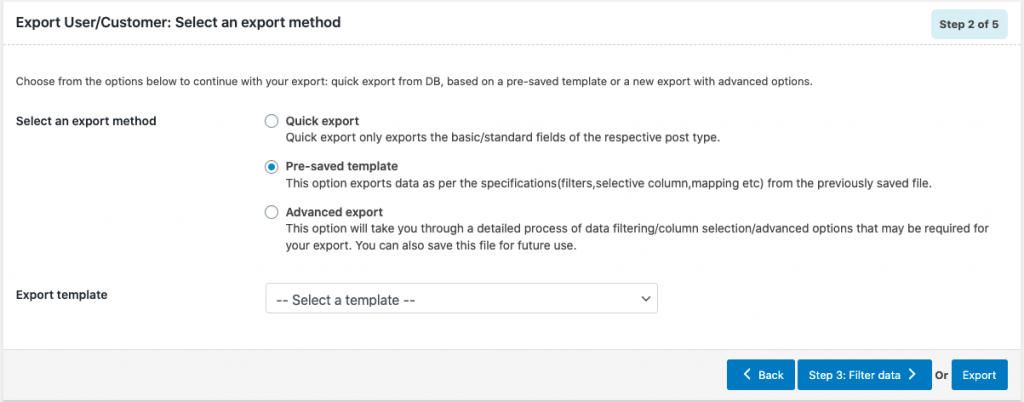
When this option is selected you will be able to choose a previously saved template from the Export template drop-down.
Once you select the template you can either edit its filters by clicking the Filter data button or go straight with Export.
Advanced Export
Advanced export will take you through the entire process of filtering/column selection/advanced options that may be required for your export. You can also save this file for future use.

Now go to the next step Filter data.
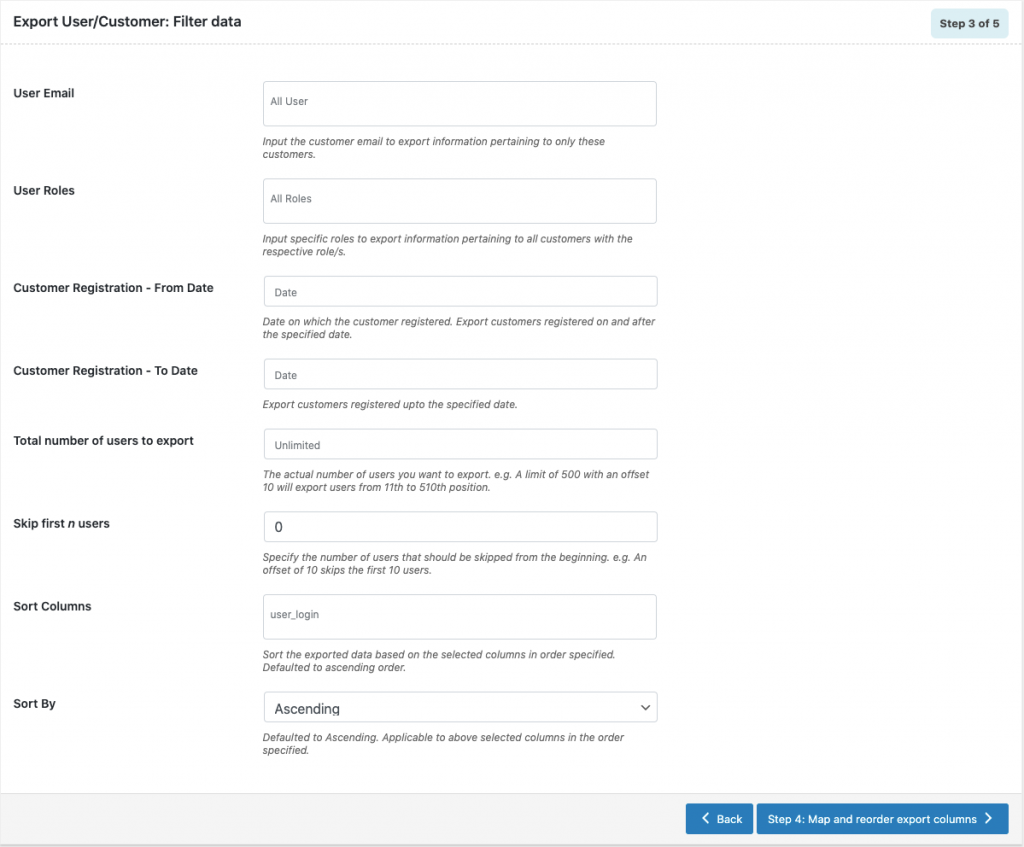
User Email – Her you can enter the emails of customers/users to export the data pertaining to them alone.
User roles – Choose or input user roles to export information pertaining to them alone.
Customer Registration – From Date – Choose a specific date to export the customer/user data (who registered) on and after the specified date.
Customer Registration – To Date – Choose a specific date to export customers/user data (who registered) up to the specified date.
Total number of users to export – Enter the total number of users/ customers you wish to export.
Skip first n users – Here you can specify the number of users you wish to skip from the beginning of export. If you entered the total number of users 500 in the above field and are skipping 10 you will be exporting users up to user ID 510 in total.
Sort columns – Sort exported data based on the selected columns in the order specified. It is defaulted to ascending order.
Sort by – It is defaulted to ascending but you can change it to descending as well. It is applicable to the above selected columns.
Proceed to the next step by clicking the button Map and Re-order export columns.
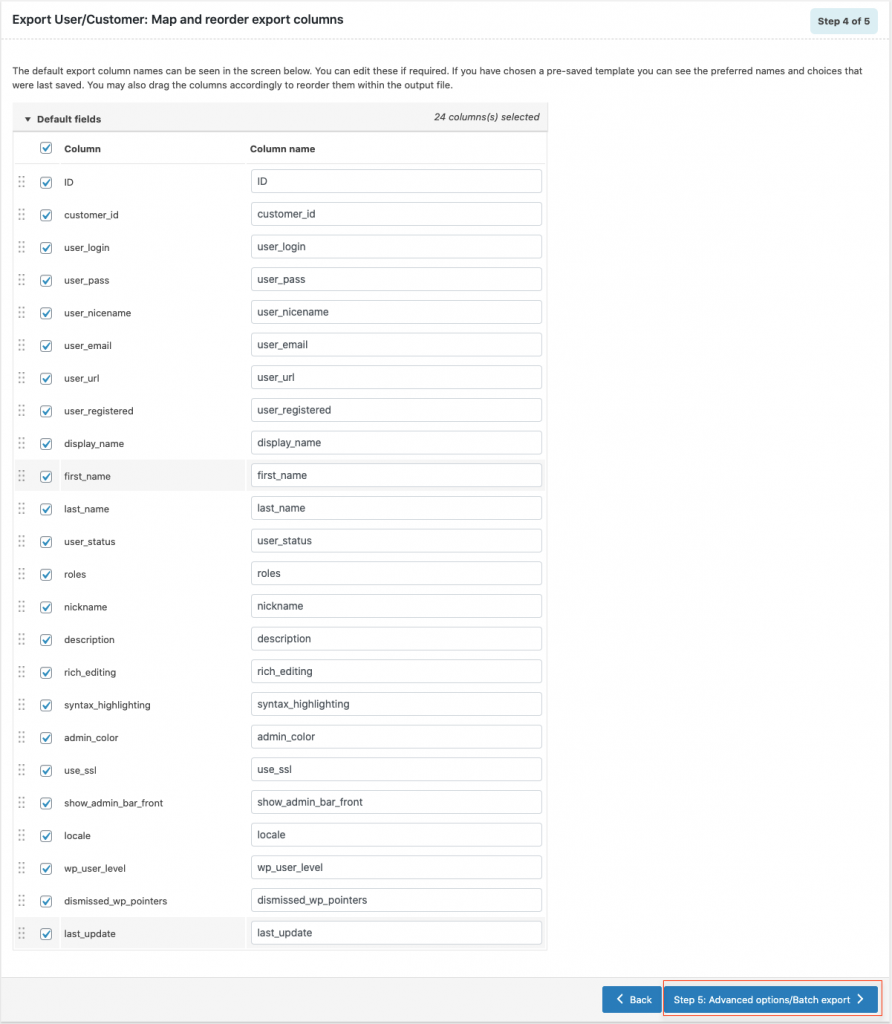
The default export column names can be seen in the above screen. You can edit these if required. If you have chosen a pre-saved template you can see the preferred names and choices that were last saved. You may also drag the columns accordingly to reorder them within the output file.
Now you may go to the Advanced options/batch export window.
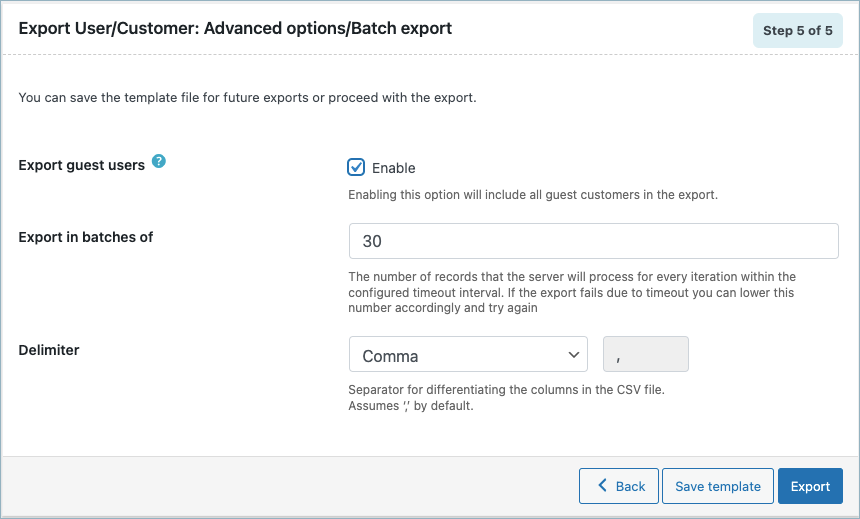
Here the following options can be configured:
- Export guest users – Enable to include guest users during export. This feature requires the store settings to allow guest user checkout. Minimal guest user details are fetched from the order details. For these users, the columns like password, username, user created date, etc will be empty.
- Export in batches of – you can give the number of records that the server will process for every iteration within the configured timeout interval. If the export fails you can lower this number accordingly and try again. The default number of records is 0.
- Delimiter – The delimiter allows changing the column separator for columns in the CSV file. Assumes comma by default.
Now if you wish to save the configured settings for export, you can click the Save template button. It opens a popup to add a name for the template.
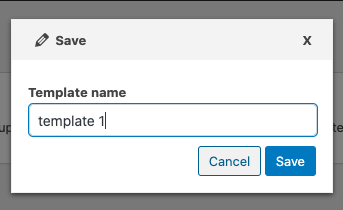
After naming the template click the Save button. Now the saved template will be visible on the previous templates list for you to choose from.
User/Customer Import
In this section you can import users/customers to your site.
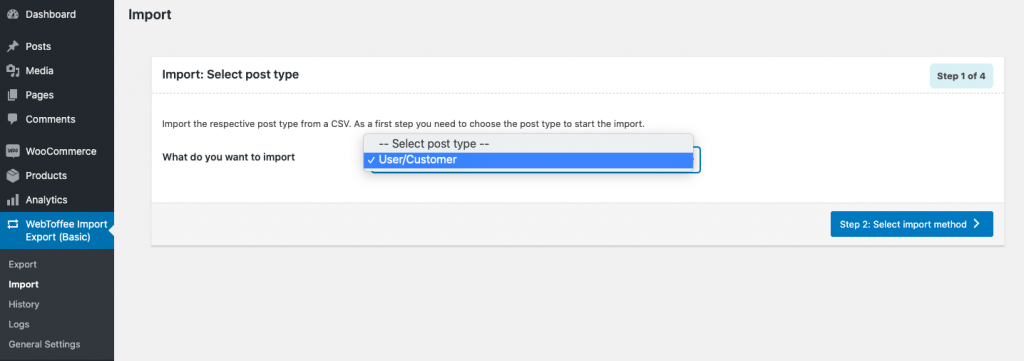
You can start by selecting User/Customer as the post type. Now hit the Select import method button to proceed with the next step.
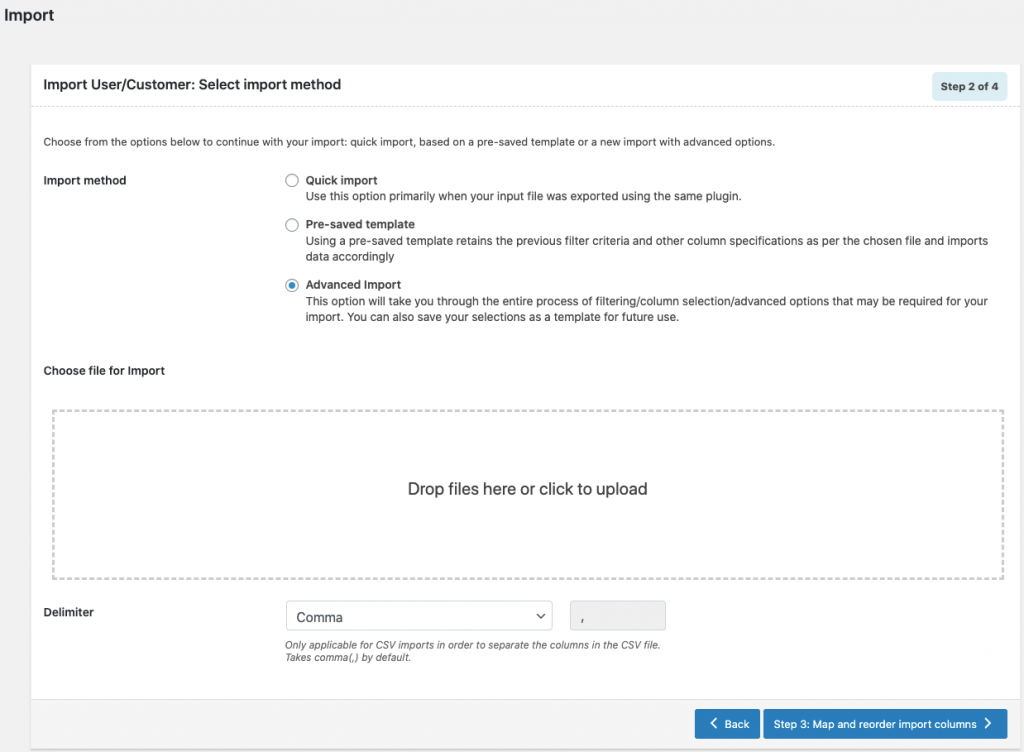
Here you can choose an import method, upload the CSV to be imported from your computer, and choose a delimiter (which is selected comma by default).
Let’s go through each of the import methods.
Quick Import
Quick import only imports the fields from the input file that conforms to the specific column headers as required by the plugin. You do not get to selectively filter the columns with this option. Use this option primarily when your input file was exported using the same plugin.
After selecting Quick Import as the import method, you can either start the Import or go to Advanced Options/Batch import to import users in batches.
If the user exists in the store – If the CSV contains matching users you can either skip them or update the user data.
Retain user passwords – Here you can select ‘Yes’ if you wish to retain user passwords as per the input record.
Import in batches of – Here you can specify the number of records that the server will process for every iteration within the configured timeout interval. If the import fails you can lower this number accordingly and try again. It’s defaulted to 100 records.
Now you can click Import to finish with the import of users/customers. Once the import is completed you will be displayed a pop-up showing import status which contains the number of successful imports and failed imports (if any).

Or you can view a detailed log from the History section by clicking on the link.
Pre-saved Template
By choosing to import with this method, you will be able to use a pre-saved template and retain the previous filter criteria and other column specifications as per the chosen file and import data accordingly. You can also edit this file in the process and import it accordingly or import straightaway.
New Import
A new import will take you through the entire process of filtering/column selection/advanced options that may be required for your import. You can also save this file as a template for future use.
Once you choose New Import as the import method, your next step will be to Map import columns.
Here you can map the standard columns with your CSV column names.
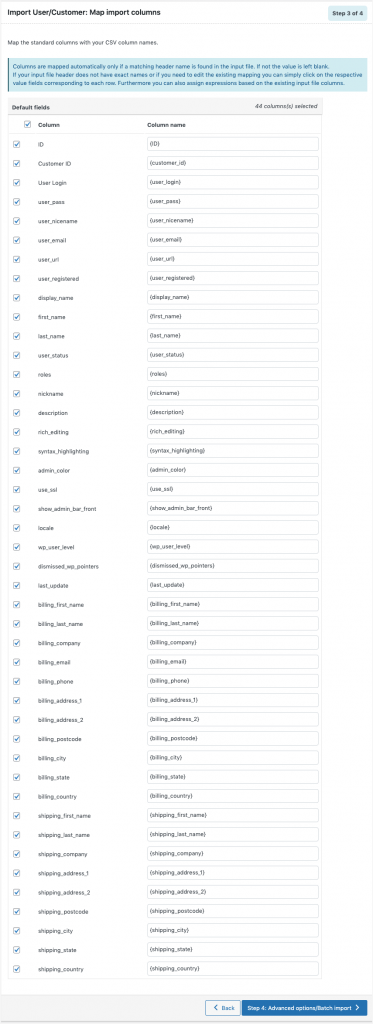
Columns are mapped automatically only if a matching header name is found in the input file. If not the value is left blank. If your input file header does not have exact names or if you need to edit the existing mapping you can simply click on the respective value fields corresponding to each row. Furthermore, you can also assign expressions based on the existing input file columns.
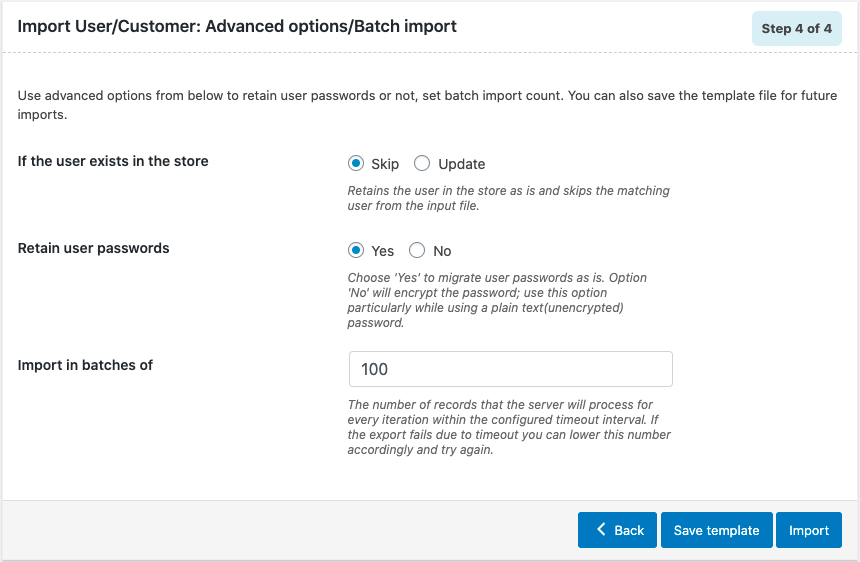
Now you can proceed to the next step which is for configuring batch import. Click the Advanced options/batch import button.

If the user exists in the store – If the input file contains existing users in the store, you can either choose ‘Skip’ to retain the users in the store as is or ‘Update’ the existing users.
Retain user passwords – You can choose ‘Yes’ if you wish to retain user passwords as per the input record. ‘No’ will encrypt the password, use this option particularly while using a plain text (unencrypted) password.
Import in batches of – Here you can specify the number of records that the server will process for every iteration within the configured timeout interval. If the import fails you can lower this number accordingly and try again. It’s defaulted to 100 records.
Now you can click the Save template button if you wish to save the configured import settings for future use.
Click the Import button to finish the import process.
All the users contained in the .csv file will be imported and listed under the Users tab of the WP admin panel. Any registered users who have never placed an order, will not be imported to the customer table. However, you can rebuild and refresh the WooCommerce customers list to include those users.
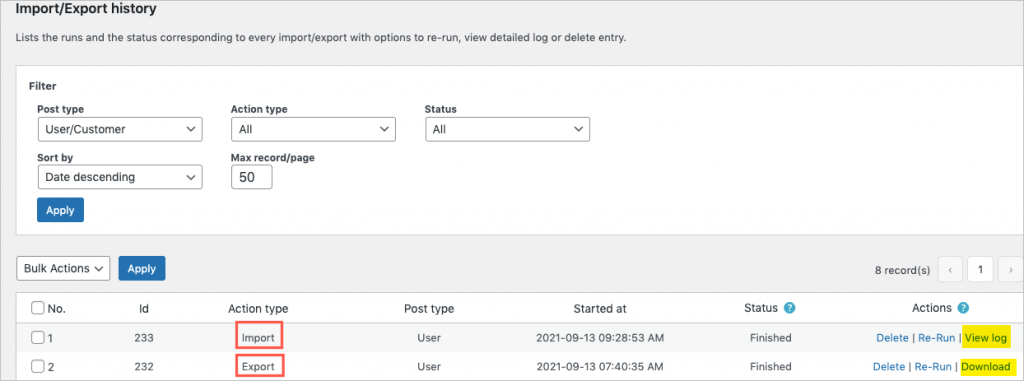
History
The History tab lists the runs and the status corresponding to every import/export with options to :
- Re-run: re-runs the action by taking the user to the respective screen.
- View log: view a detailed import log
- Delete: deletes the entry
- Download: This option appears only for export action type. Here, you can download the generated export file.
Also, you have different filters available to sort the list. You can sort the data on the basis of action type (ie; all/export/import), status ( all/finished), date ( ascending/descending), and by the maximum records to be included in a page.
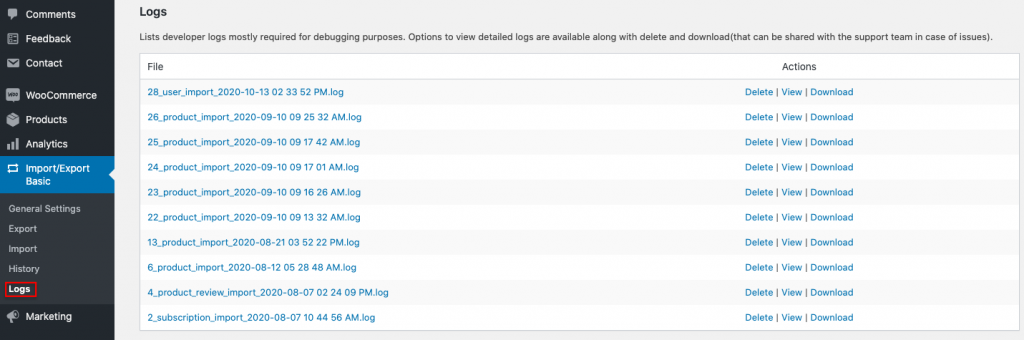
Logs
It lists developer logs mostly required for debugging purposes. Options to view detailed logs are available along with the delete and download options (that can be shared with the support team in case of issues).
General Settings
The general settings window is further divided into :
- General
- Help Guide
- Pro Upgrade
General
In this section, you will be able to configure certain settings that applies to all the features of the plugin.
- Default Export batch count : Here you can give the default count for the records to be exported in a batch.
- Default import batch count : Specify the default number of records to be imported in a batch.
Advanced options
- Maximum execution time: Increasing the time will avoid uninterrupted data transfer. To remove the time limit, set value to zero. Default value is 600 seconds.
- Generate Import log : Here you can choose ‘Yes’ to generate the import log as a text file and to make it available in the log section.
- Default Export method : Here you can choose a default export method from the three given options:
- Quick export (chosen by default).
- Pre-saved template
- Advanced export
- Default Import method : Choose an import method from three options Quick import, Pre-saved template, and advanced import.
- Default Export method : Choose an export method from three options Quick export, Pre-saved template, and advanced export.
- Auto-delete history: You can auto-delete the history by choosing ‘Yes’.
- Maximum entries : Here, you can specify the maximum records to retain in history. It will limit the number of records with the status ‘Finished’. E.g: if you input a count of 50 the system will retain only the most recent 50 number of records with the status ‘Finished’. All other records of any other status will not be impacted by this count.
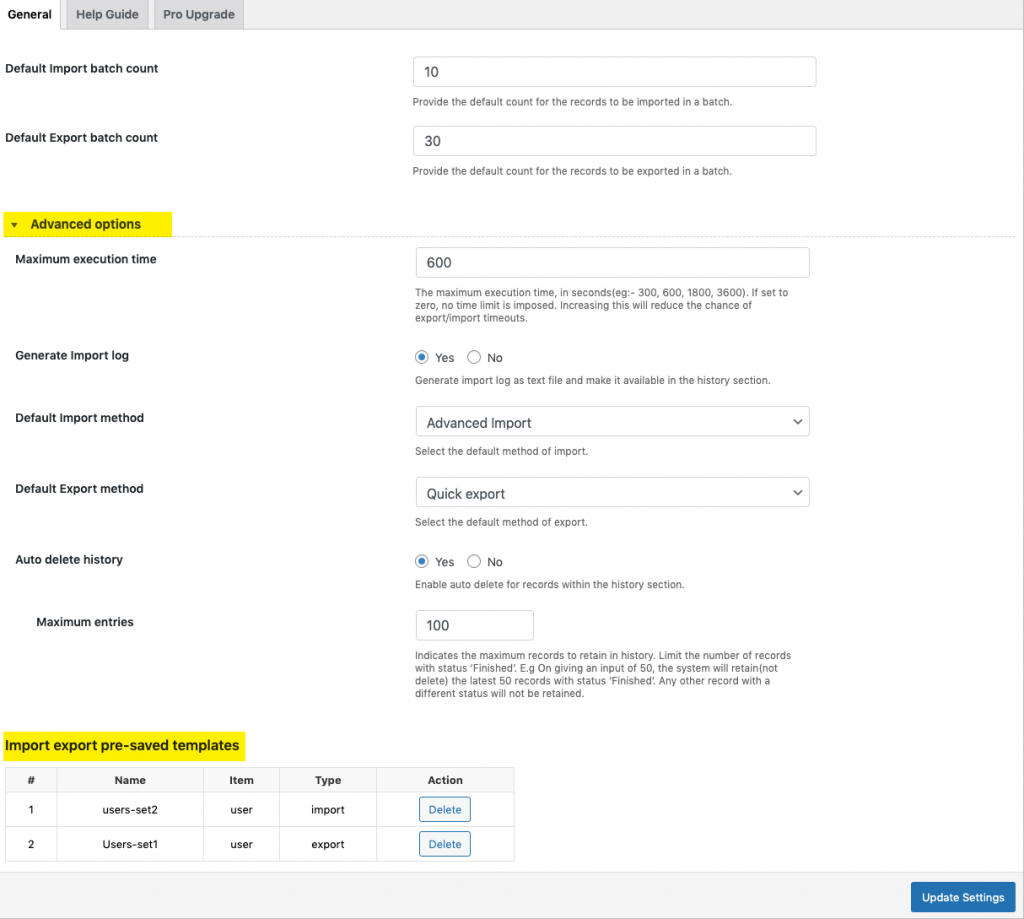
Import export pre-saved templates
This section lists all the pre-saved templates that were saved during an import-export process. You can delete the template file if not needed.
Click on Update Settings to save changes.
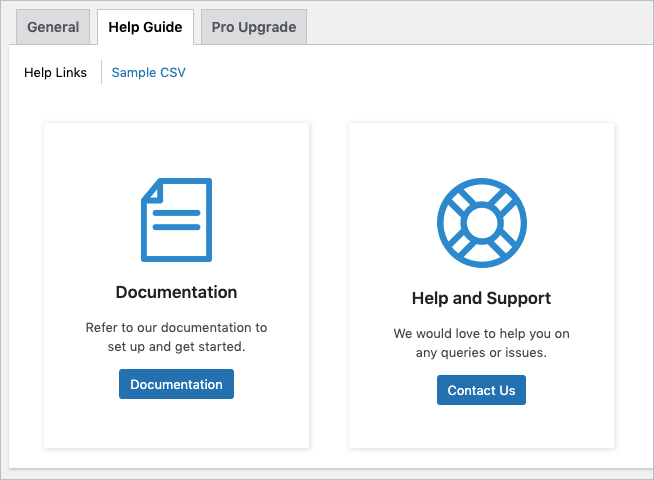
Help Guide
Here you can find the links to the documentation and support of the plugin.
Pro Upgrade
From this tab, you can upgrade to the premium version of the plugin.
Know more about the plugin.


Comments (47)
Wayne
November 20, 2023
In our user profiles we asked additional questions like, Branch of service, dates of service, rank, etc. When downloading members data we are unable to download the additional profile data. How can we download the entire profile data of a member, excluding passwords ?
Vineetha
November 24, 2023
Hi Wayne,
Thanks for reaching out. Custom fields are supported only in the pro version of the plugin with the hidden metadata option enabled. If you are a pro version user, refer to Export/Import WooCommerce Custom Fields of Third-Party Plugins. If you are a free version user, kindly upgrade to the pro version to manage custom fields.
STEFANO
October 24, 2023
how i can ussgn a rule to user?
Vineetha
October 25, 2023
Hi STEFANO,
Thanks for reaching out!
Can you please brief us about the rule you have mentioned? Kindly contact customer support for further assistance.
Gustavo
March 23, 2023
Hole, como están?
Es posible desabilitar la opción “Enviar correo electrónico a nuevos usuarios” durante la importación en la versión libre?
Gracias
Saludos
Mark
March 28, 2023
Hi Gustavo,
Thanks for reaching out!
The email to new users option is a premium version feature and therefore it is not available in the free version. The free version does not send emails to users upon import. Let us know if any further queries.
Mehrdad
January 7, 2023
I imported the users by CSV file. but the users are inactive. how can I import the file with activated users?
Alan
January 27, 2023
Hi,
Can you please reach us via support and share the CSV file you used to import? You may please share the CSV file after removing user sensitive data from the CSV.
James H
October 12, 2022
I am trying to download a list of Users with their Company Name included. How is that possible? Thank you.
Alan
October 13, 2022
Hi,
You may please just export the users by selecting billing address fields and the company name data will be exported to the billing_company column in the exported file.
Gill
March 14, 2022
I am trying to export a list of clients including their email addresses and phone numbers. I have been able to get a download with the emails but not the phone numbers – how can I include them?
Mark
March 18, 2022
Hi Gill,
By default, the WordPress user data does not include a phone number field. Do you use Woocommerce or any other method that saves phone number fields?
Dave Howe
January 22, 2022
Haven’t found what users are included in the export file. My need is comments to posts. The first list I did produced around 500 emails but have over 4000 commenters to my posts. Thought all commenters including spam would be able to download. My goal is once I can do that then can have the list cleaned at one time.
Help
Dave Howe
https://biblicalhealingdirectory.com/
Alan
February 2, 2022
Hi,
The User import-export plugin only supports exporting the registered users and the guest customers. If the commenters are not listed on your site as a user then they cannot be exported using the plugin.
bluelogiclabs
January 6, 2022
I am trying to export my user’s pws not hashed, I want to know what their pw’s are. Is this possible?
Alan
January 6, 2022
Hi,
Sorry to let you know that the original passwords of the users cannot be exported. The user passwords are stored in a hashed format in the database.
parsa
December 21, 2021
hi
how can i import yhe customers that dont registered by email.Only they sign up ehit phone number.
i cant move this users and this eror apiered.
-Ensure the import file has the user’s email ID for a successful import. Use default column name user_email or map the column accordingly if you are using a custom column name-
Alan
December 30, 2021
Hi,
If you are trying to migrate the guest customers then please make sure that you copy/map the email address from the billing_email column to the user_email field while importing.
David
December 5, 2021
Hi Team,
I am having a problem importing fields (first name, last name, etc) that are in another language, they are imported as “blank”. CSV file is saved in utf-8. Any suggestions? Thx.
Alan
December 6, 2021
Hi David,
Can you please share your importing CSV via support? You may please remove the user-sensitive data from the CSV before sharing.
Lisa Fadden
November 12, 2021
Hi there,
when I imported all my customers I received a message saying all imports were skipped because email is not valid… ?
Mark
November 16, 2021
Hi,
Kindly make sure that you haven’t included any extra space in the email column. If the issue still persists please reach us via support.
Ed Boon
October 28, 2021
Hi,
Is it possible when you import the users to automatically disable the checkbox Sent user notification?
Please let me know.
Regards,
Ed Boon
Mark
October 29, 2021
Hi,
By default in the pro version plugin the Email new users option will be disabled during import.
Yvonne
August 30, 2021
Is it possible to import a user’s profile picture? If so, do I use a link on the CSV to where the image is stored on my server, say in uploads/bio-images?
Mark
September 1, 2021
Hi,
By default, WordPress loads the profile picture from gravatar.com based on the user email. Currently, there is no option to import a user’s profile picture from a CSV file. Please tell us whether you are using any third-party plugin to add profile pictures to the users. If yes then please reach us via support.
Rebecca
August 9, 2021
I am trying to import users with WebToffee Import Export (Basic), and I cannot get to step 3. I dropped my csv file in successfully, and when I click “Step 3: Map import columns” there is a very quick pop up message that says “creating temp file and validating”, but the screen never advances to the next step.
Mark
August 12, 2021
Hi,
Please reach us via support.
Alex
July 21, 2021
Will the user be notified that they have been imported?
Mark
July 25, 2021
Hi Alex,
You can choose to send emails to users upon importing. This is an option in the import screen.
Nico
July 19, 2021
Hello,
Is it possible to import advanced fields like VAT-number or representative?
Thanks
Alan
July 26, 2021
Hi,
If you are using any third-party plugin to create custom data fields to users then it will be stored as metadata. You can export and import metadata using the pro version plugin. You may please export a user with the option Hidden meta checked in the export mapping and the custom metadata fields will be included in the exported CSV. Later on, you can use the same exported CSV as a template to import data back.
Antony Johnson
June 24, 2021
On import the plugin says successful but the user details have not been changed.
I set the plugin to update and retain password but none of the user changes are showing.
Alan
June 25, 2021
Hi,
Please reach us via support and share your import file so that we can check it.
Pierre GAIN
May 13, 2021
Hi, I have a file with my users (user_login and password in clear, and email…) Last year I succed to do that and the password were encripted (I see that when I export the file) I wanted modify my lsit and i did not succeed to add new user from Excel ! i cannot remember how I did in december 2020…
A line of the export file :
customer_id user_login user_pass user_email first_name last_name
15 1329 $P$B0uq9j/jrKmQhxptmMbiR3MprB6ATx0 1329@gmail.com BERNARD BOU
and what I have in my input file :
customer_id user_login user_pass user_email first_name last_name
15 1329 00850 1329@gmail.com BERNARD BOU
For connecting, people have to entre 1329 and 00850. They do not have to change PW, as it is a list of owner in my building.
Cab you help ? Thanks in advance.
Alan
May 21, 2021
Hi,
You can import the hashed password as it is by selecting “yes” for the option Retain user passwords so that users can log in with same old password. If you are importing new plain password from the file please select “no” for the option Retain user passwords.
If you still have any queries please reach us via support.
Joshua
April 8, 2021
Hi,
i’m using the basic version and when I want to make an export from all my clients, I only get 45 clients. How can I make an export of all my clients (600+)?
Regards,
Joshua
Mark
April 13, 2021
Hi,
If you are required to export the details of the unregistered guest users on your site then its not supported in the basic version. E
Mark
April 13, 2021
Hi,
As per our understanding, you are required to export the unregistered guest users from your site. Exporting guest users is one of our premium features. The basic version of the plugin does not support it.
Barbara Bourn
April 1, 2021
How do you delete a pre-saved template. I had created several iterations before deciding on the final template. I would like to delete the others.
Mark
April 13, 2021
Hi,
Currently, there is no option to delete the pre-saved templates. We will be including that feature in the upcoming release.
Aaron Gil Olandria
March 5, 2021
I’ve exported a csv file of customers from wix and uploaded it using this plugin but it was saved as users not customers. Is there a way to have it saved as customers in woocommerce?
Alan
March 8, 2021
Hi,
As per our understanding you are having issue with listing the imported users under Woocommerce > Customers, instead they are listed under users section. The reason why the imported users do not show up under Woocommerce > Customers is because any one user to appear in this section
(DB view wp_customer_lookup) has to have at least 1 placed order. And freshly imported users have 0 orders.
So once an imported user places his/her first order, this view will be populated and the the users will show up under
Woocommerce > Customers
Marc Kreidler
December 15, 2020
Hi there,
If I am migrating a single-site install into a multisite install will the retain user passwords option work?
Mark
December 16, 2020
Hi,
Yes, you can migrate the user password.
Kingsley Lewis
November 6, 2020
This plugin is exactly what I need, thank you. Just one question please, what happens if I select no to Retain user passwords?
Thanks in advance
Mark
November 17, 2020
Hi,
A new password will be generated for the users automatically by WordPress.