This article applies to the following document types:
- Invoice
- Packing slip
- Delivery note
- Dispatch label
- Credit note
- Picklist
- Proforma invoice
Using WebToffee’s Customizer for WooCommerce PDF Invoices add-on, store owners can easily add product attributes to WooCommerce documents. Product attributes can be shown in two ways using the customizer:
- Under the product name within the product table.
- Steps :
- Navigate to Invoice/Packing > Preferred document type(eg. Invoice) > Customize.
- Click on the product table of the active template.
- From the Editor pane on the right side, click on the element Product.
- In the expanded product window, click on the ‘+‘ icon on the right side of Meta below product name.
- In the dialog box that pops up,select Product attribute from the Meta type dropdown.
- Now, add the Product attribute key and a suitable label.
- Click on Save.
- Steps :
- In a new column within the product table.
- Steps :
- Navigate to Invoice/Packing > Preferred document type(eg. Invoice) > Customize.
- Click on the product table of the active template.
- Now, click on the ‘+‘ icon present at the top right corner of the editor pane.
- In the dialog box that pops up, select Product attribute from the Column type dropdown.
- Fill in the Product attribute key and a suitable Column header.
- Click on Save.
- Click on Save Template.
- Steps :
Adding a product attribute
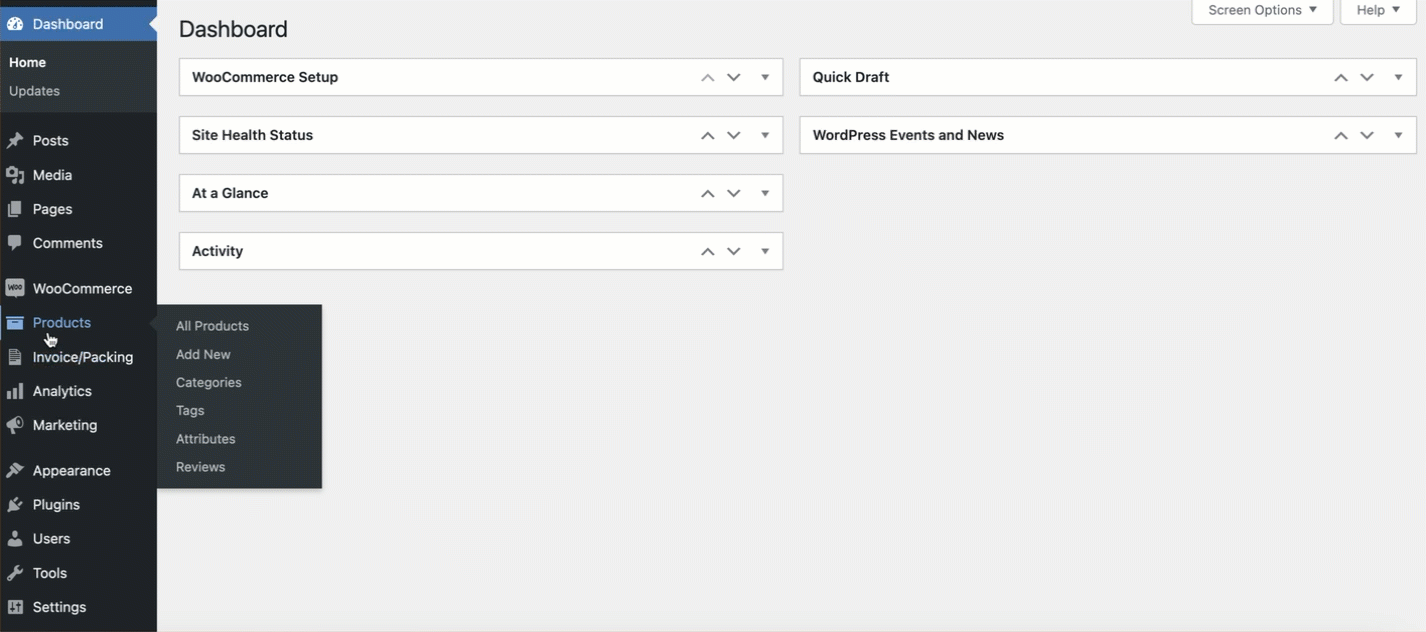
- From the WordPress dashboard, navigate to Products > Attributes.
- In the Attributes page, add a new attribute by giving it a suitable name and a slug.
- On adding an attribute, go to Configure terms and add the variations/terms for the new attribute.
- Now, navigate to Products > All Products, click on a product to add the attribute.
- Under the Edit product page, head to Attributes and add the previously created product attribute to the product.
Product attribute beneath the product name
Let’s go through the steps on adding a product attribute beneath the product name on invoices.
- Navigate to Invoice/Packing > Invoice > Customize.
- In the active invoice template, scroll down and click on the product table. The editor pane on the right will show all the elements within the product table.
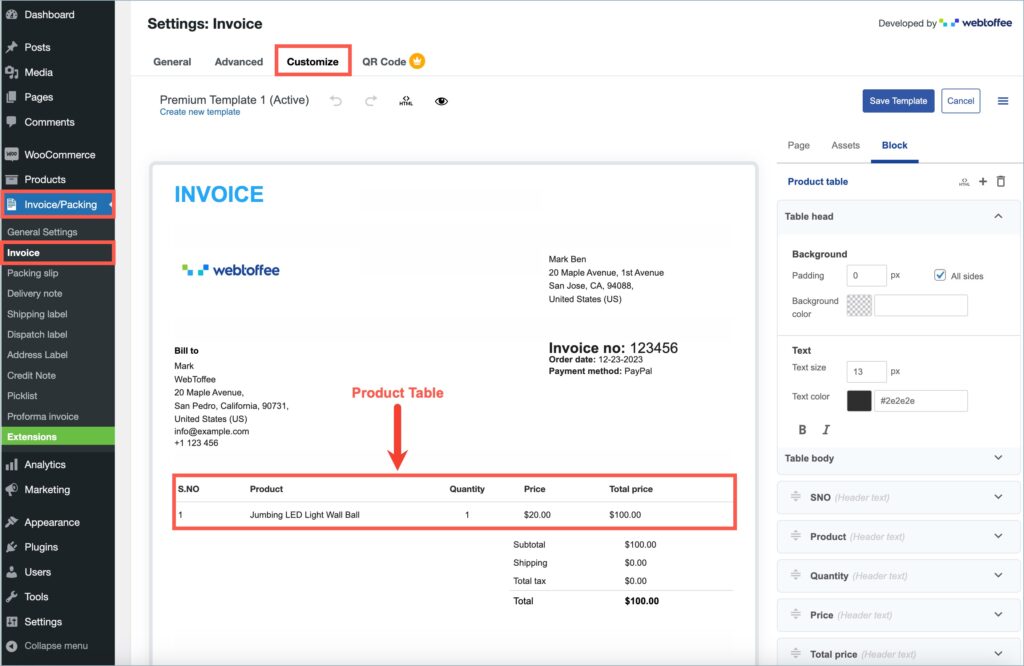
- On the editor pane, click on Product. The product element will expand showing additional features.
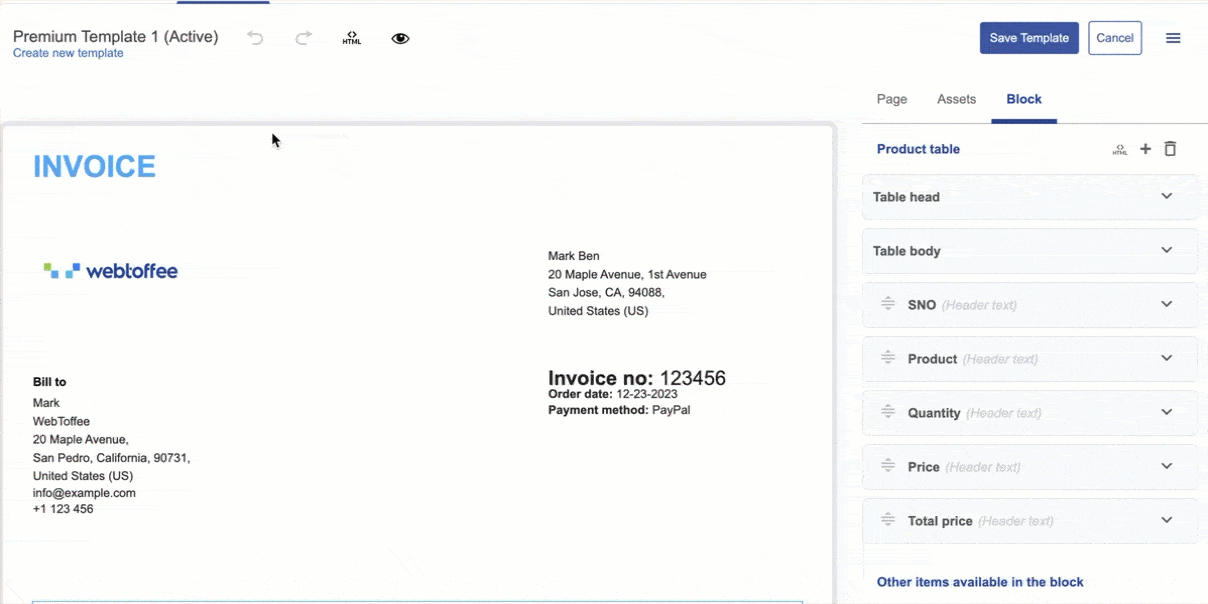
- Click on the ‘+’ icon located at the right side of Meta below product name. A dialog box will pop up.

- Inside the dialog box, from the Meta type dropdown, select Product attribute.
- Key in the Product attribute key and an attribute label in the fields that follow. Product attribute key is the slug of the attribute specified on the attributes page.
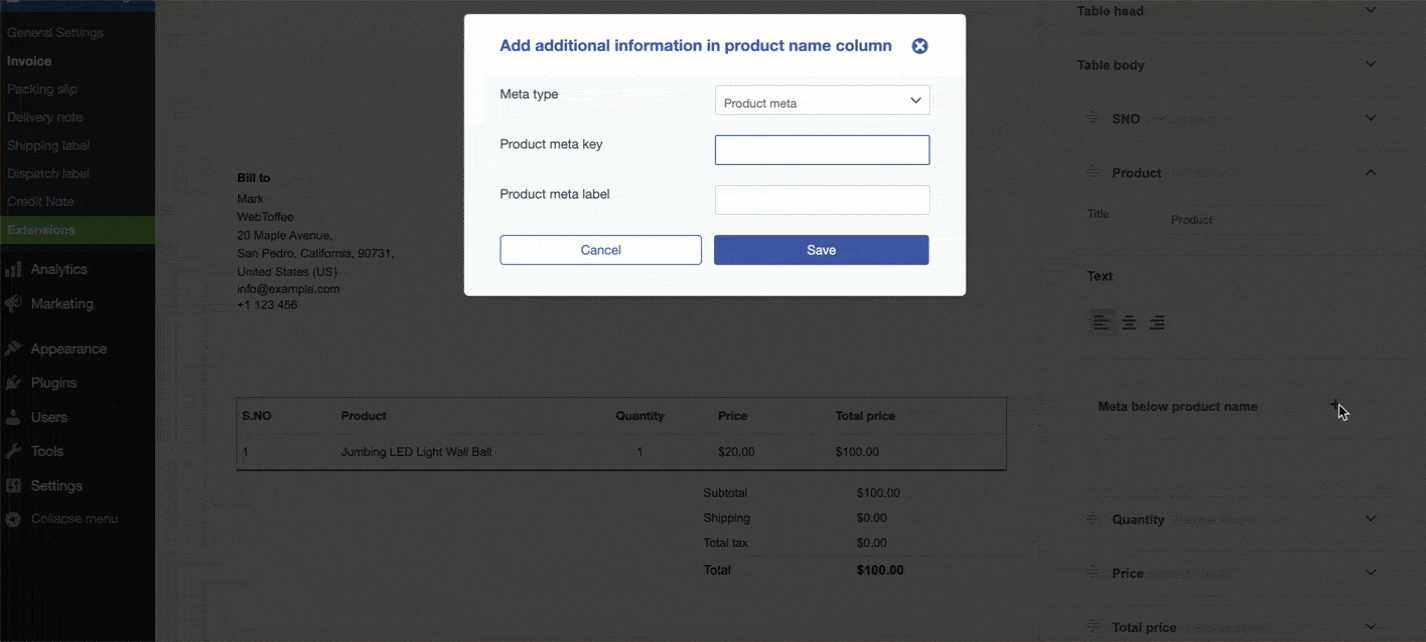
- Click on Save.
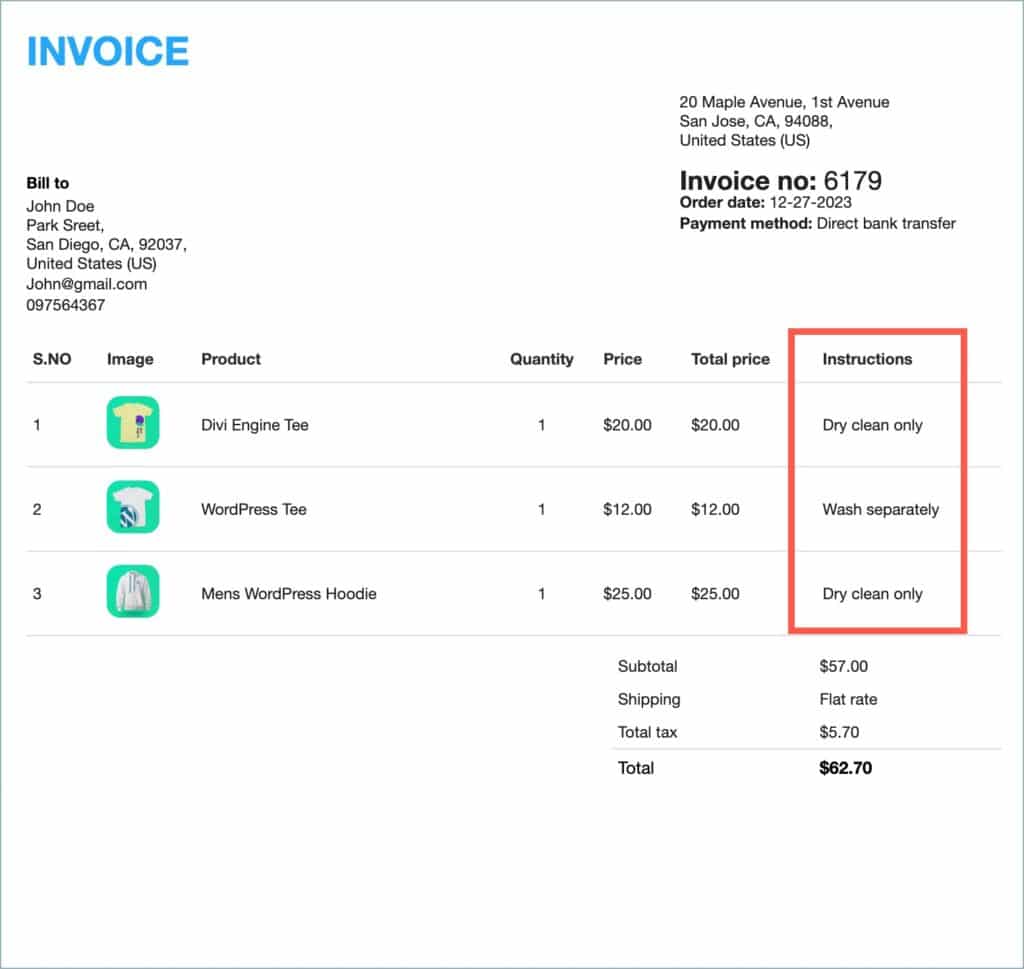
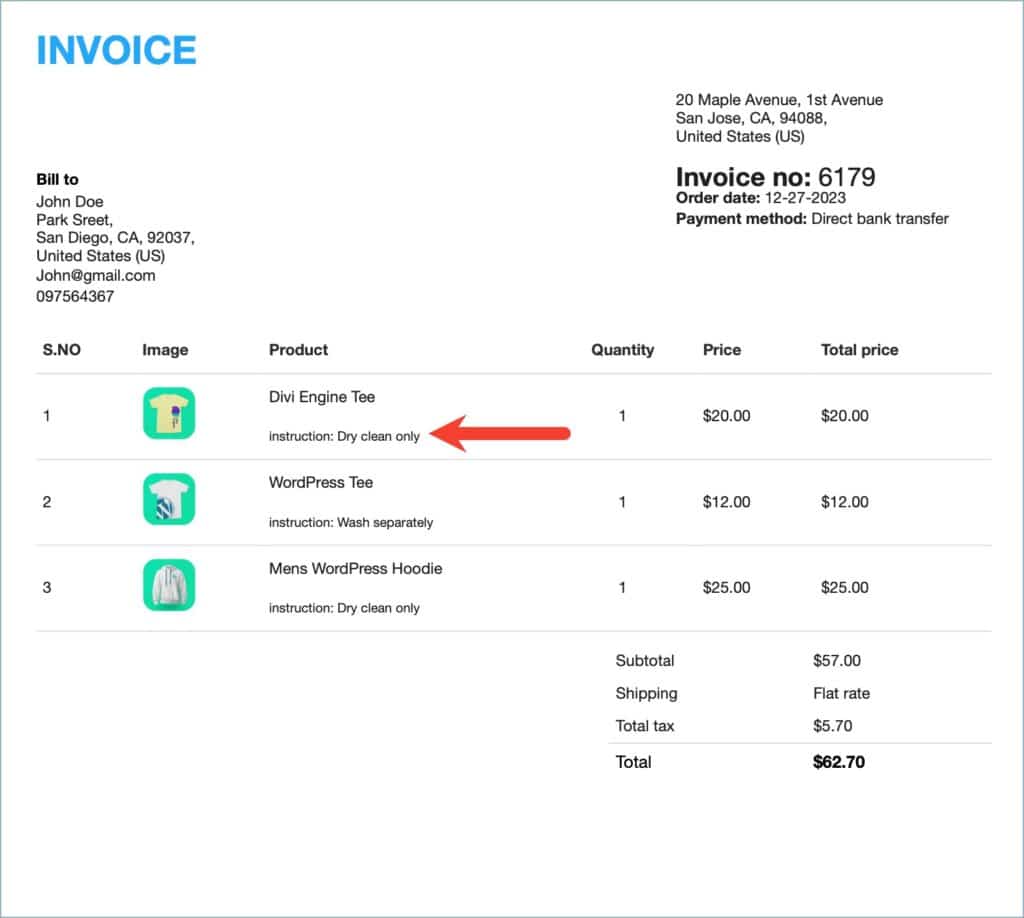
The image below is an example of how product attributes will appear beneath the product name in an invoice document.
Product attribute in a new column within the product table
The below steps will help you add product attributes in a new column within the invoices:
- Navigate to Invoice/Packing > Invoice > Customize.
- In the active invoice template, scroll down and click on the product table. The editor pane on the right will show all the elements within the product table.
- Click on the ‘+’ icon present at the right top corner of the editor pane. A dialog box titled Add new column will pop up.
- From the Column type dropdown, select Product attribute. On selection, new fields will open up.
- Add the Product attribute key and a Column header for the new column.
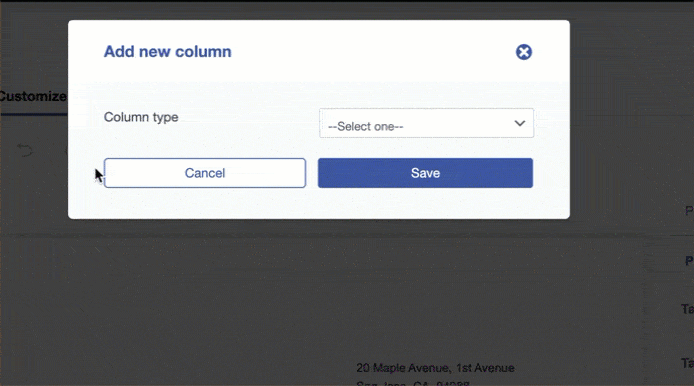
- Click on Save.
- Finally, click on Save Template to save the changes for the active template.
The image below is an example of how product attributes will appear in a column within the invoice document.