- Invoice
- Packing slip
- Delivery note
- Dispatch label
- Credit note
- Picklist
- Proforma invoice
Store owners can easily add product meta to the product table of WooCommerce documents using WebToffee’s Customizer for WooCommerce PDF Invoices add-on. Below are the steps to add a product meta:
- Navigate to Invoice/Packing > Invoice(or preferred document type) > Customize.
- Head to the Product table of the active template.
- Click on the ‘+ ‘icon in the top right corner of the editor pane and select Product meta from the Column type dropdown menu.
- Enter the Product meta key and a suitable column header.
- Click on Save.
- Finally, click on Save Template.
Adding product meta using customizer
Given below are the detailed steps on how to add a product meta as a new column in the product table of invoices using customizer.
- Navigate to Invoice/Packing > Invoice > Customize.
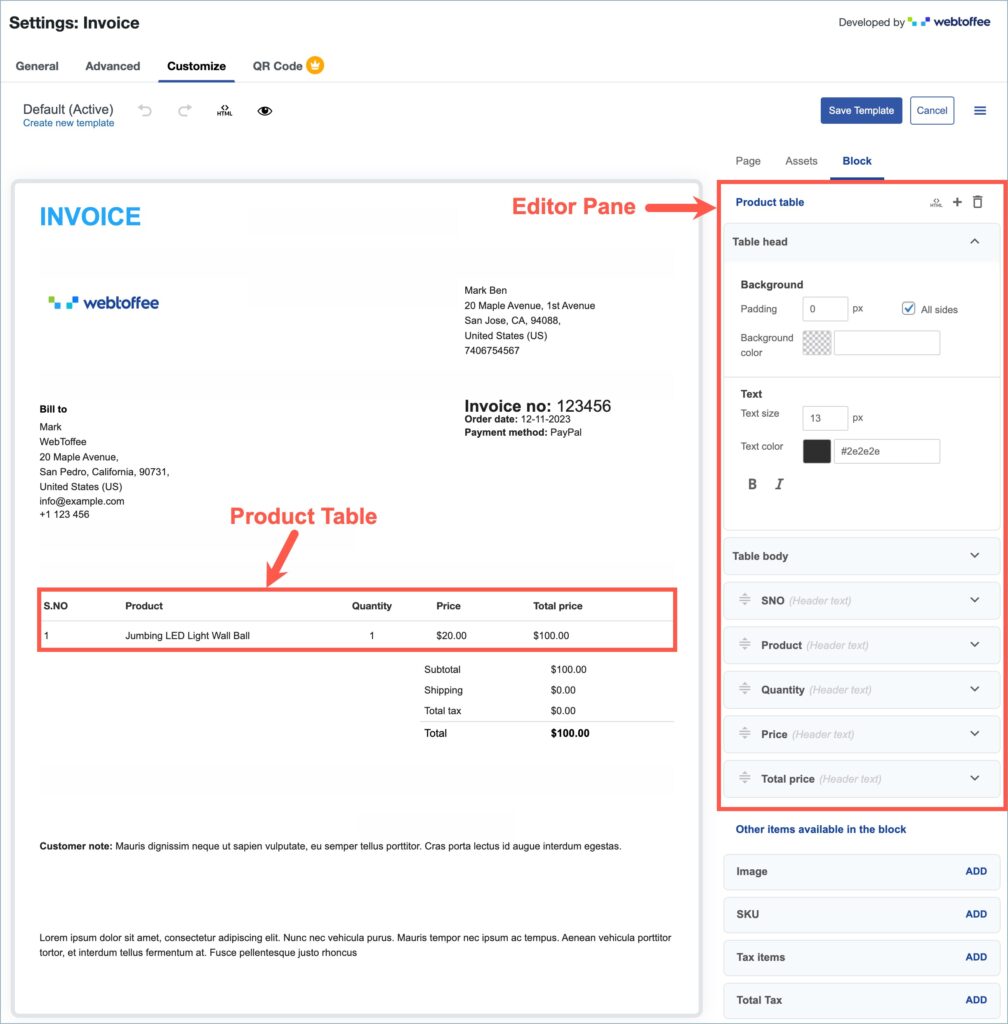
- Click on the product table of the active invoice template. The editor pane on the right side will list all the elements in the product table.
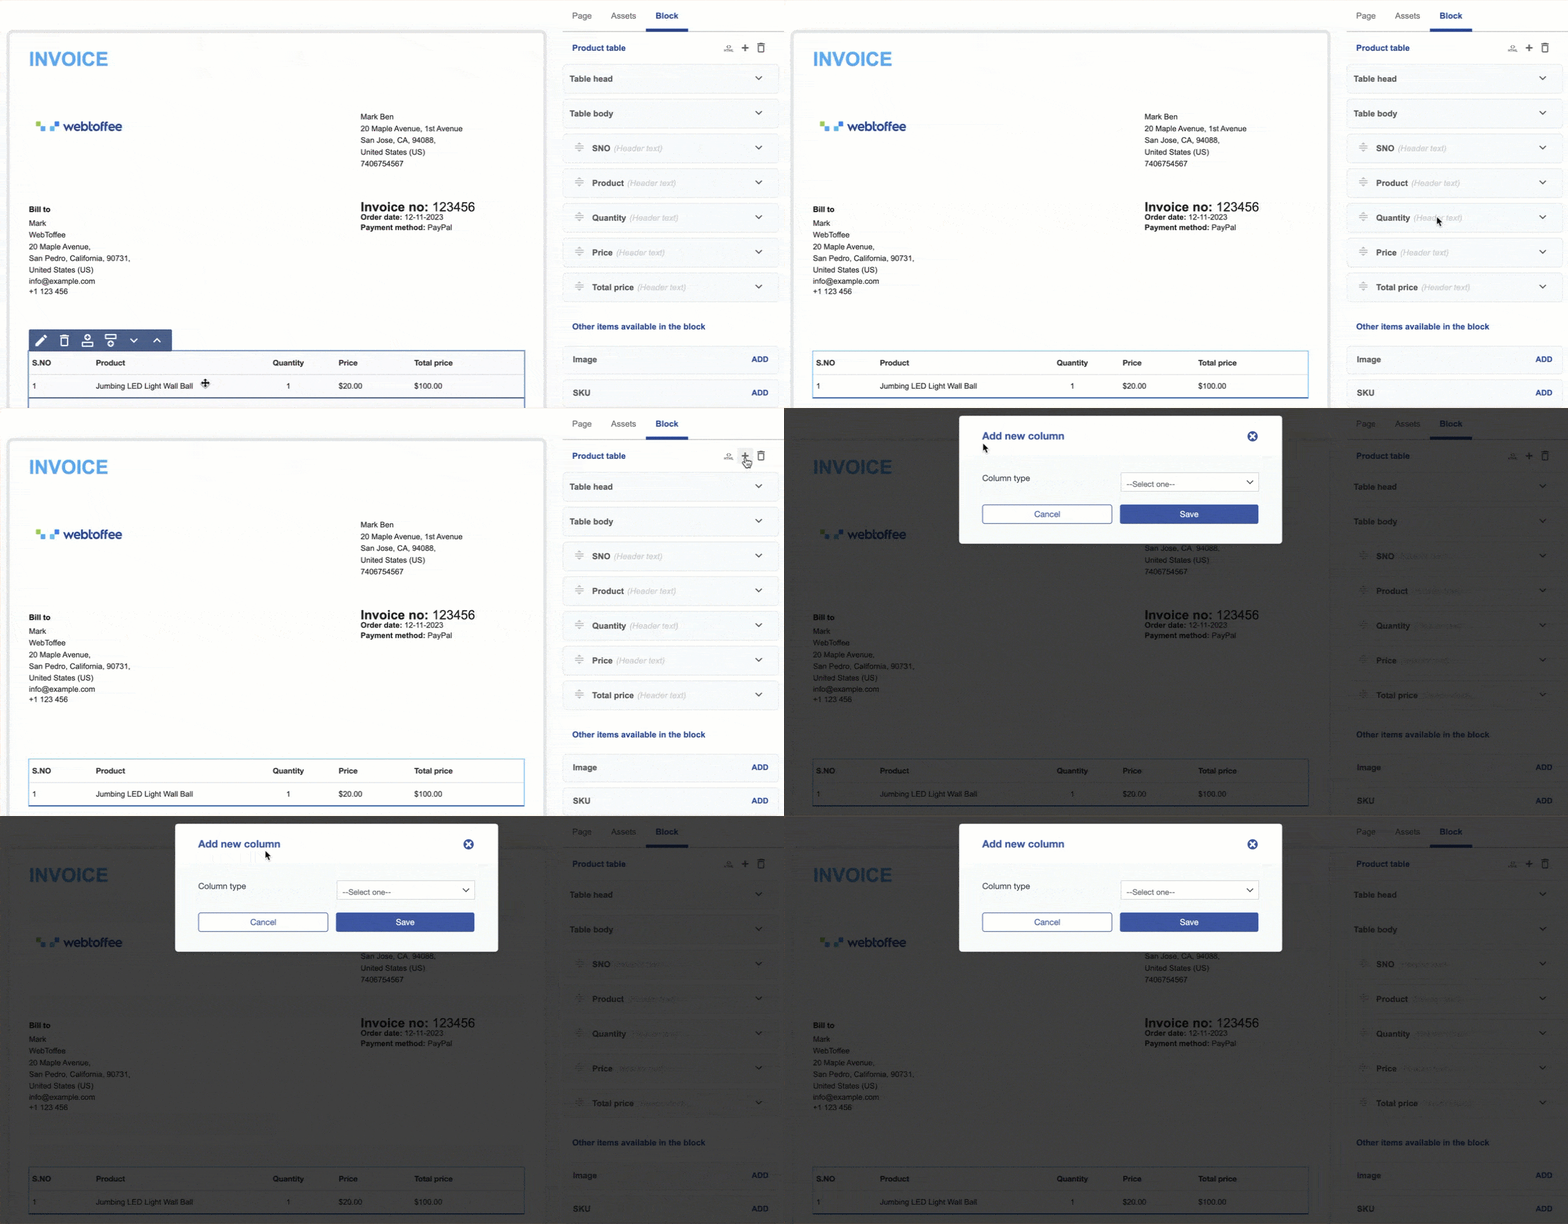
- Click on the ‘+’ icon present at the right top corner of the editor pane. A dialog box titled ‘Add new column’ will pop up.
- From the Column type dropdown, select Product meta. On selection, two additional fields to enter Product meta key and Column header will appear.
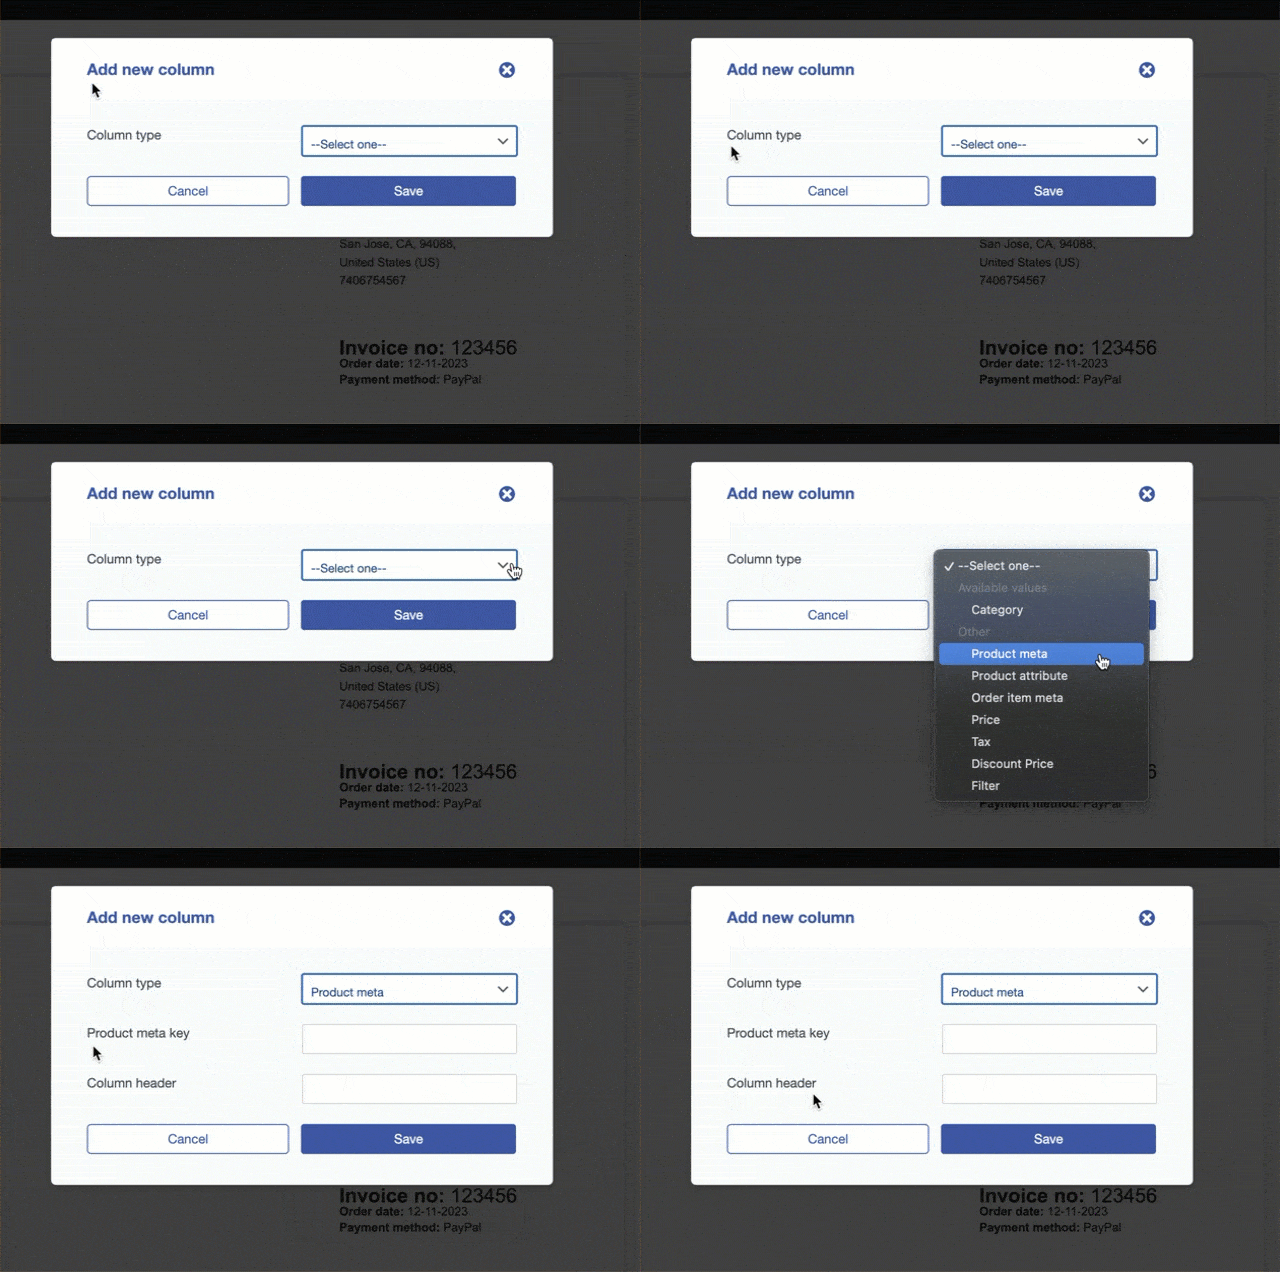
- Enter the Product meta key and a suitable Column header for the new column. Check your site’s database for the product meta key.
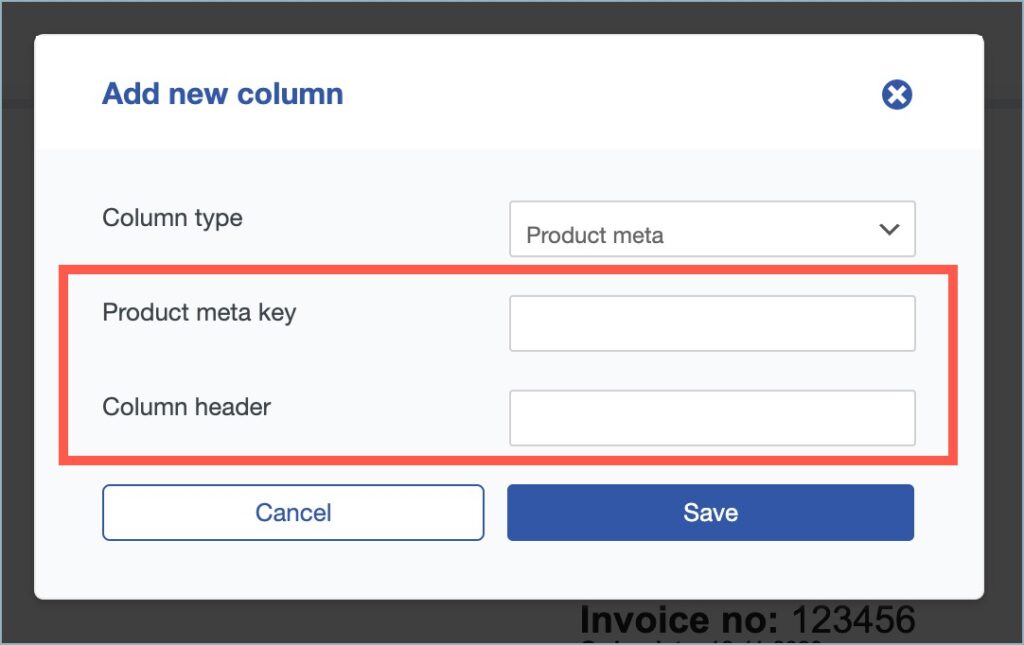
- Now, click on the Save button to add the new product meta column to the active invoice template.
- Finally, click on Save Template to apply the changes to the active template.
Use case
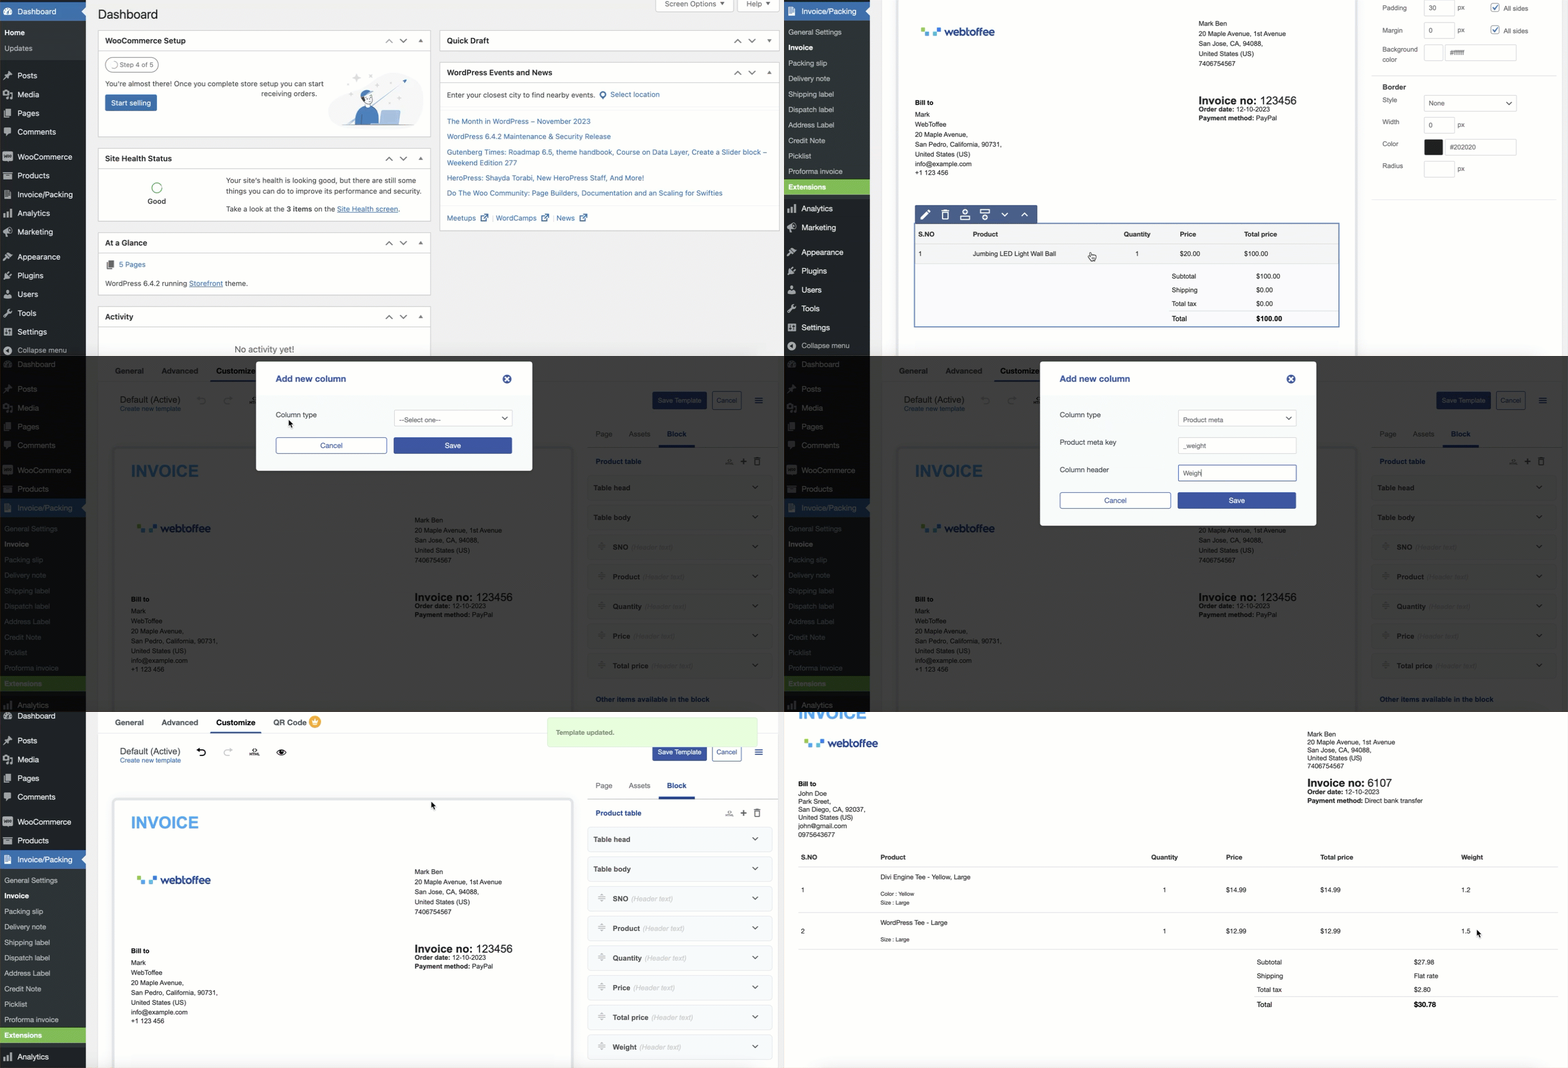
Let’s take an example of adding ‘Weight’ (product meta) to the invoice product table. The GIF below illustrates the detailed steps.
