Coupon banners provide an enticing visual representation of discounts, promotions, sales, and special offers that can’t be missed. This article will provide valuable insights into the world of coupon banners, and how to set up a coupon banner seamlessly with the help of the Display Discounts for WooCommerce plugin by WebToffee.
The basic steps involved in creating a coupon banner are:
- Navigate to Banner configuration page.
- Set up a title and Associate the banner with a coupon.
- Choose a banner layout.
- Customize the banner layout.
- Set up triggers.
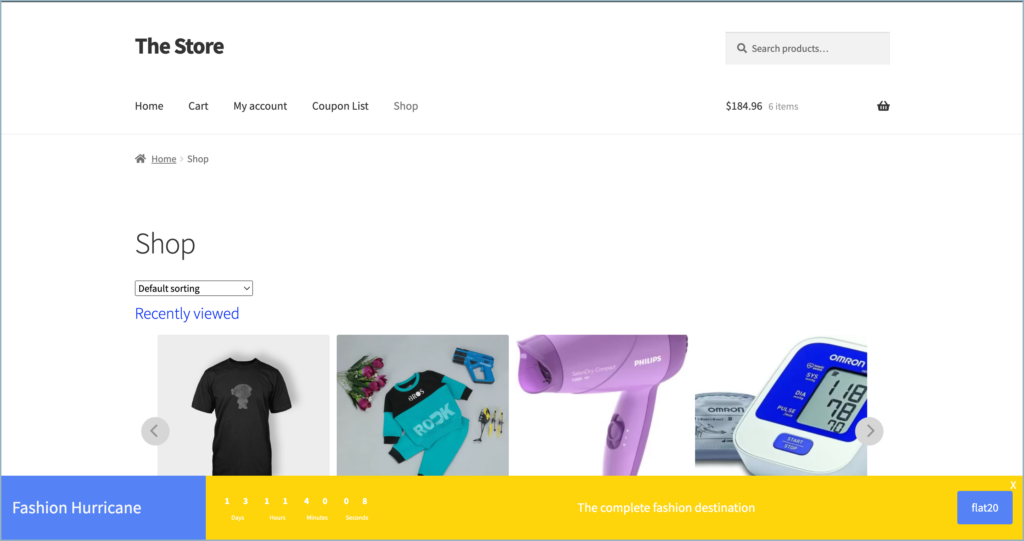
Here is a preview of how the banner will appear on the website to represent a fashion sale with a coupon associated to give a flat 20% discount on fashion purchases.
Step 1 – Navigate to the Banner Configuration page
To set up a coupon banner
- From the WordPress dashboard, navigate to Marketing > Display Discounts > Add banner/widget.
- Alternatively, if Smart Coupons for WooCommerce is installed, then navigate to Smart Coupons > Display discounts > Add banner/widget.
- Click on Create new banner/widget.

Step 2 – Set up a title and Associate with a coupon
As an initial step:
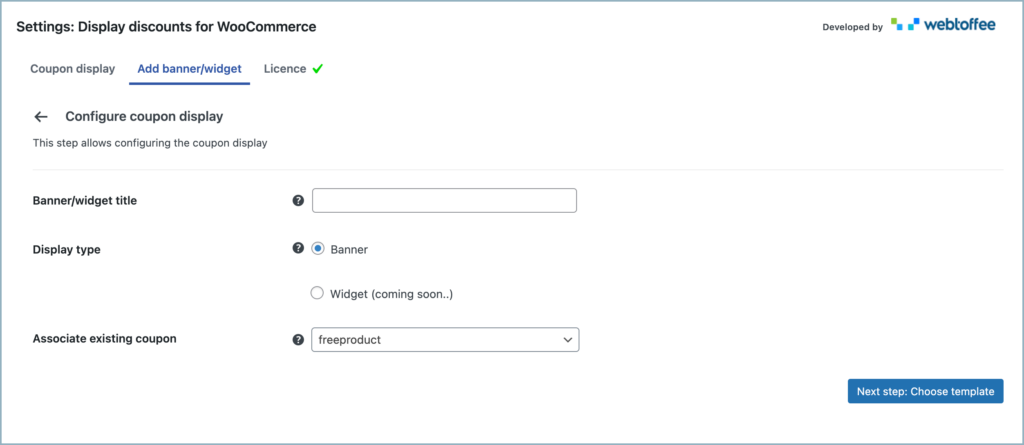
- In the Banner/widget title section, key in an appropriate title for the banner.
- This title is only used to identify the banner from the back end.
The plugin enables the seamless integration of an existing coupon on the website with the banner, ensuring that the coupon is automatically applied when the banner is clicked.
- Choose the relevant coupon from the Associate existing coupon dropdown menu.
- For example, consider selecting a coupon that gives a flat 20% discount for fashion products.

- Click on Next step: Choose template.
Step 3 – Choose a banner layout
The plugin offers a few pre-designed coupon banners to choose from, as displayed below.
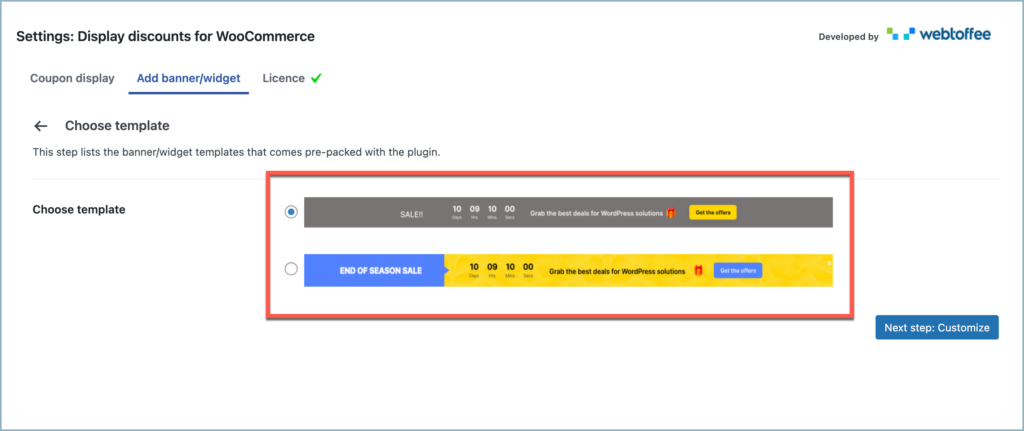
- Select a layout for the banner from the list
- Click on Next step: Customize.
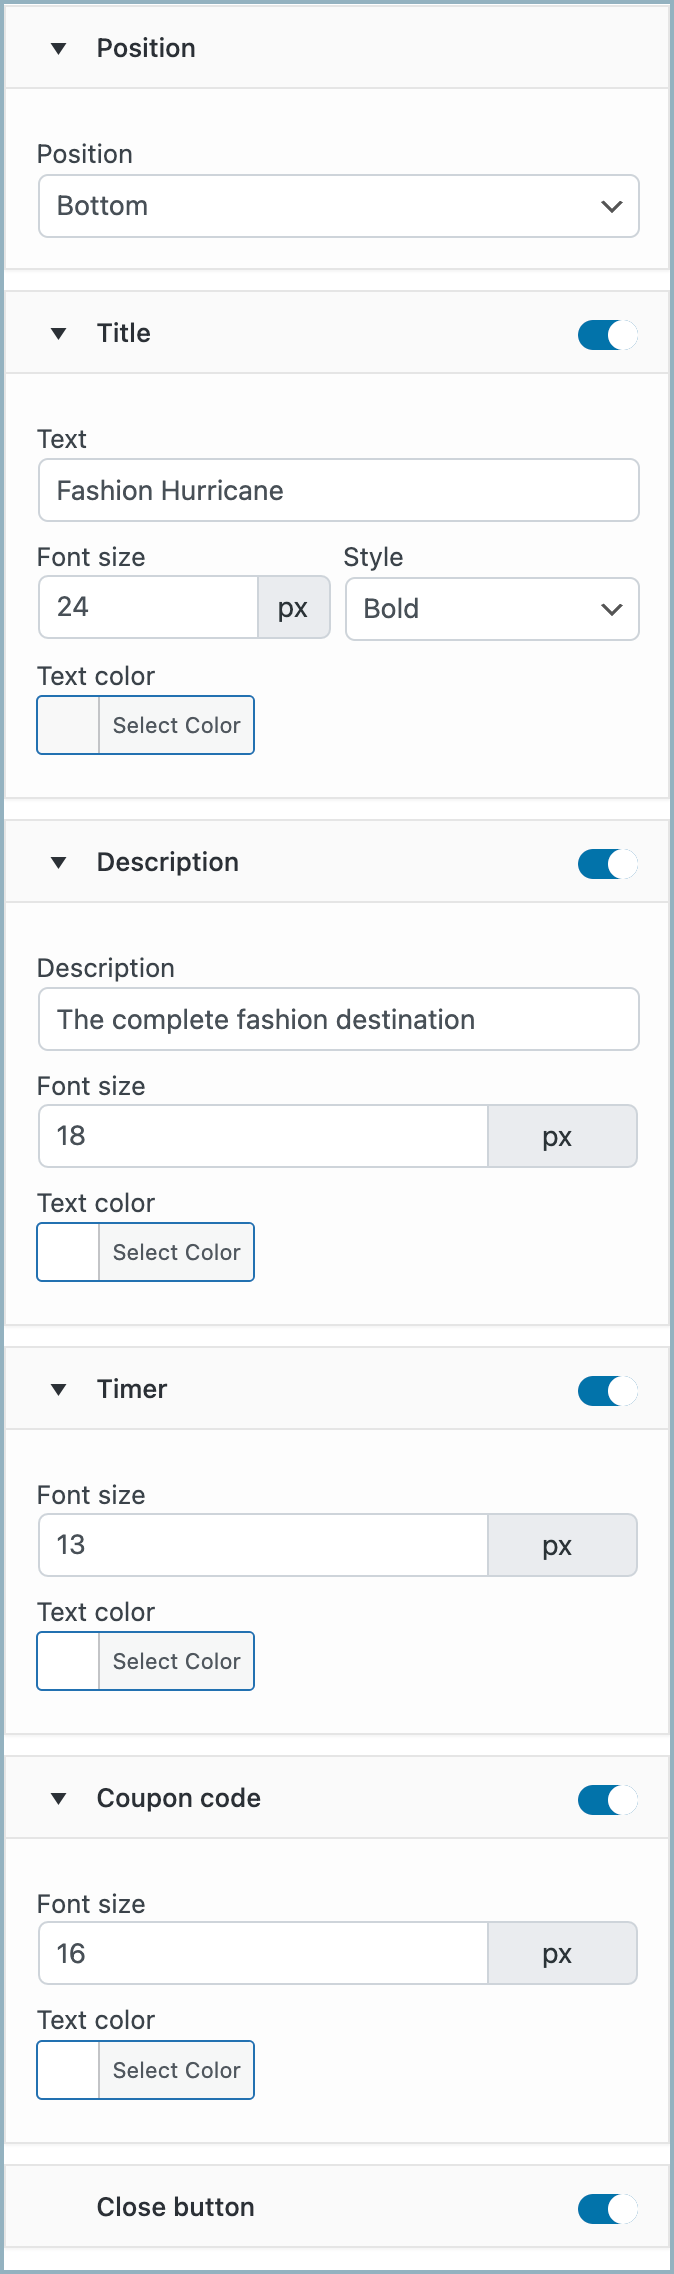
Step 4 – Customize the banner layout
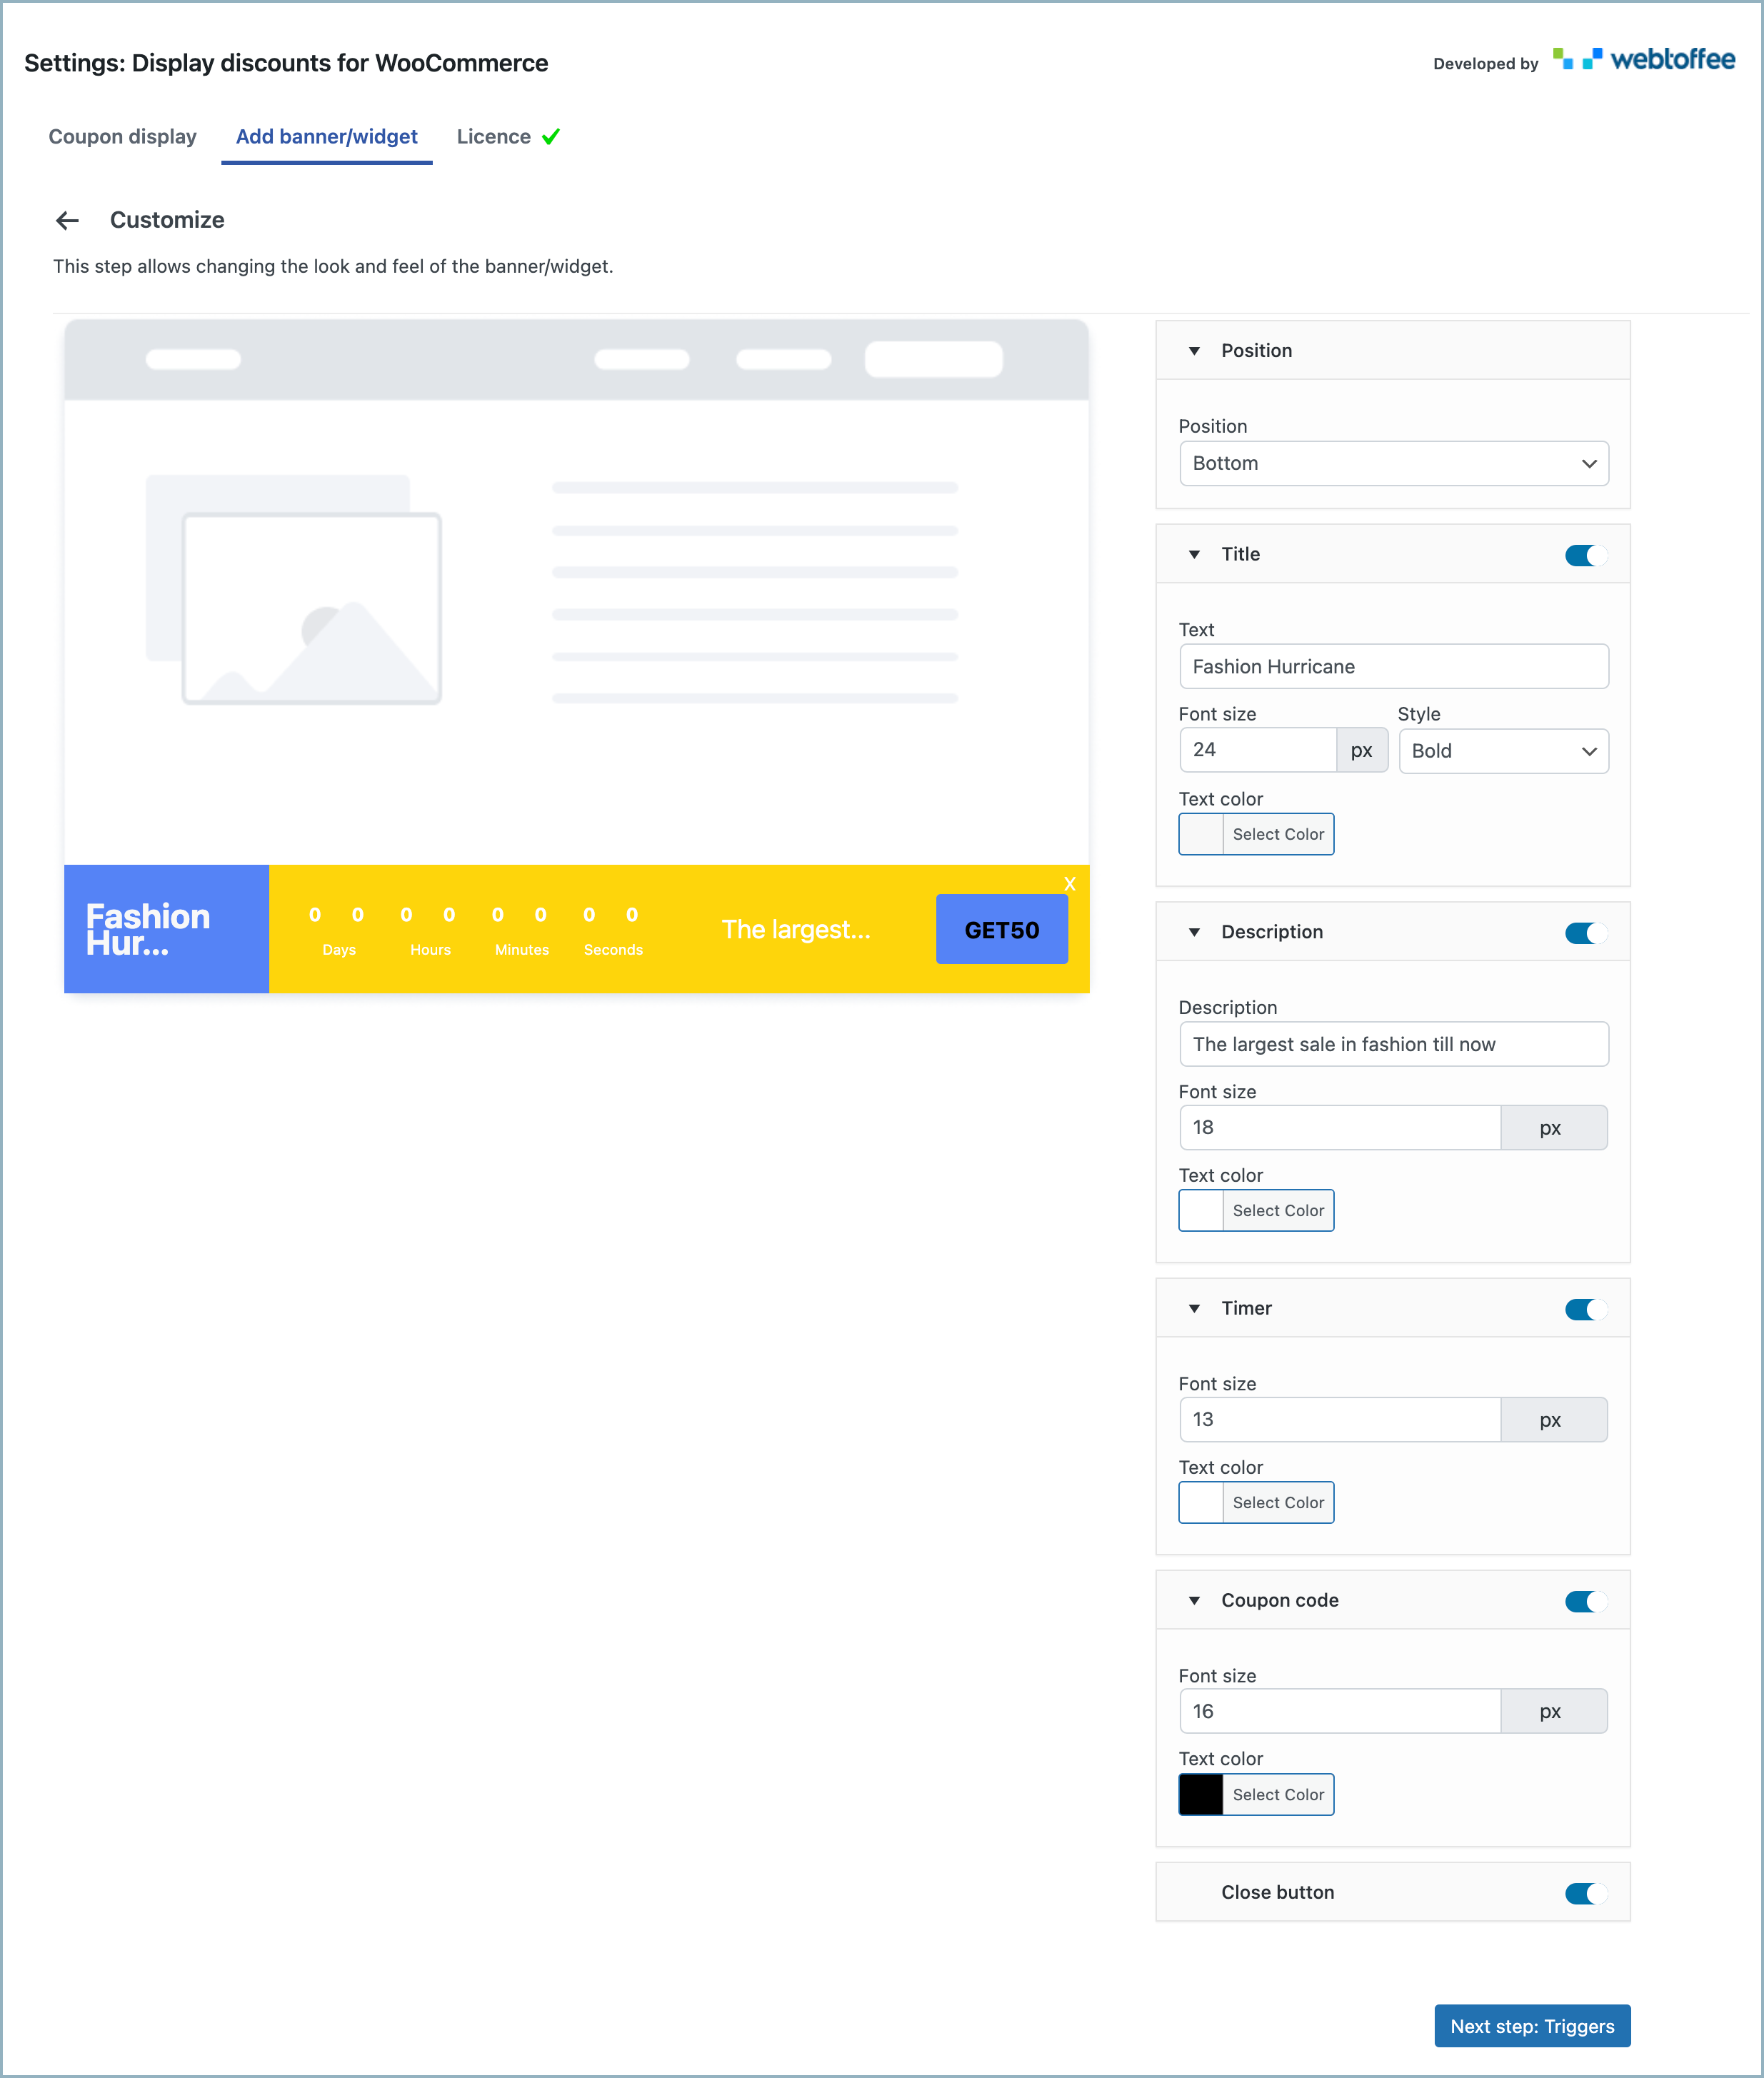
- Select a suitable location for the banner from the Position drop-down. The available positions are:
- Bottom of the page.
- Top of the page.
- Set the title and customize the text size, style, and color using the Title drop-down.
- Set a description for the banner and customize the font size and color using the Description drop-down.
- Customize the timer font and color using the Timer drop-down.
- Customize the Coupon code font and color using the Coupon code drop-down.
- Toggle the Close button to include a close button in the banner.
- Click on Next step: Triggers.
For example, consider the shown combination.
Here is a preview of how the banner will appear:

Step 5 – Set up triggers and Choose where to display
A trigger serves the purpose of initiating or activating the display of a banner on a specific webpage. For example, the banner becomes visible to users once they stay active on the webpage for 4 seconds.
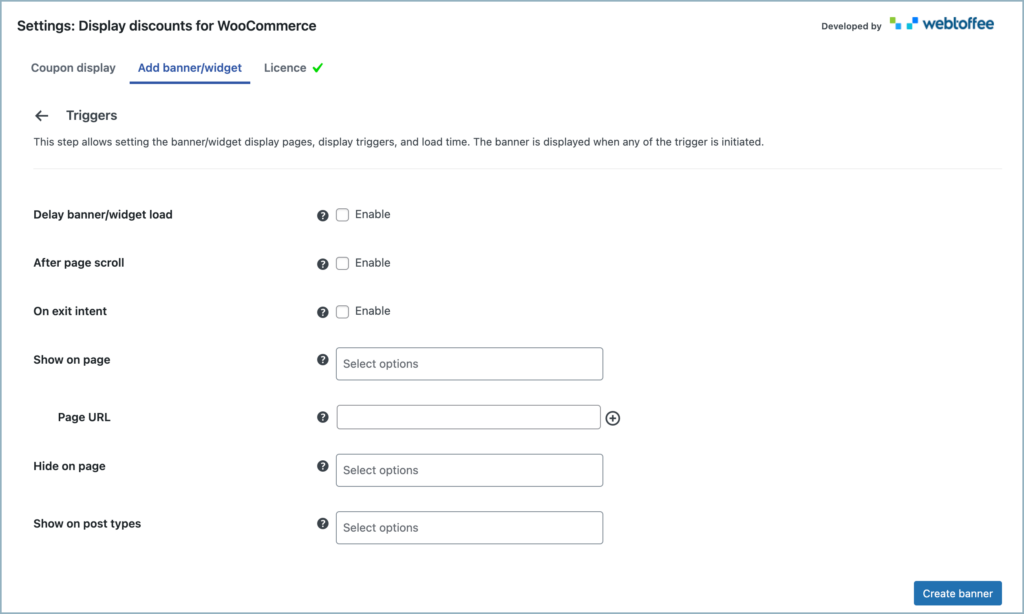
Choose the desired triggering option from the list.
- Delay banner/widget load – After a specific amount of time has passed since entering the page, the banner will be displayed.
- After page scroll – The Banner will be displayed once the customer has scrolled through a set portion of the page.
- On exit intent – The banner will appear when the user’s cursor approaches the Close window button.
- To indicate the page on which the banner should appear, choose an option from the Show on page list. Alternatively, leave the field blank to display the banner on all pages.
- If there is a need to display the banner on a specific custom page, please provide the URL of the desired page in the Page URL section.
- If there is a requirement to hide a banner from a specific page, select the page from the Hide on page list.
- Select the required post type from the Show on post type list to display the banner on a specific post type.
- Finally, click on Create banner to generate the banner.
Below is a sample banner that appears on the shop page after 4 seconds of entering the page to represent a fashion sale with a coupon that gives a flat 20% discount on fashion purchases.