Scheduling the import export tasks in Shopify gives you more flexibility and helps you automate the task for repeated import export jobs. In this article, we will look into the step-by-step process to schedule product import and export in Shopify.
By scheduling import/export jobs, you can automate the process of updating product information, inventory levels, and other related data. This helps save time and reduces the manual effort required for repetitive tasks.
You can focus on other important tasks while the import export jobs will run in the background as per the schedule.
Let’s dive into the details of scheduling import and export in Shopify.
To schedule the import export actions, we will be using a third-party app called SR Product Import Export App. The app allows you to import, export, and update products and collections in Shopify. Using this app, you can also migrate products directly from WooCommerce to Shopify.
The app is available in free and paid plans, but the scheduling option is available only in paid plans. You can choose any paid plans as per your requirements, and install and activate the app on your Shopify store.
After installing the app, follow the below steps:
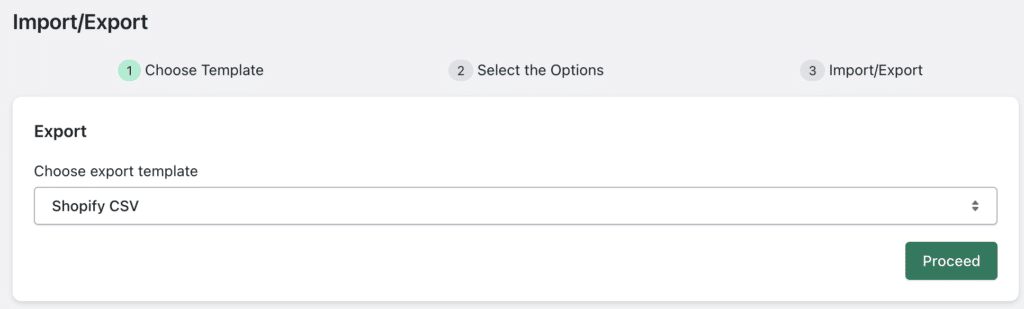
Step 1: Choose an Export Template
From your Shopify admin account, go to the Apps menu and select SR Product Import Export App.
Choose the export template as Shopify CSV and click on Proceed to continue.
Step 2: Select the Data You Want to Export
The app lets you export products, smart collections, and custom collections. For this tutorial, we’ll choose products only.
If you want to export the product data to an FTP server, enable the Enable FTP/SFTP for exporting file checkbox. Let’s keep it unchecked for now.
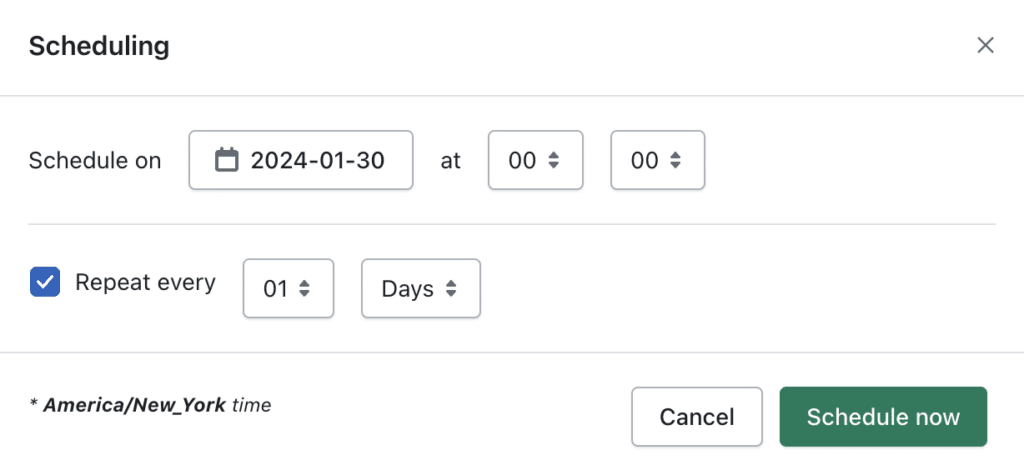
Step 3: Schedule the Export Job
Click on the Schedule button, and choose a date and time for the scheduling action. You can also repeat the scheduled job at specified intervals. Then, click on Schedule now.
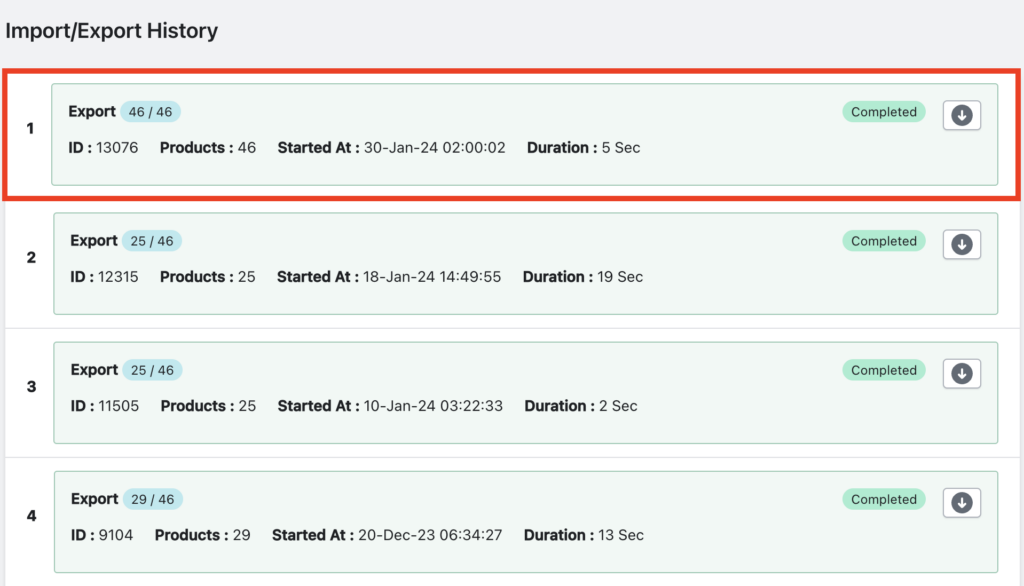
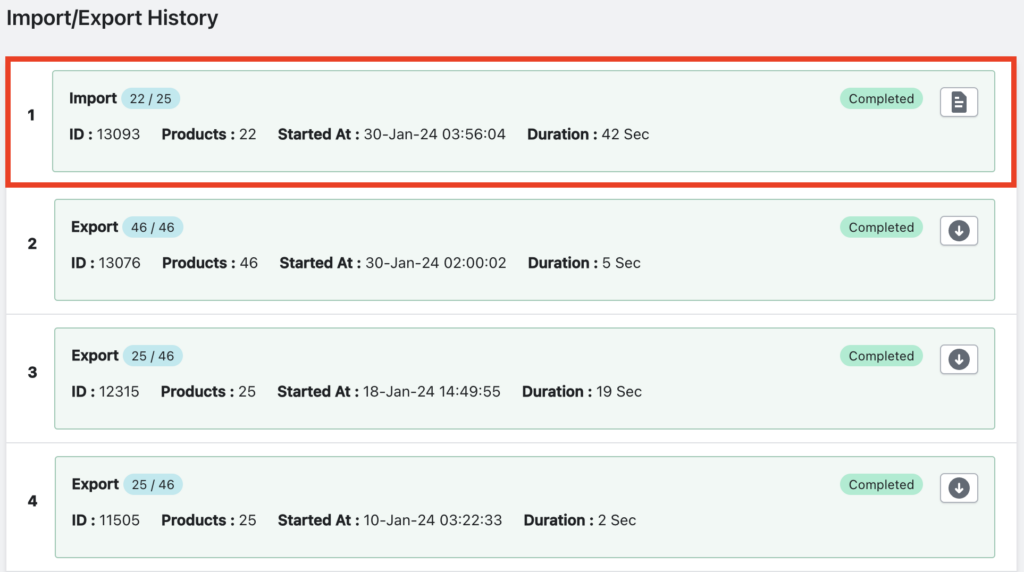
This will schedule the export job, and the app will automatically export data as per the schedule. Once the export job is completed, you can download the export file from the Log History page of the app.
Now, let’s see how to schedule the import process in Shopify.
We will be using the same app to import products to Shopify.
Step 1: Choose Import File Location
Go to the Home page of the SR Product Import Export App.
Choose a file location to import the products. You can import files from your local storage, FTP server, public URL, or directly from WooCommerce using the WooCommerce API.
For this tutorial, we will be importing files from our local storage.
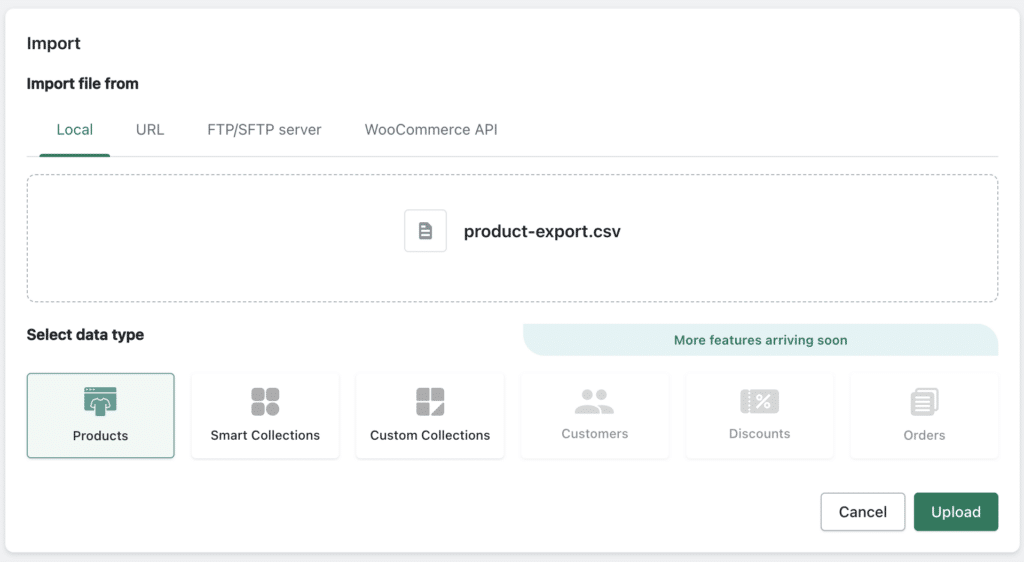
After uploading the file, choose the data type as Products. Then, click on Upload to continue.
Step 2: Choose the Import Filters
Once the file is uploaded, the app will automatically identify the file template. You can still choose the template in case you want to import a custom CSV file.
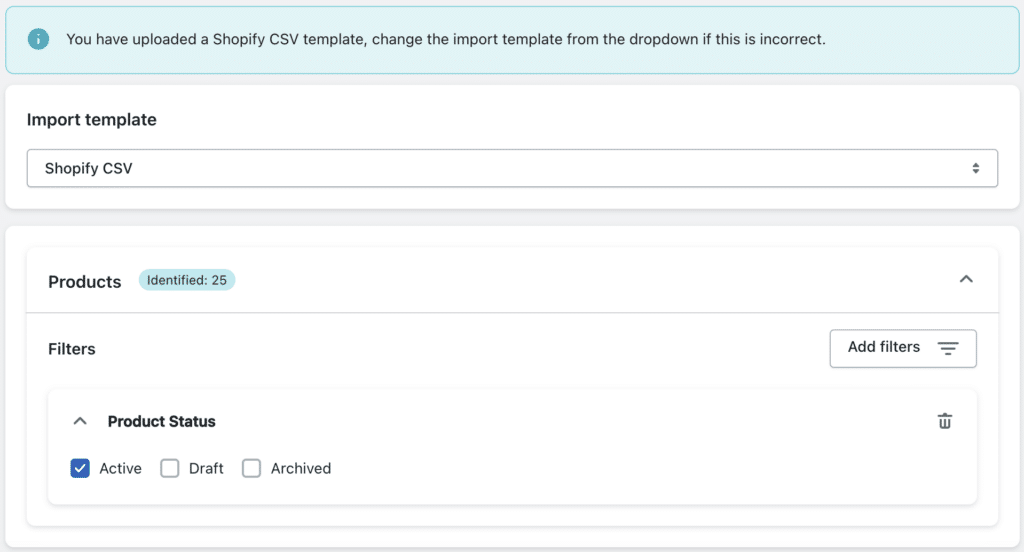
Then, you can filter products based on product status. Choose whether you want to import Active, Draft, or Archived products.
Step 3: Select the Import Options
In this step, you can select various options to import products to Shopify.
- Choose whether to ignore the Product ID.
- Select whether you want to update the product data if products already exist in your store.
- Choose whether to skip importing new products from the CSV file.
- Choose whether to publish new products from the CSV file.
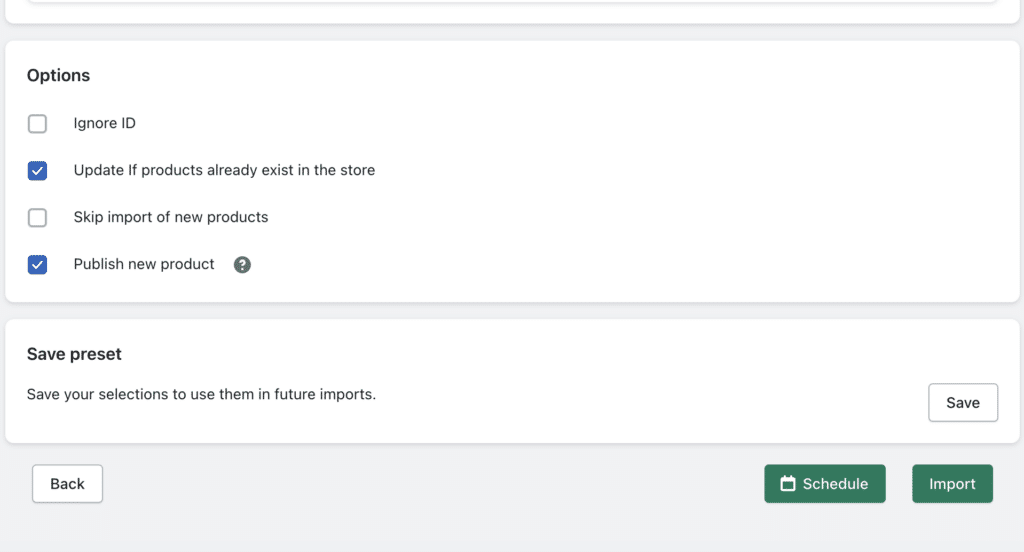
After choosing the necessary options, click on the Schedule button to schedule the import job.

The scheduling import job is similar to the one with the export job. Choose the date and time for the scheduler and select the required interval for repeated imports.
The products will be imported to your store, and you can view the import job details from the Log History page.
And that’s it. You can schedule the import and export jobs in just three steps. The app will run the job in the background, and you don’t have to look at the progress bar.
Now, let’s see some of the benefits of the scheduling option for import and export jobs.
Here are some benefits of scheduling the import-export jobs in Shopify:
- Saves time and effort: By scheduling, you can automate the data migration tasks on your Shopify store. It will automatically update the product data, inventory data, and other related data. This will save you time and effort, especially for repeated tasks.
- Ensure consistency: When you sell products on multiple Shopify stores, you can ensure the consistency of your product data across all stores. You can schedule the import-export jobs at the same time. So, any update in the product data will be updated automatically across all the stores.
- Timely updates: Scheduled tasks enable you to update your product catalog, inventory, or other data at specific times. For example, you can schedule updates during off-peak hours to minimize disruptions to your online store and ensure a smooth customer experience.
- Reduce errors: Manually updating product data is prone to errors. Instead, you can automate the data updation by scheduling the task on your Shopify store. This will reduce the risk of mistakes that can occur when handling large volumes of data, helping to maintain accurate information in your store.
- Integration with third-party services: If you are using external systems, suppliers, or third-party tools to manage your inventory, scheduling import/export tasks facilitates seamless integration. This ensures that your Shopify store is always up-to-date with the latest information from your suppliers or other systems.
Conclusion
To wrap up, scheduling the import-export process on your Shopify store can save you time and reduce errors. The Shopify Product Import Export app we mentioned in this article will help you automate the import and export of products on your Shopify store.
We hope this article has helped you learn how to schedule the import-export job in Shopify. If you have any questions, please feel free to ask them in the comments section.