Consider yourself shopping online from different marketplaces. Entering the payment information during every new purchase can be the most tedious task! This can negatively impact the way your customers perceive your store.
So, here is an alternative! How about keeping your customers’ payment info in a safe place and automatically fetching it during their next checkouts? You can do this with the PayPal payment gateway.
PayPal is an efficient online financial service that will make your customers’ payments quick and easy. Convenience is what customers seek in an online retail outlet. Thus, integrating PayPal with WooCommerce for easy payment can boost your business.
Why choose Paypal for WooCommerce?
From its quick WooCommerce integration to an easy-to-use interface, PayPal for online business has several advantages. Some of which include:
- Faster payouts
- Easy to configure
- Feasible pricing structure
- Supports multiple services such as recurring billing and invoicing
- Highly popular payment gateway
To know more about WooCommerce PayPal and how it works, refer to PayPal Basics.
Know the benefits of using PayPal in WooCommerce.
Paypal for WooCommerce payments
With the most powerful payment processing tools, PayPal is a complete resource for your WooCommerce store transactions. The PayPal checkout is one of the simplest, quickest, and most secure checkout options available in the market.
You can add PayPal to your WooCommerce store using simple plugins such as the WebToffee PayPal Express Checkout Plugin. But, prior to that, you will need to create a PayPal account and register your card details/bank account. If you already have an account you can log in using the credentials.
With this plugin, you can offer your WooCommerce store customers the most advanced checkout options. Let us have a look at how to set up PayPal in WooCommerce.
Setup PayPal Standard In WooCommerce
PayPal Standard will not be available as a built-in option on WooCommerce versions 5.5.0 or higher. You will have to use the WebToffee PayPal plugins to set up PayPal checkout.
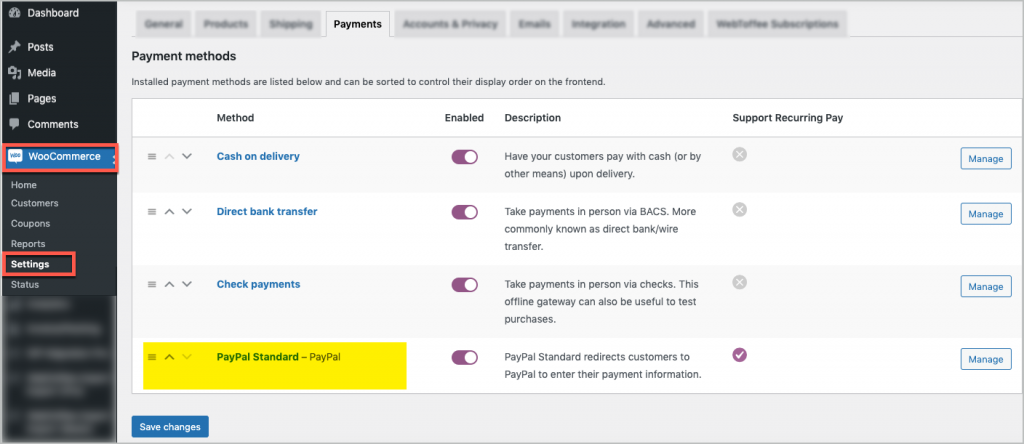
PayPal Standard in WooCommerce redirects customers to PayPal to enter their payment details. To set up PayPal Standard:
- From the WordPress admin panel, click on WooCommerce > Settings.
- Click on the Payments tab.
- Under the method: PayPal Standard, you can either click on the Manage button or use the toggle under Enabled to select PayPal.
- Fill up the details on the settings page of PayPal Standard.
- Click on Save changes to complete the setup.
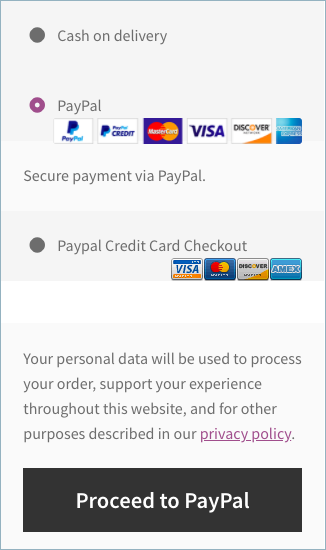
Here is how the PayPal payment button will appear on the checkout page.
Checkout in 3 Clicks
While using PayPal Standard, the buyer has to first add the product to the cart, go to the cart page and proceed to checkout. The WooCommerce PayPal payment button will only be available on the Checkout page.
The advanced version of the Standard PayPal payment option, PayPal Express Checkout will reduce the number of clicks to complete the checkout process. But, how does it do that?
Well, with PayPal Express, your buyers can complete the checkout without navigating to the checkout page. So, integrating the PayPal Express Checkout shortcut will enable your buyers to speed through the checkout.
PayPal Express Checkout uses the shipping information and payment credentials that are already stored in your customer’s PayPal accounts. This reduces shopping cart abandonment and saves time. In the best case, it will reduce the clicks from 7 to 3!
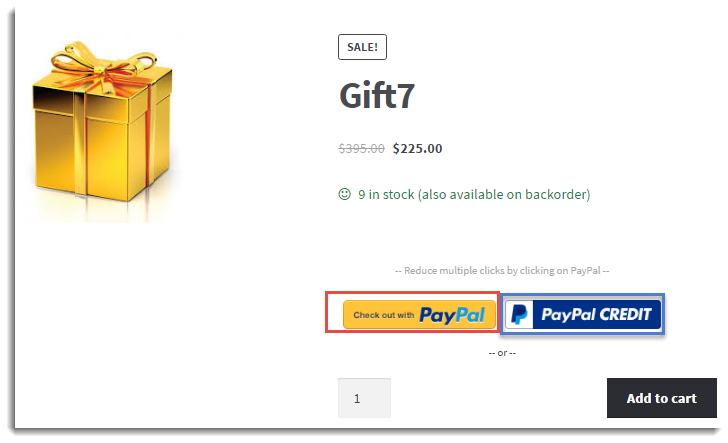
With the WebToffee PayPal Payment Gateway plugin, you can add the PayPal payment button to the cart and even the product page. However, you will need the pro version of the PayPal Express Checkout plugin to add the button to the product page.
PayPal Express Checkout Plugin
The free version of the plugin WebToffee PayPal Express Checkout Payment Gateway for WooCommerce will integrate PayPal Express checkout with your WooCommerce store. This integration lets you accept customer payments through the secure WooCommerce PayPal gateway.
With this PayPal for WooCommerce plugin, your customers can use their credit cards, debit cards, PayPal credit, Pay later, or PayPal money to make an order, and that too, from the cart page itself.
Setting Up PayPal Express
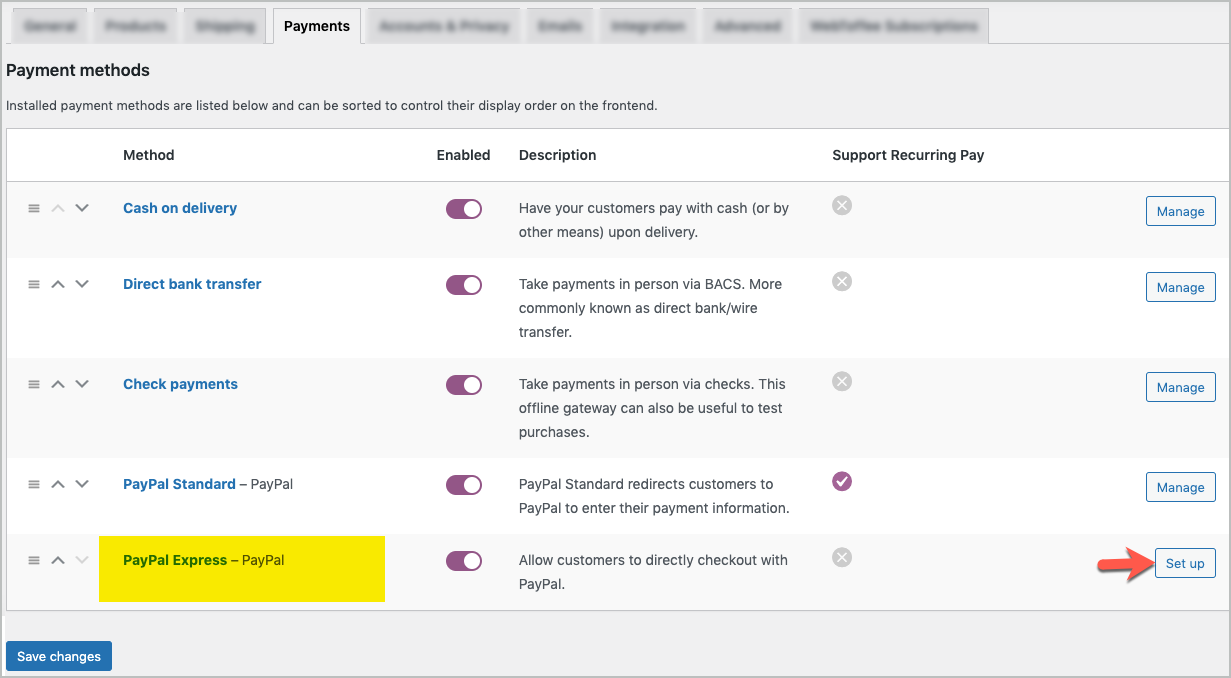
The PayPal Express payment method allows customers to directly checkout with PayPal.
- Install and activate the WebToffee PayPal Express Checkout Payment Gateway on your WordPress admin panel.
- Go to WooCommerce > Settings.
- Click on the Payments tab.
- Under the method PayPal Express, click on the Set up button to configure the payment method.
- Fill up the details on the settings page of PayPal Express.
- Click on Save change to finish.
Test Payments – Paypal Express Sandbox
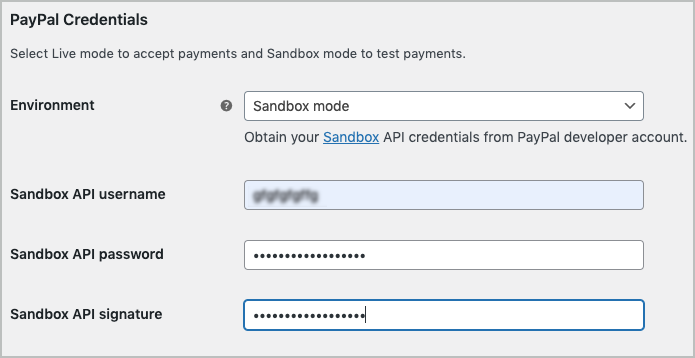
To accept payments, select the environment as Live mode. However, If you want to test the payments, select the PayPal Express environment as Sandbox mode. This mode enables you to test and troubleshoot the errors without causing any problems. If payments are successful in the test mode, you can switch back to the live mode.
Both the live and sandbox accounts are free of cost. The Sandbox API credentials can be obtained from the PayPal developer account.
Also Read: How to fix Unpaid Order Cancelled – Time Limit Reached error in WooCommerce?
PayPal Express Pro for WooCommerce
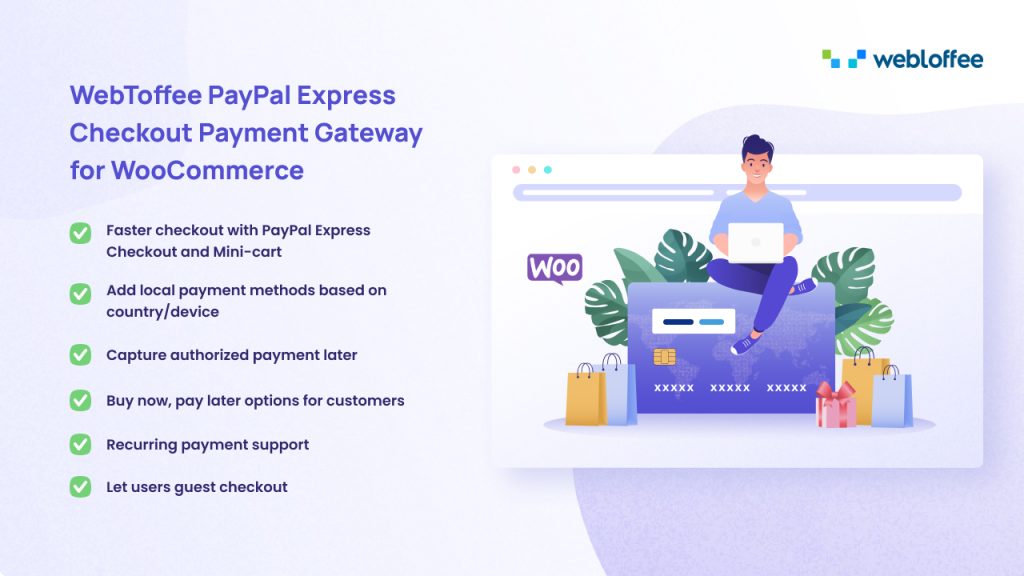
The premium version of the WebToffee plugin, PayPal Express Checkout for WooCommerce provides the fastest checkout option available in the market. The premium version lets you set up, test, and go live with your WooCommerce PayPal Integration in minutes. The features include:
- Payment through Accept Debit/Credit Card or PayPal
For more details, refer: How to set up PayPal direct credit card checkout.
- Express Checkout from Product Page
- Faster & Secure Checkout
- Hold and Capture payments
- Full and Partial Refunds
For more details, refer How to issue a refund using the PayPal Express Checkout payment gateway.
- Guest Checkout using Credit Card Payment
- Custom Checkout Fields
- Extensive Customisation
To know more about customization, read: How to have a PayPal Express button on a custom page.
- PayPal Locale
To set up PayPal Express Pro, watch:
You can also refer to the user guide: Set Up PayPal Express Checkout Payment Gateway for WooCommerce.
Wrapping Up
The WebToffee PayPal Express Checkout is a WooCommerce payment gateway plugin that helps you secure your store transactions. Both the free and premium versions of the plugin provide checkout payment with utmost security. So, do check them and share your queries in the comment section.


Comments (2)
Thomas Kleinbeck
September 5, 2021
Please explain how to get updates when you have them turned off in your plugin and there is no download page on “webtoffee”.
Mark
September 8, 2021
Hi Thomas,
You will receive updates directly in your site if the license for the plugin is active. Go to the Plugins page or WordPress Updates page to check for updates after activating the license.