Do you have a list of customer data that you want to import to your Shopify store? Or are you looking for a way to transfer your Shopify customers from one store to another? If so, you have come to the right place.
In this guide, we’ll walk you through the process of importing and exporting customers on Shopify. We’ll cover using both Shopify’s built-in import/export tool and a third-party app.
Let’s dive in!
How to Import and Export Shopify Customers CSV? (Using Default Option)
Import Customer CSV to Shopify
Follow the below steps to import a CSV file with customer data to Shopify stores:

- Prepare the customer list in a CSV file structured in the Shopify CSV template.
- Log in to your Shopify admin account and go to the Customers menu from the sidebar.
- Click on the Import button in the top right corner.
- Upload the customer CSV file. Enable the Overwrite existing customers that have the same email or phone.
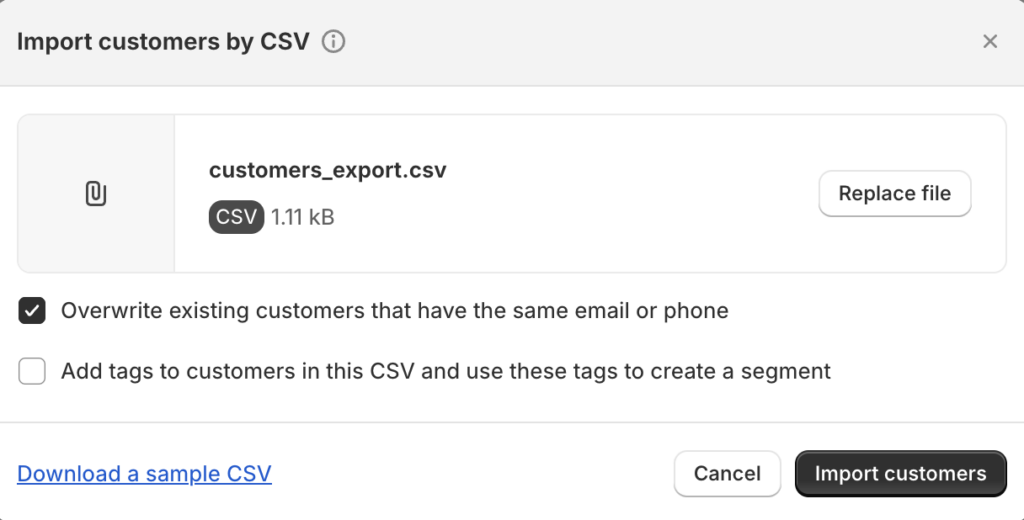
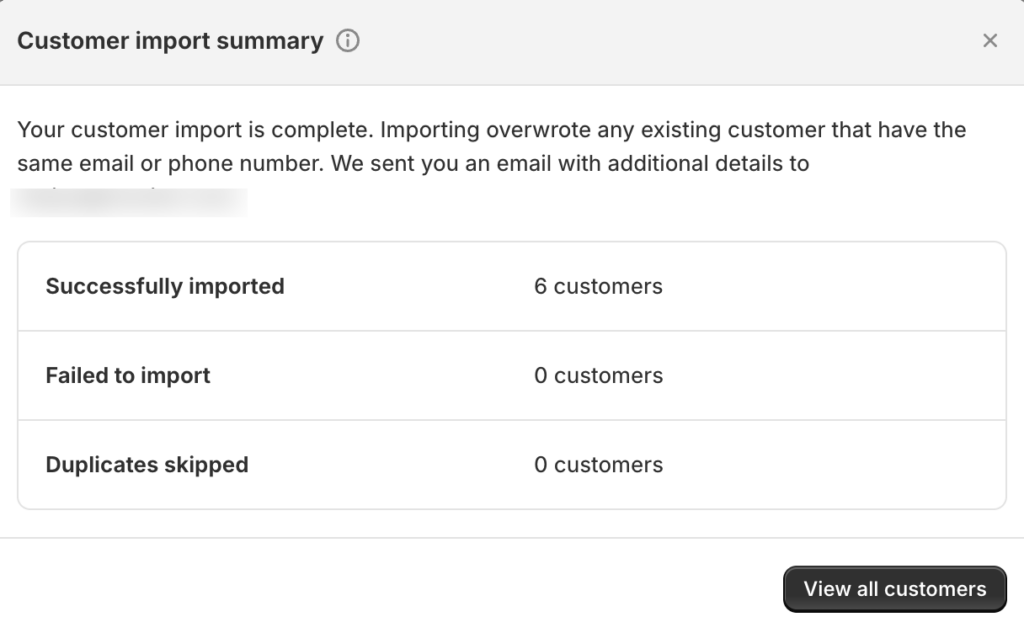
- Then click on Import customers. This will import the customer list to your Shopify store.
Export Shopify Customers to CSV
The below steps will help you export Shopify customer data to a CSV file using the default export option.
- Go to the Customers menu from the sidebar and click on Export.
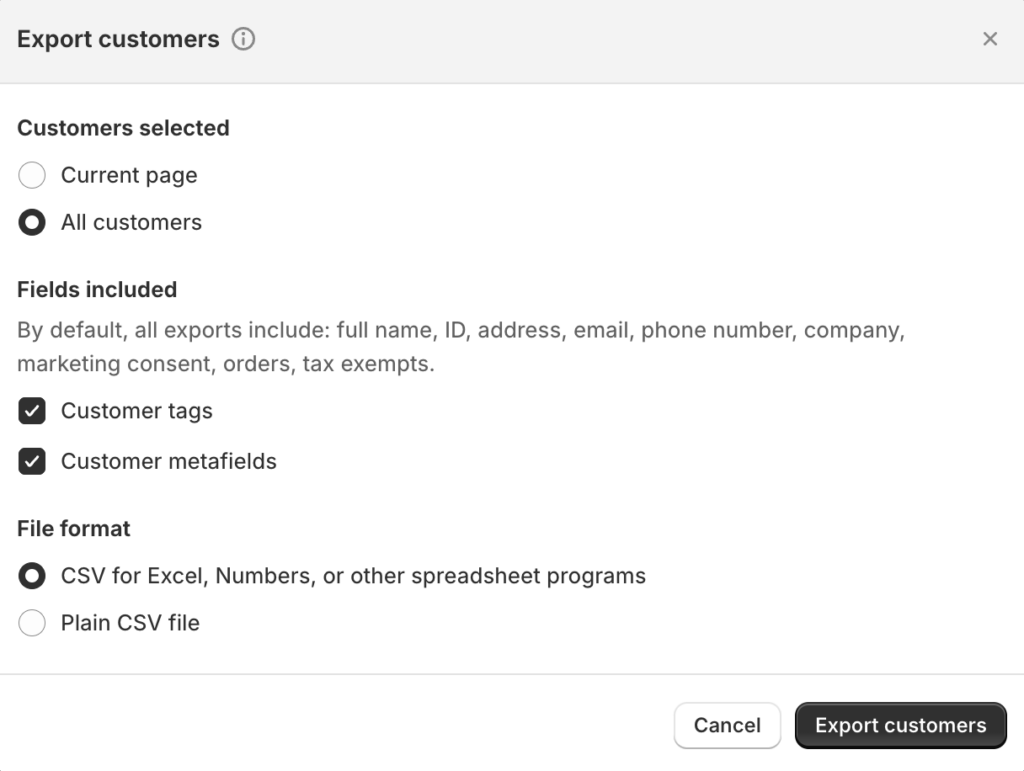
- Choose whether you want to export all customers or customers on the current page.
- Select whether to include Customer tags and Customer metafields in the export file.
- Then, choose a file format for exporting the data.
- Click on Export customers.
Shopify will export the customer list to a CSV and send the CSV file to the admin’s registered email address. You can download and view the CSV file from the mail.
Also Read: Getting Started with Shopify Import Export
Benefits of Using a Third-Party Plugin to Import and Export Shopify Customers
The default customer import export option in Shopify is enough for your basic import or export requirements. However, it only supports Shopify CSV file format and does not have advanced filtering options.
In such cases, you can use any third-party import export app. We recommend to use the StoreRobo Import Export App for Shopify. StoreRobo is an advanced import export tool for Shopify stores that allows you to import and export products, collections, and customers.
Below are some of the major benefits of using StoreRobo instead of the default tool to import and export Shopify customers.
- Multiple methods for importing data: StoreRobo offers multiple methods to import data to Shopify. You can import customers from a CSV file from your local storage, public URL, external FTP server, or WooCommerce API.
- Create activation URL when exporting customers: StoreRobo will let you generate an activation URL when exporting customers from your Shopify store. So when you are importing the customers to a new store, you can share the activation URL with the customers, and they can manually activate their account on the new website.
- Supports multiple CSV formats: StoreRobo supports importing CSV files in Shopify CSV or WooCommerce CSV format.
- Advanced export filters: StoreRobo offers advanced filters to export customers from Shopify.
- Support import and export of additional fields: StoreRobo supports importing and exporting additional data fields related to Shopify customers.
- Export to FTP: Using StoreRobo, you can export customer data to an external FTP server.
- Schedule import export jobs: You can schedule the import-export jobs on your Shopify store for a later time.
Also read: How to Bulk Import Products to Shopify Using a Custom CSV File?
How to Import and Export Customers in Shopify? Using StoreRobo App
Before we begin, make sure you have installed the StoreRobo Import Export App on your Shopify store. The app has different plans for different store sizes. With the free plan, you can import or export up to 10 customers only. If you have more number of customers, consider choosing any of the premium plans.
Check out the pricing information here.
Now, let’s see how we can import and export customers in Shopify.
How to Import Customers to Shopify?
Follow the below steps to import customers to Shopify using the StoreRobo app:
Step 1: Choose Input File Location
- From your Shopify admin account, go to the Home page of the StoreRobo App.
- Under the Import section, choose a file location for the input file.
- Let’s choose Local and upload a CSV file. Then, choose the data type as Customers.
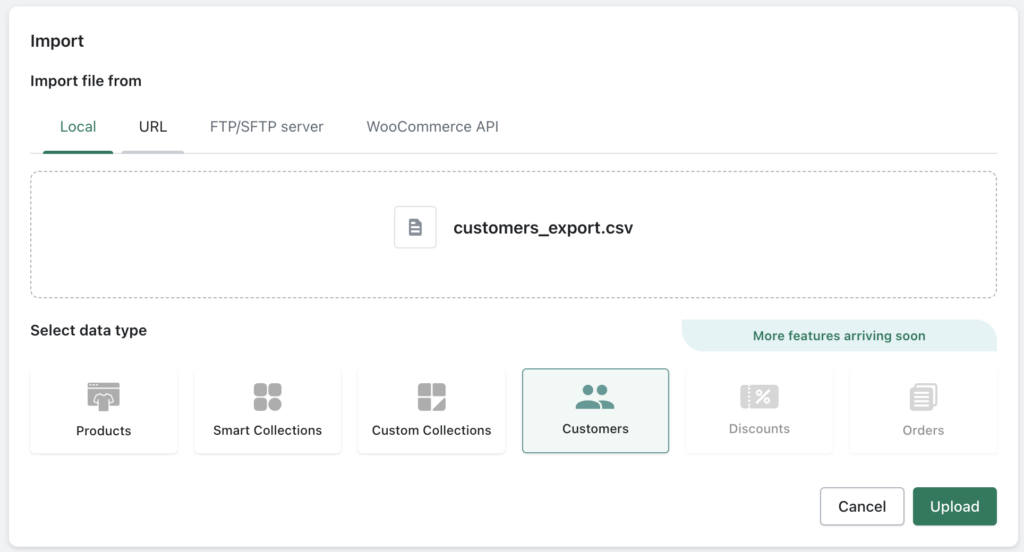
- Click on the Upload button.
Step 2: Schedule or Import Customers to Shopify
In this step, you can choose whether to schedule the import job or import customers right away.
If you select the schedule option, the app will ask you to select the date and time for the scheduler. You can also select whether to repeat the import process at specific intervals.
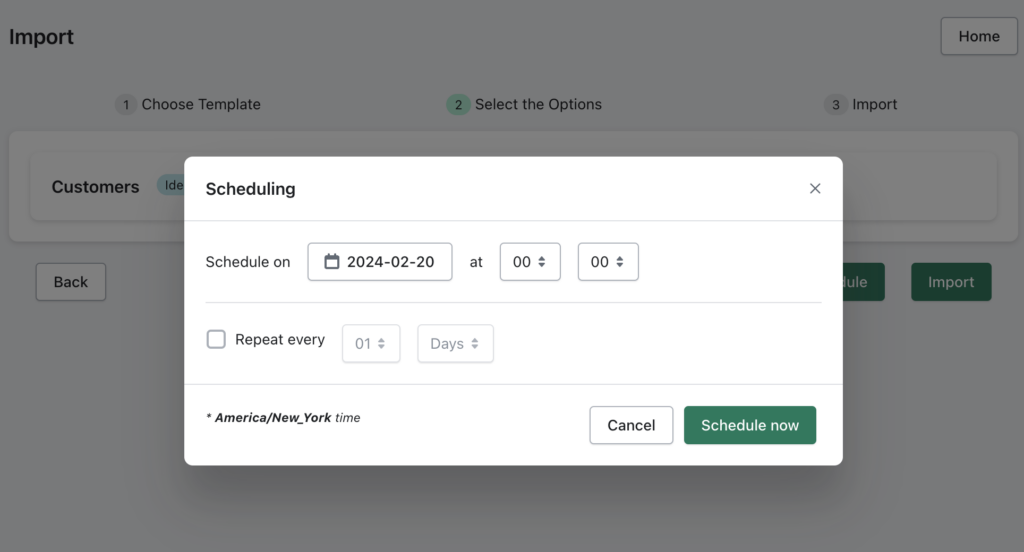
Once the import job is scheduled, the app will execute it at the designated time.
Now, let’s see how we can export customer data from Shopify with the StoreRobo app.
How to Export Shopify Customers to a CSV File?
Follow the below steps to export the Shopify customer list to a CSV file using the StoreRobo app.
Step 1: Choose an Export Template
- From the Home page of the StoreRobo app, go to the Export option and select Shopify CSV as the export template. Then click on Proceed to continue.

Step 2: Choose the Data Type as Customers
- Choose the data type as Customers from the list.
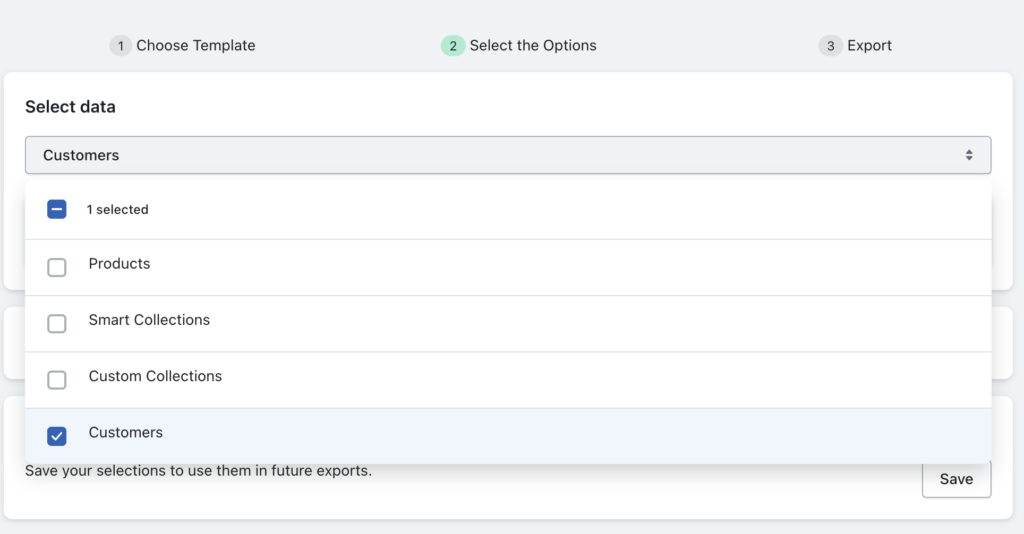
- You can also select the specific data fields you want to export from your store.
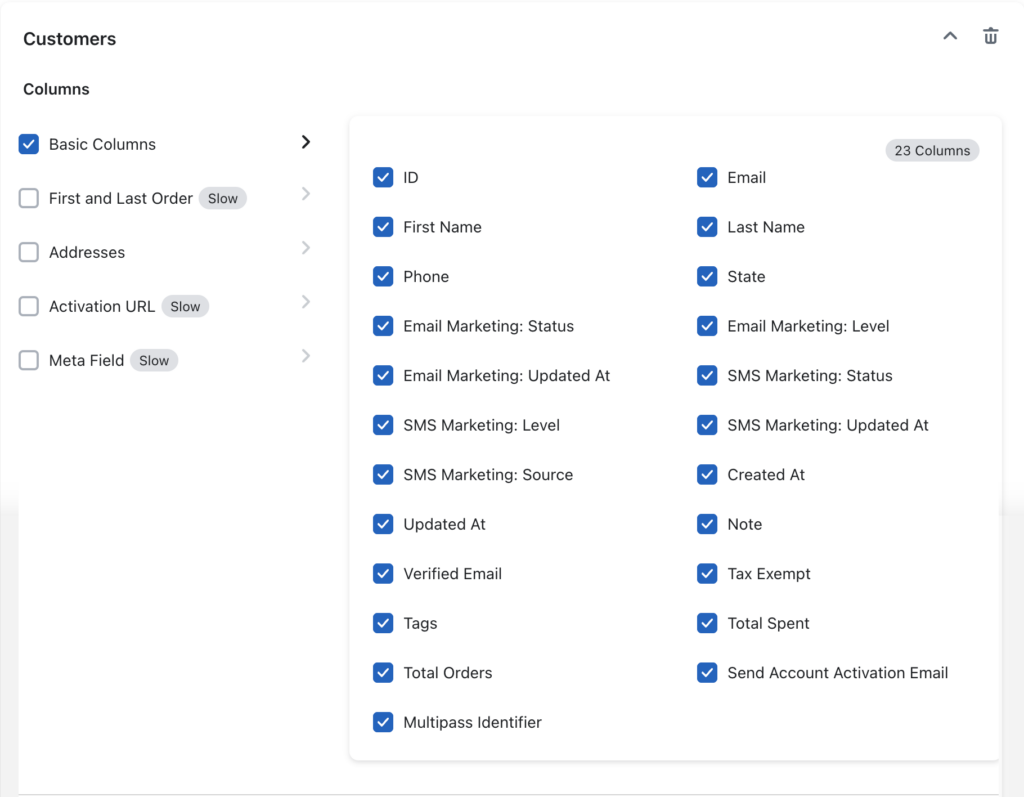
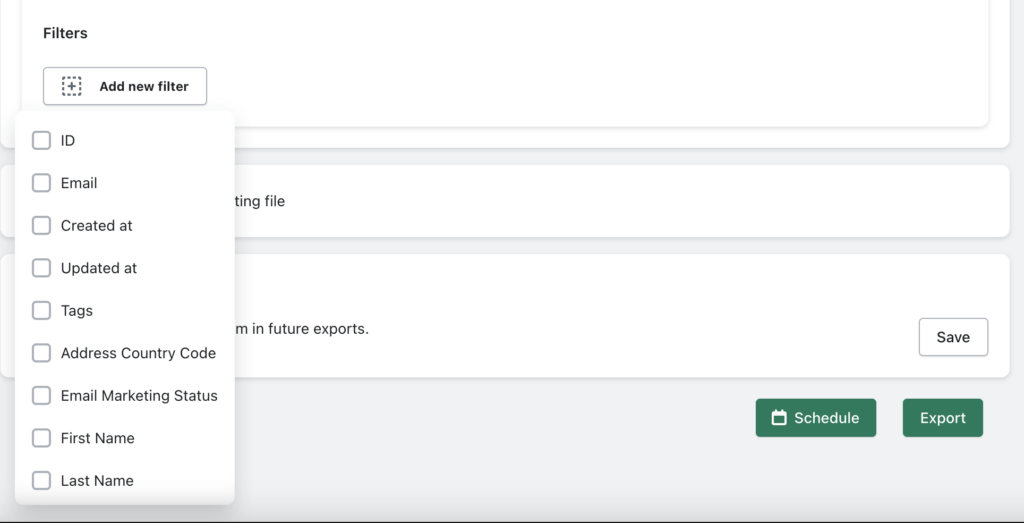
StoreRobo allows you to export additional data fields such as Email Marketing Level, Email Marketing Status, etc.
Step 3: Use Filters to Export Data
- Then, you have the option to filter the data based on advanced filters. This helps you specifically export the data based on different filters.
Step 4: Click on the Export Button
After choosing the necessary filters, you can schedule the export job or export data right away.
- Click on the Export button to initiate the export job.
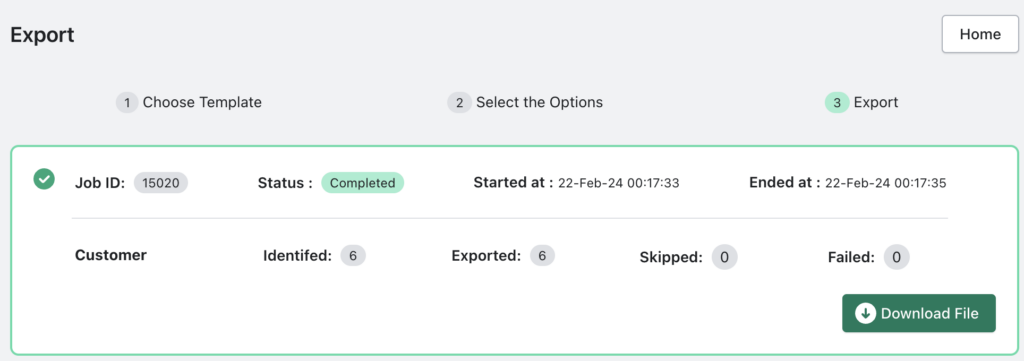
- Once the export job is completed, the app will display a log report of the job. You can click on the Download File button to download the exported file.
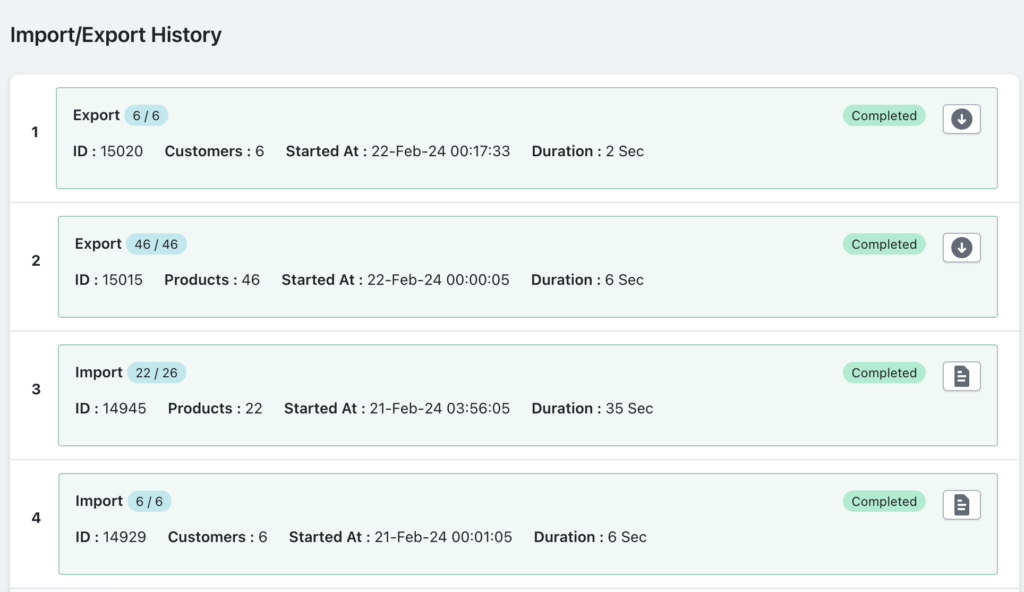
You can also view the detailed log report of the Import/export job from the Log history page of the StoreRobo app.
Conclusion
Importing and exporting customer lists in Shopify allows you to migrate your store customers from one store to another or import customers from your old store to a new store. The default customer import export option in Shopify will be enough for your basic data migration requirements.
However, if you are looking to transfer customers from one store to another, we recommend using a third-party app like StoreRobo. The support for additional data fields, advanced export filters, and the provision to generate activation URLs make the data transfer seamless for your Shopify website.
We hope this article has helped you learn how to import and export customers in Shopify using the default tool and the StoreRobo app.
If you have any queries, please feel free to ask them in the comments section.
We also recommend you read the below articles:
