Using WebToffee’s WooCommerce Shipping labels, Dispatch labels, and Delivery Notes plugin, admins can easily add a Print dispatch label button to the Order emails. The print dispatch label button will be added to the order emails based on the order statuses. The order emails sent to the customers will have this option. Here are the steps to add a print dispatch label button to order emails.
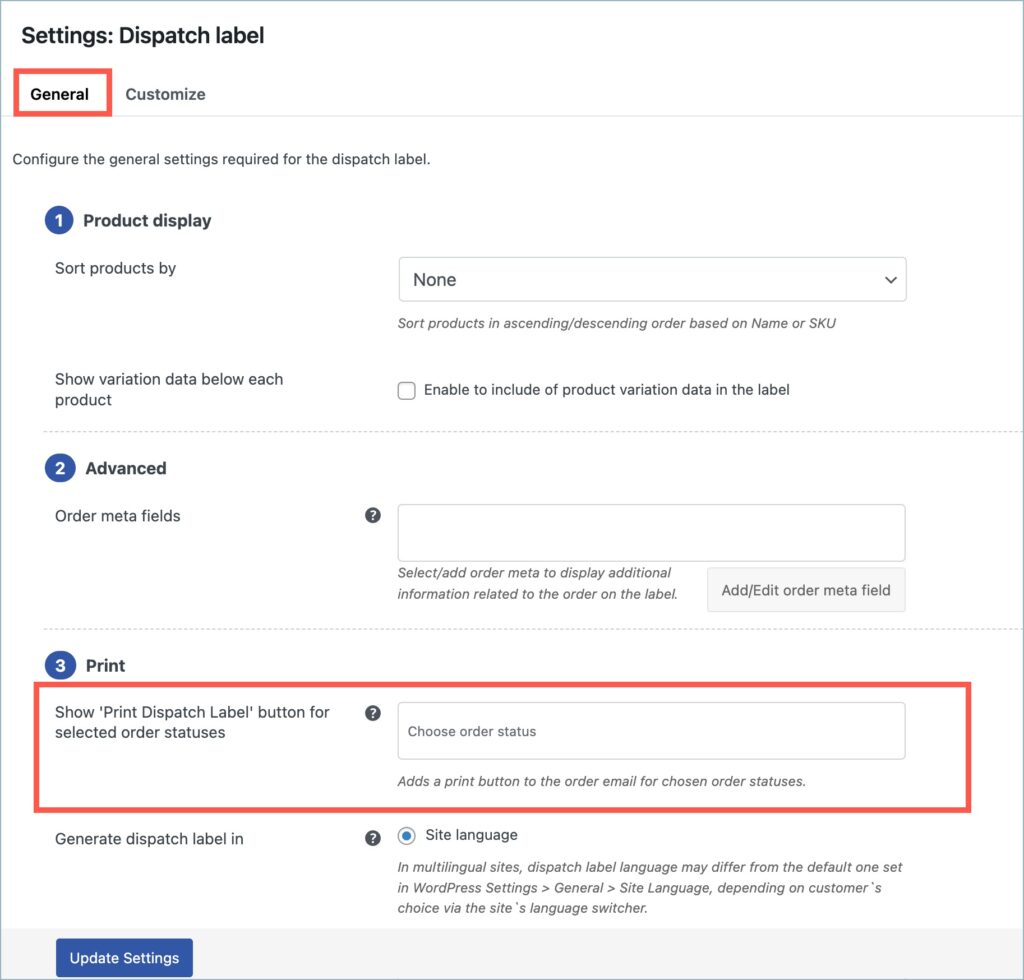
- Navigate to Invoice/Packing > Dispatch label > General.
- Scroll down to the Print section and find the Show ‘Print Dispatch Label’ button for selected order statuses option.
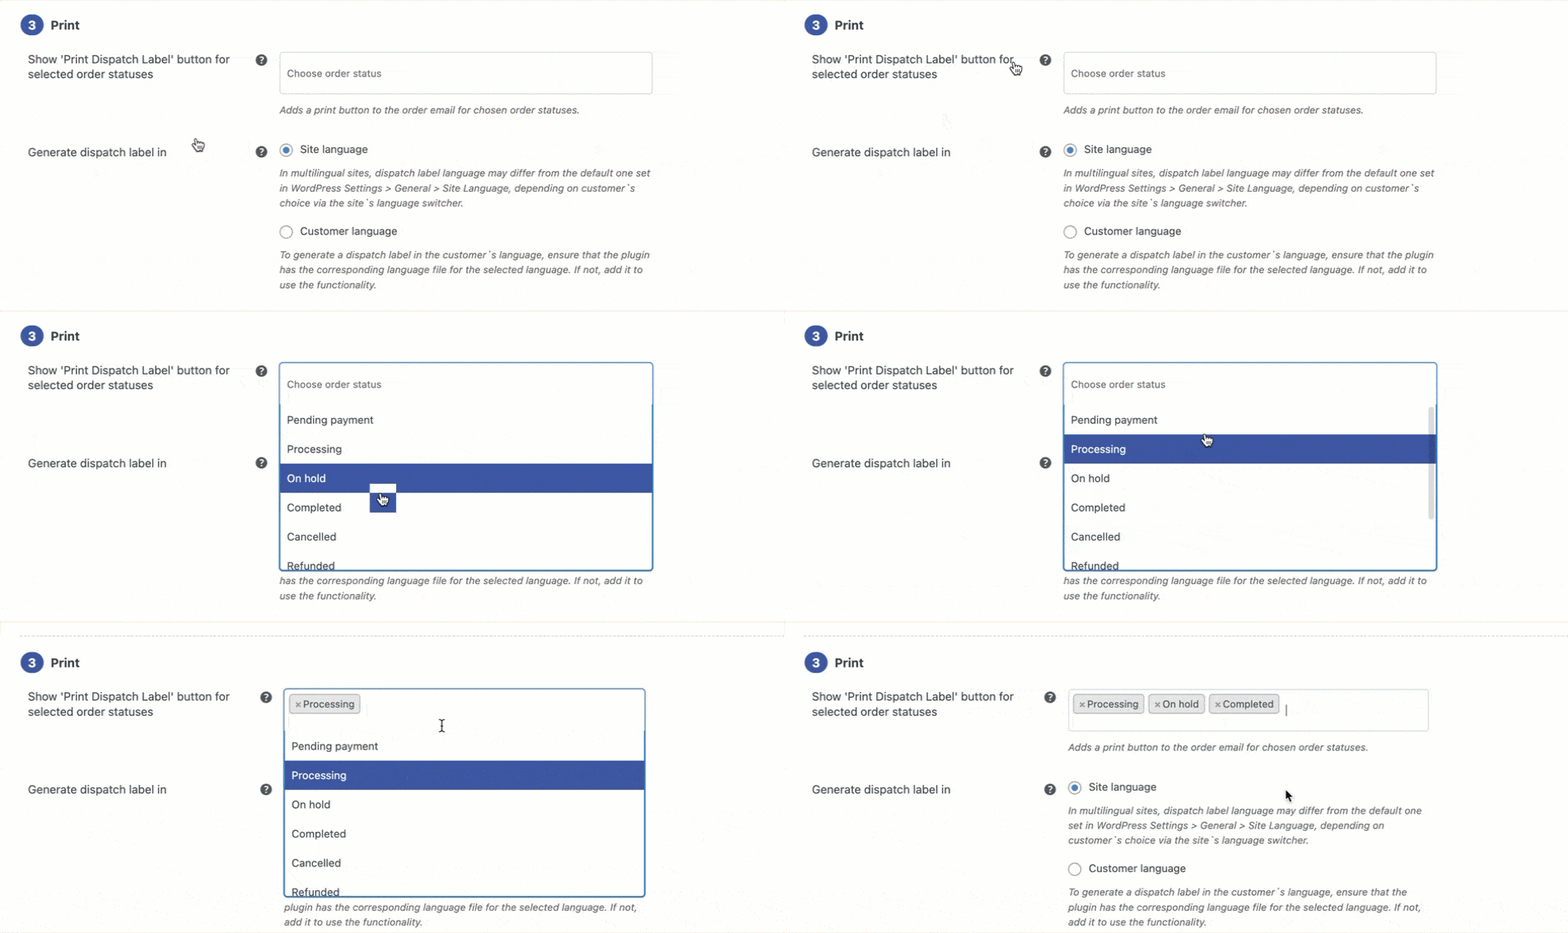
- Choose the order statuses from the dropdown.
- Click on Update Settings.
Generating dispatch labels from order emails
- Navigate to Invoice/Packing > Dispatch label > General.
- Scroll down to the Print section and find the Show ‘Print Dispatch Label’ button for selected order statuses option.

- Click on the Choose order status field and from the dropdown select the order statuses. Choose all the order statuses for which you wish to add the Print dispatch label button.

- Click on Update Settings.
Completing the above steps will ensure a print dispatch label button in the order emails for the selected order statuses. However, this print dispatch label button can be accessed only based on the admin’s selection under the Print button access for option.
Use Case
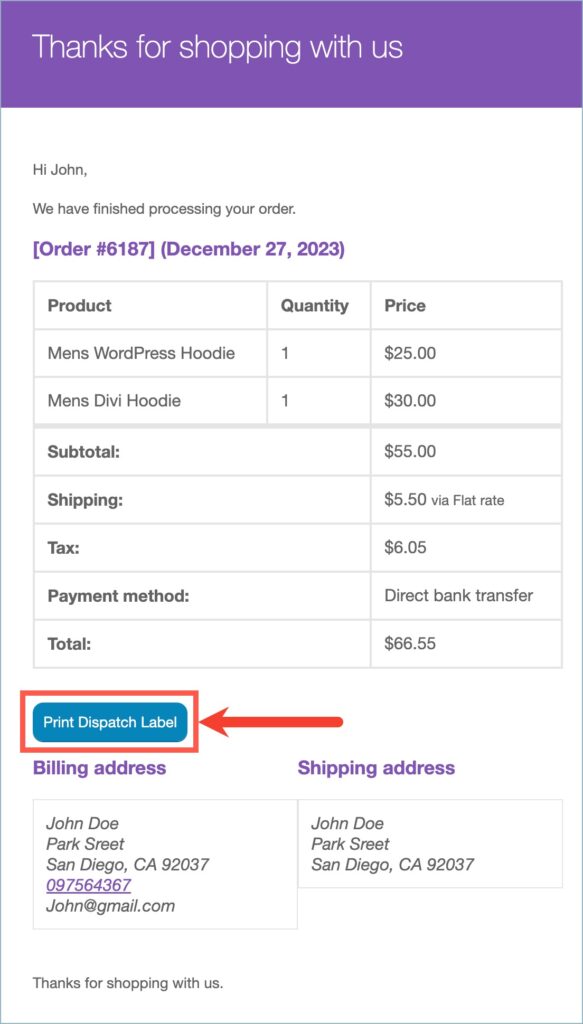
The admin selects order statuses ‘Processing’ and ‘Completed’ under the Show ‘Print Dispatch Label’ button for selected order statuses option. A customer purchases products under the order number #3903. The admin changes the order status to ‘Processing’ and updates the order. The customer will receive an order email with a Print dispatch label button in it.
The image below is an example of how the Print dispatch label button will appear in the order email sent to the customer.
