PayPal Express Checkout Payment Gateway for WooCommerce facilitates checkout using PayPal Smart Buttons and Express Buttons, which considerably reduces the number of clicks to complete the checkout process.
With the plugin, you can accept PayPal payments in two ways:
| Payment types | Steps to set up |
|---|---|
| PayPal Smart Buttons |
|
| PayPal Express Buttons |
|
PayPal Express Checkout Button Settings
Step 1: Enable the PayPal Payment Gateway and Express Button
When you integrate the PayPal Express Checkout Button, your buyers can quickly checkout using the shipping information and funding source already stored in their PayPal accounts. They don’t have to re-type any information— saving them time and reducing shopping cart abandonment.

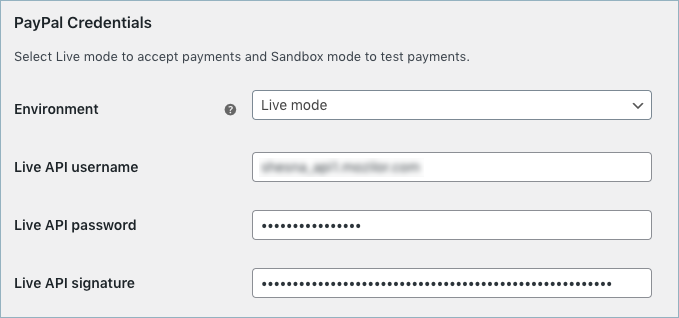
Step 2: Input the API Username, API Password, and API Signature
Requires a PayPal Business account linked with confirmed identity, email, and bank account.
To get the API credentials:
- Log in to your PayPal business account.
- Get API Access credential in any of the two ways:
- Go to Activity at the top of the page and choose API Access or
- From Account settings > API Access.
- Scroll down to NVP/SOAP API Integration (Classic) and click Manage API credentials.
- Create keys if not done already. Else, copy the API Username, API Password, and Signature
- Paste API Username, API Password, and Signature in the respective fields of the plugin.
Step 3: Customize the Express Buttons
Following are the customization options:
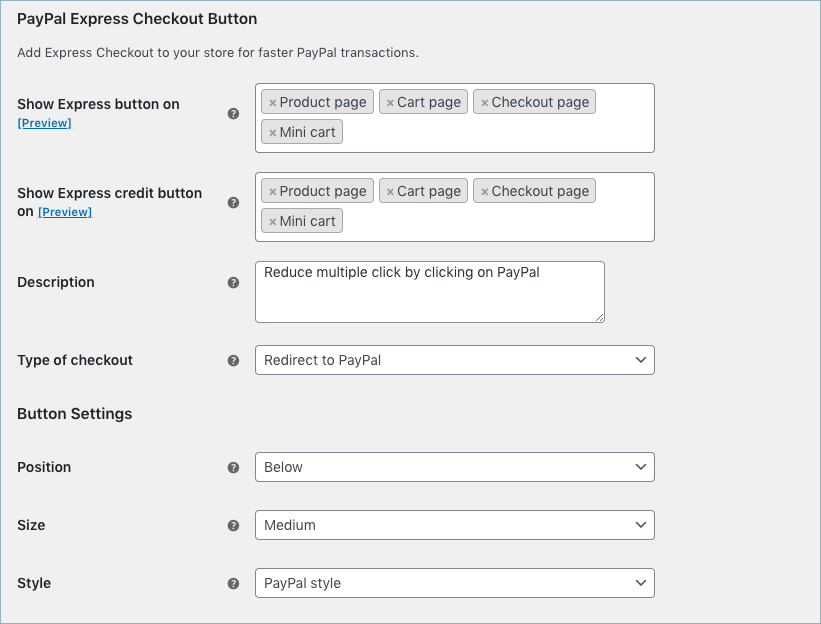
The settings are as shown below:
- Show Express button on: Displays PayPal Express button on chosen pages.
- Show Express Credit button on: Displays a PayPal Express Credit button on selected pages. By using PayPal Credit, store owners will receive the payment upfront but customers can opt for financing and pay over time.
The express button on the cart page will appear as shown below:

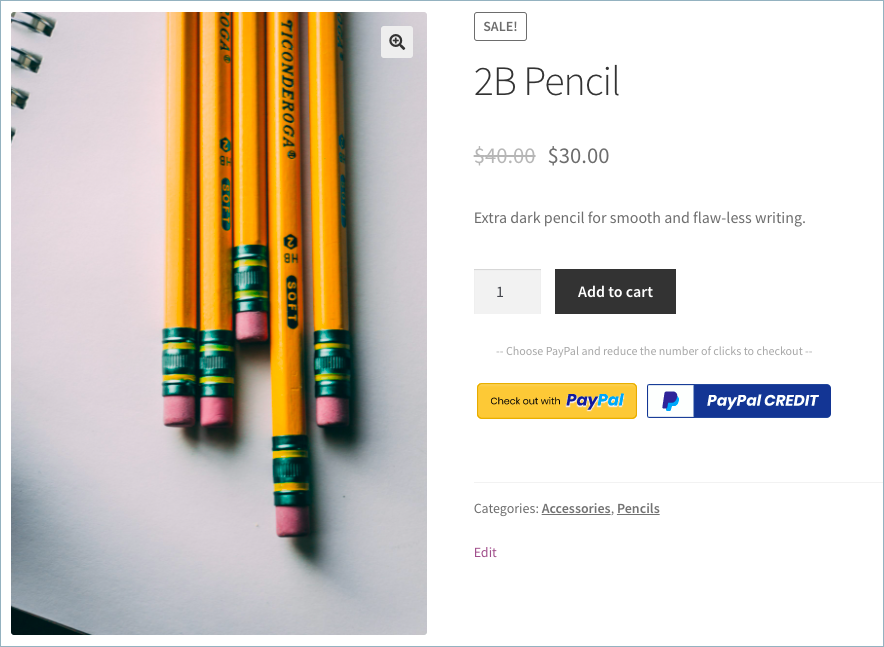
The express button on the product page will appear as shown below. The buyer can checkout directly from the product page. Clicking the Checkout with the PayPal button/ PayPal Credit will redirect the buyer to the PayPal site.
- Description: Input description displayed above the PayPal Express button.
- Type of Checkout: Select the type of PayPal checkout type. The available options are as given below:
- Redirect to PayPal: Choose ‘Redirect to PayPal’ to open PayPal in the same window from the cart or checkout page.
- In-Context Flow PayPal: Choose ‘in-context flow’ to open PayPal in a new window from the cart or checkout page.
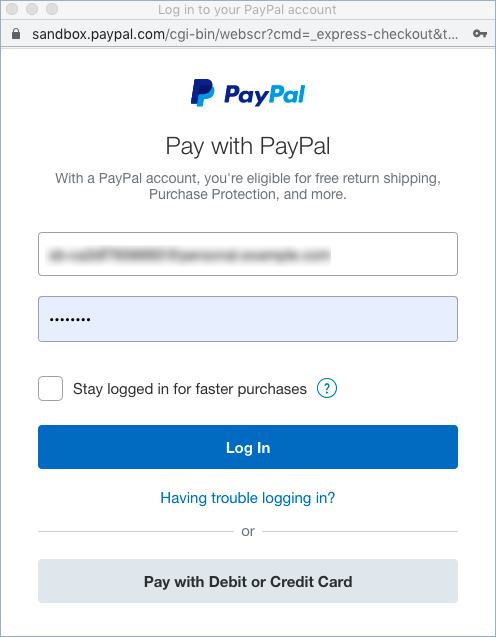
In-Context Flow Checkout
- Once the customer click the Checkout with PayPal button.
- The PayPal popup window appears as shown below:
- The customer will have to enter the PayPal login credentials and pay the order amount.
- Button Settings:
- Position: Select the position of PayPal Express/Credit Card checkout buttons from the given dropdown list. The available options are as given below:
- Above: Displays PayPal Express/Credit Card checkout buttons above Add to Cart (Product page checkout) or Proceed to Checkout (Cart page checkout).
- Below: Displays PayPal Express/Credit Card checkout buttons below Add to Cart (Product page checkout) or Proceed to Checkout (Cart page checkout).
- Size: Select the Button size for PayPal Express/Credit Card Button according to your choice. The available options are as given below:
- Small
- Medium
- Large
- Position: Select the position of PayPal Express/Credit Card checkout buttons from the given dropdown list. The available options are as given below:
- Style: Select the style of PayPal Express/Credit ard checkout buttons from the dropdown list. The available options are as given below:
- PayPal Style: Displays PayPal Express/Credit Card checkout buttons in PayPal style.
- WooCommerce Style: Displays PayPal Express/Credit Card checkout buttons in WooCommerce style i.e. same style as Add to Cart / Proceed to Checkout.


Step 4: Save Settings
Checkout using Express button
The PayPal express button on the cart page will appear as shown below:
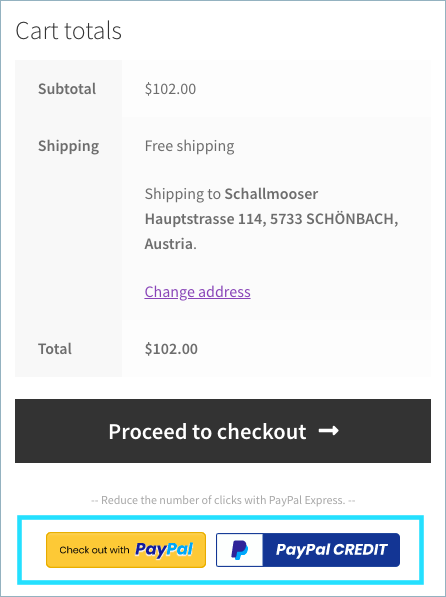
- The buyer can checkout directly from the product page or from the cart page.
- Then buyer can choose to pay using either Checkout with PayPal or PayPal Credit button.
- This will redirect the buyer to the PayPal Login page.
- The buyer needs to enter the PayPal login credentials and pay the order amount. If the customer checks out with PayPal Credit Card, the customer needs to enter the credit card and billing details. Finally, the customer is taken to the Review page(if not skipped in settings).
- The buyer can Place / Cancel the order by clicking the respective buttons.
Comments (2)
Octavio Jacobo
July 18, 2023
Does this process allow WooCommerce to automatically create accounts for customers? This is a feature I need to be able to actually charge subscriptions
Arjun
July 20, 2023
Hi Octavio,
Thank you for getting in touch with us. Indeed, the plugin enables WooCommerce to automatically create customer accounts. By default, the PayPal Express Button does not redirect customers to the checkout page in order to create an account. However, if you wish to redirect customers to the checkout page for account creation, you can follow these steps:
1. Navigate to the plugin settings.
2. Locate the Advanced Options section.
3. Disable the Skip review page option.
After completing these steps, customers will be redirected to the checkout page during the order process, and a WooCommerce account will be automatically generated with the provided data on the checkout page.