PayPal Express Checkout Payment Gateway for WooCommerce facilitates checkout using PayPal Smart Buttons and Express Buttons, which considerably reduces the number of clicks to complete the checkout process. With the plugin, you can accept PayPal payments in two ways:
| Payment types | Steps to set up |
|---|---|
| PayPal Smart Buttons |
|
| PayPal Express Buttons |
|
PayPal Smart Button Settings
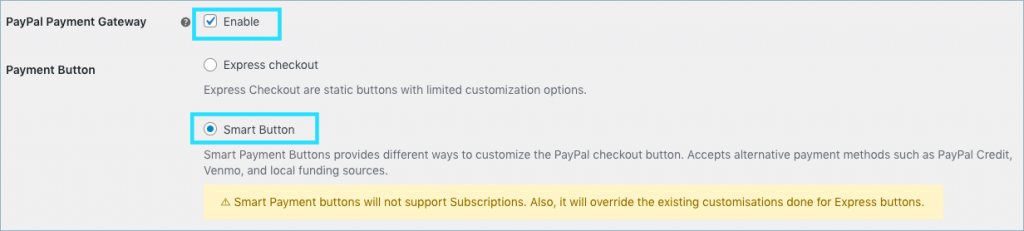
Step 1: Enable the PayPal Payment Gateway and Smart Button
PayPal Smart Payment Buttons are rendered using the PayPal API. It allows customizing the smart buttons in different ways. The alternative payment methods accept payments by using local funding sources based on the country.
- Smart Payment buttons will not support Subscriptions.
Using PayPal’s Smart Button, you can accept payment from customers using multiple Alternative Payment Methods (APM). With Alternative payment methods, customers can pay with their bank accounts, wallets, and other local payment methods based on country or device such as:
Step 2: Input the Client ID and Secret
To use the WooCommerce PayPal Smart Payment Button, you must have a PayPal business account. You can open Live or Sandbox accounts free of cost.
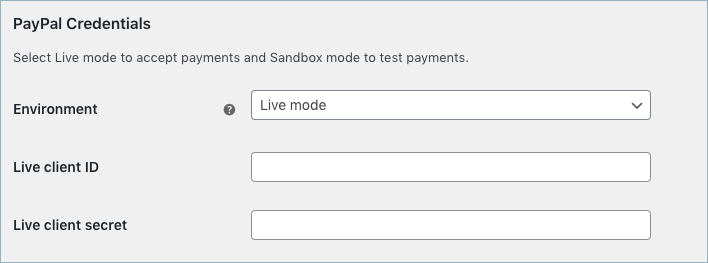
To get the Client ID and Secret:
- Log in to your PayPal business account.
- Get API Access credential in any of the two ways:
- Go to Activity at the top of the page and choose API Access or
- From Account settings > API Access.
- Scroll down to the REST API Integration section and click Manage API apps and credentials. The REST API apps window opens up.
- Click on the PayPal Developer experience link to create or manage apps.
- Next, click on the create a new app button. Then, input the application details.
- Copy and paste the Client ID and Secret in the respective fields of the plugin.
Step 3: Customize the Smart Payment Buttons
Following are the customization options:
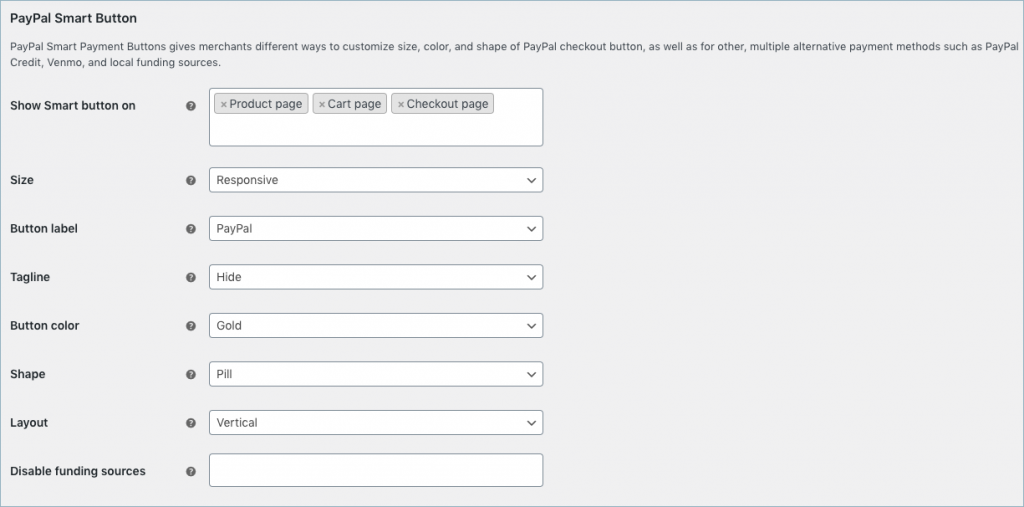
You get options to choose the Size of buttons as Small, Medium, Large or Responsive.
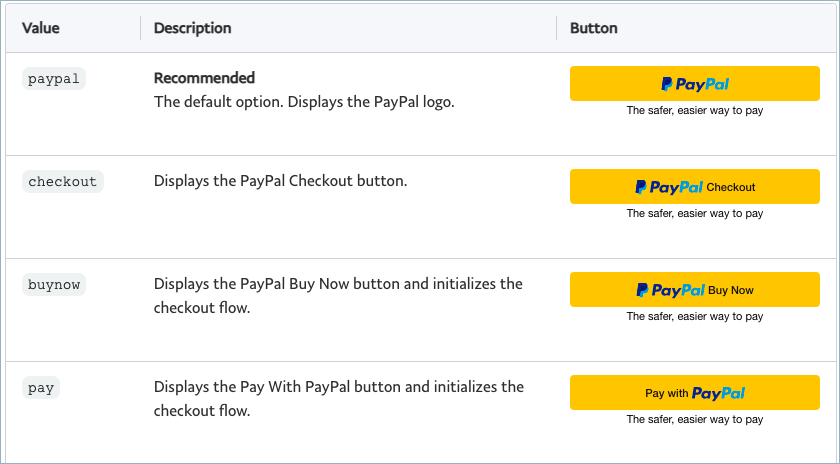
Choose from a set of predefined labels from PayPal to appear as Button labels. The available options are PayPal, Buy Now, Pay, Checkout.
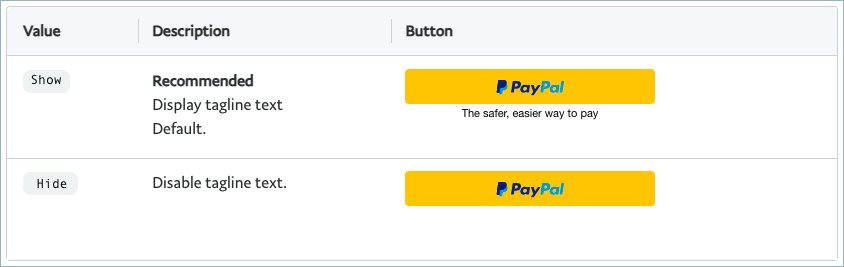
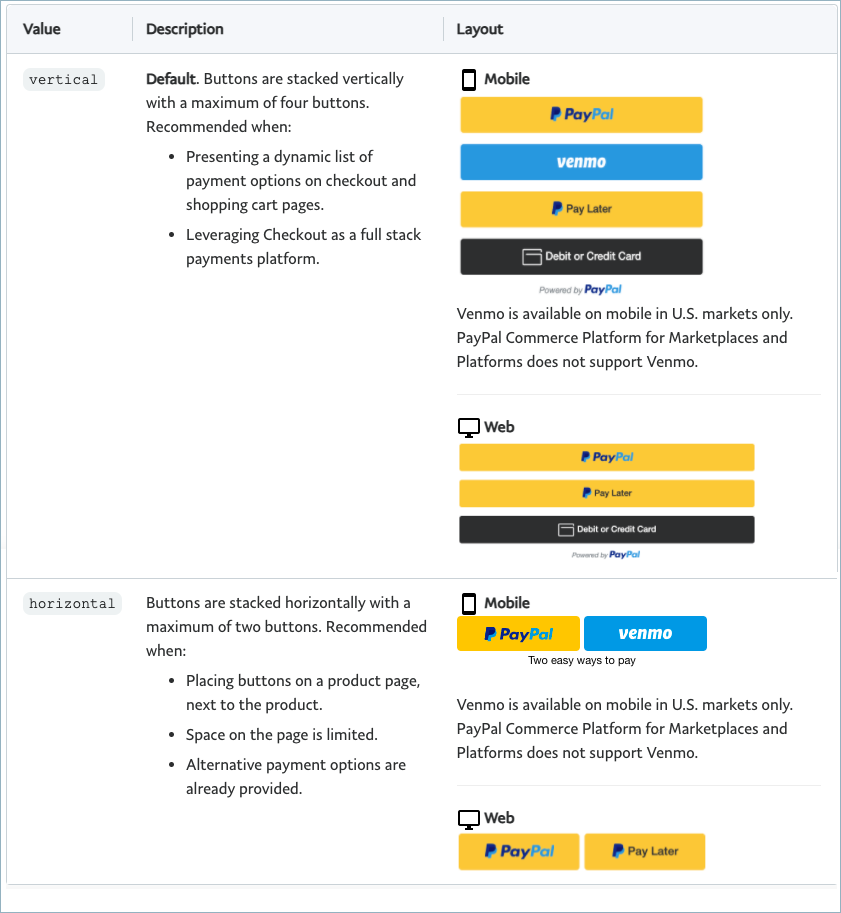
Show or hide the Tagline on the checkout page. Note: The Tagline will be hidden for the Vertical layout.
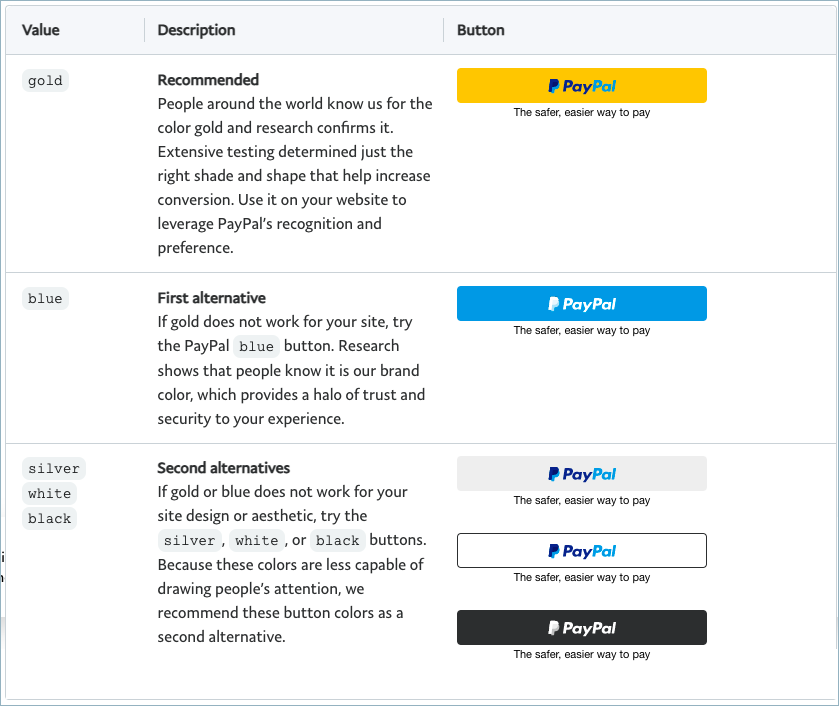
Choose the Button color as Gold, Blue, Silver, White or Black.
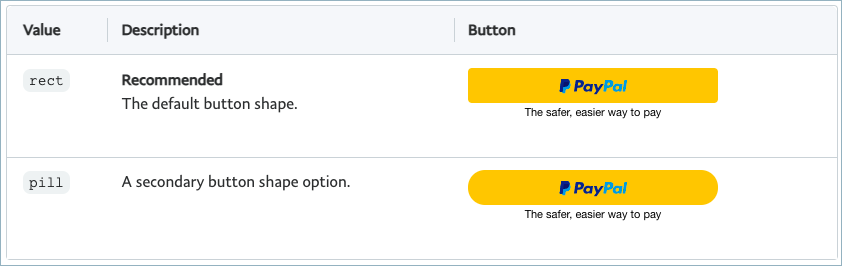
Choose the Shape of the button as either Pill or Rect.
Layout for buttons can be either Vertical or Horizontal.
Disable a funding source by choosing it from the available options. Note: The funding sources are shown on the checkout based on country or device type.
Step 4: Save Settings
Scroll down the window and Save settings to get the payment buttons at the checkout.
Checkout using PayPal Smart Button
For the Alternative Payment Method to render, the cart currency must be in the supported currency. PayPal supports currency codes for the buyer countries unless otherwise stated.
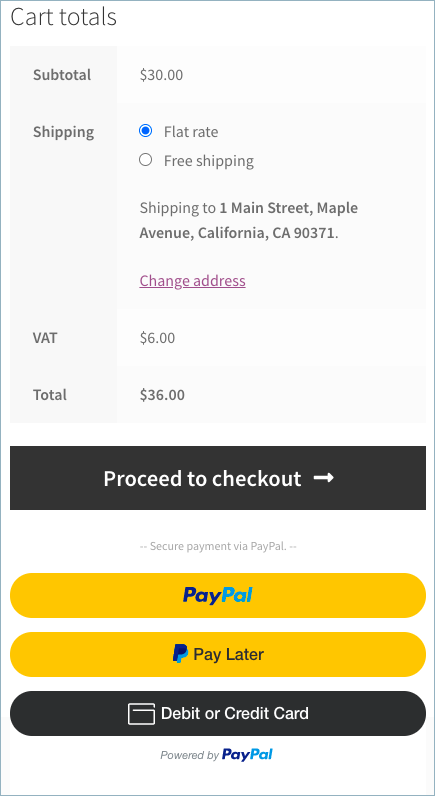
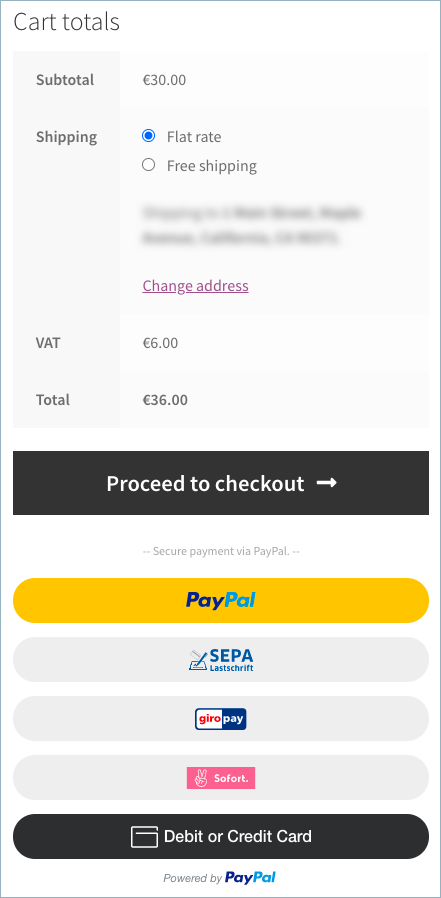

Payment workflow:
- The buyer clicks on an alternative payment option from the cart, product or checkout page as per the settings. In the above example, for the United States – PayPal Later, Debit and Credit Card, for Germany – SEPA, giro pay, Sofort, Debit and Credit Card and for the Netherlands – Online betalen, Sofort, Debit and Credit Card appears as alternative payment method.
- This will prompt the buyer to provide their personal information.
- PayPal transfers the buyer to an alternative payment provider (bank, wallet) to confirm the purchase.
- Authorizes and confirms payment by the buyer.
- Upon returning to the merchant’s site, the buyer completes the transaction.
- The merchant initiates payment completion. Following the payment, PayPal will send funds to the merchant.