The Payment Gateway Plugin for PayPal WooCommerce allows you to easily integrate PayPal payment gateway into your WooCommerce store. By configuring the webhook feature, the WooCommerce order status will be automatically updated based on the notification from PayPal. This is a useful feature for orders having delayed payments. Follow the below steps to add your site’s webhook to PayPal:
- Copy the Webhook URL of your site.
- Paste the site’s Webhook URL in the PayPal Developer dashboard.
- Upon registering the Webhook, paste the Webhook ID on your site.
- Finally, click on Save Changes.
Configuring Webhook with PayPal
Note:
Currently, our plugin supports the following event types:
1. Checkout order approved
2. Payment capture completed
3. Payment capture denied
Also make sure to enable the Save abandoned orders option from the settings page of the plugin.
Here are the detailed steps on how to configure the Webhook with PayPal:
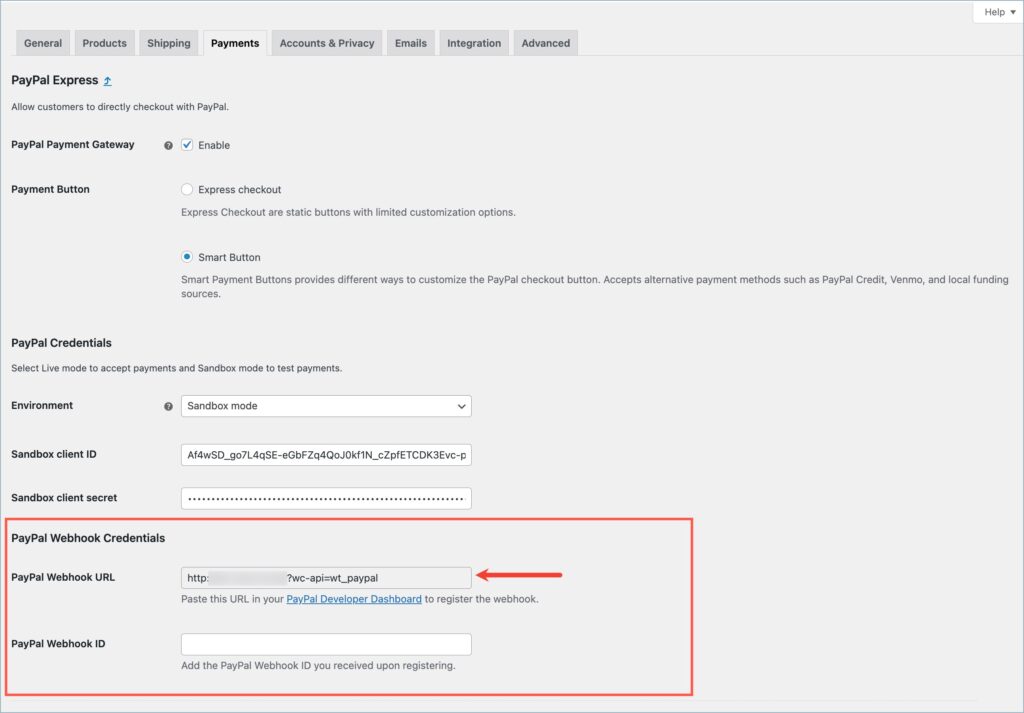
- Navigate to WooCommerce > Settings > Payments > PayPal Express
OR
- Navigate to Plugins > Installed Plugins > PayPal Express Checkout Payment Gateway for WooCommerce > Settings.
- Head to the Paypal Express section and under the Payment Button option, select Smart Button. The PayPal Webhook feature is available only under Smart Button.
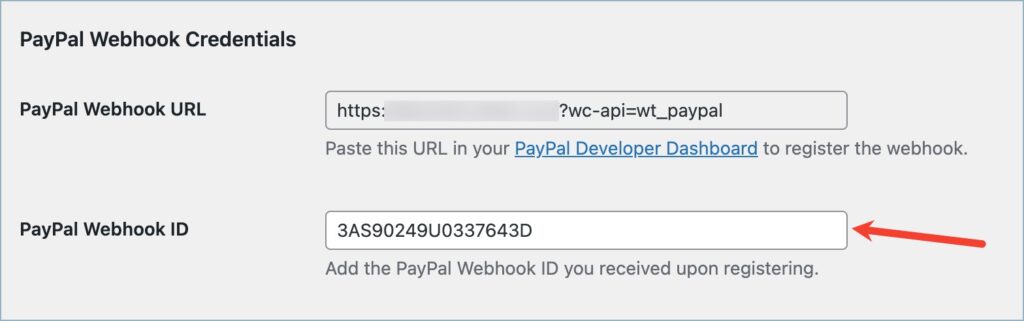
- Now, head to the PayPal Webhook Credentials section, and copy the Webhook URL from the PayPal Webhook URL option.
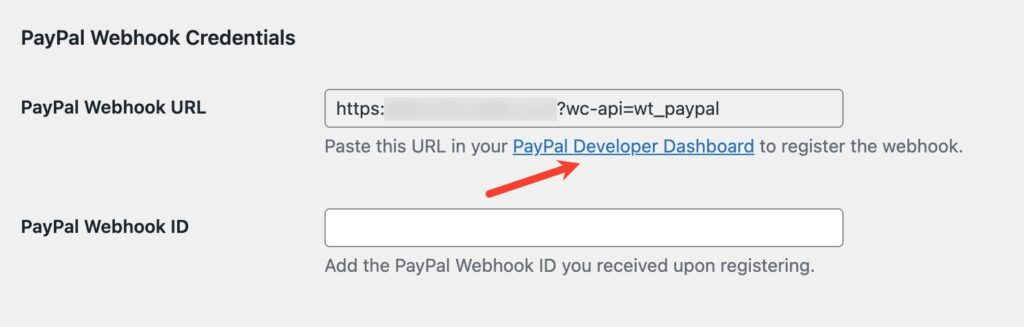
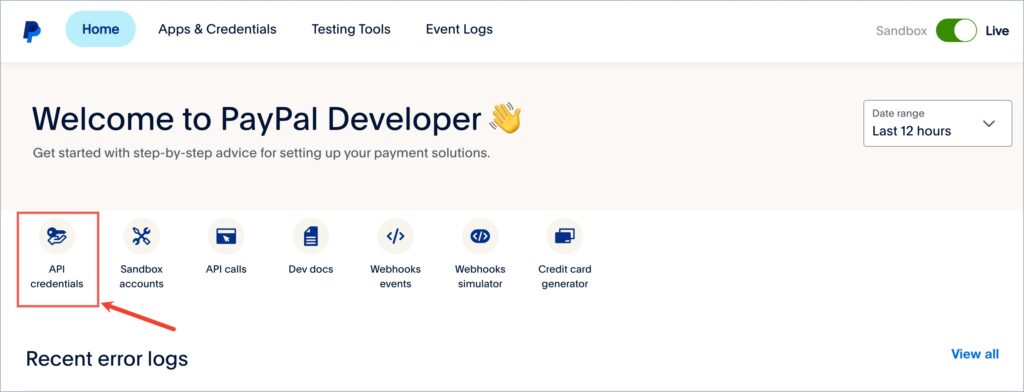
- Now paste this URL into your PayPal Developer Dashboard. For that, click on the PayPal Developer Dashboard hyperlink given in the help text. From the PayPal Developer Dashboard, click on the API credentials option.
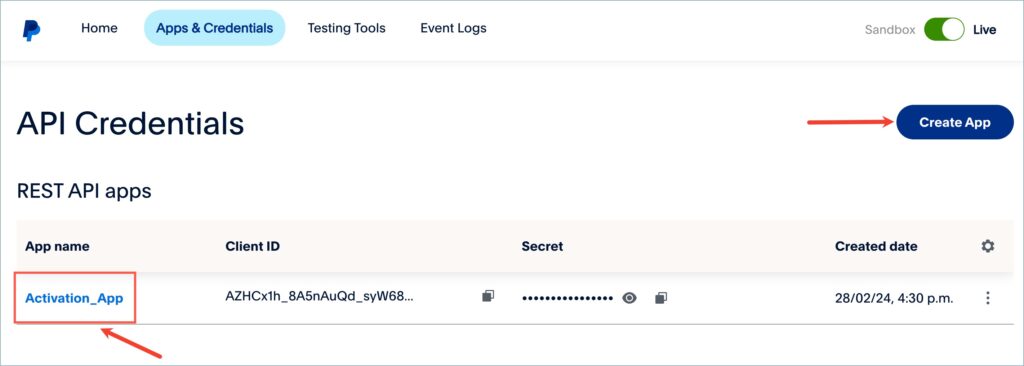
- From the list of REST API apps, click on the preferred App name. You can also create a new App by clicking the Create App button.
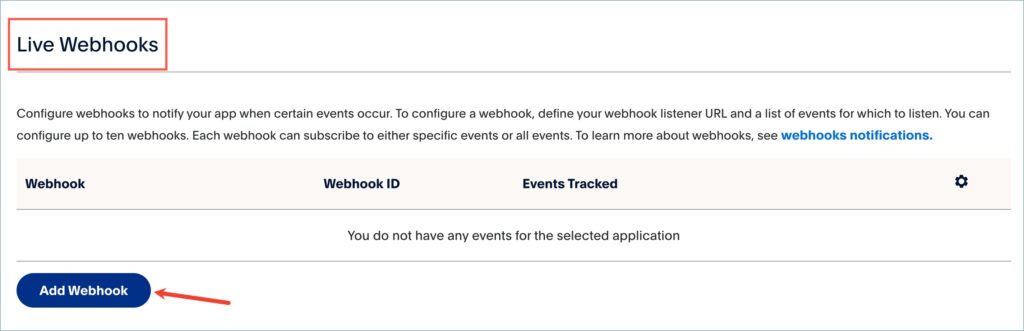
- Now, scroll down and find the Live/Sandbox Webhooks section.
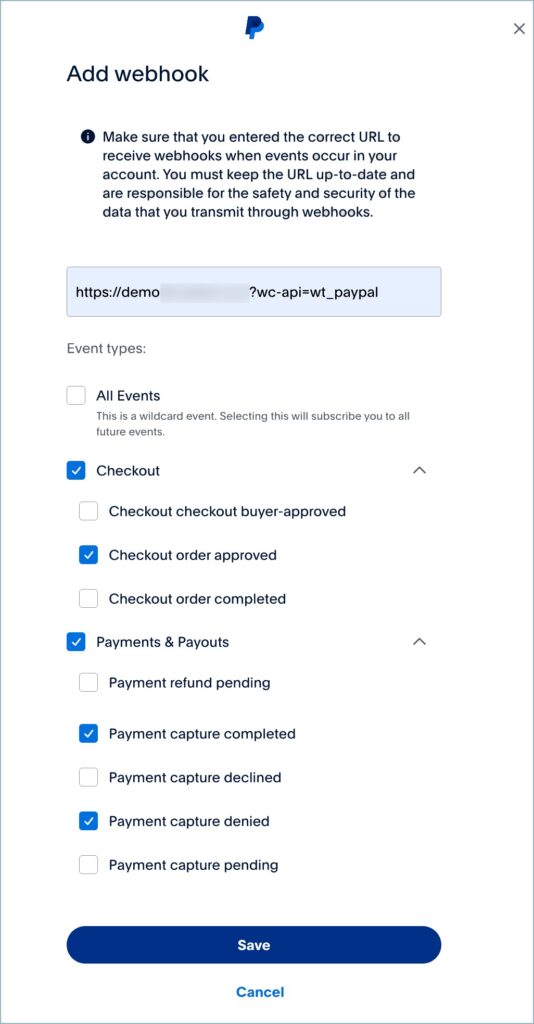
- Click on the Add Webhook button. Paste the copied Webhook URL and select the event types. Currently the plugin supports the following event types:
- Checkout order approved
- Payment capture completed
- Payment capture denied
Click on Save to add the webhook.
- Upon adding the Webhook, you can see a Webhook ID. Copy this and paste it under the PayPal Webhook ID section of the plugin.
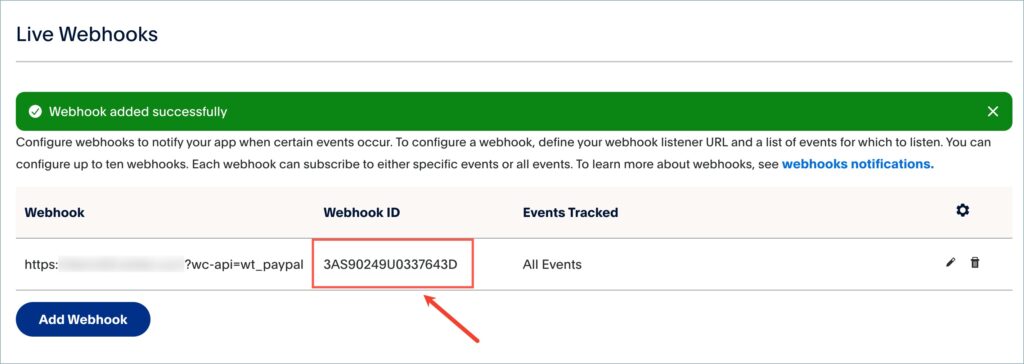
- Finally, click on Save changes to reflect the changes.