


The Product Import Export Plugin for WooCommerce lets you send exported product files directly to a specified email address as an attachment. This eliminates the need to download the export file first and manually attach it to an email.
To send a WooCommerce product export file by email, select E-mail as the export location, choose an email template, specify the recipient’s email address, and complete the export.
Steps to email the product export file
- Navigate to WebToffee Import Export (Pro) > Export from your WordPress admin dashboard.
- Choose the post type as Product and click Step 2: Select an export method.

- Select Advanced export and click Step 3: Filter data. The E-mail option appears on the final step of the advanced flow.

- Filter the data if you want to narrow down what gets exported, using the Element, Condition, and Value rows. Use + Add new filter to add more criteria, or skip this step to export all products. Proceed to Step 4: Map and reorder export columns.

- Select, rename, and reorder the columns you want in the export file, then proceed to the final step.

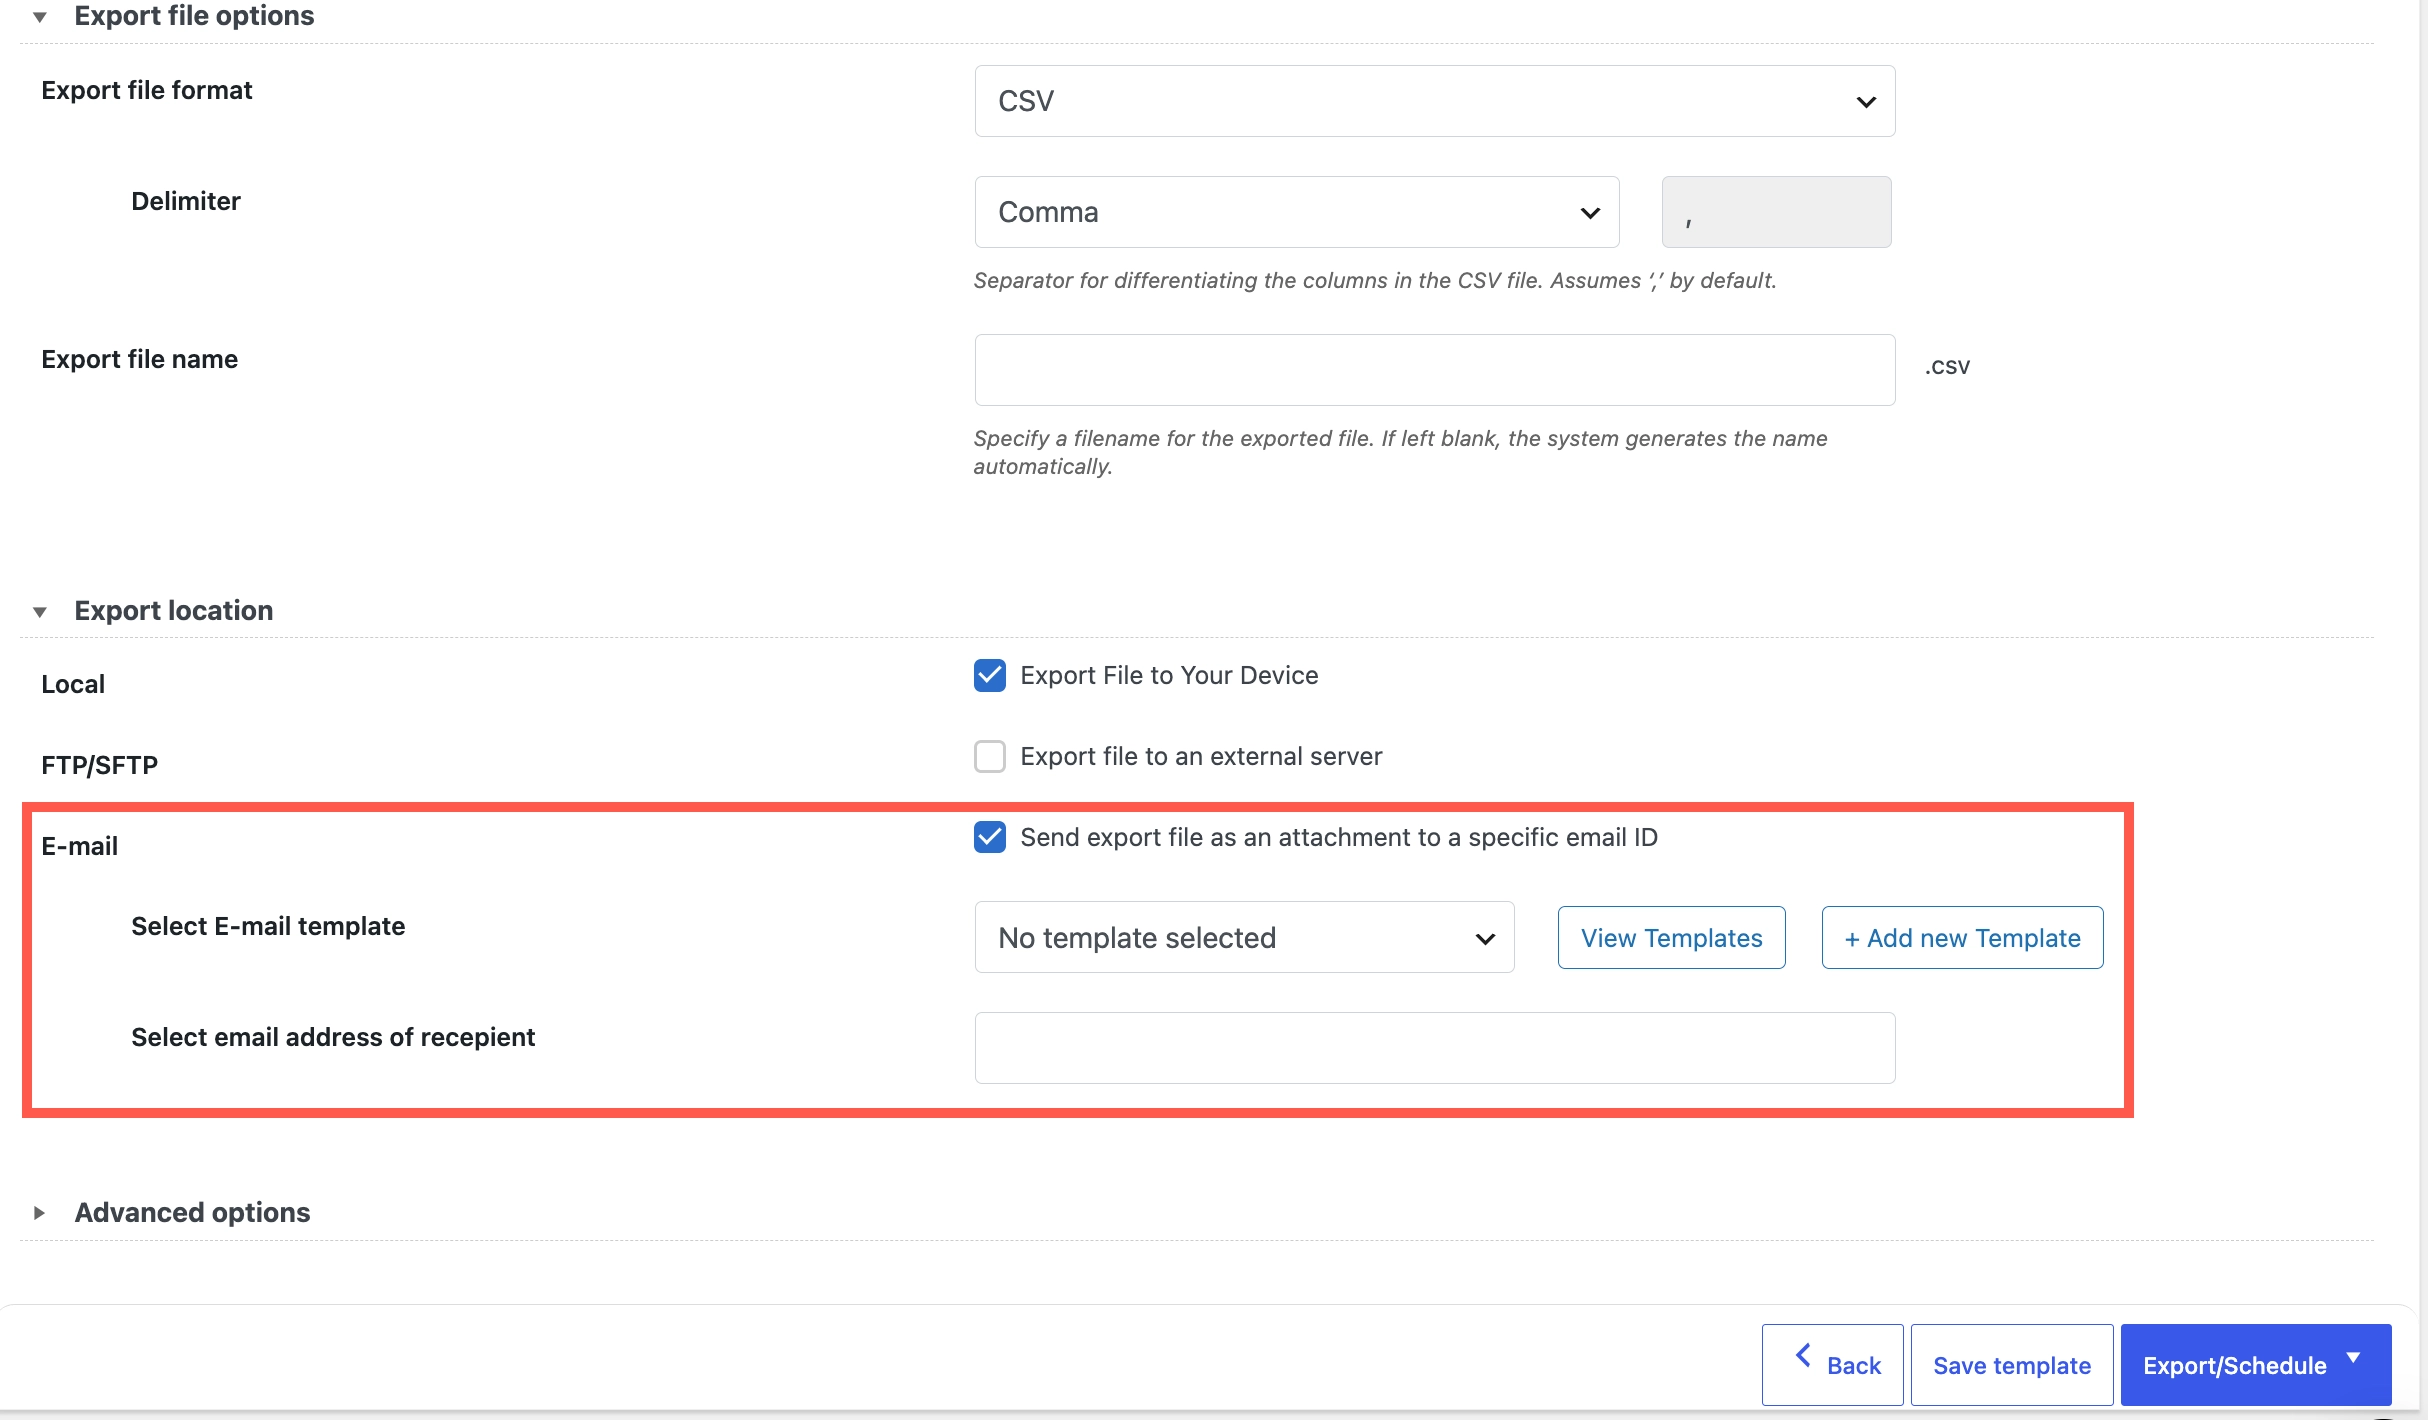
- Under Export file options, set the Export file format and the Export file name. Leave the file name blank to have the plugin generate one.
- Expand Export location and, under E-mail, enable Send export file as an attachment to a specific email ID.

- Choose an entry from Select E-mail template. The template controls the subject line and body of the message the file is attached to, and the dropdown shows No template selected until you pick one.
- Click + Add new Template to create one. See Creating an email template below.
- Click View Templates to review or edit the templates already saved on your site.
- Enter the destination address in Select email address of recipient.
- Under Local, Export File to Your Device is enabled by default. Leave it enabled if you also want the file in your browser downloads, or clear the checkbox to send the file by email only.
- Click Export/Schedule.


Once the export finishes, the file is attached to an email built from the selected template and sent to the recipient you specified. The attachment uses the file name and format you set under Export file options, so an export named products in CSV format arrives as products.csv.
Creating an email template
Clicking + Add new Template opens the Email Template window on the Add new tab. Switch to the Email template tab to see the profiles already saved.
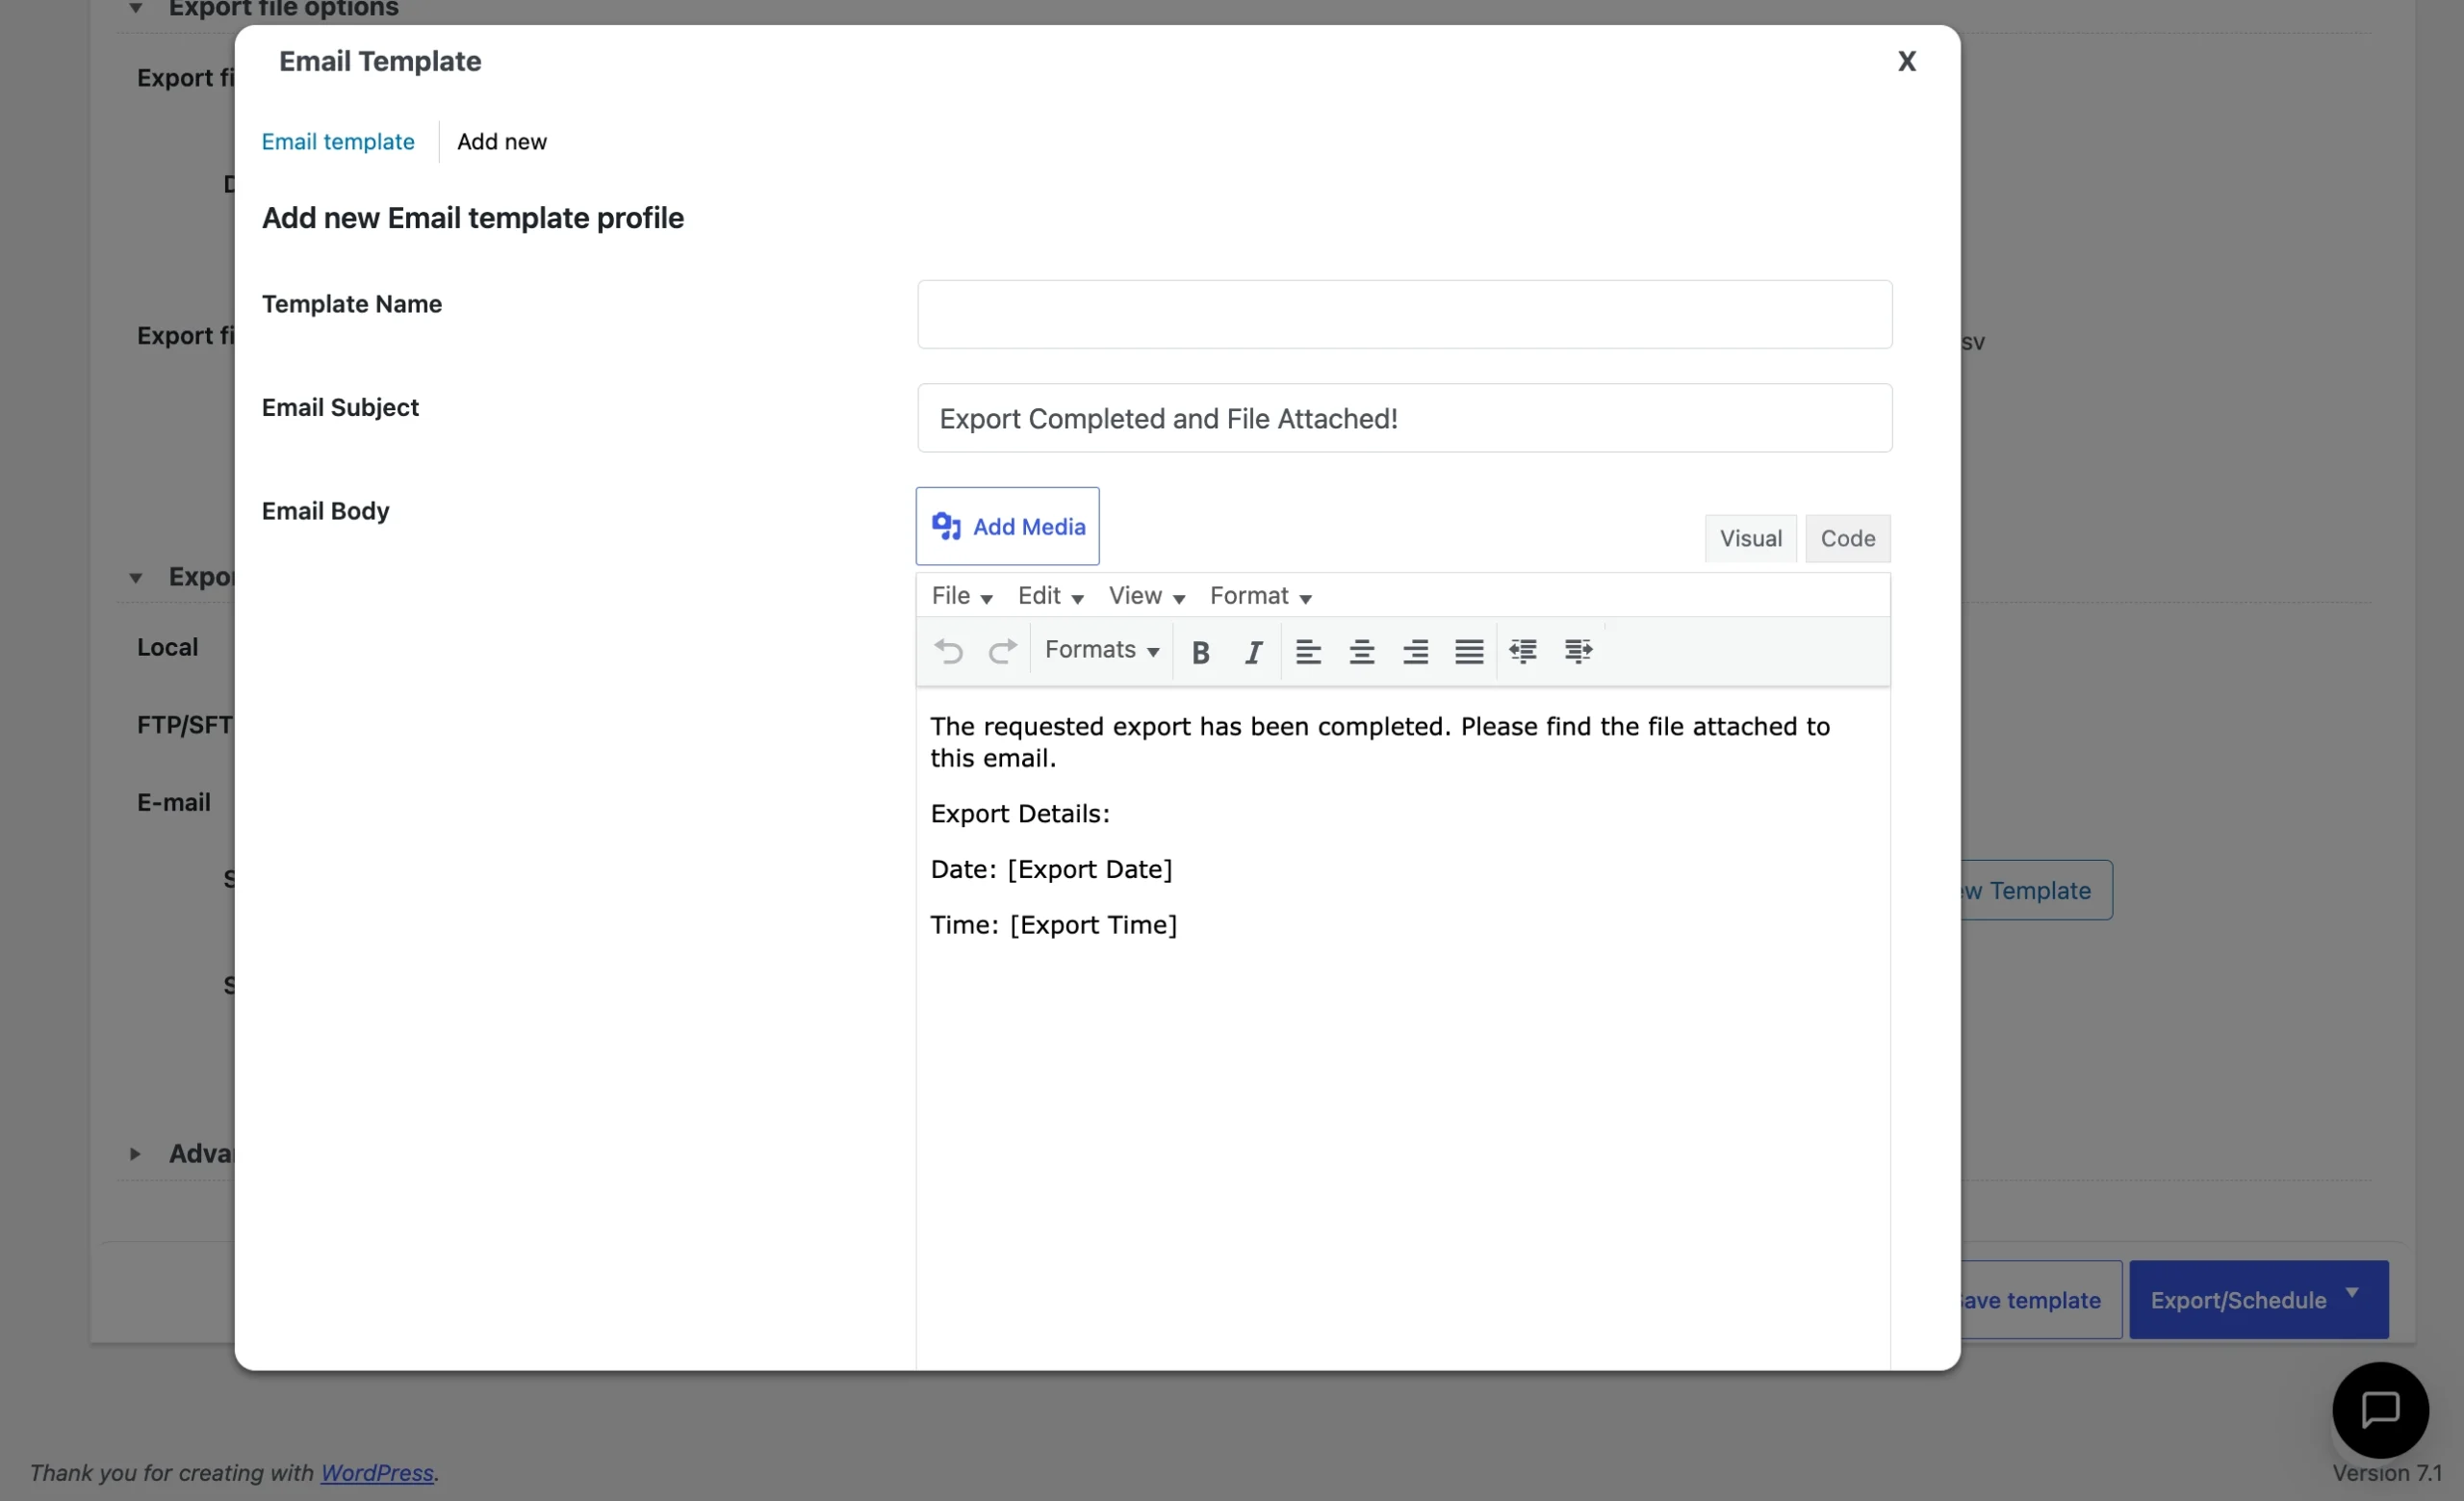
- Template Name — how the profile is identified in the Select E-mail template dropdown. This is the only field that starts empty.
- Email Subject — the subject line of the message. It comes prefilled and can be edited.
- Email Body — the message text, edited in the standard WordPress editor with Visual and Code views and an Add Media button for images. The default body states that the export has completed and lists the export date and time.
Saved templates are reusable, so one profile can serve every export that goes to the same audience.
Emailing the file on a schedule
The recipient address and email template are saved with the rest of the export configuration, so they carry over to scheduled runs. Set up the export once with the E-mail option enabled, save it as a template, and schedule that template. Every run then emails the latest product data to the same address.
Refer to cron scheduled import-export for the scheduling steps.
