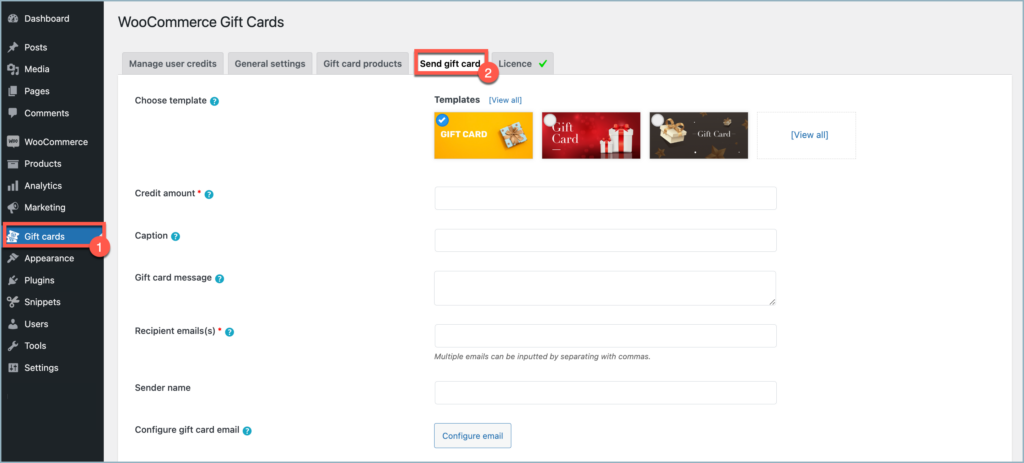
Adding an option to purchase gift cards in a store can greatly enhance convenience for gift-givers. On certain occasions, store owners may desire to present users or potential customers with gift cards as gifts or for promotional purposes. The WebToffee WooCommerce Gift Cards plugin includes a valuable feature that allows gift cards to be configured and delivered to any desired email address directly from the backend. Follow the given steps to send a gift card manually from the backend:
- Access the Send gift card tab inside the Gift Cards plugin.
- Configure the gift card and choose the recipients.
- Set up usage restrictions.
- Send mail.
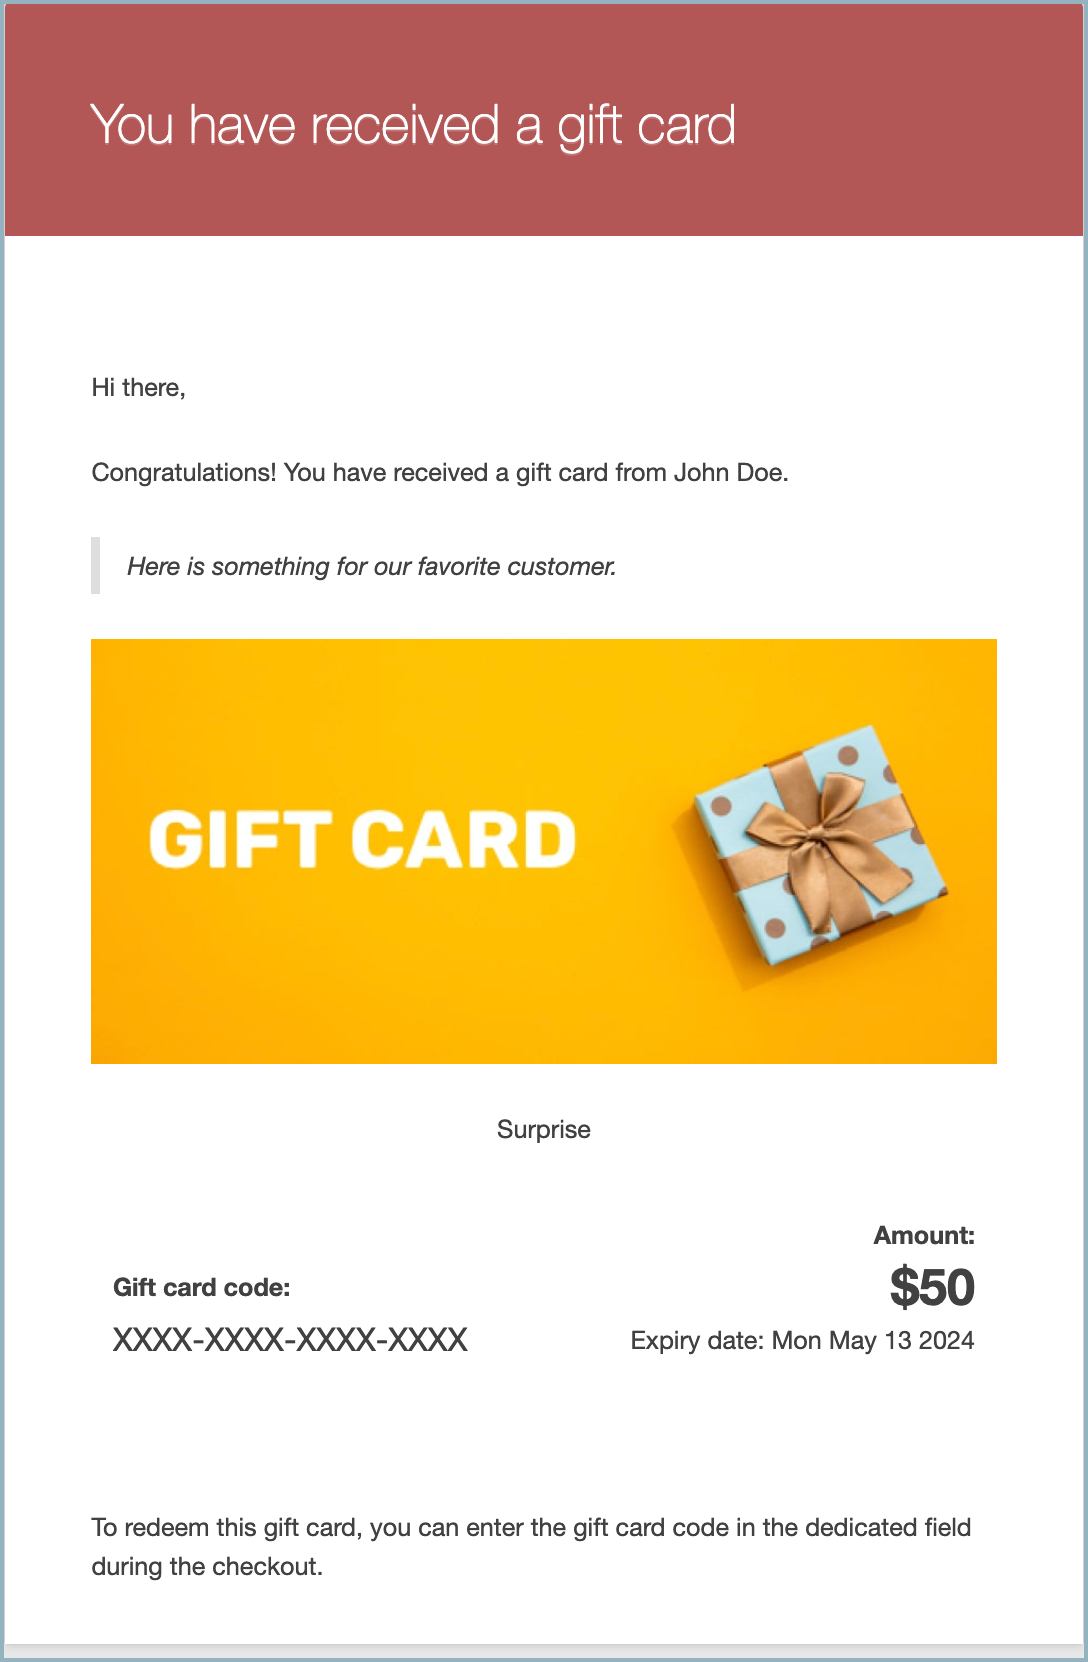
Here is a preview of what the mail in the receipt inbox will look like.
To set up a gift card:
- From the WordPress dashboard, navigate to Gift Cards > Send gift card.
- Alternatively, if Smart Coupons for WooCommerce is installed, then navigate to Smart Coupons > Gift cards > Send gift cards.
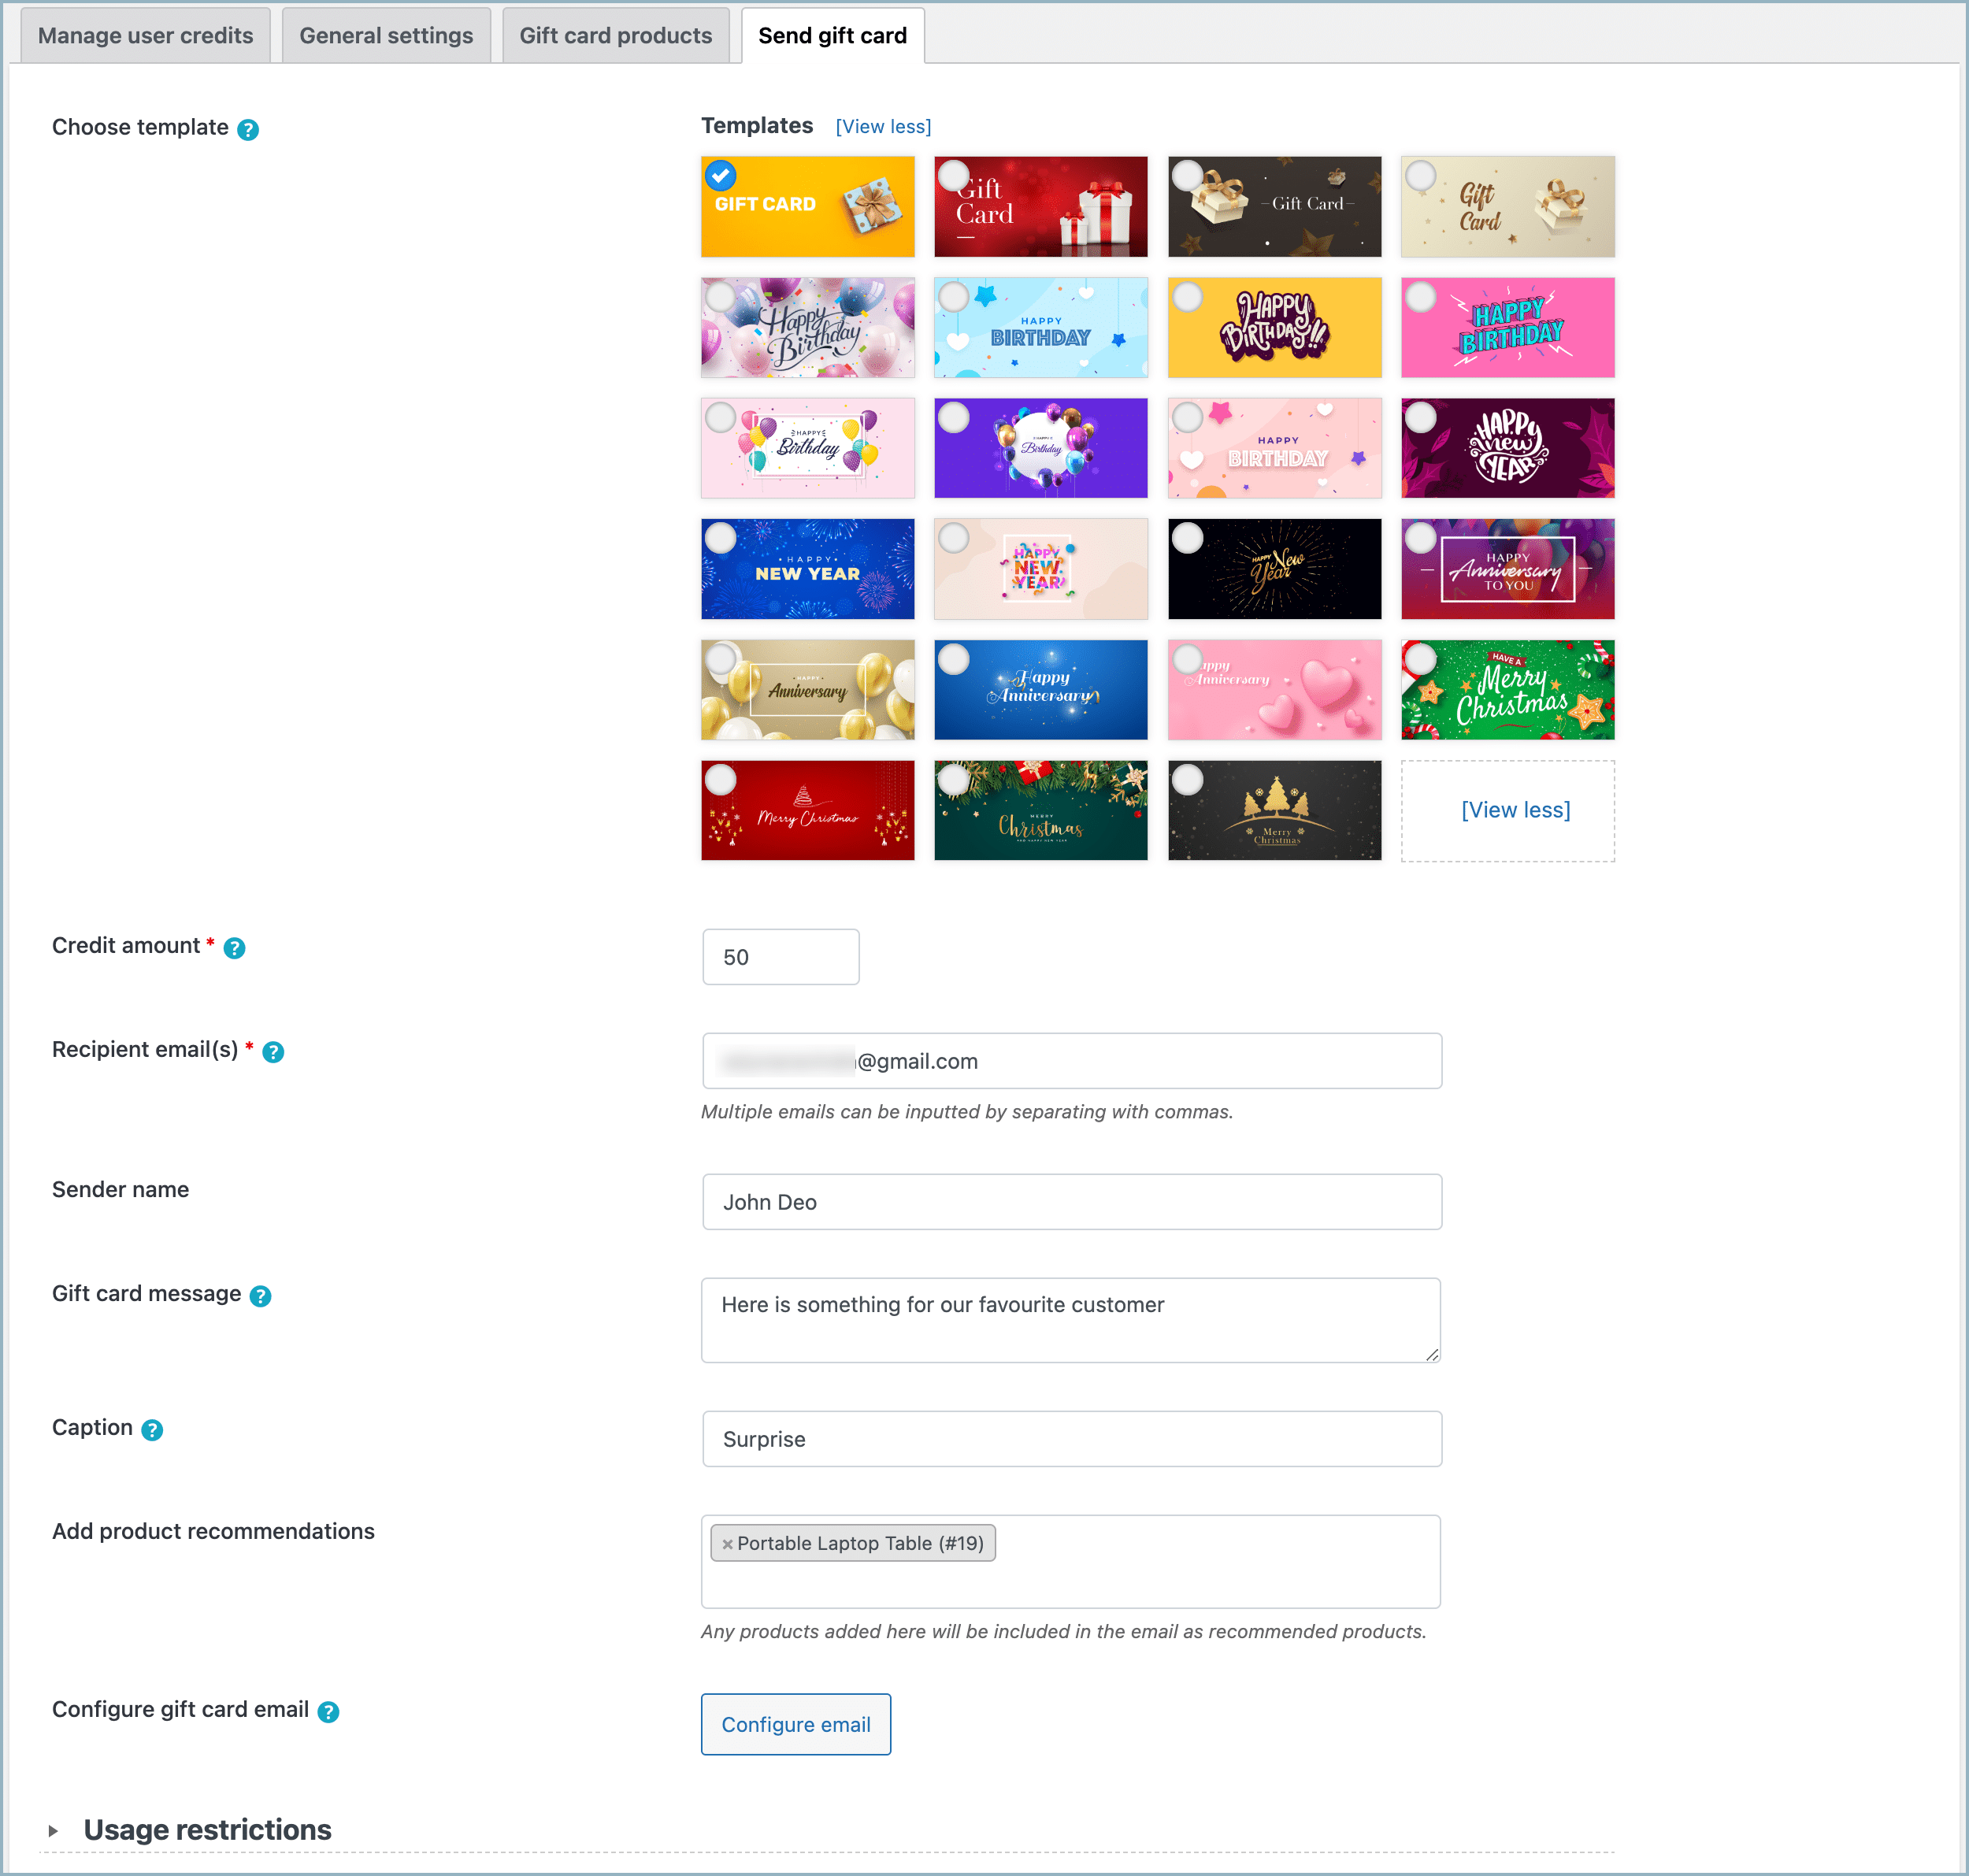
Step 2: Configure the gift card and choose the recipients
- From the Choose template section, choose a gift card template to attach with the mail.
- To add a custom template, from the WordPress dashboard, navigate to Gift cards > General settings > Template settings.
- In the Credit amount section, enter the value of the gift card.
- Select the recipients of the gift card using the Recipient email(s) field. Separate multiple emails with a comma.
- In case you want to mention the sender’s name in the mail, enter the name in the Sender name field.
- Enter a message to display on top of the gift card in the Gift card message field.
- On the Caption field, key in a proper caption for the gift card.
- Additionally, if you wish to recommend a product to the customer through this gift card select that product(s) from the Add product recommendations section.
- To further customize the email, click on Configure email. Know more about email customization.
Step 3: Set up usage restrictions
Expand the Usage restrictions tab below the page to access usage restrictions settings.
- Allowed products – If the gift card can only be used to purchase a specific product(s), select those products from here.
- Exclude products – To restrict the usage of the gift card against a specific product(s), select those products from here.
- Allowed category – If the gift card can only be used to purchase items from a specific category(s), select those products from here.
- Exclude category – To restrict the usage of the gift card against specific category(s), select those products from here.
- Set a usage limit for the gift card product per purchase by entering the amount in the Maximum spend allowed on a purchase section.
- Use the Set expiry for generated gift card field to set an expiry for the gift card in days. The gift card will expire after the entered number of days.
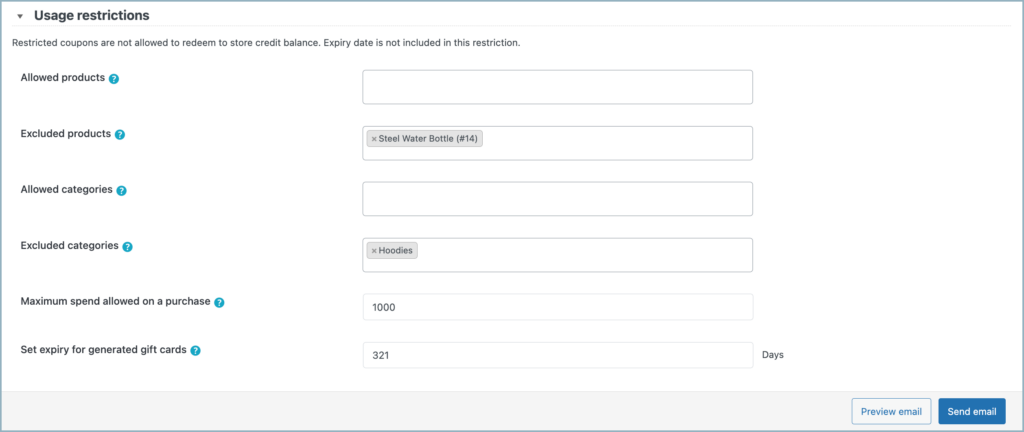
- For example, in the given settings
- The gift will not apply to the product Steel Water Bottle(#14).
- The gift card will not apply to any products from the “Hoodies” product category.
- The gift card will expire in exactly 321 days.
- Furthermore, the gift card can only be used for a maximum of $1000 in a single purchase.
- Finally, click on Send email, to share the gift card with the recipients.
Here is how the mail will appear on the recipient mail: